Trusted by companies
all over the world:
BIM technology has revolutionised architecture, and with the standardised IFC format, exchanging data is seamless.
SeveUp simplifies the process, offering an intuitive interface to navigate complex models. Paired with Excel, it becomes a powerful toolkit for professionals. With this tutorial, you will learn how to efficient IFC Data Download: Quick and Easy Methods.
SeveUp allows easy export in CSV or JSON formats. CSV suits those who prefer tabular data, while JSON provides detailed, structured information.
Whether you're new to BIM or a seasoned pro, this tutorial guides you through each step, empowering you to optimise workflows and make informed decisions.
Join us as we unlock the transformative potential of BIM data extraction using SeveUp and Excel.
Learn how to automate your BIM model checks and get certified.
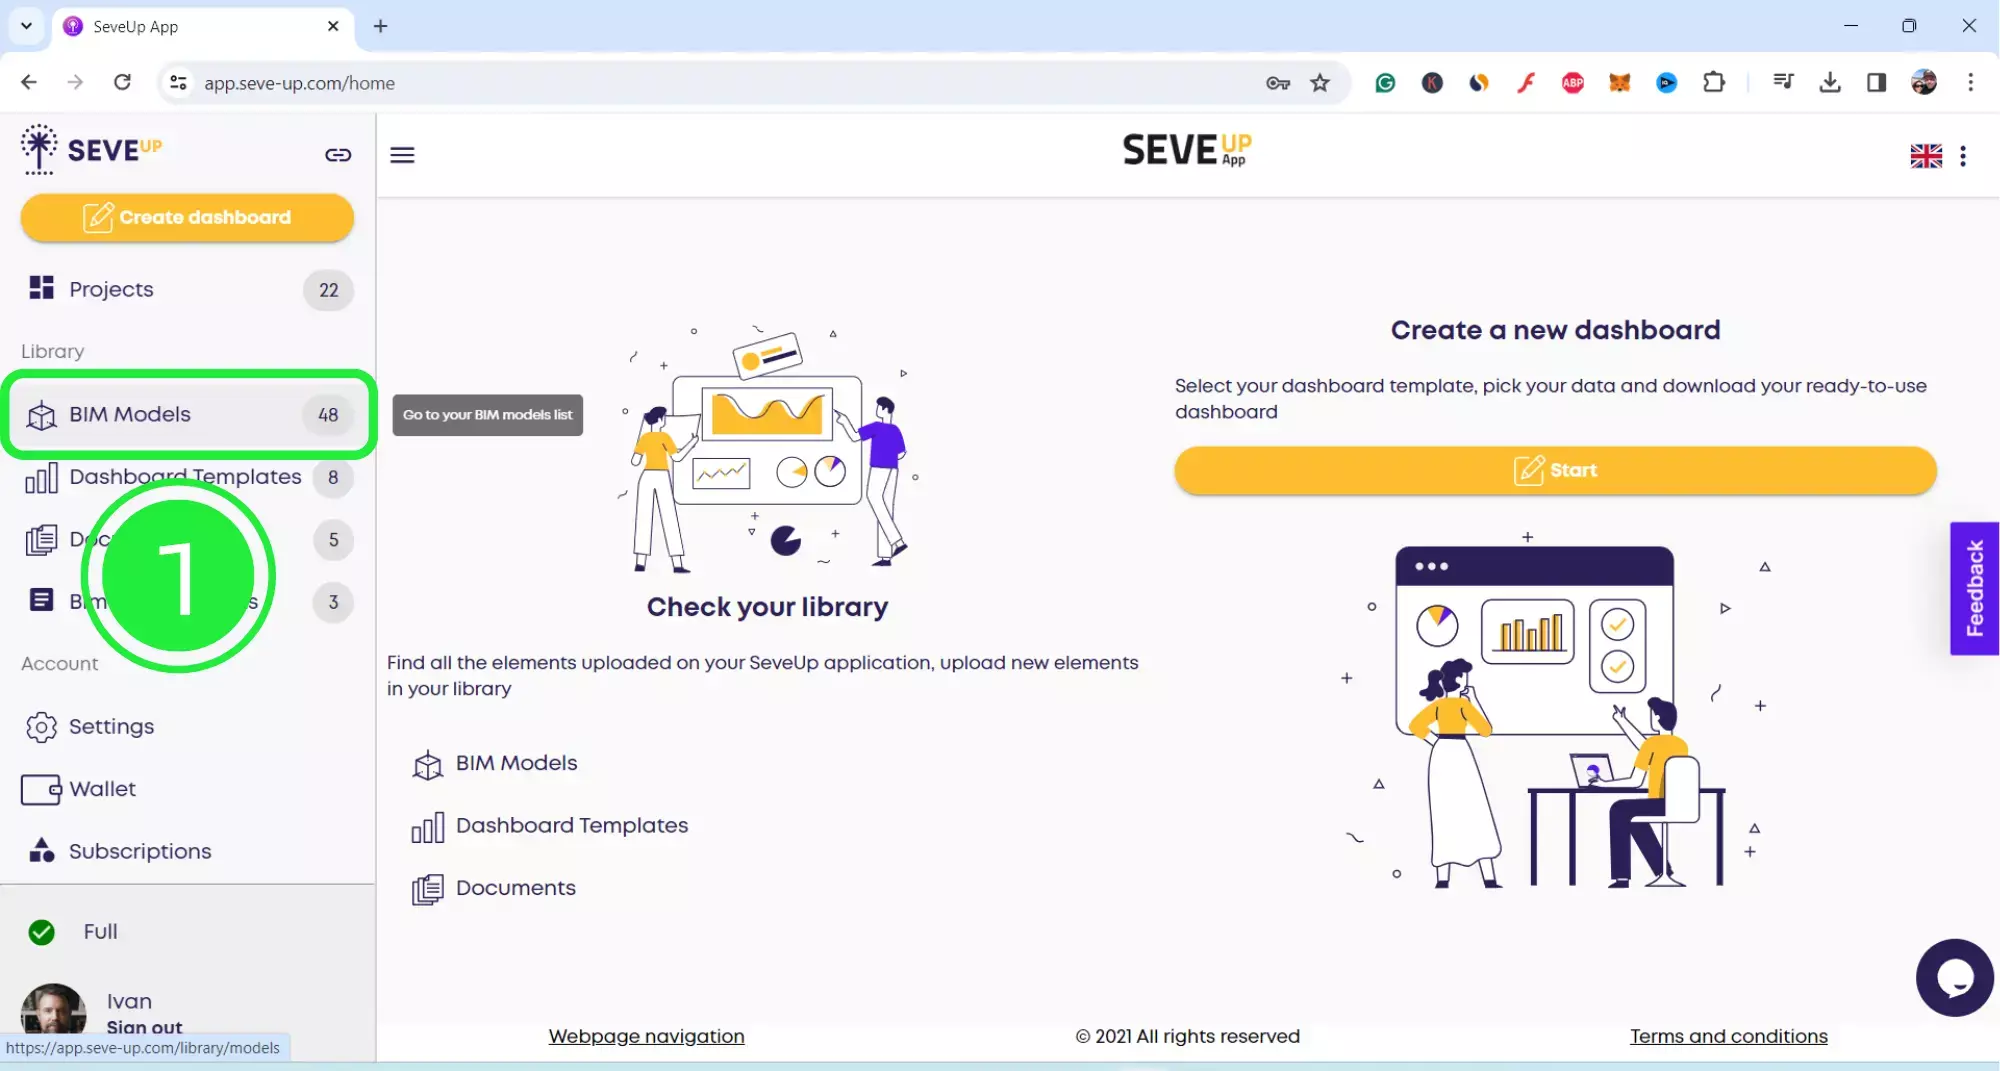
The first step is to open up the SeveUp app and log into your account. Go to the folders list on the left-hand side and click on “BIM Models”. In a few moments, we will reveal quick and easy methods to download IFC data efficiently.
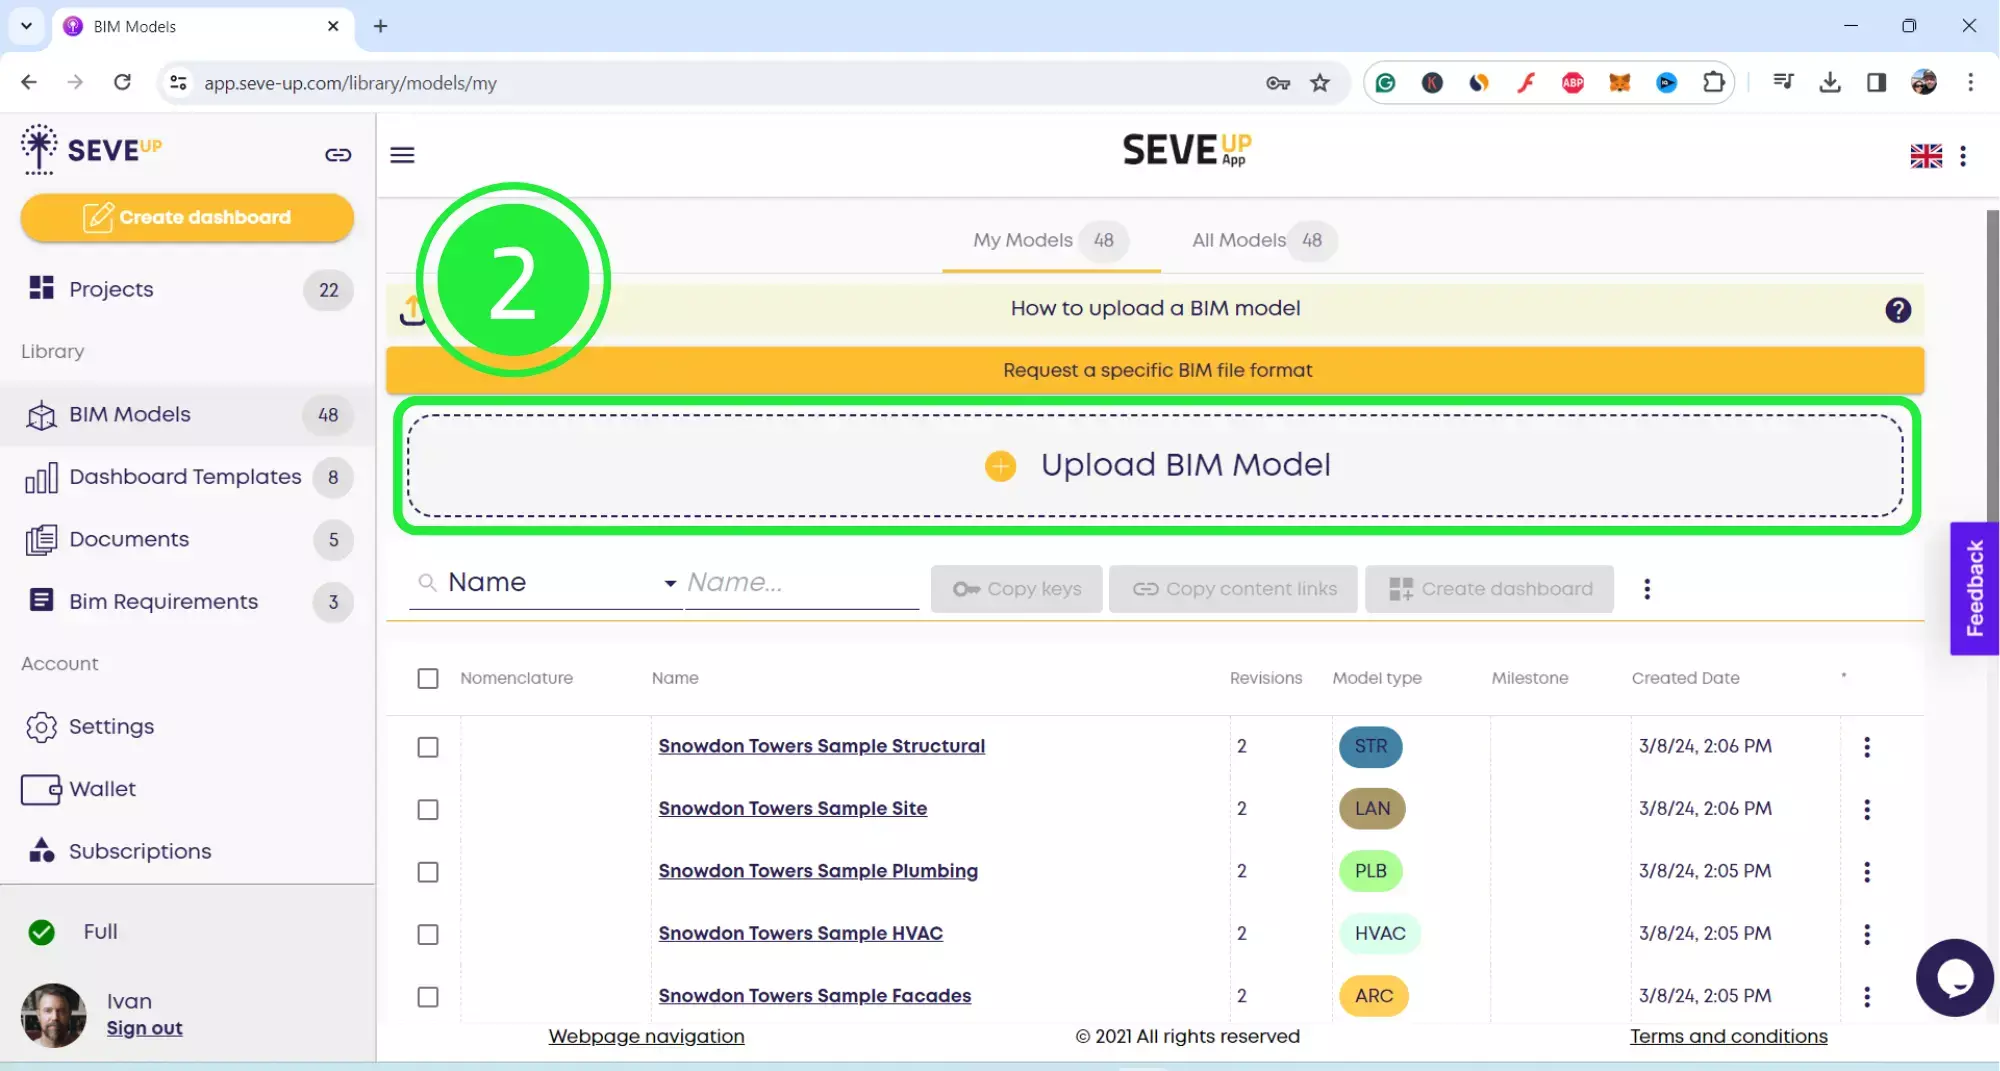
Then, this folder shows where all of your BIM model files are kept within the SeveUp app. Click on “Upload BIM Model” to upload a new file.
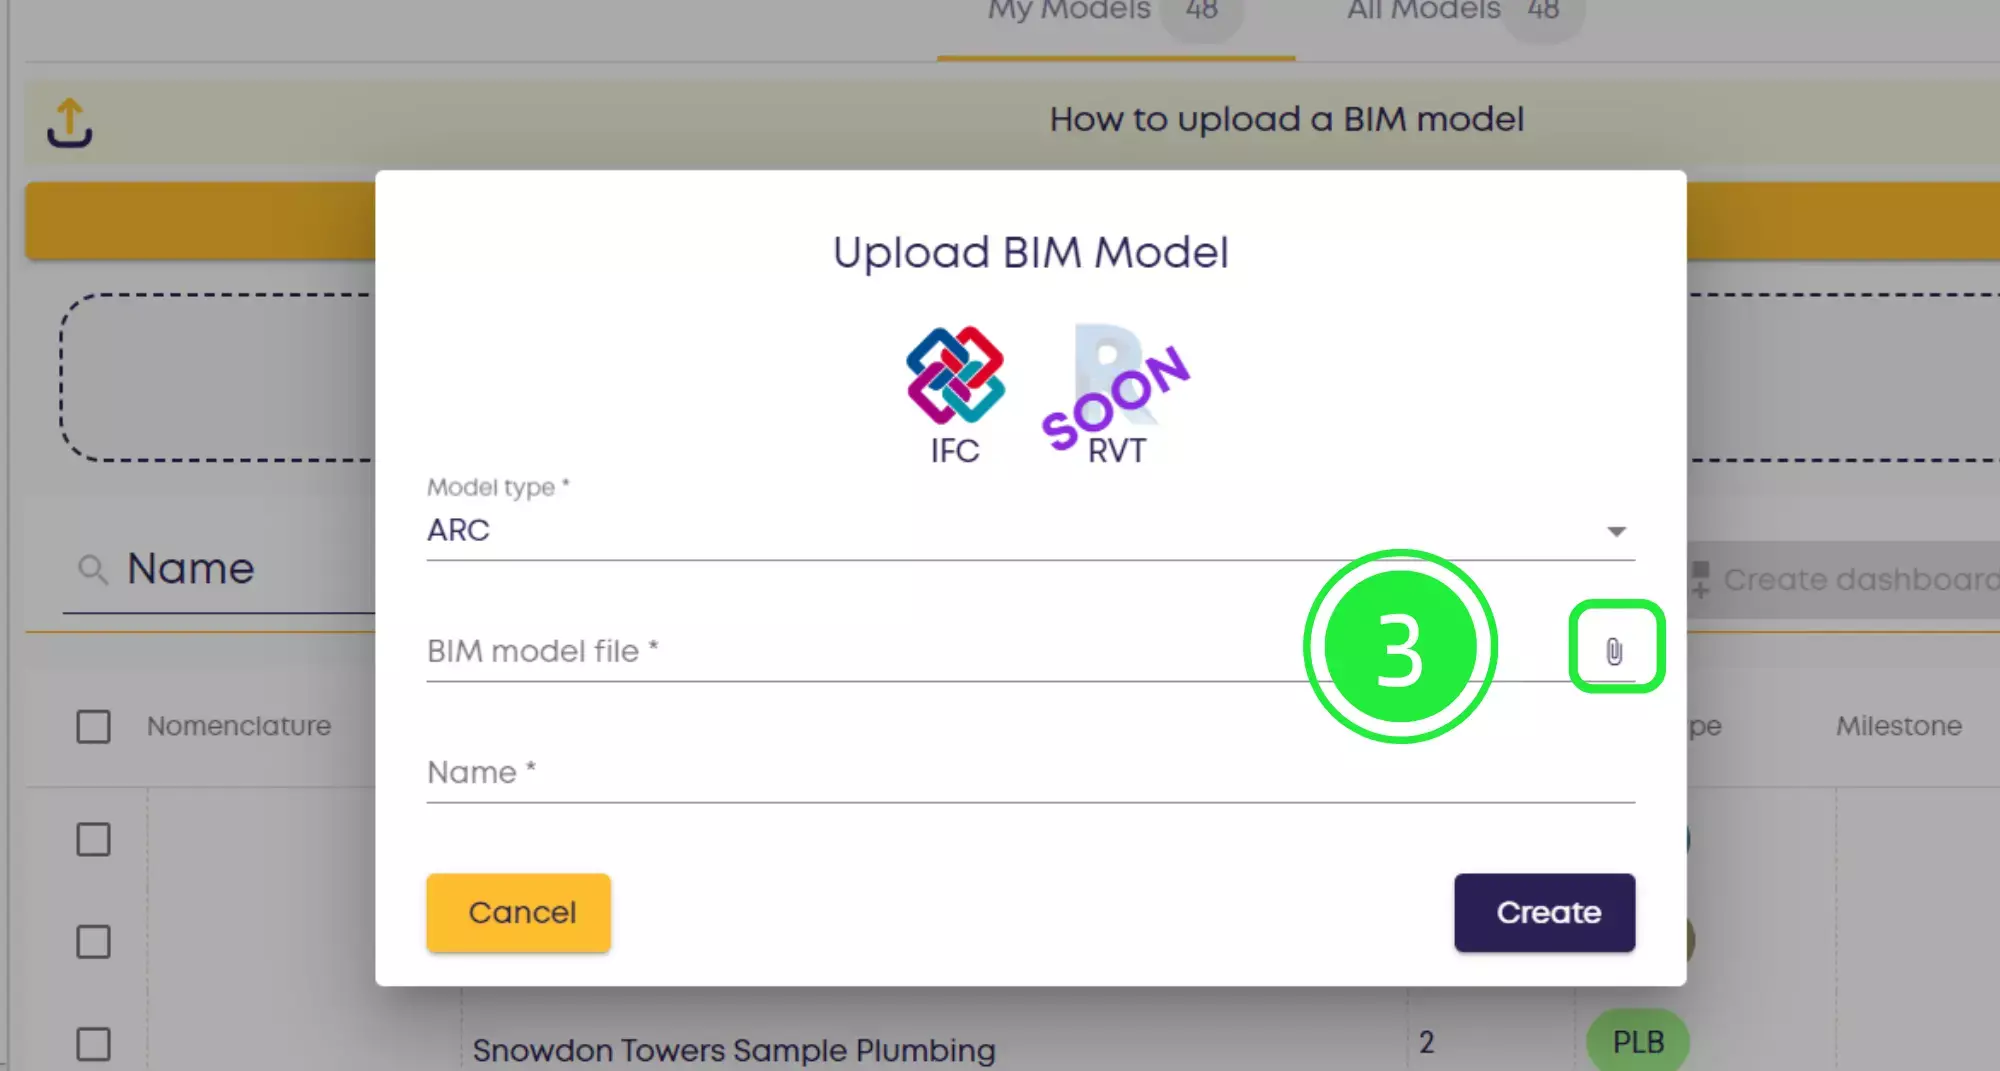
Now, a pop-up will appear where you can choose the model type and attach the file. Click on the “Attach file” icon.
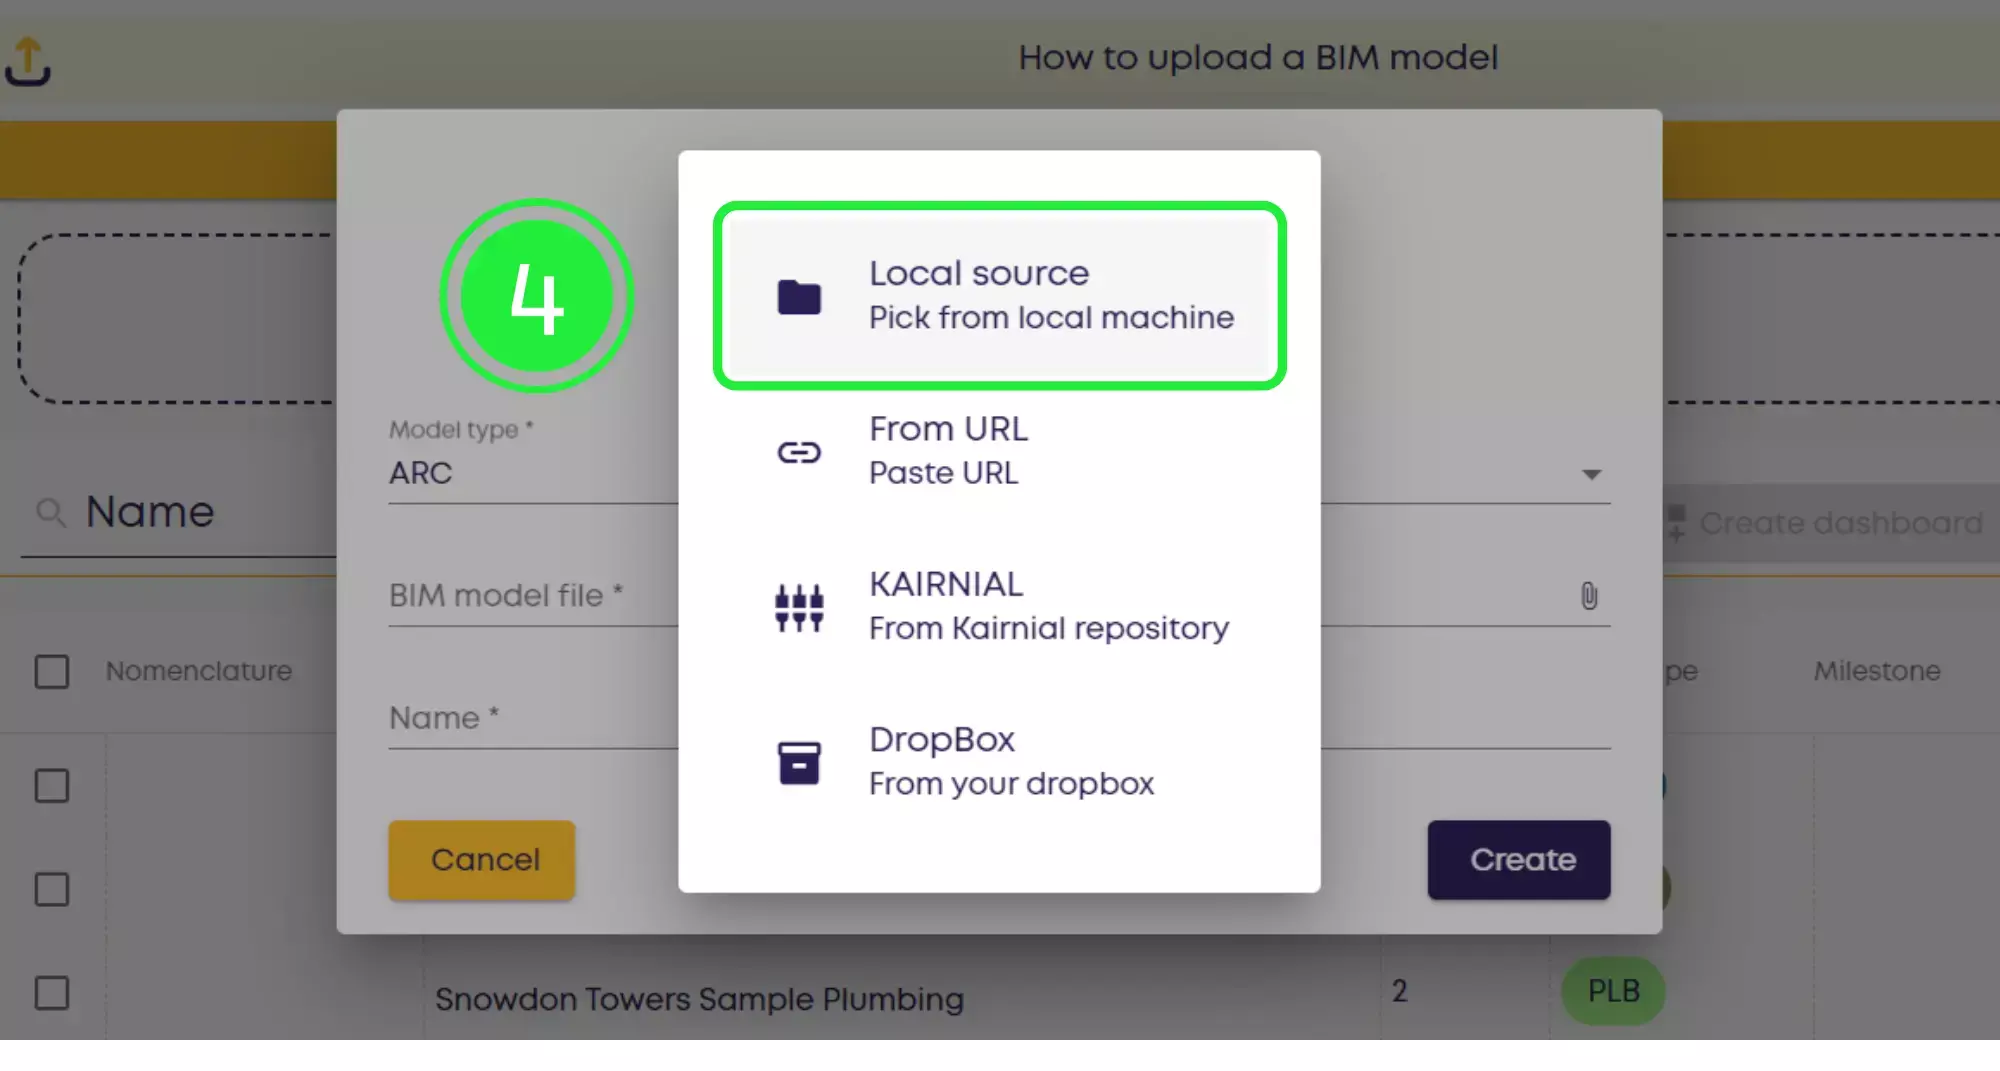
Opt for “Local Source” to upload a file from your computer. You can of course choose from any of the other options as well. SeveUp is fully integrated with Kairnial and Dropbox.
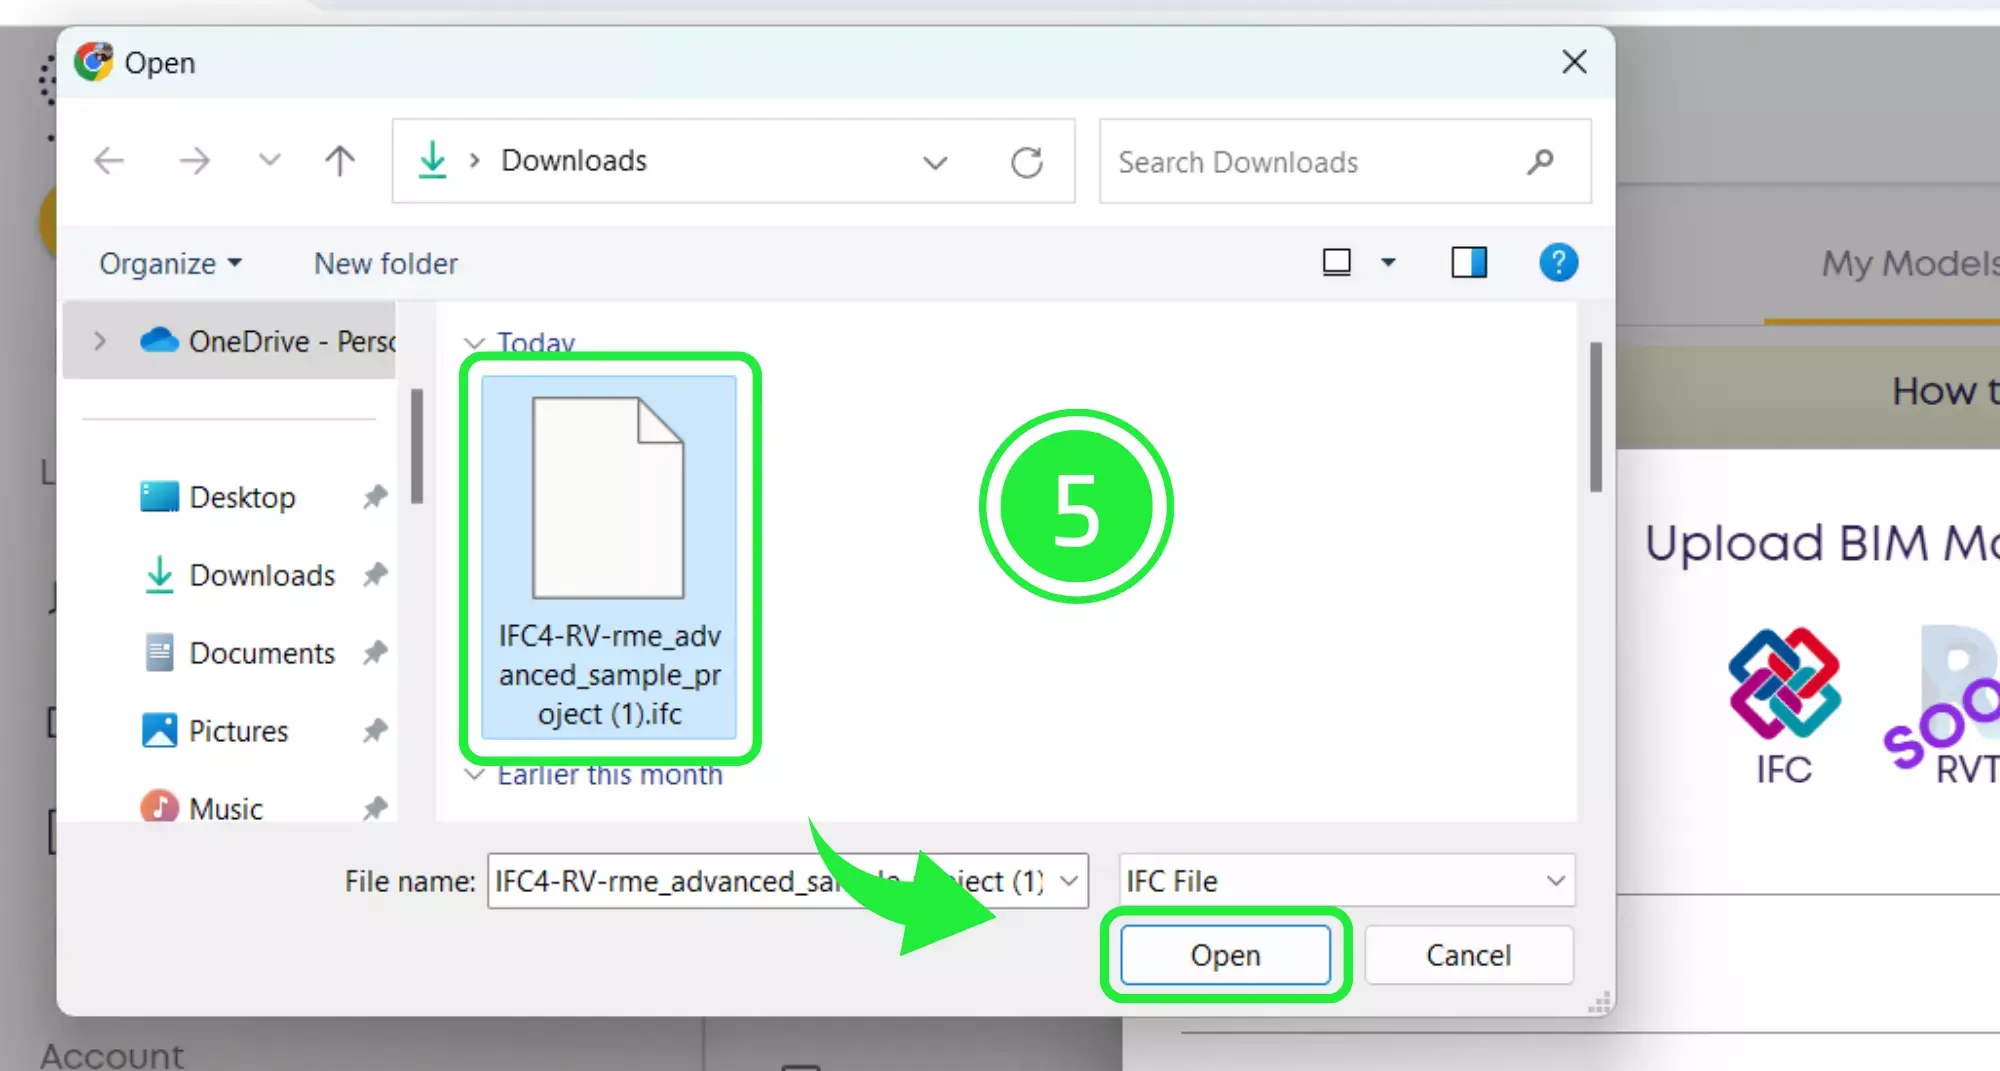
Moreover, an “Open” file pop-up will appear. Therefore, select your ifc file and then click on “Open”.
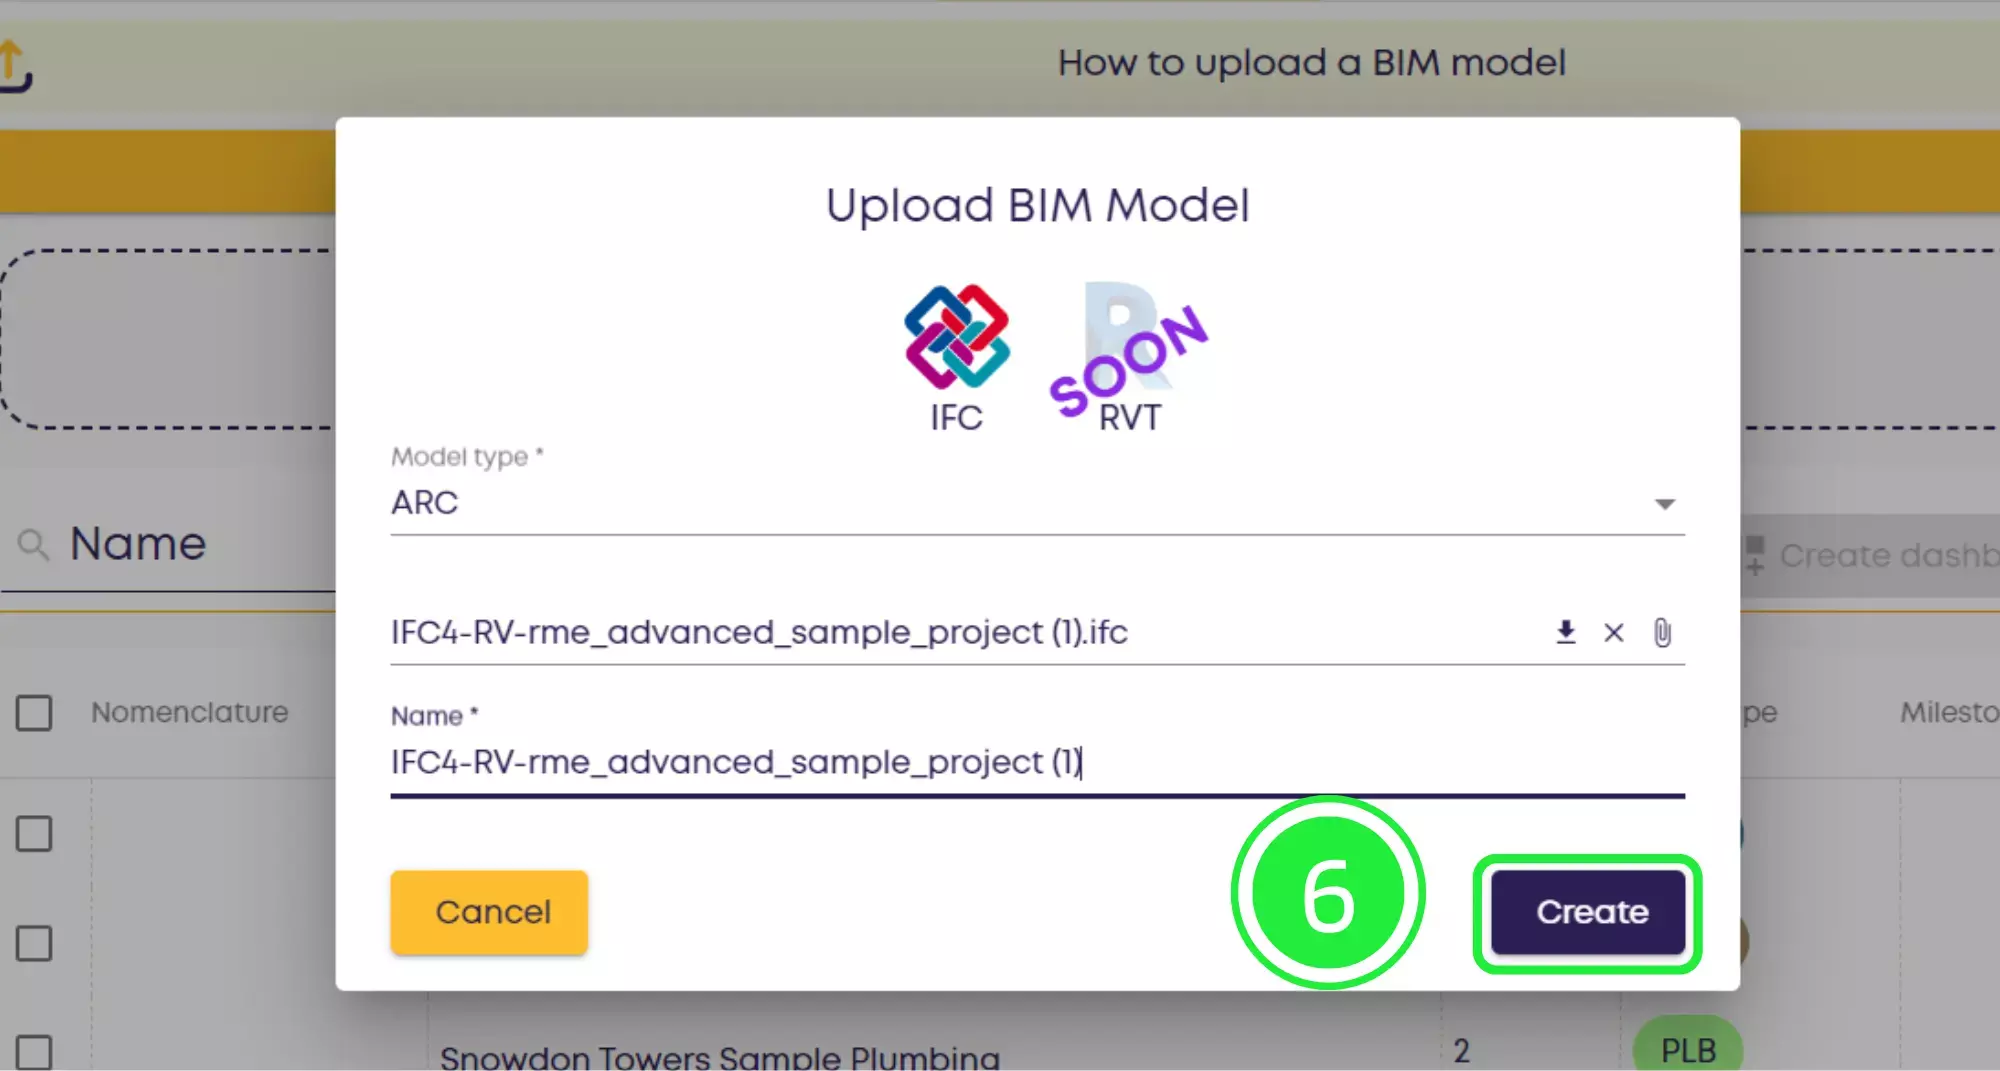
You can now choose a Name for your ifc file if you wish to do so, or you can leave it as the name of the original file. Click on “Create” to complete the upload.
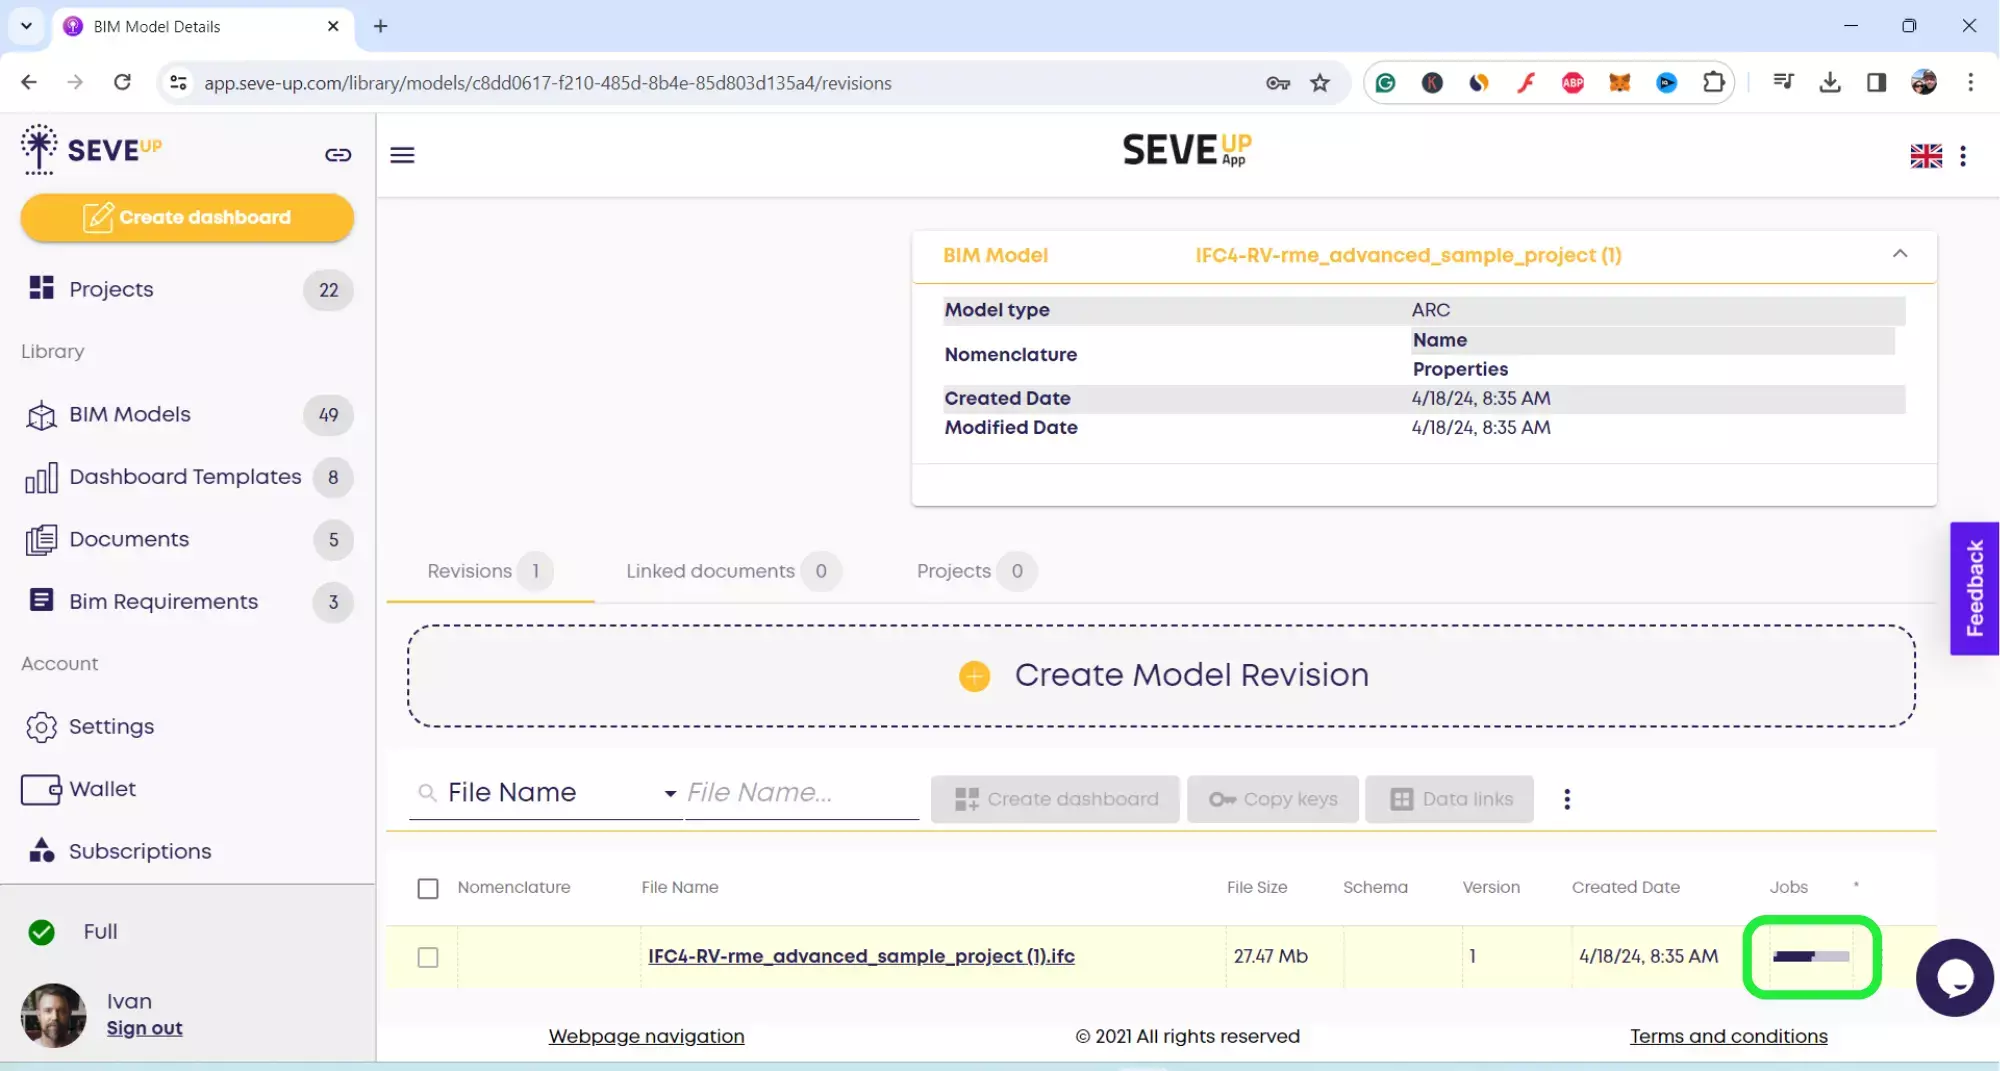
Furthermore, your file will now appear at the top of the BIM Models folder. Click on the file name to access its details.

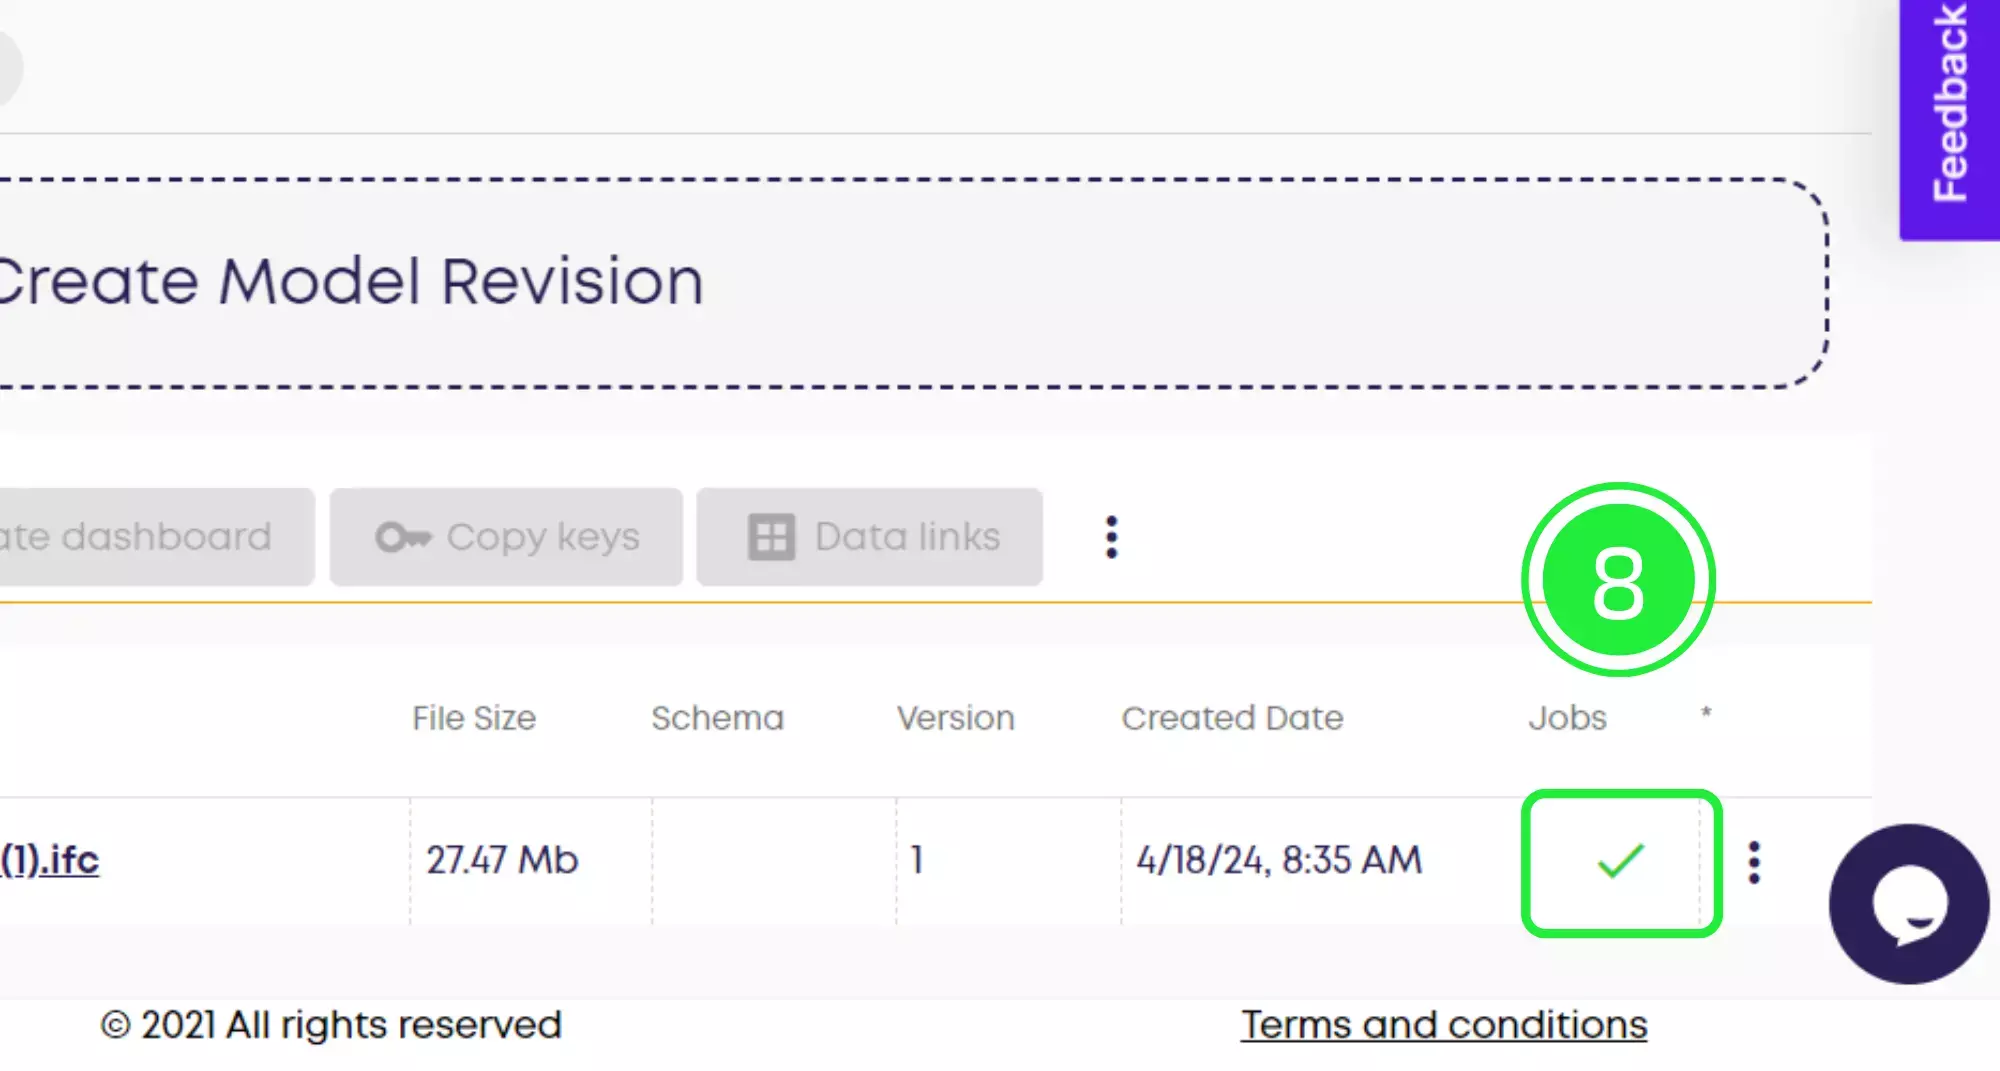
When the file opens, there will be a ”loading” line to the right hand side to show the progress of the upload. Once it’s complete it will show as a green tick which means that your file is ready to use.
Consequently, once the green tick appears click on it to access the file details. You start to understand the steps for efficient IFC Data Download: Quick and Easy Methods, aren’t you ? You can see how easy it is !
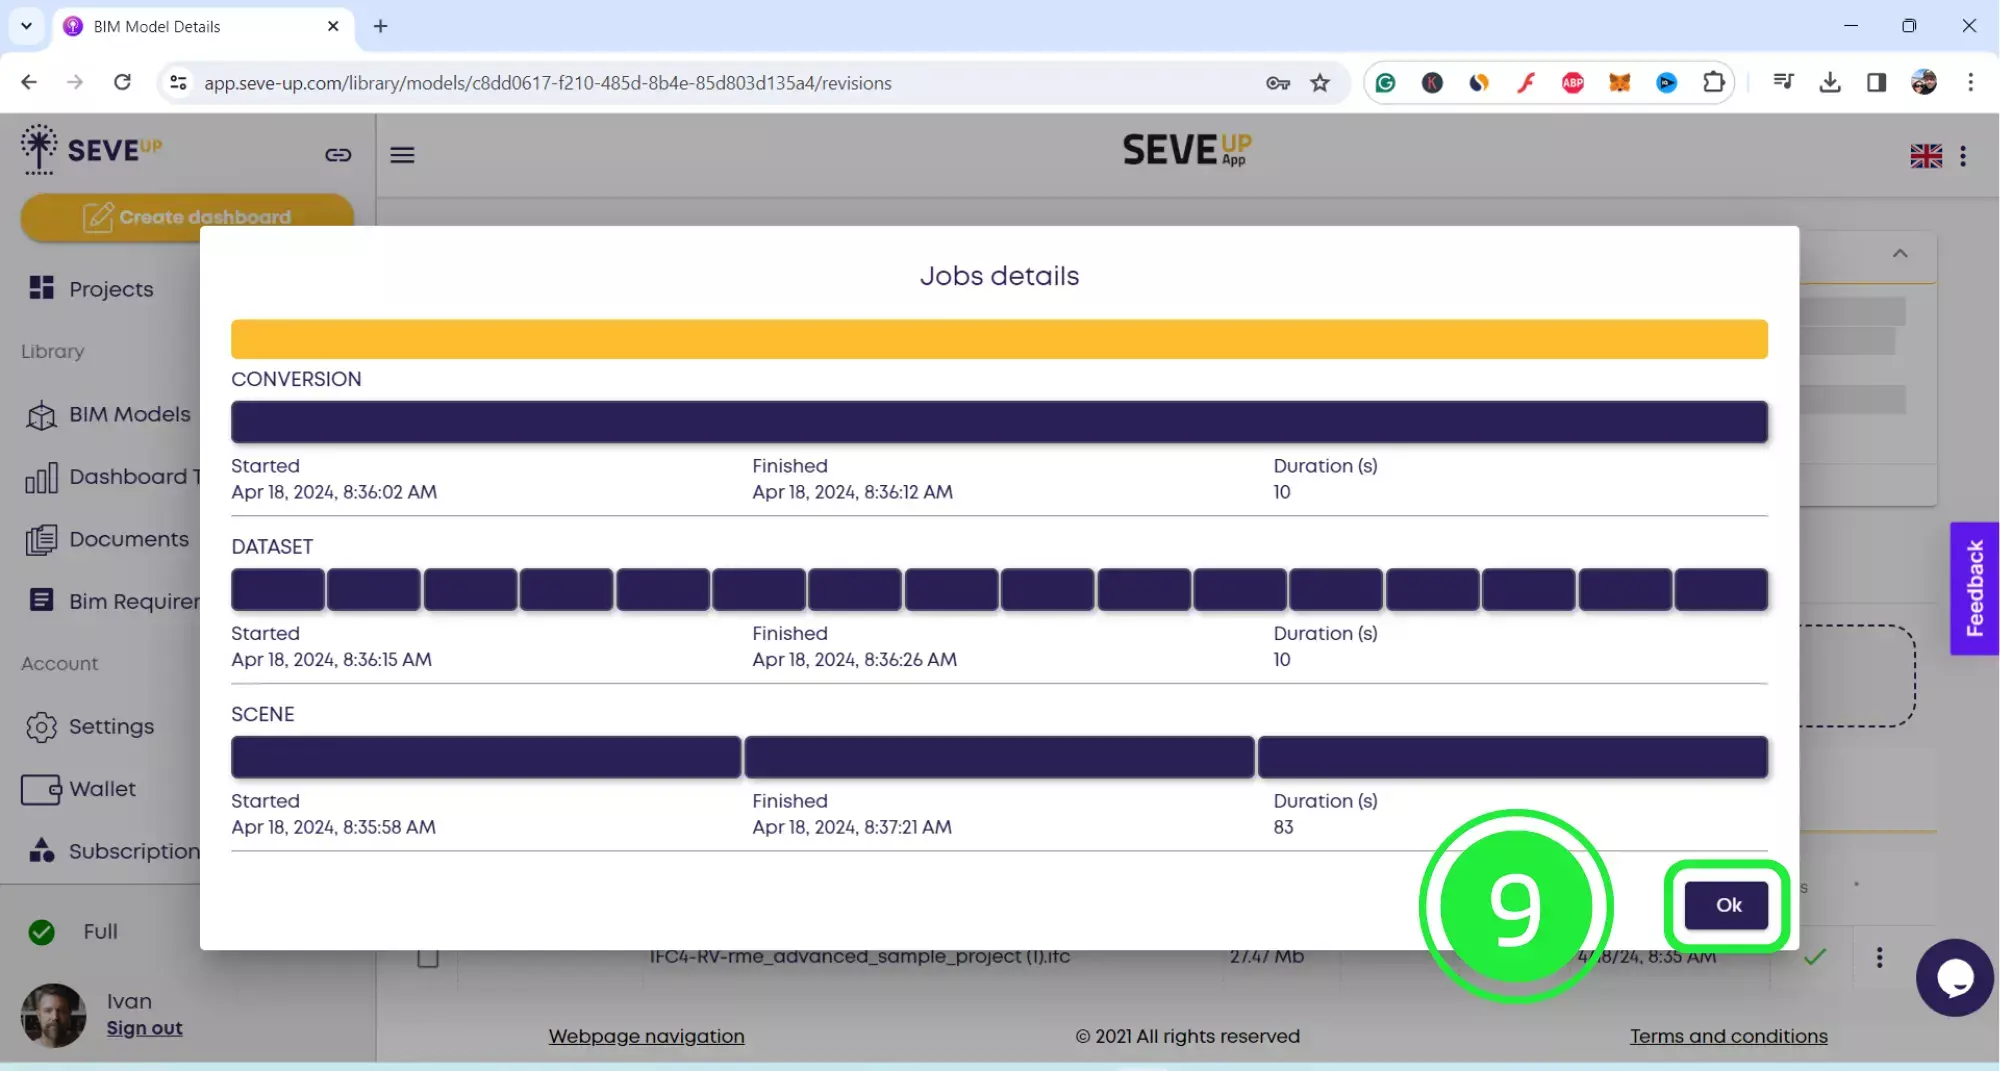
The “Jobs Details” page will now show. Under “Conversion” it shows how it has parsed the .ifc to push data inside a database. And under “DataSet” it shows the creation of all data tables which are needed to automate the Power BI dashboard creation and make it available to download in CSV and JSON.
Finally, click on “Ok” to close the pop-up.
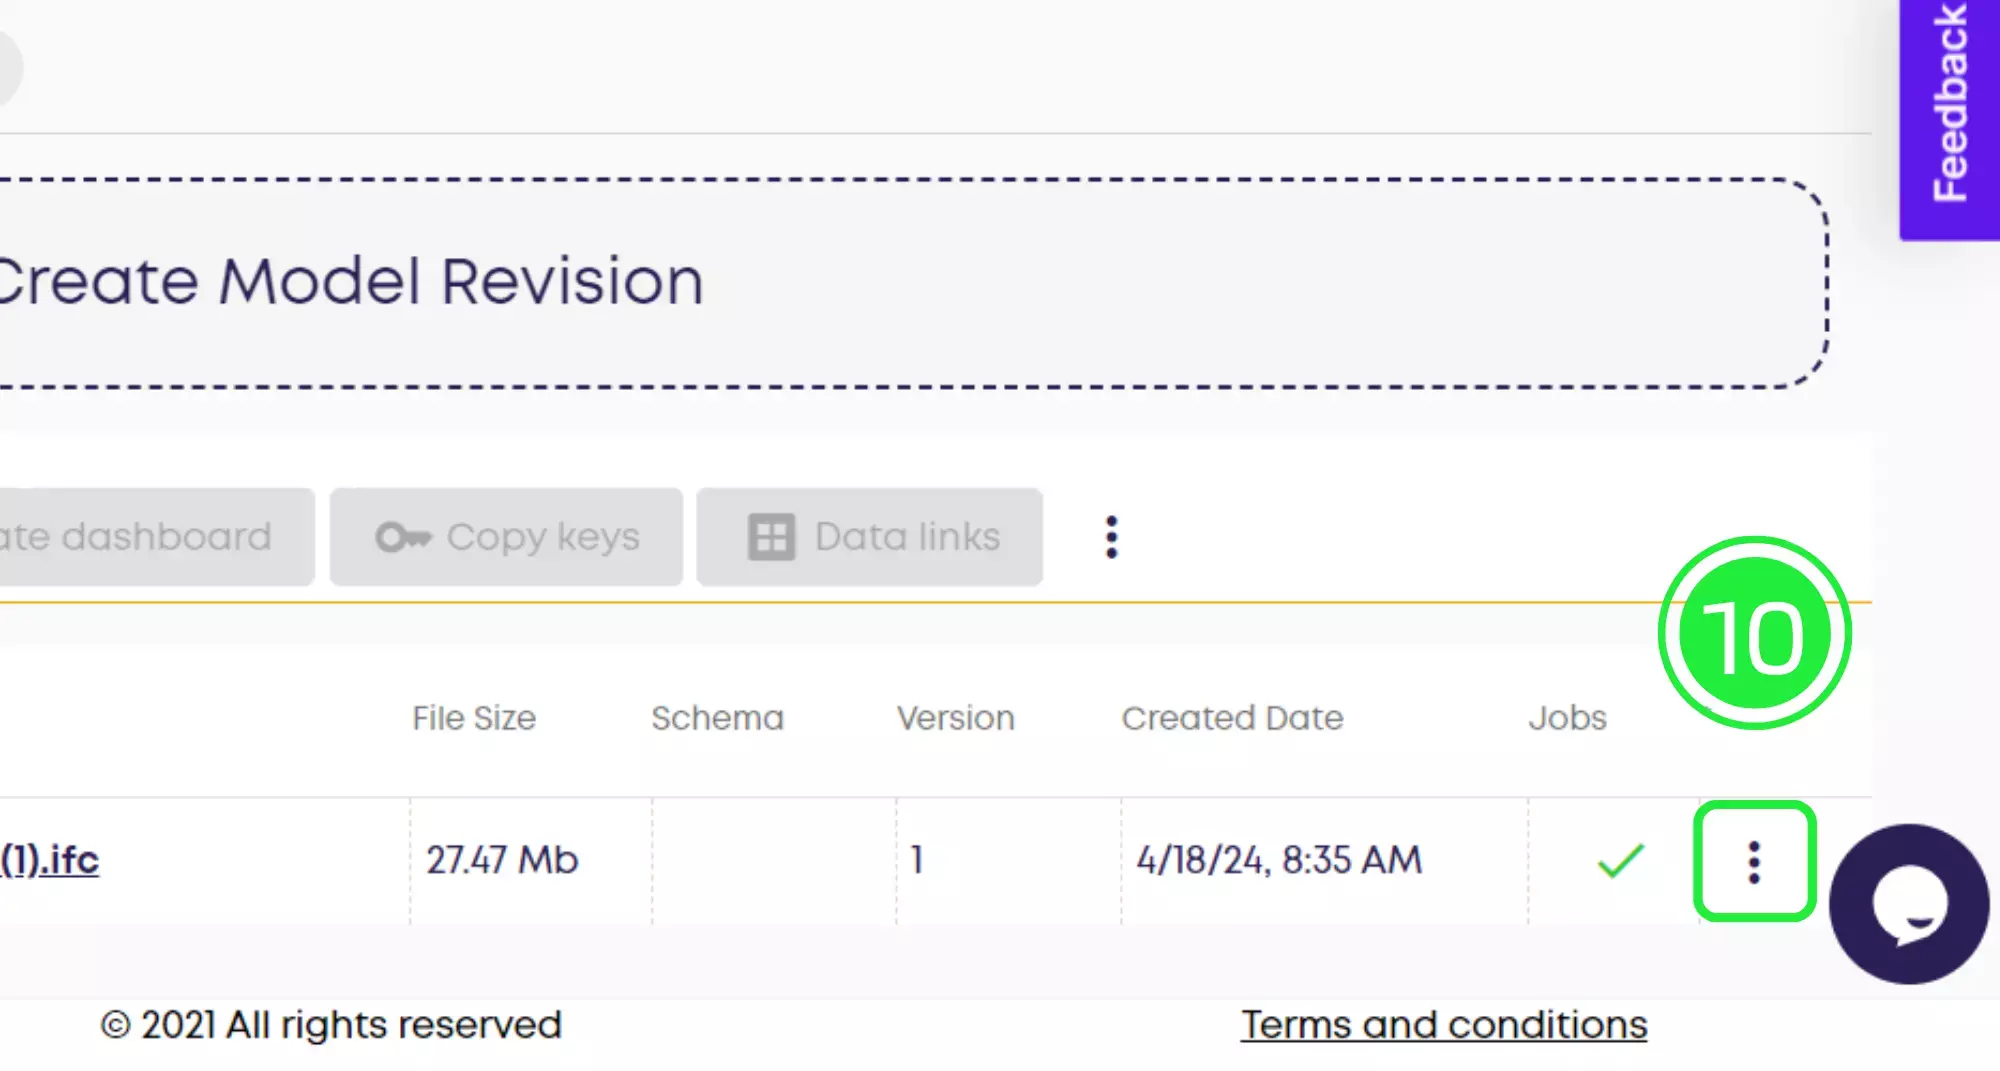
Next to the green tick is the menu icon. Subsequently, click on it to bring up the options available for the file.
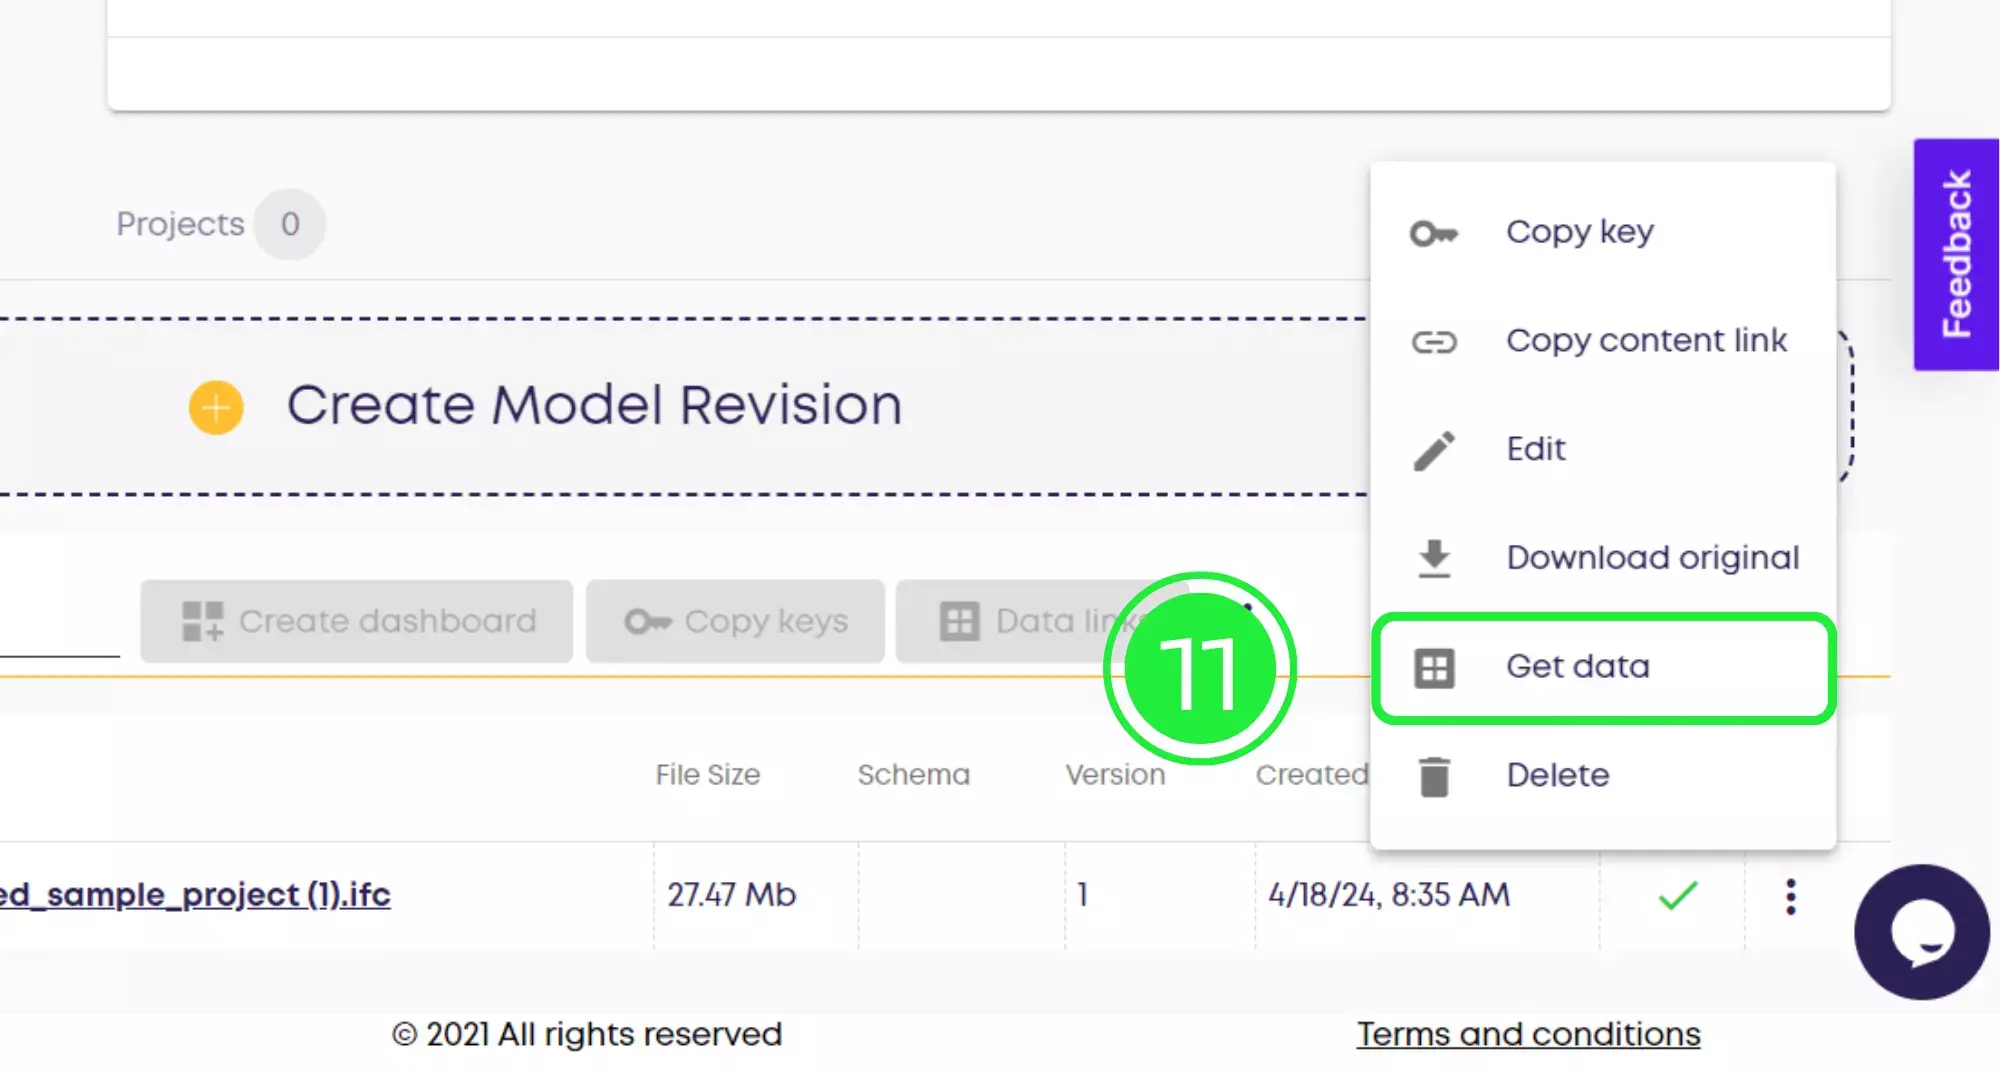
Additionally, click on “Get Data”. This is only available with one of our paid plans so if you’re still using a Freemium plan then you’ll need to upgrade.
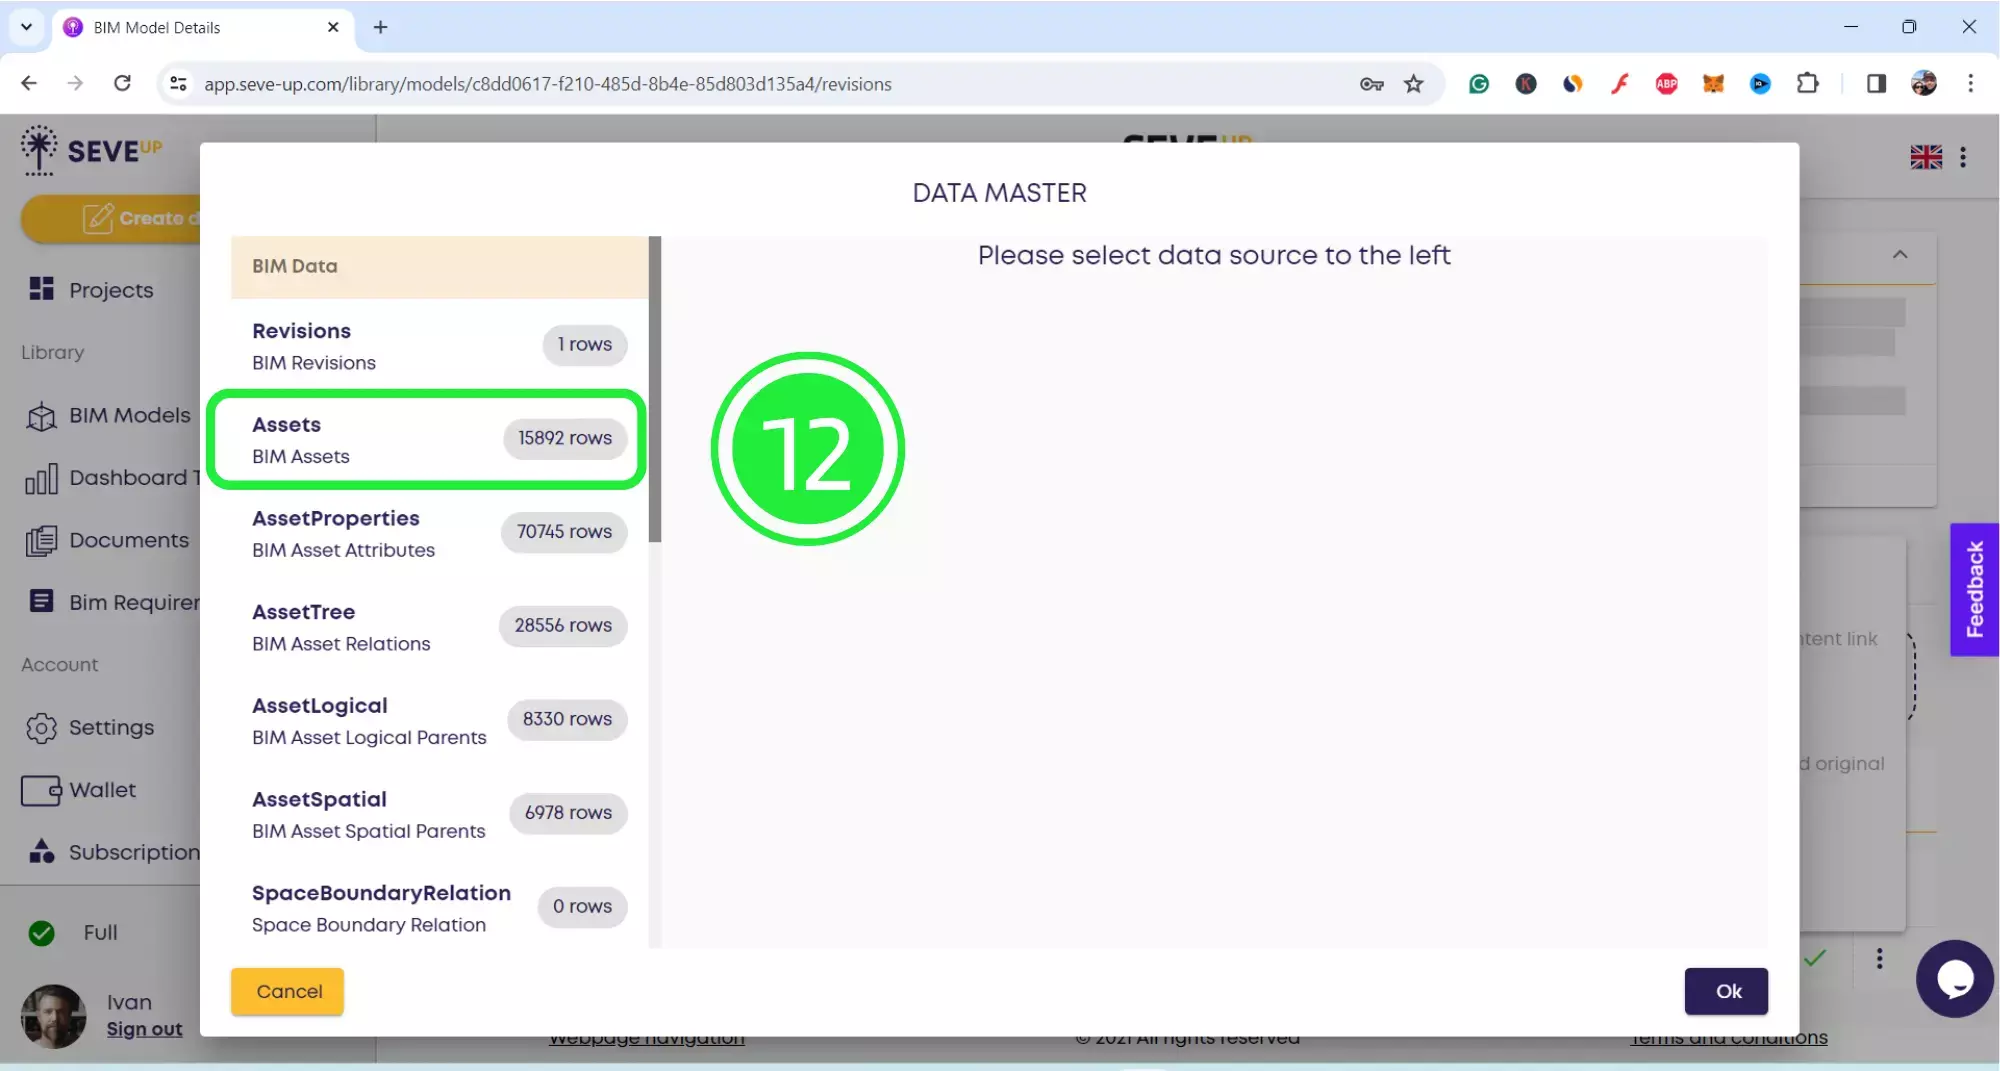
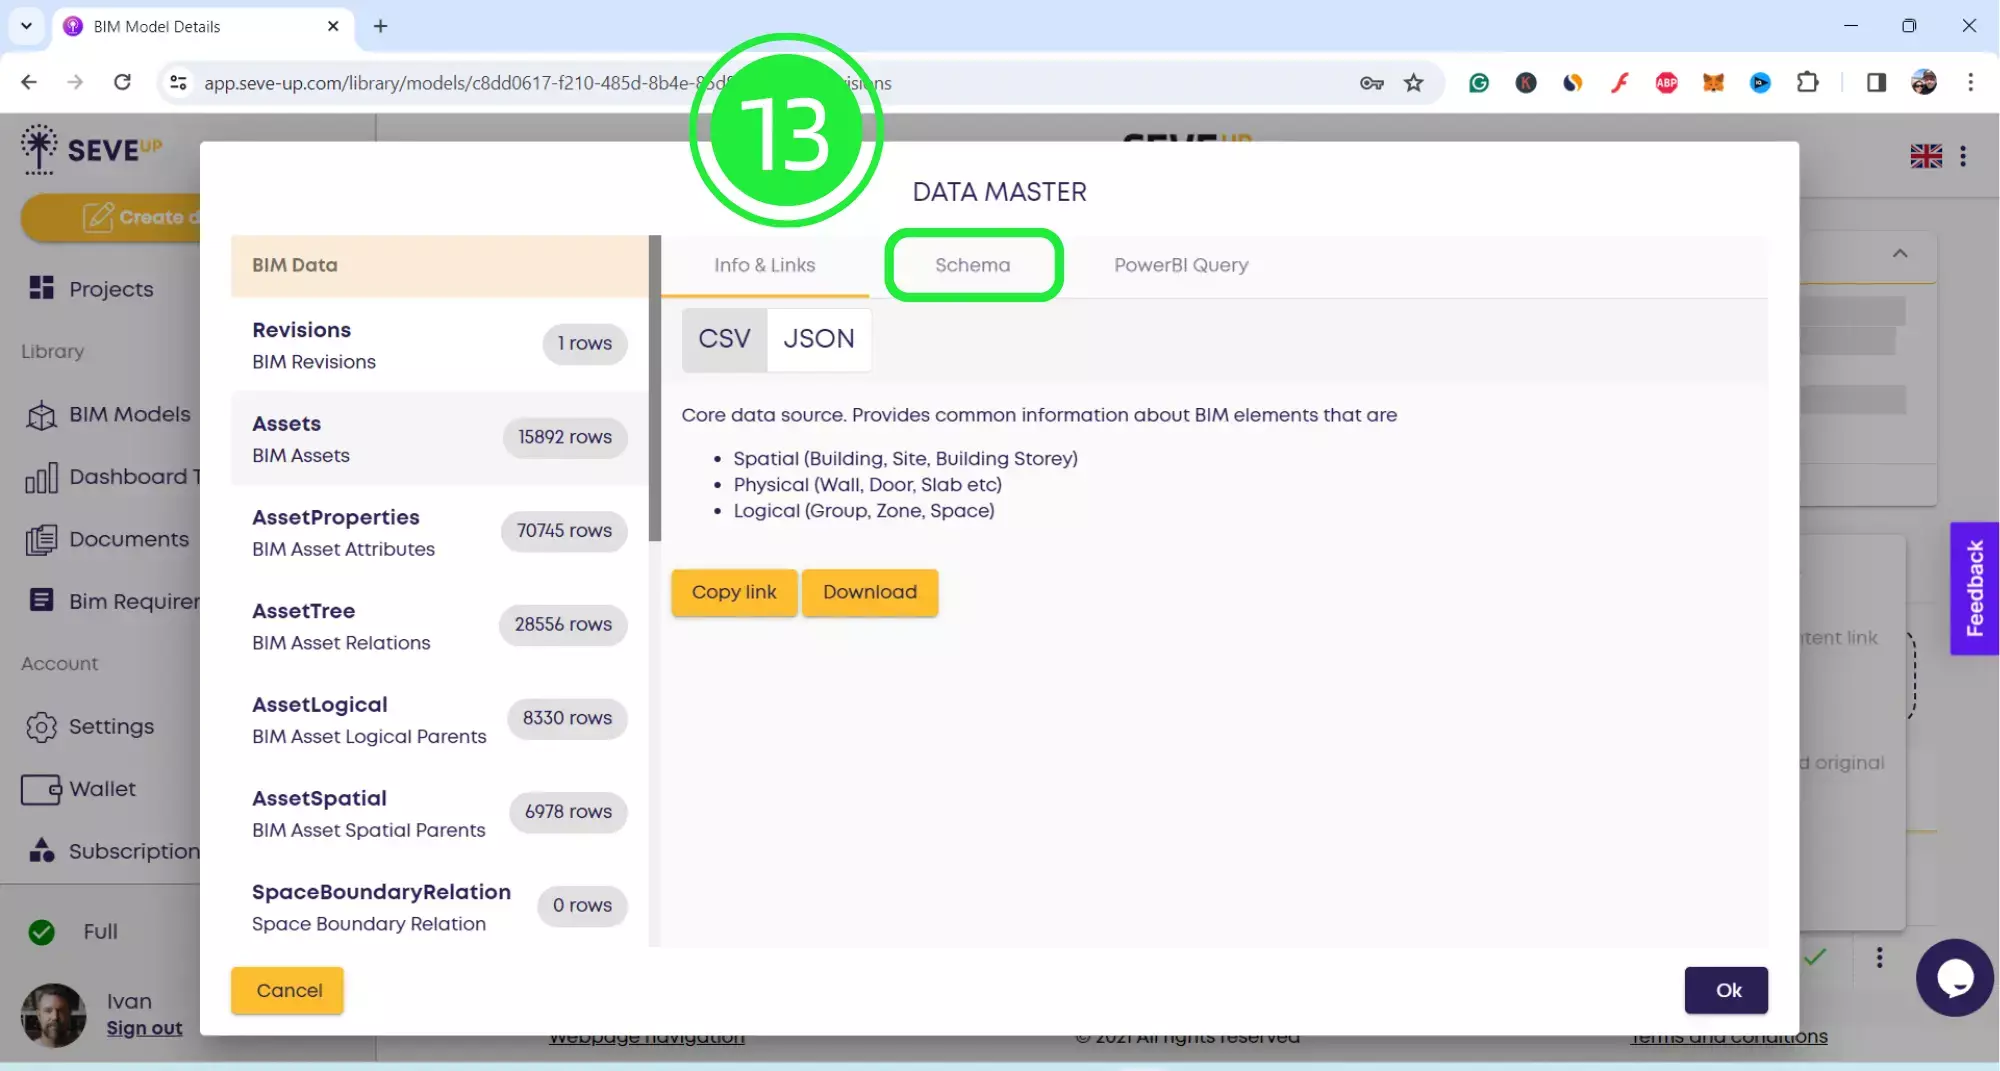
Meanwhile, the “Data Master” pop-up window will appear. Here you can choose what filter to use for downloading the data from your BIM model.
Select ”Assets” to explore the data in more depth.
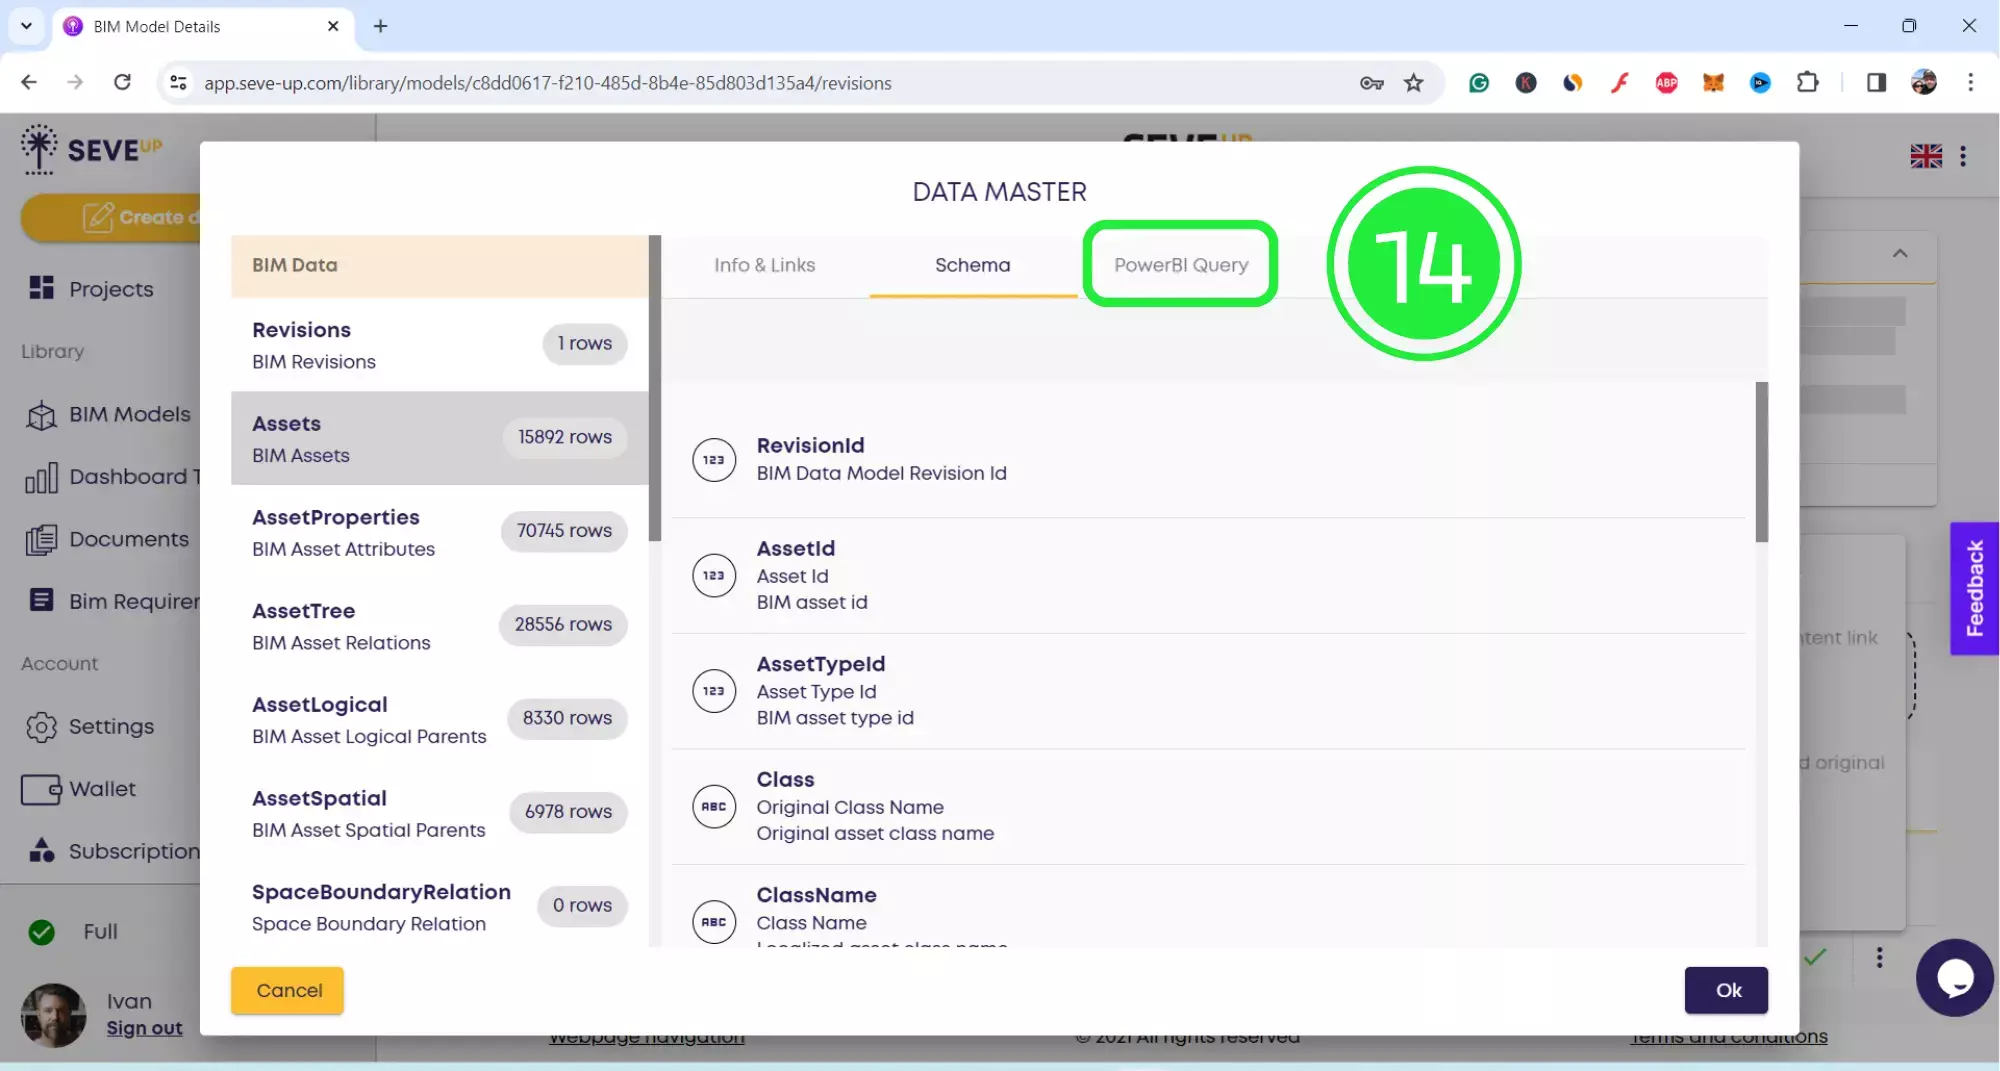
In addition, click on “Schema” to see all of the Asset schema within your file.
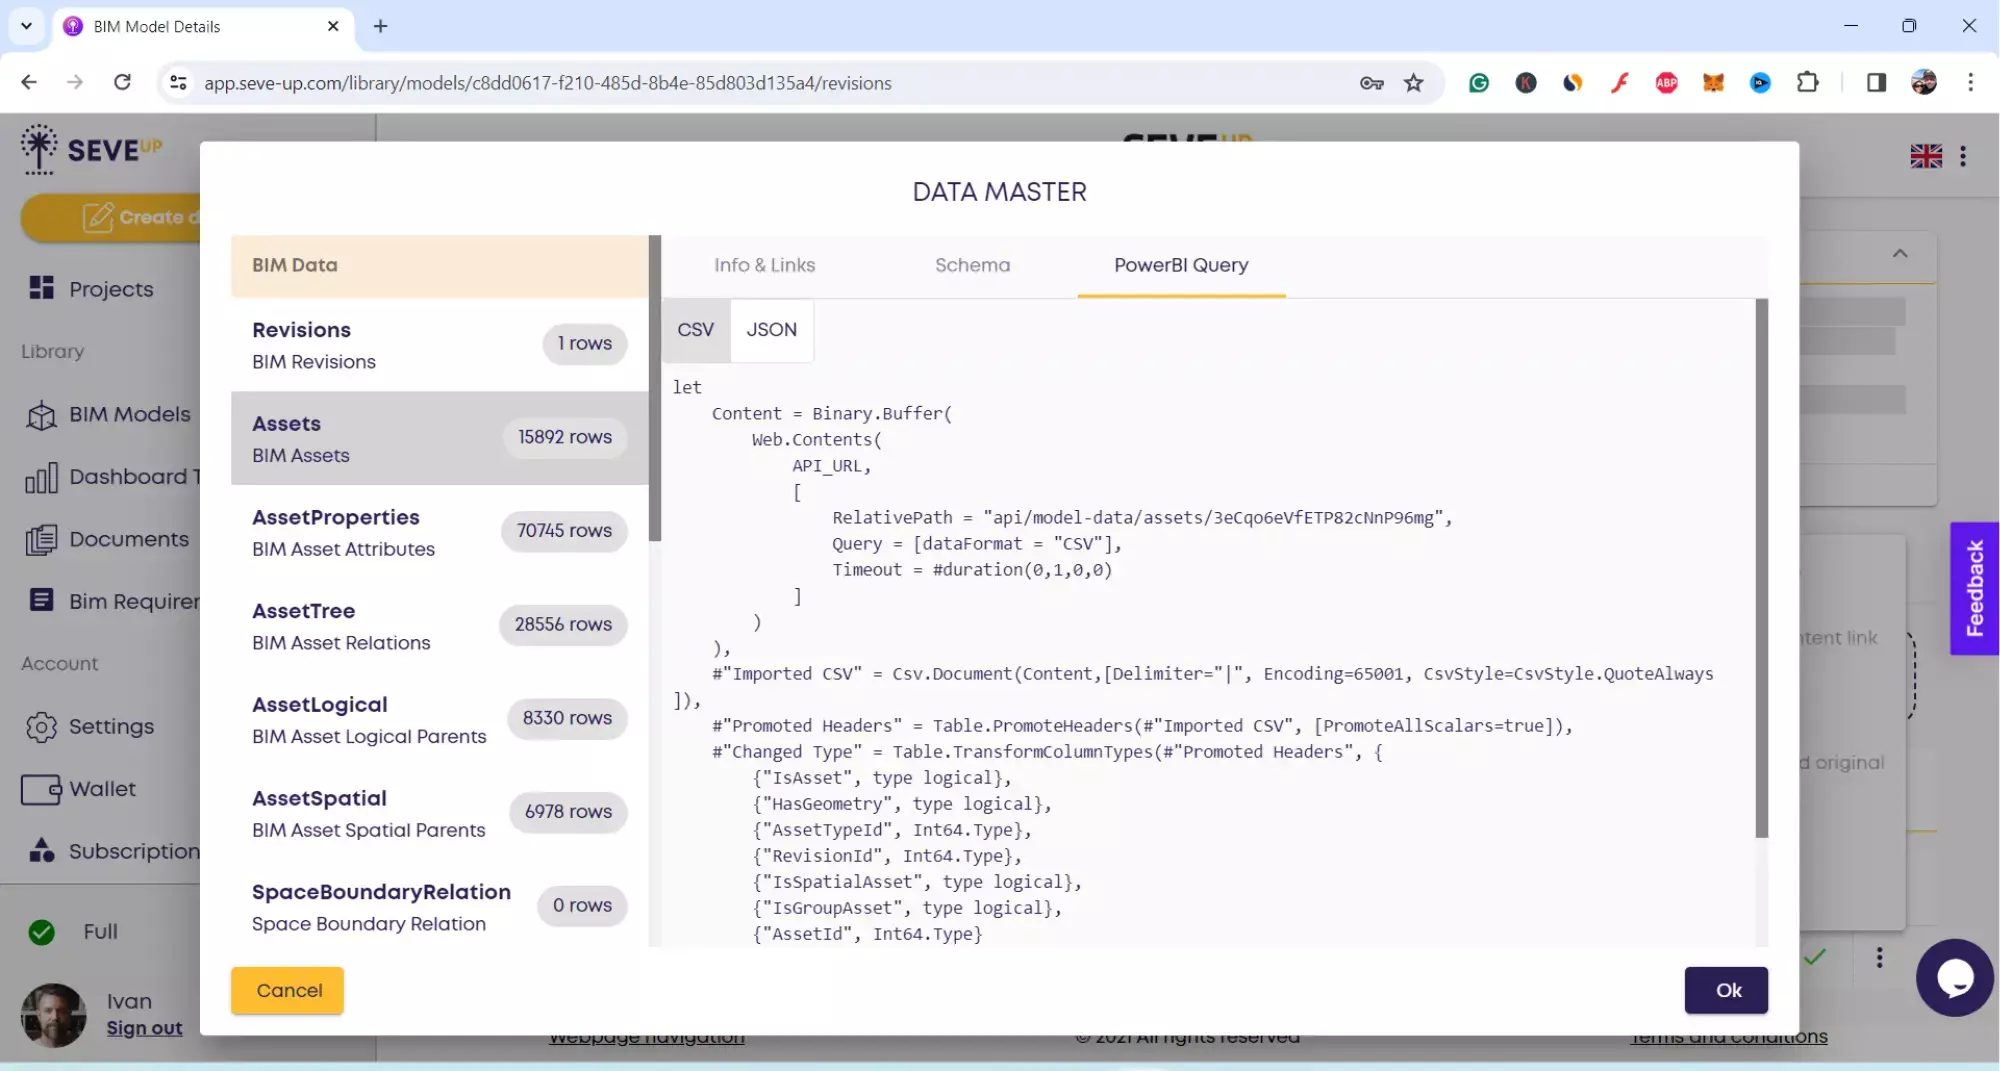
Hense, select “Power BI Query” to see that the query has already been written as CSV and JSON in the file.
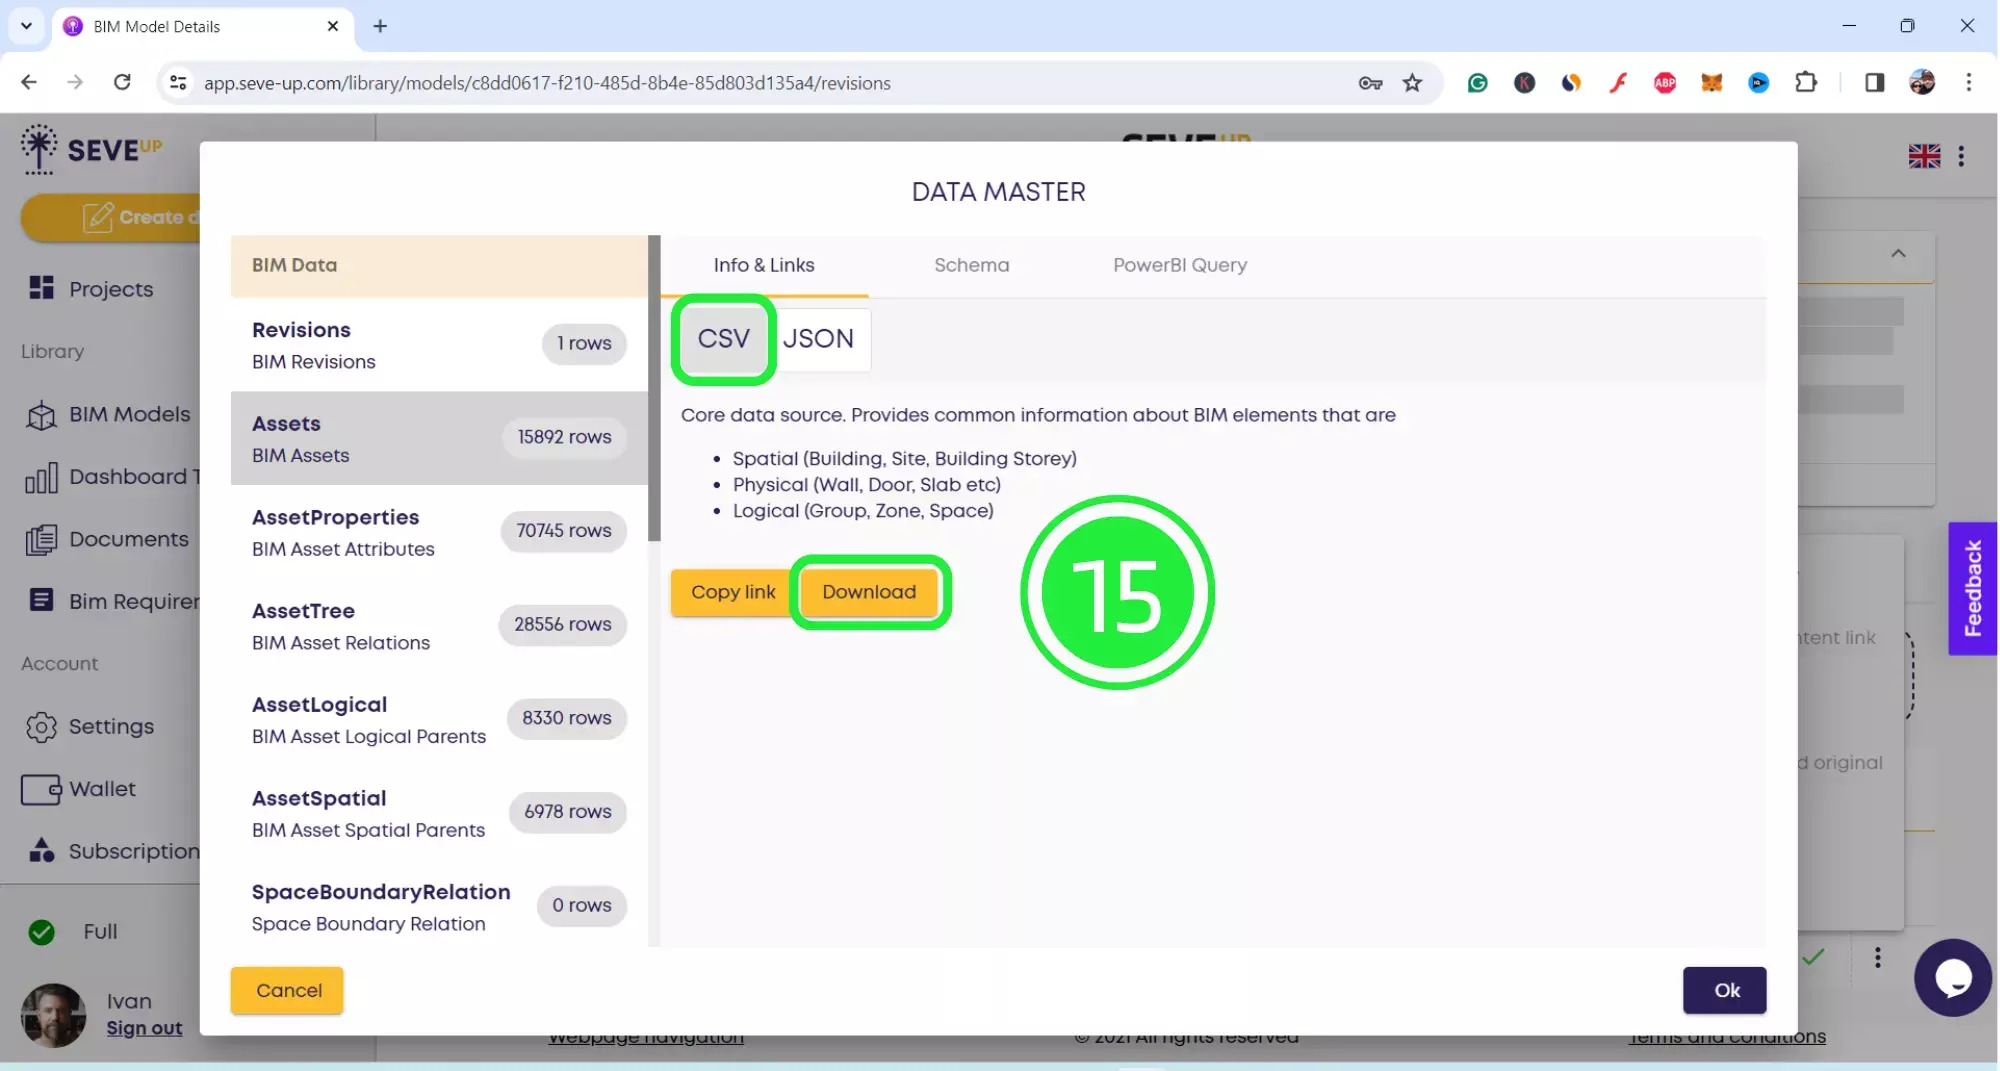
Besides, select “CSV” and then click on “Download”.
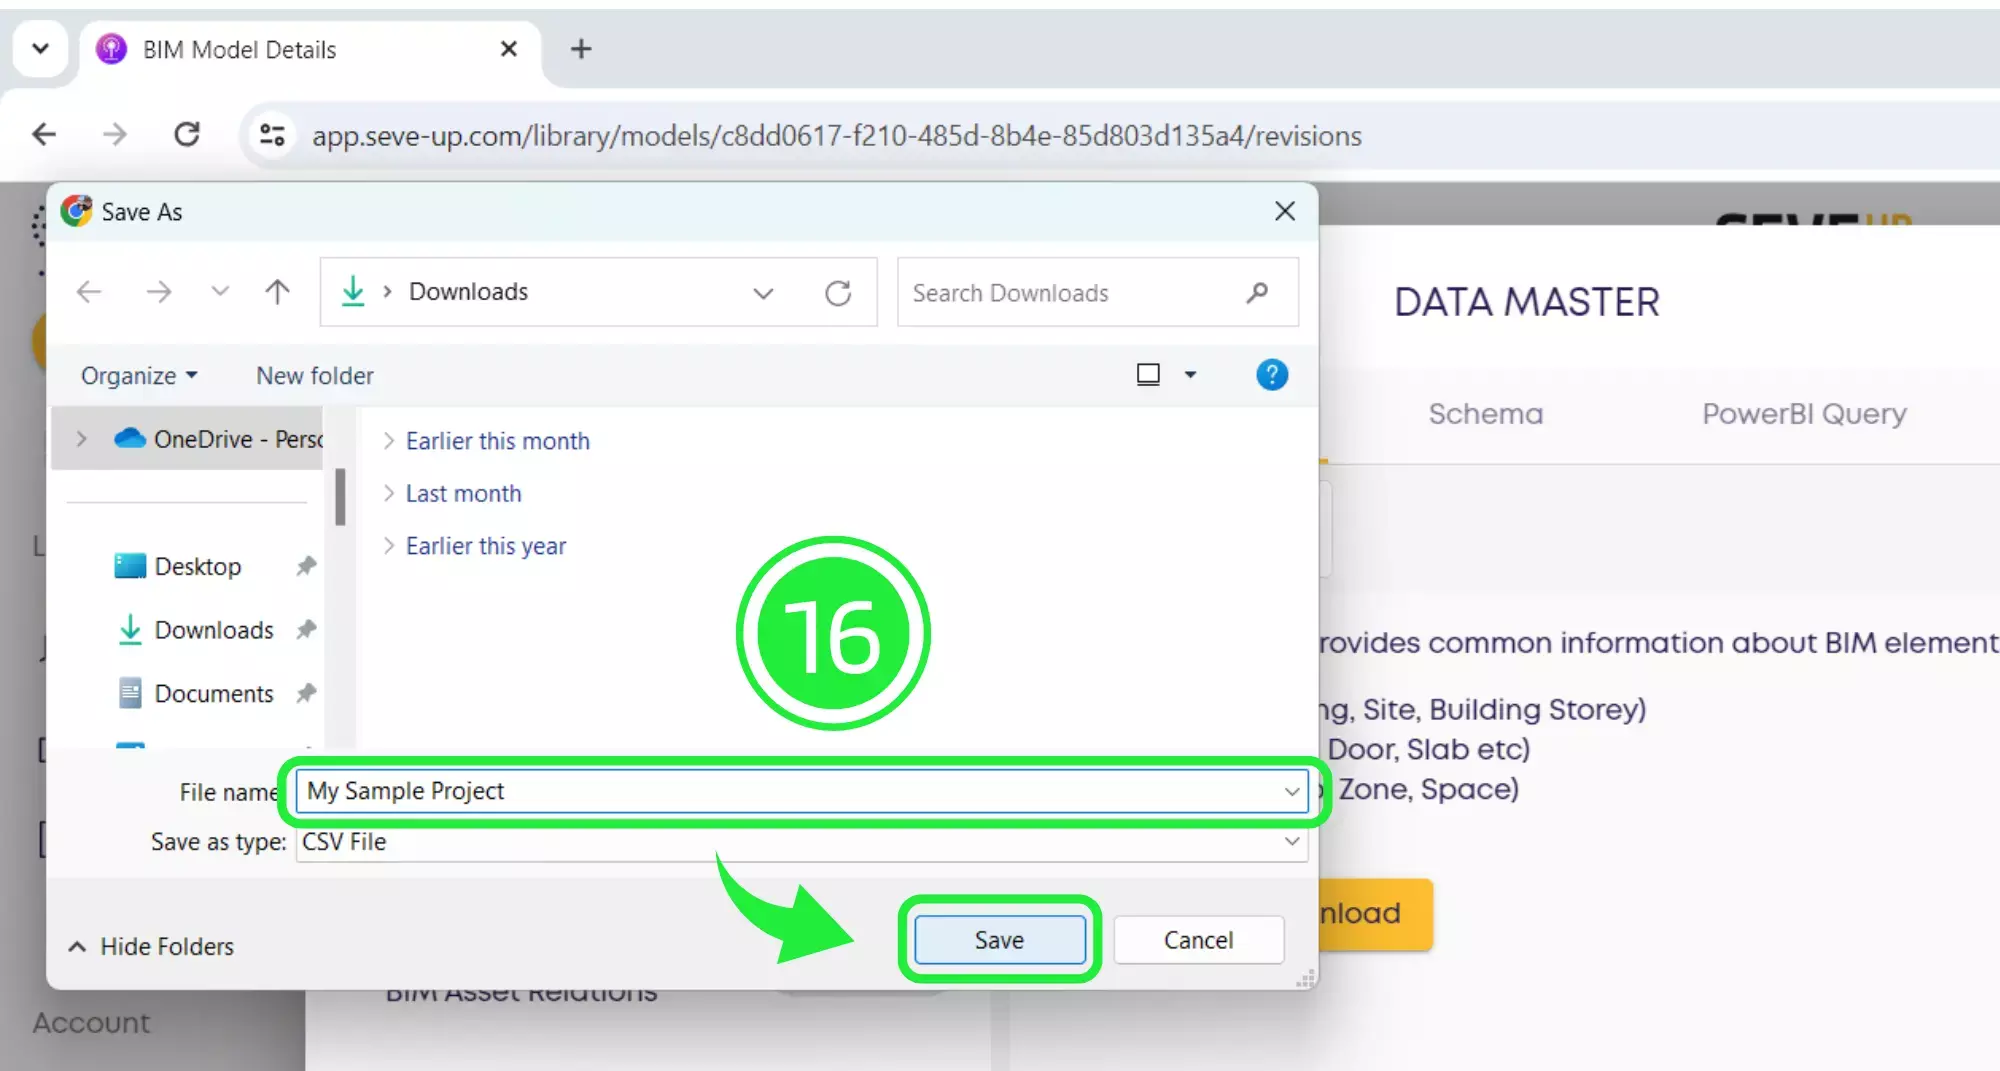
However, by default, your file will save with the name “Asset”. In order to keep your files in order, name your file something appropriate. Then click on “Save”.
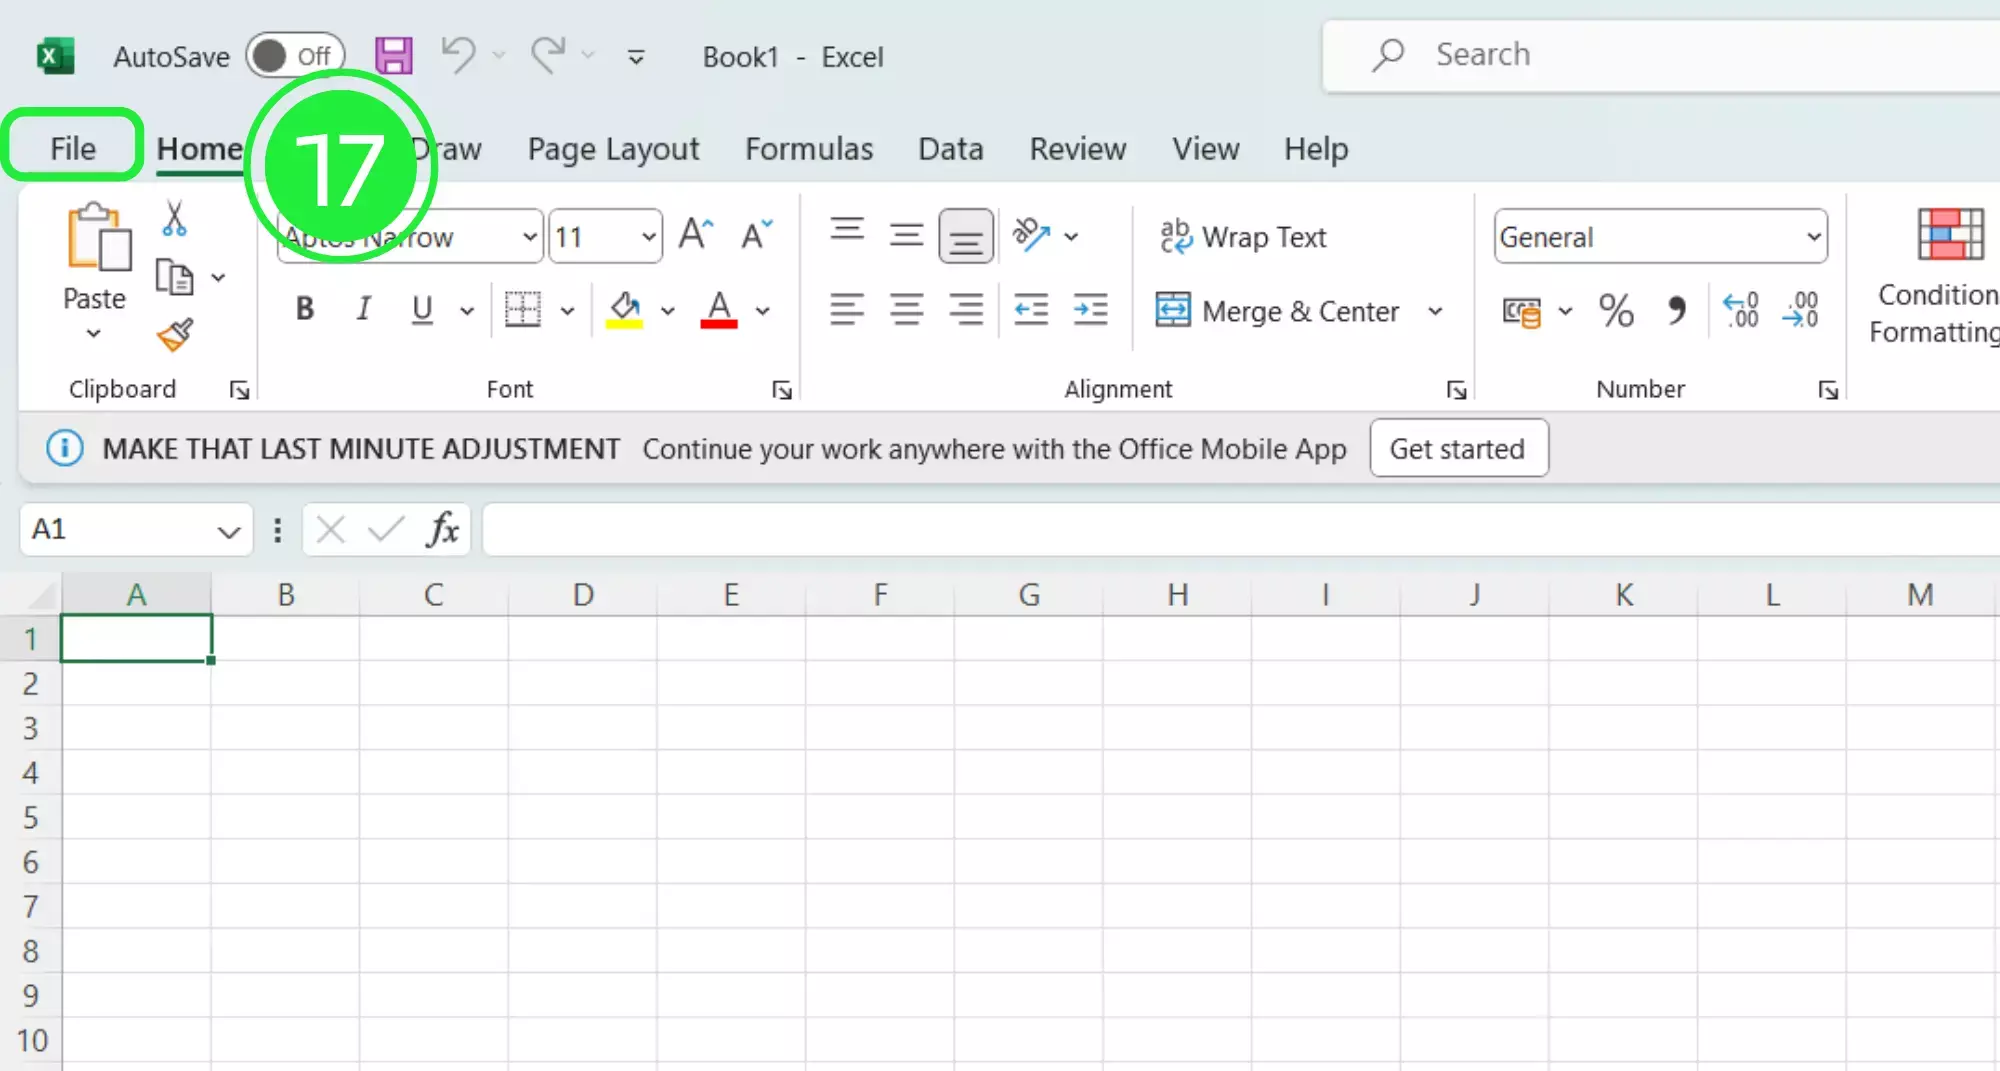
Before opening up the spreadsheet, we need to make sure that the data will display correctly. First open a blank Excel workbook and then click on “File” in the top left.
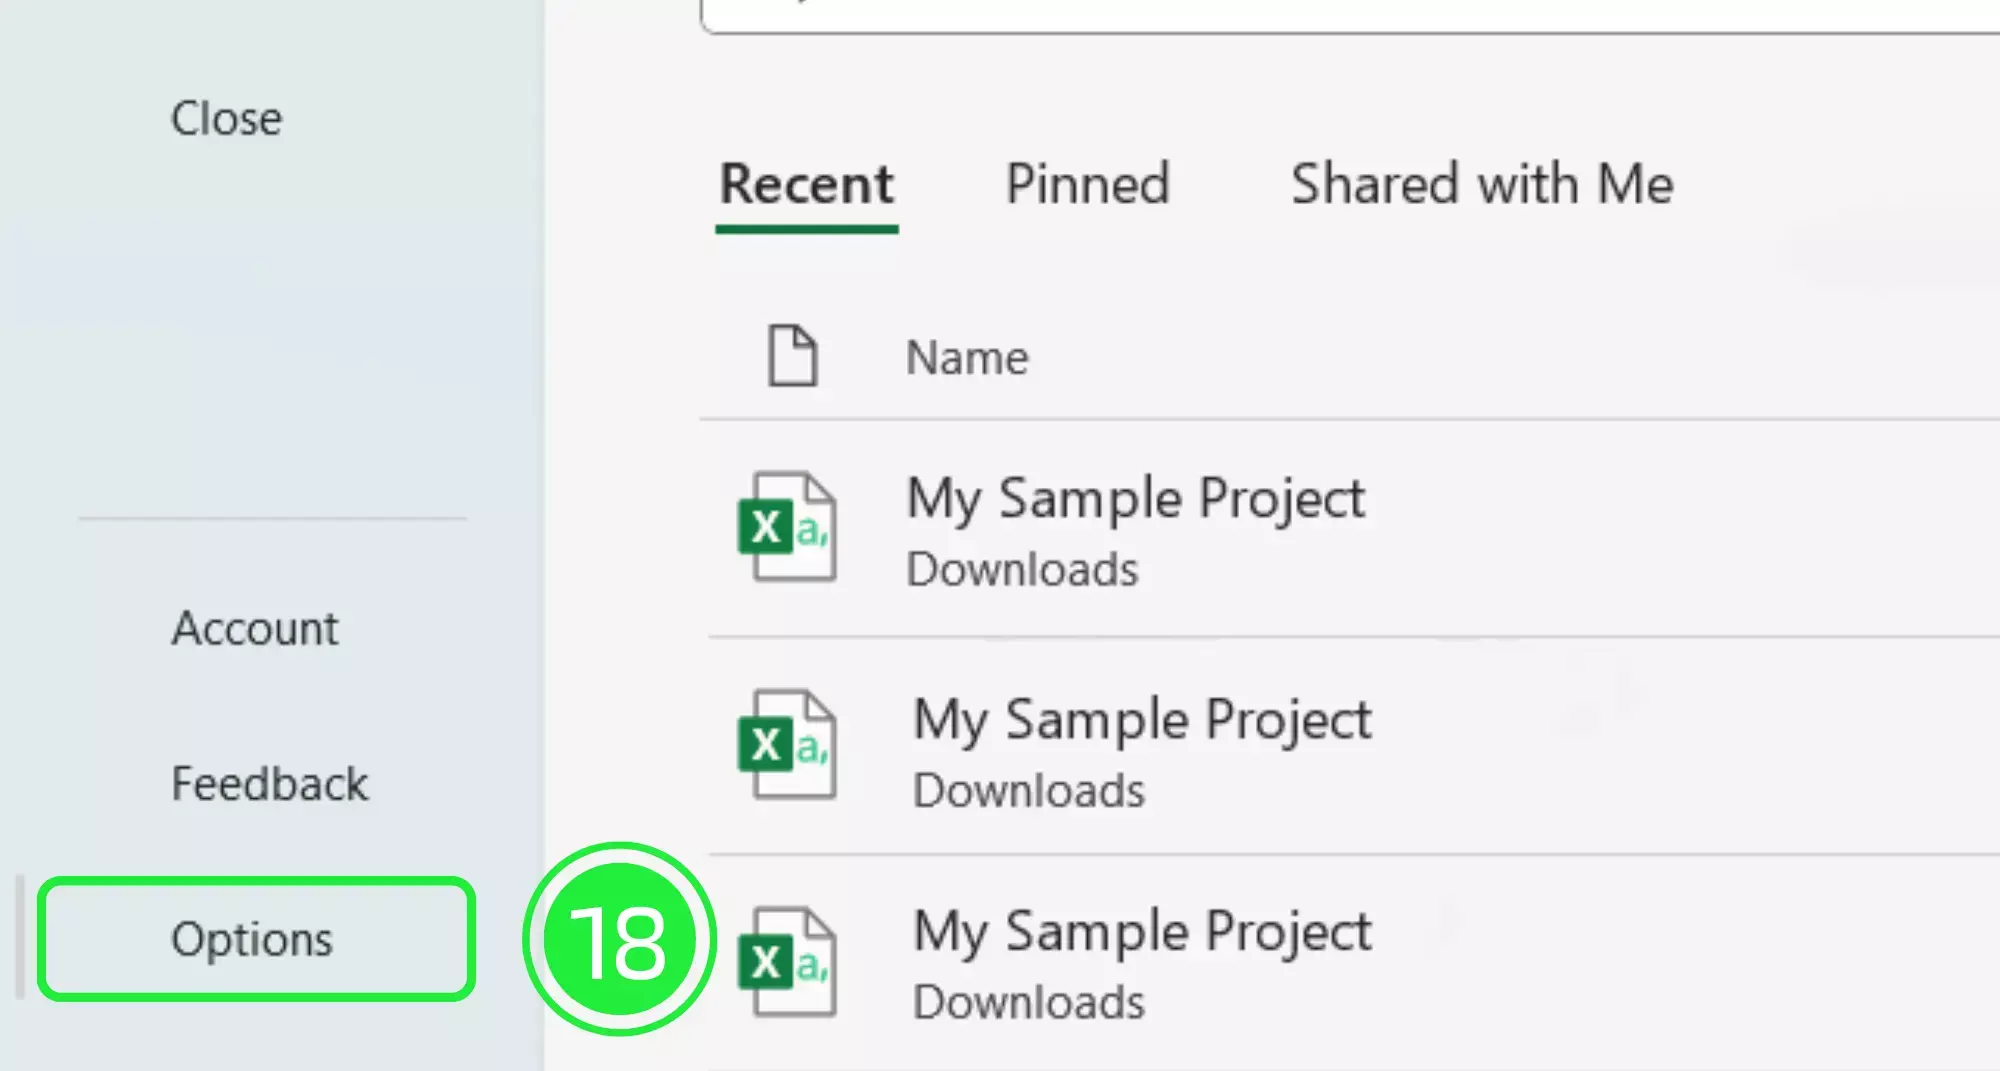
Similarly, scroll down and select “Options”
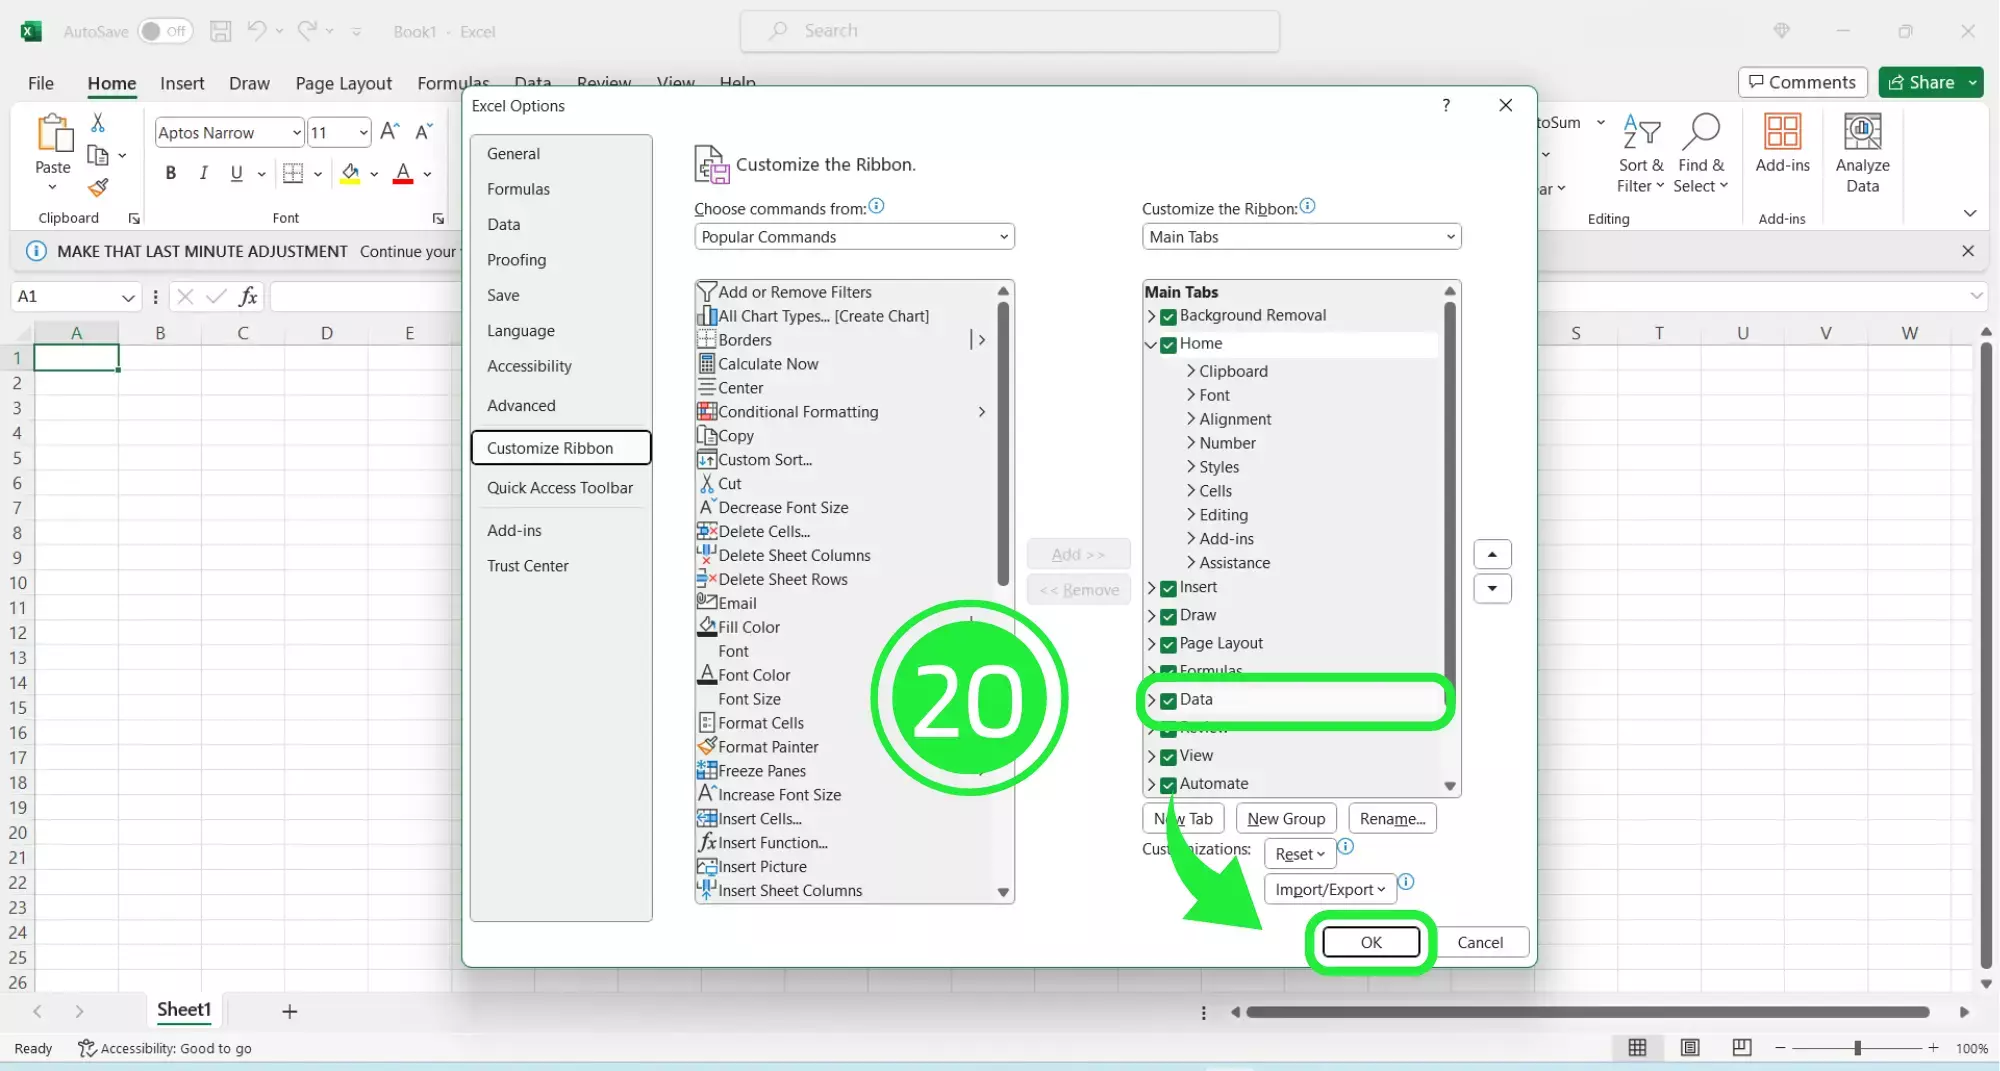
A pop-up window will appear for the “Excel Options”. So, click on “Customize Ribbon”.
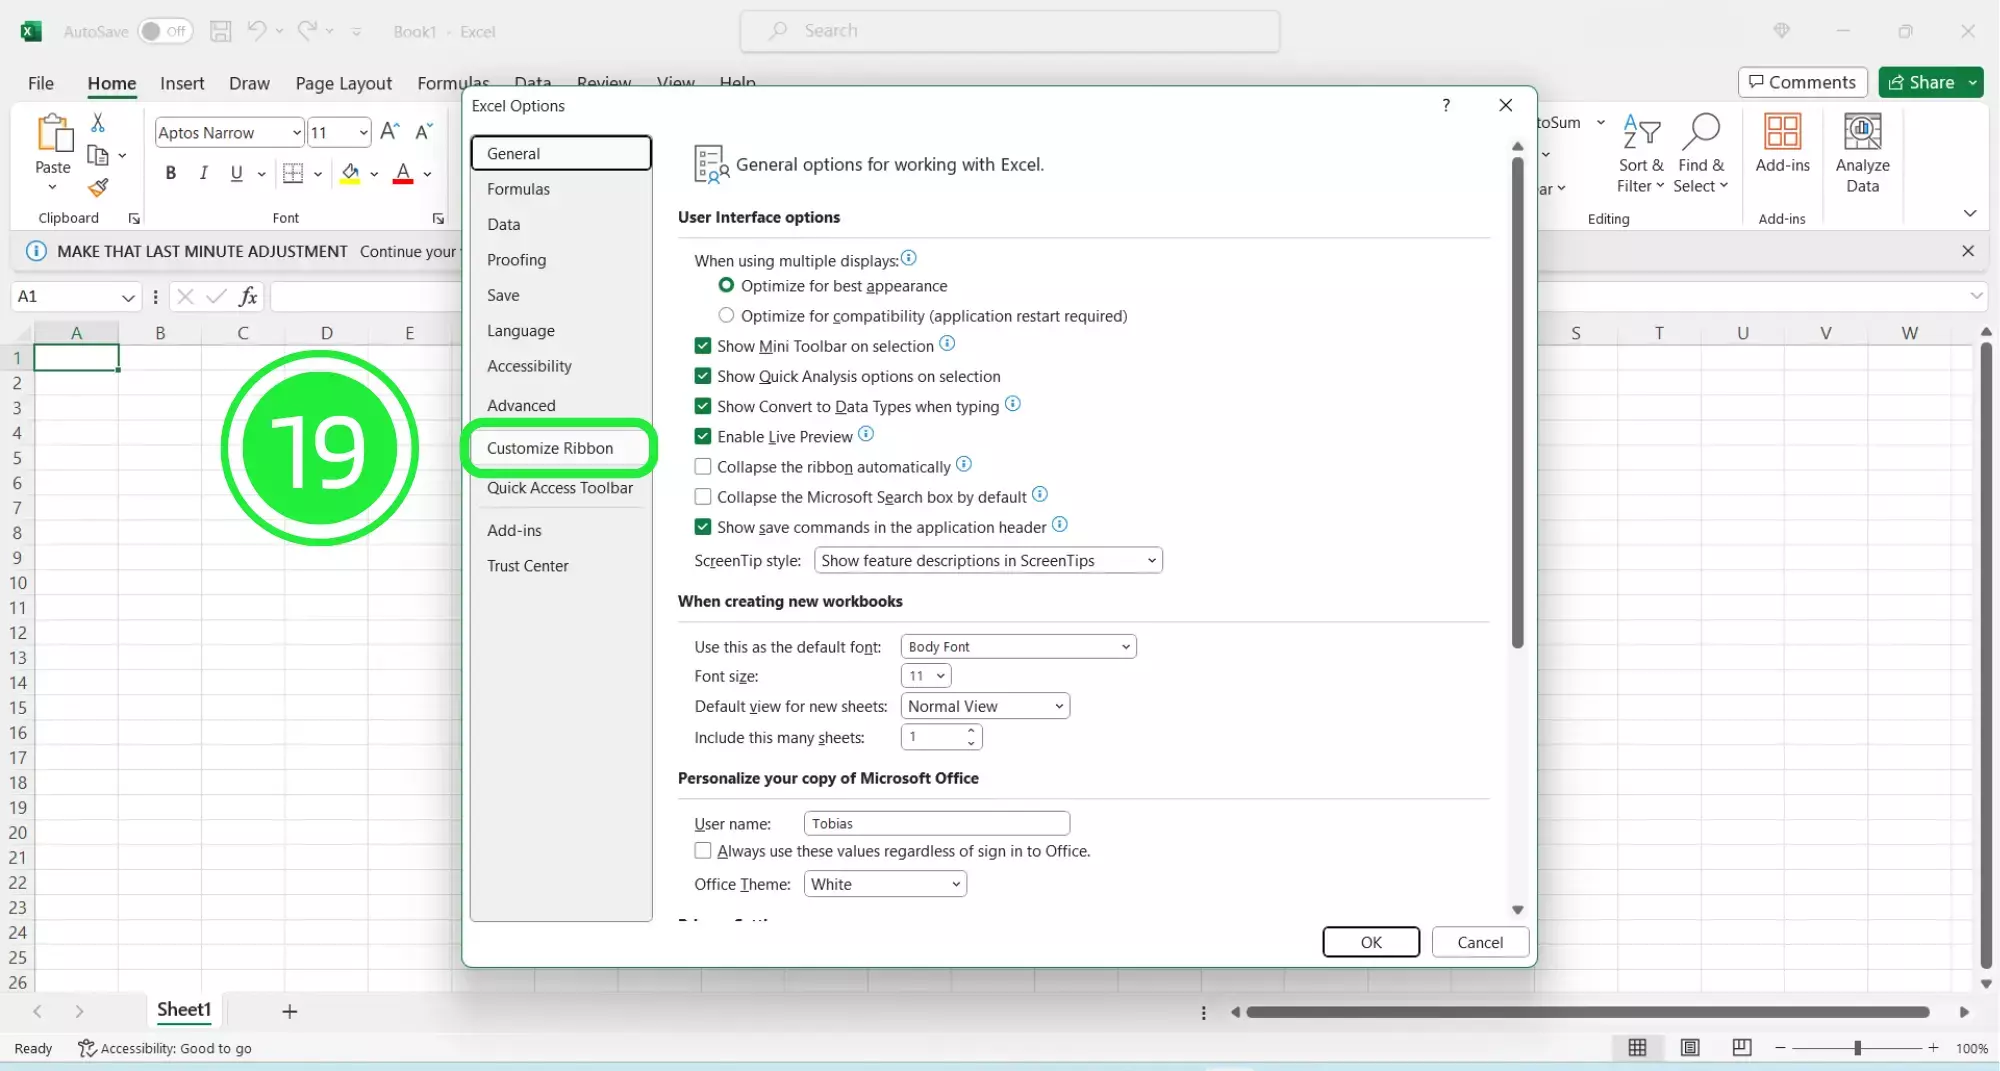
Under the “Main Tabs” pane, ensure that “data” is checked and press on “OK”.
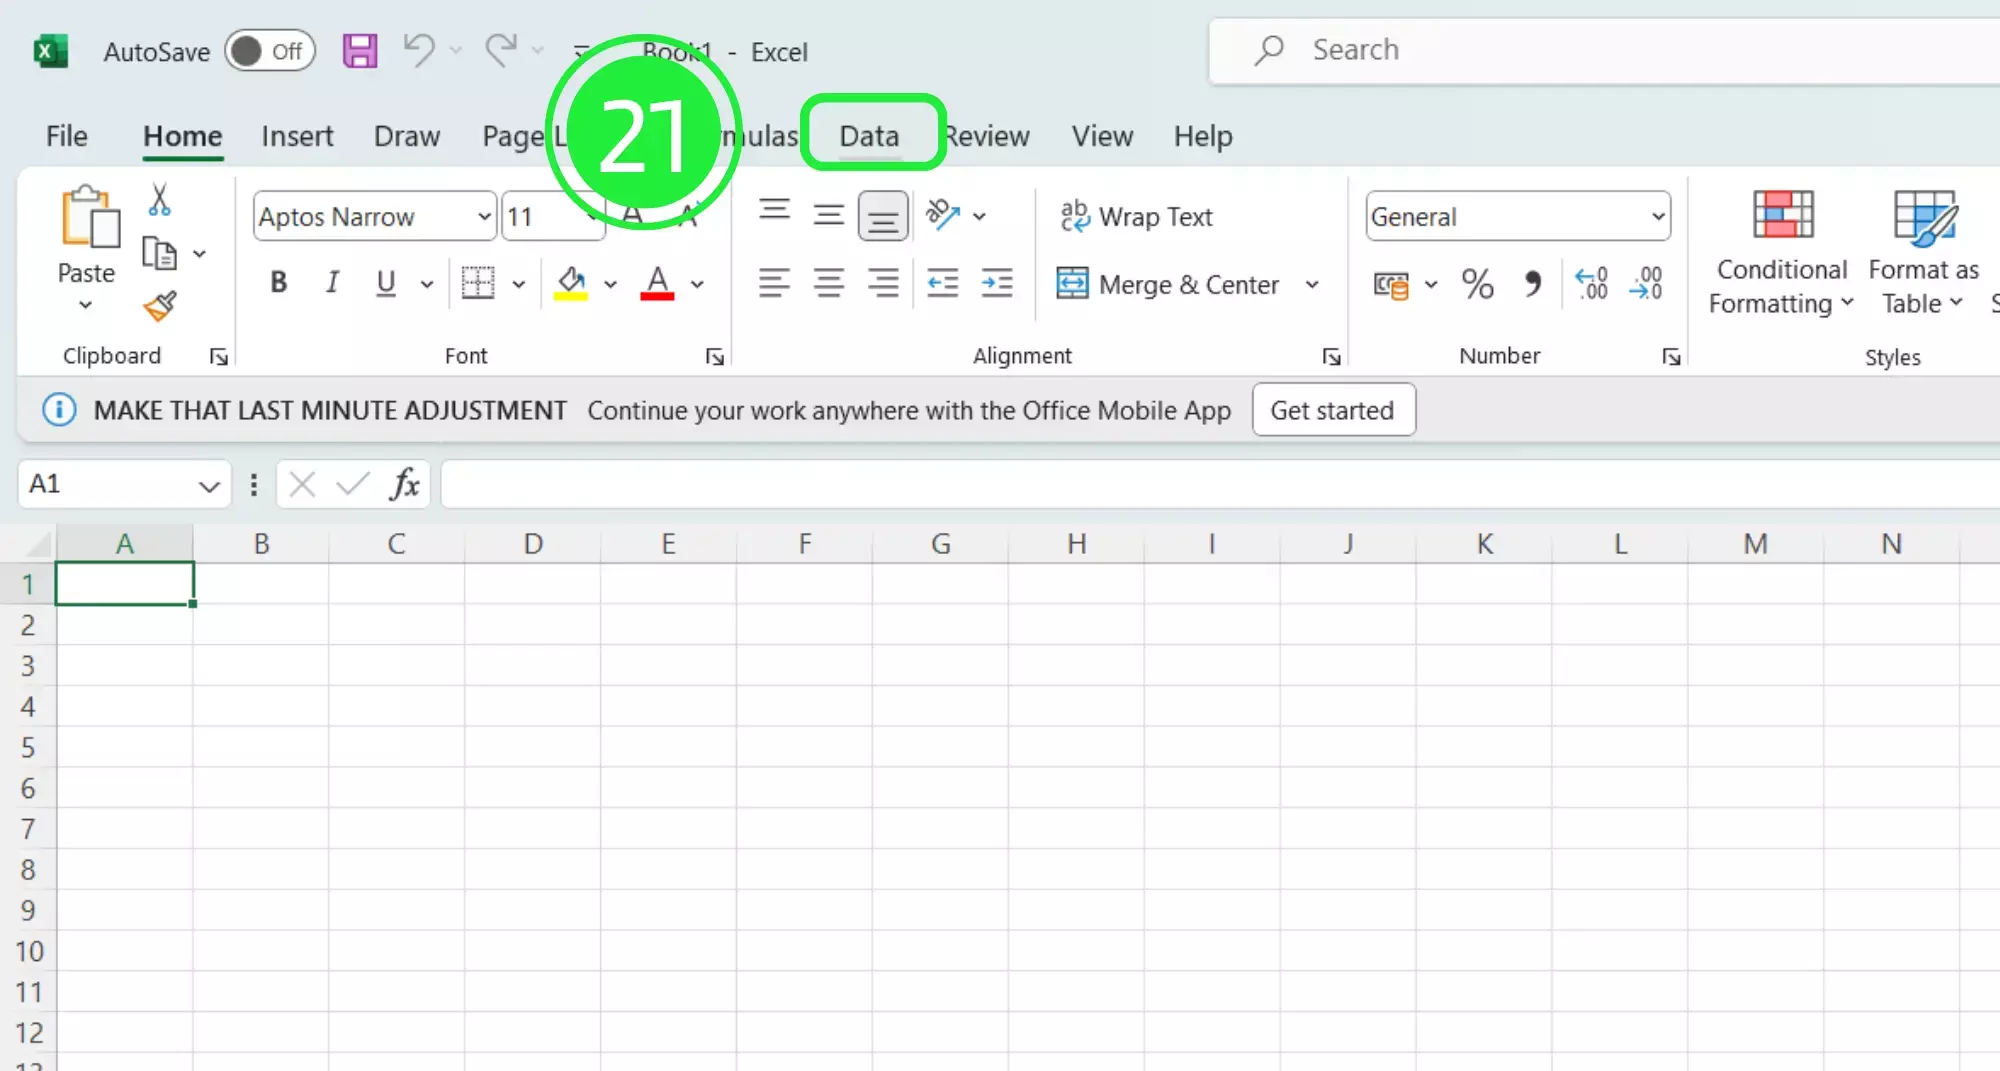
Then, go to the top menu and click on “Data”.
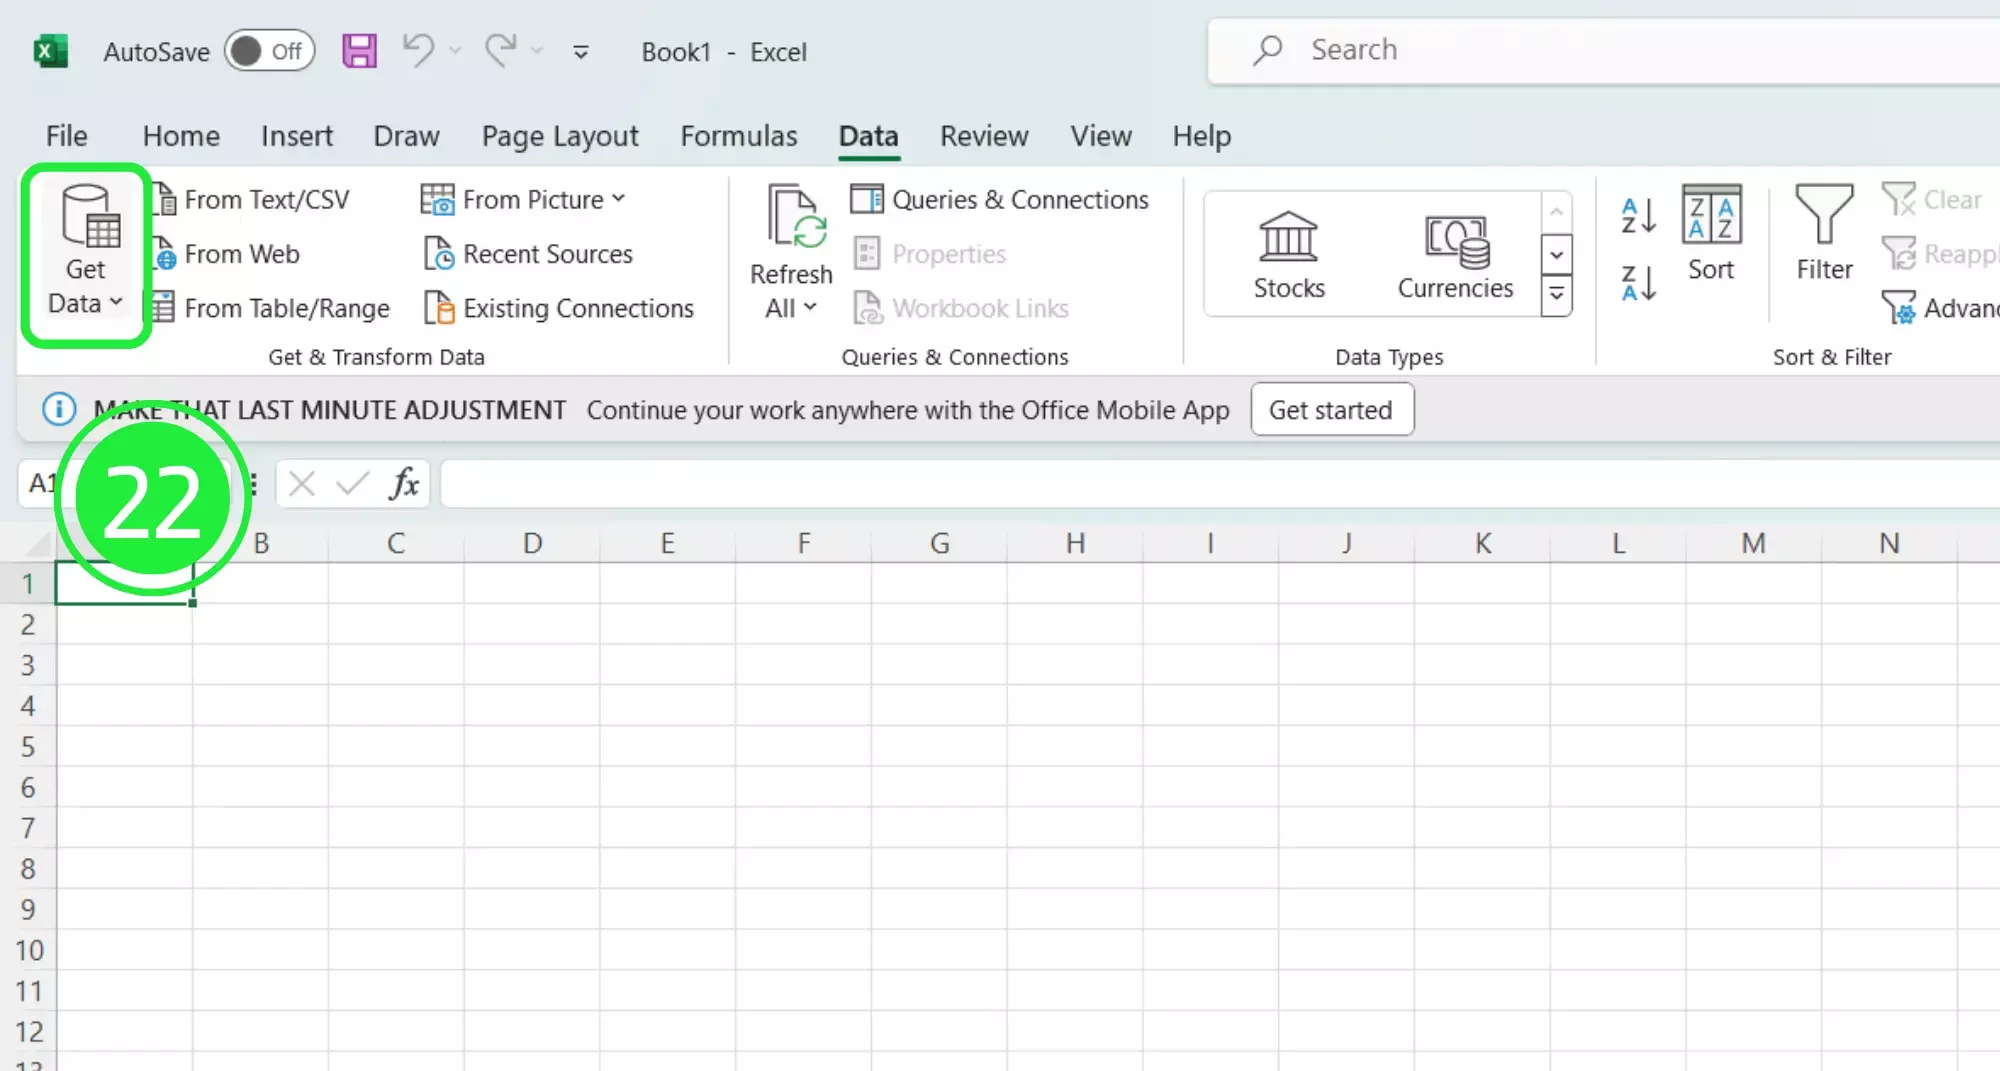
Finally, click on “Get Data” to drop down the menu.
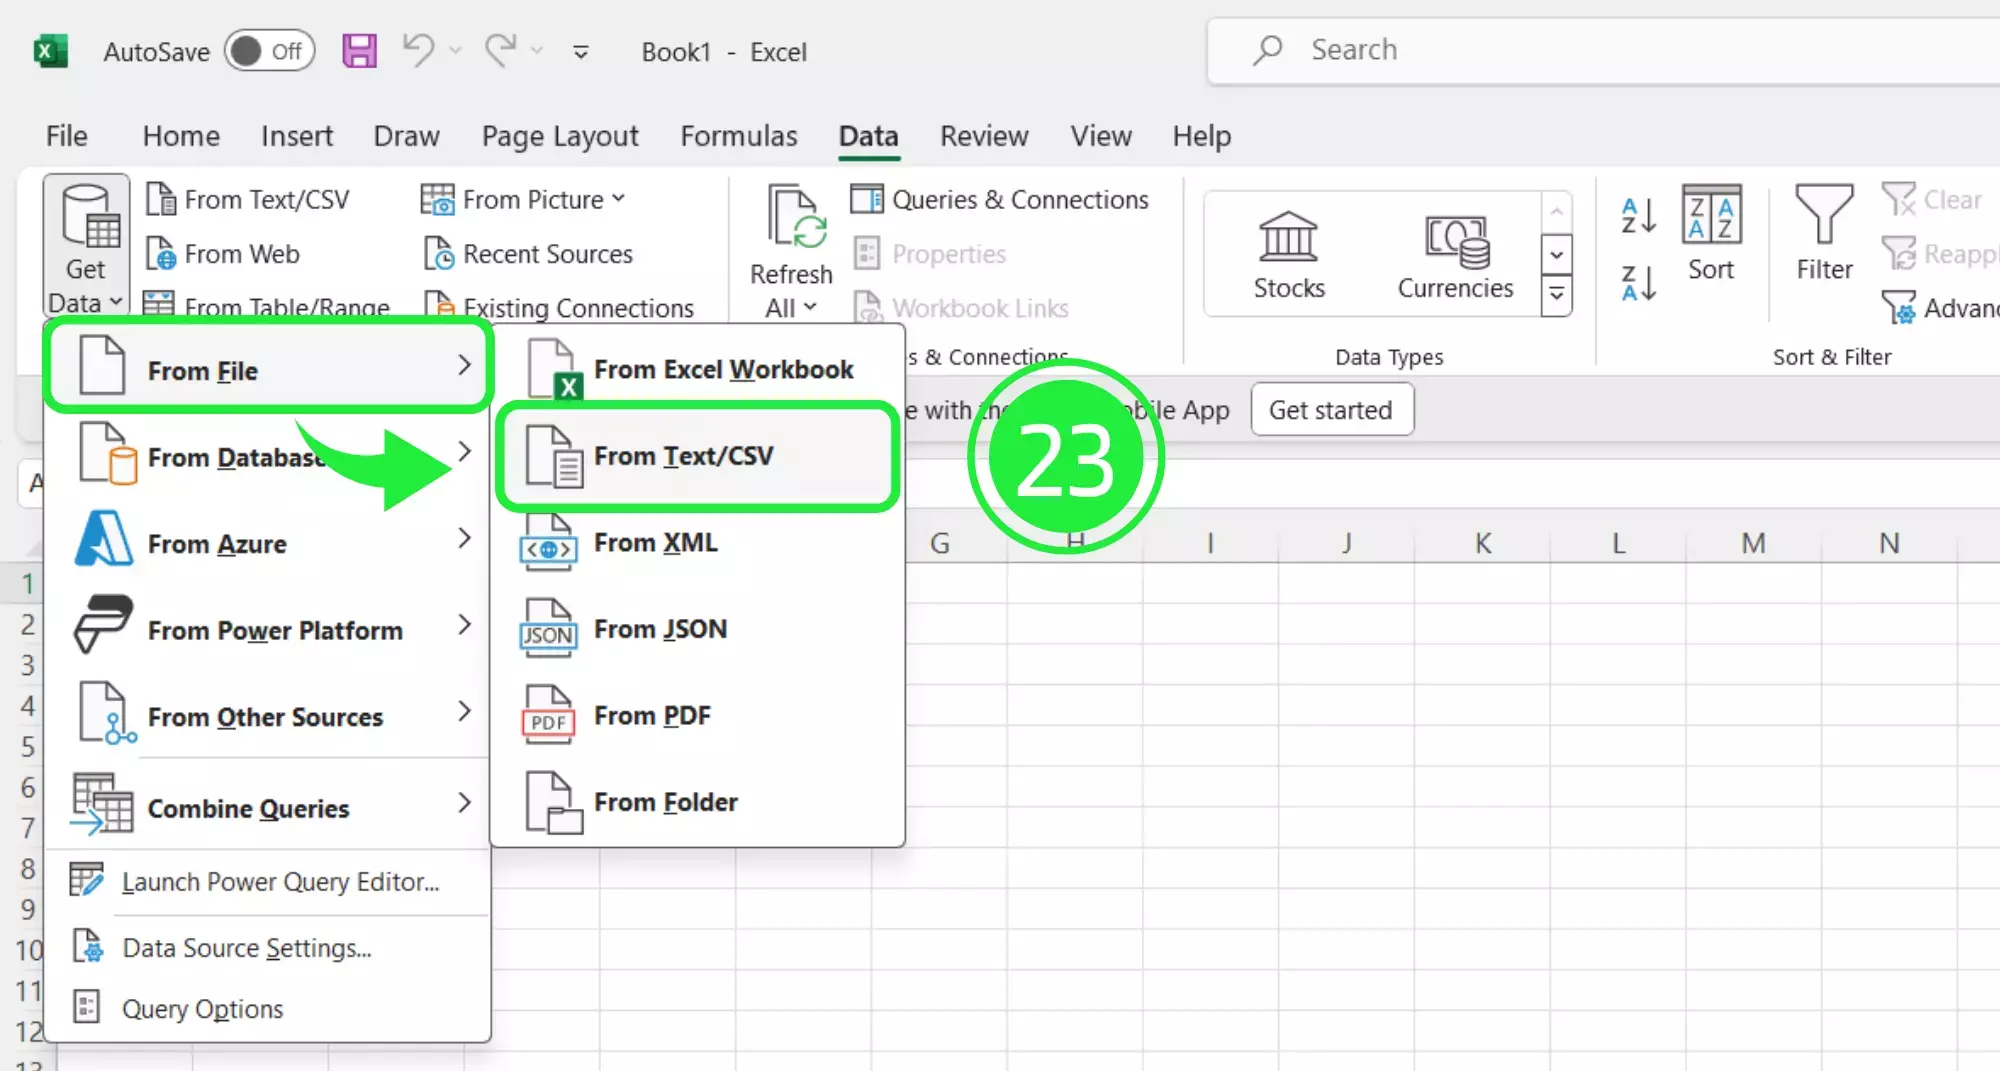
Now select “From File” and then “From Text/CSV”.
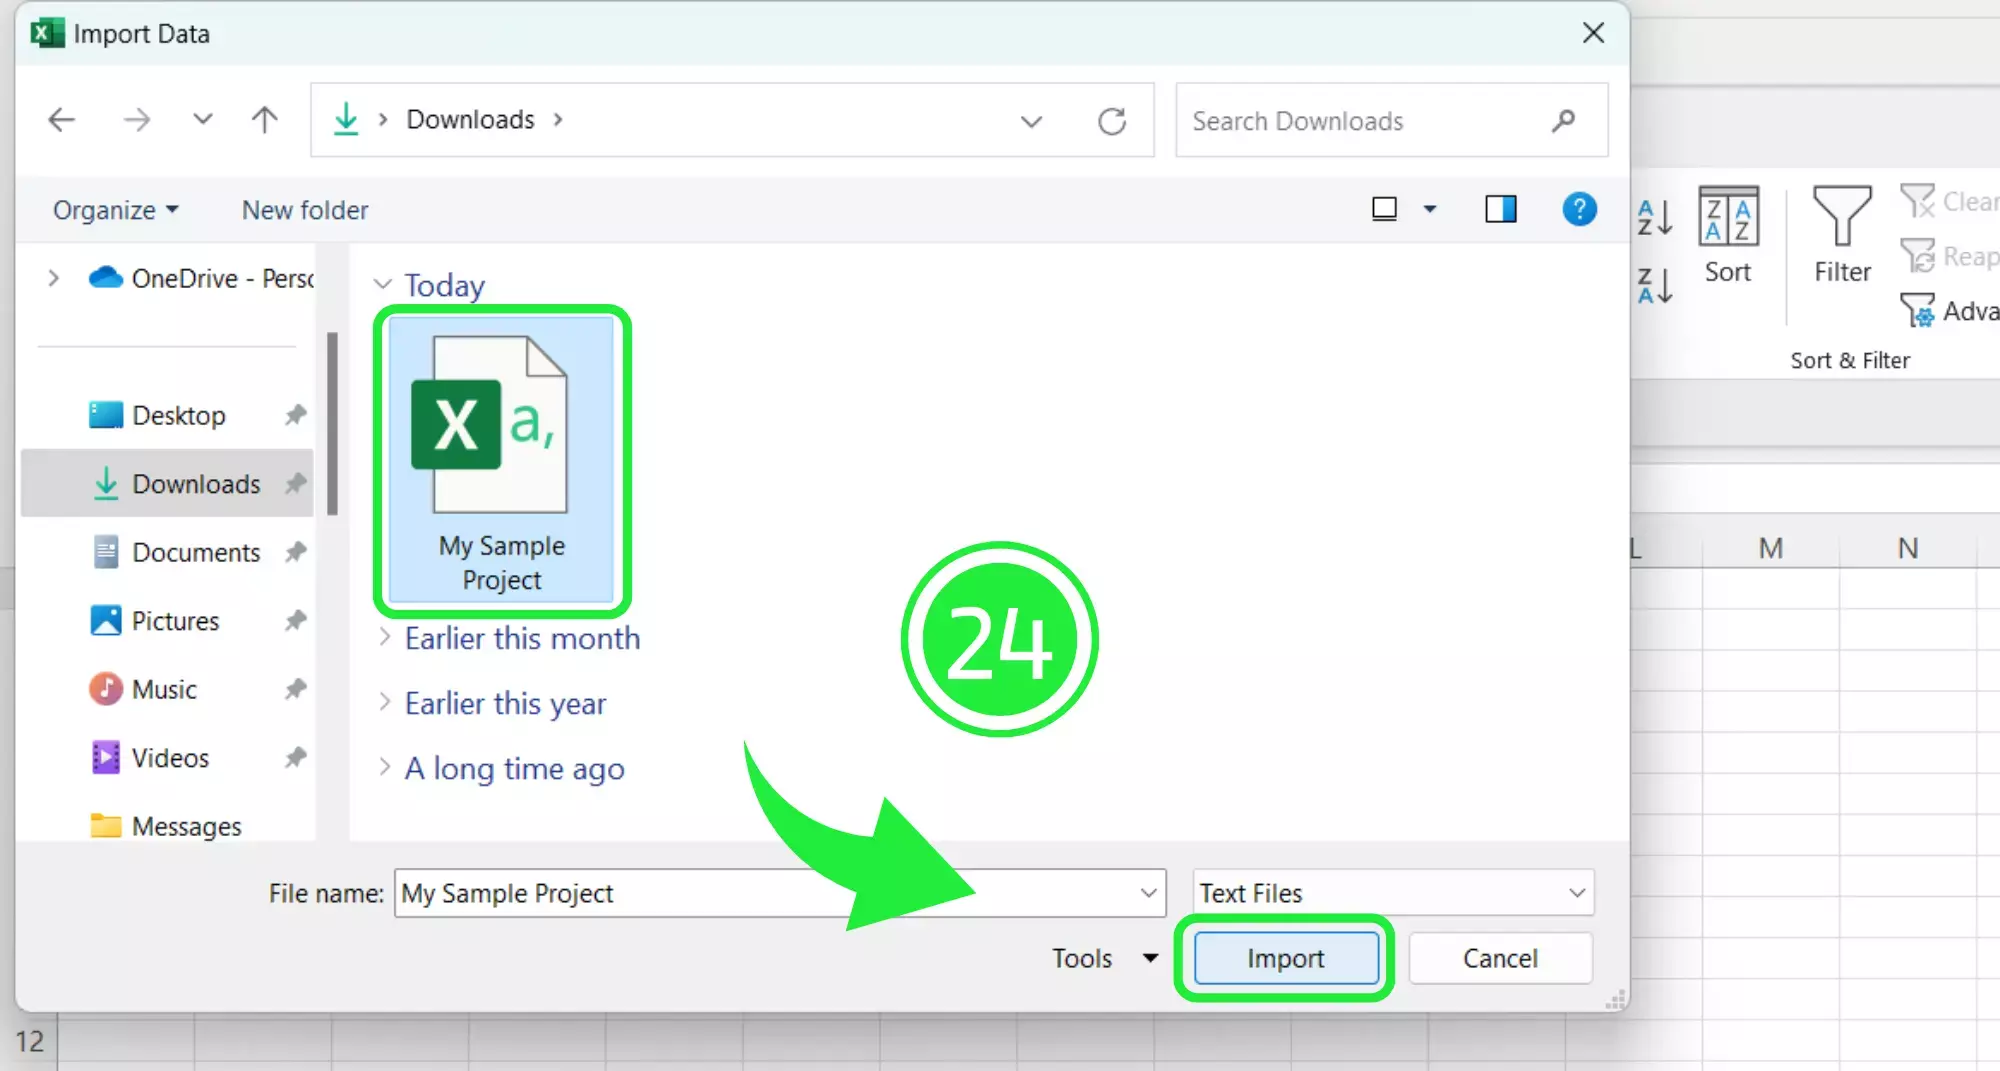
To finish, select your CSV file and click on “Import”.
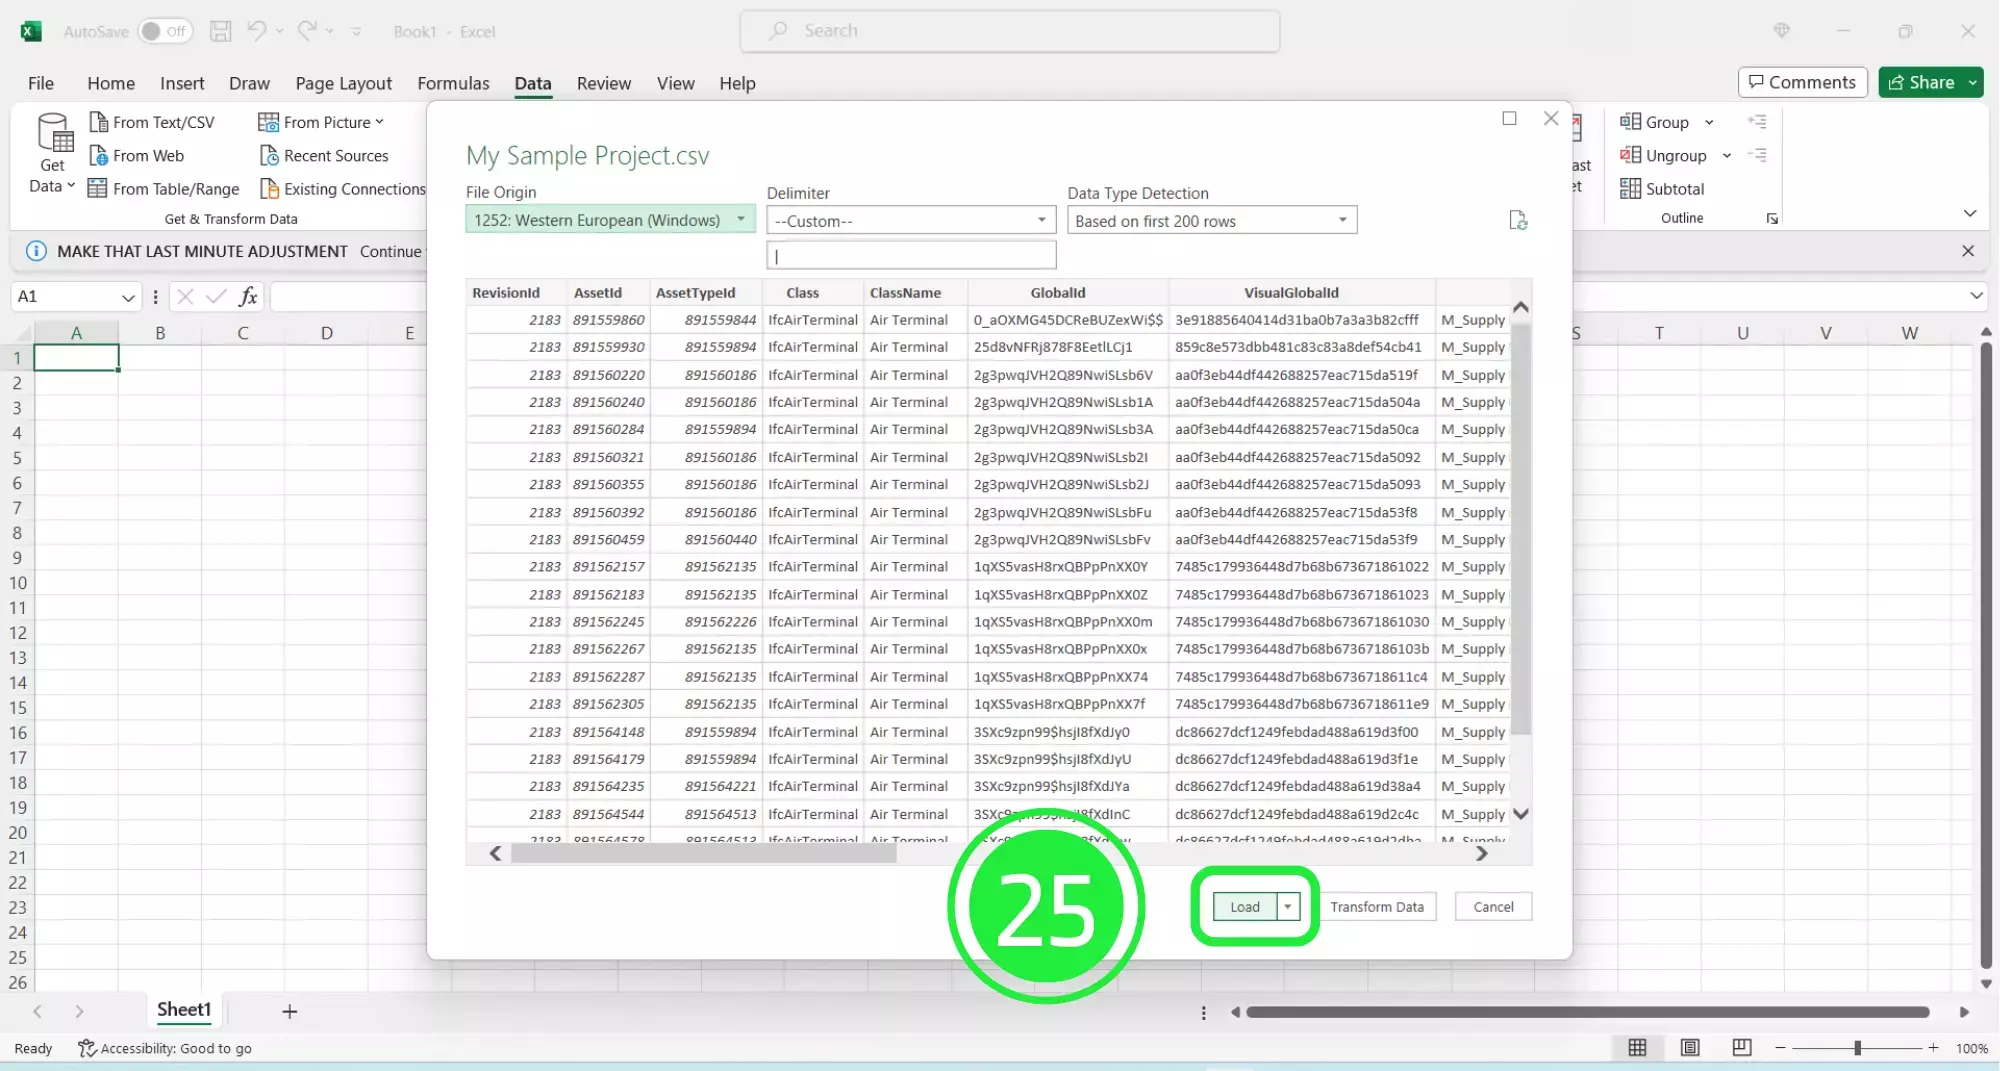
When the pop-up appears with all of the file data, click on “Load” to start loading your file into Excel.
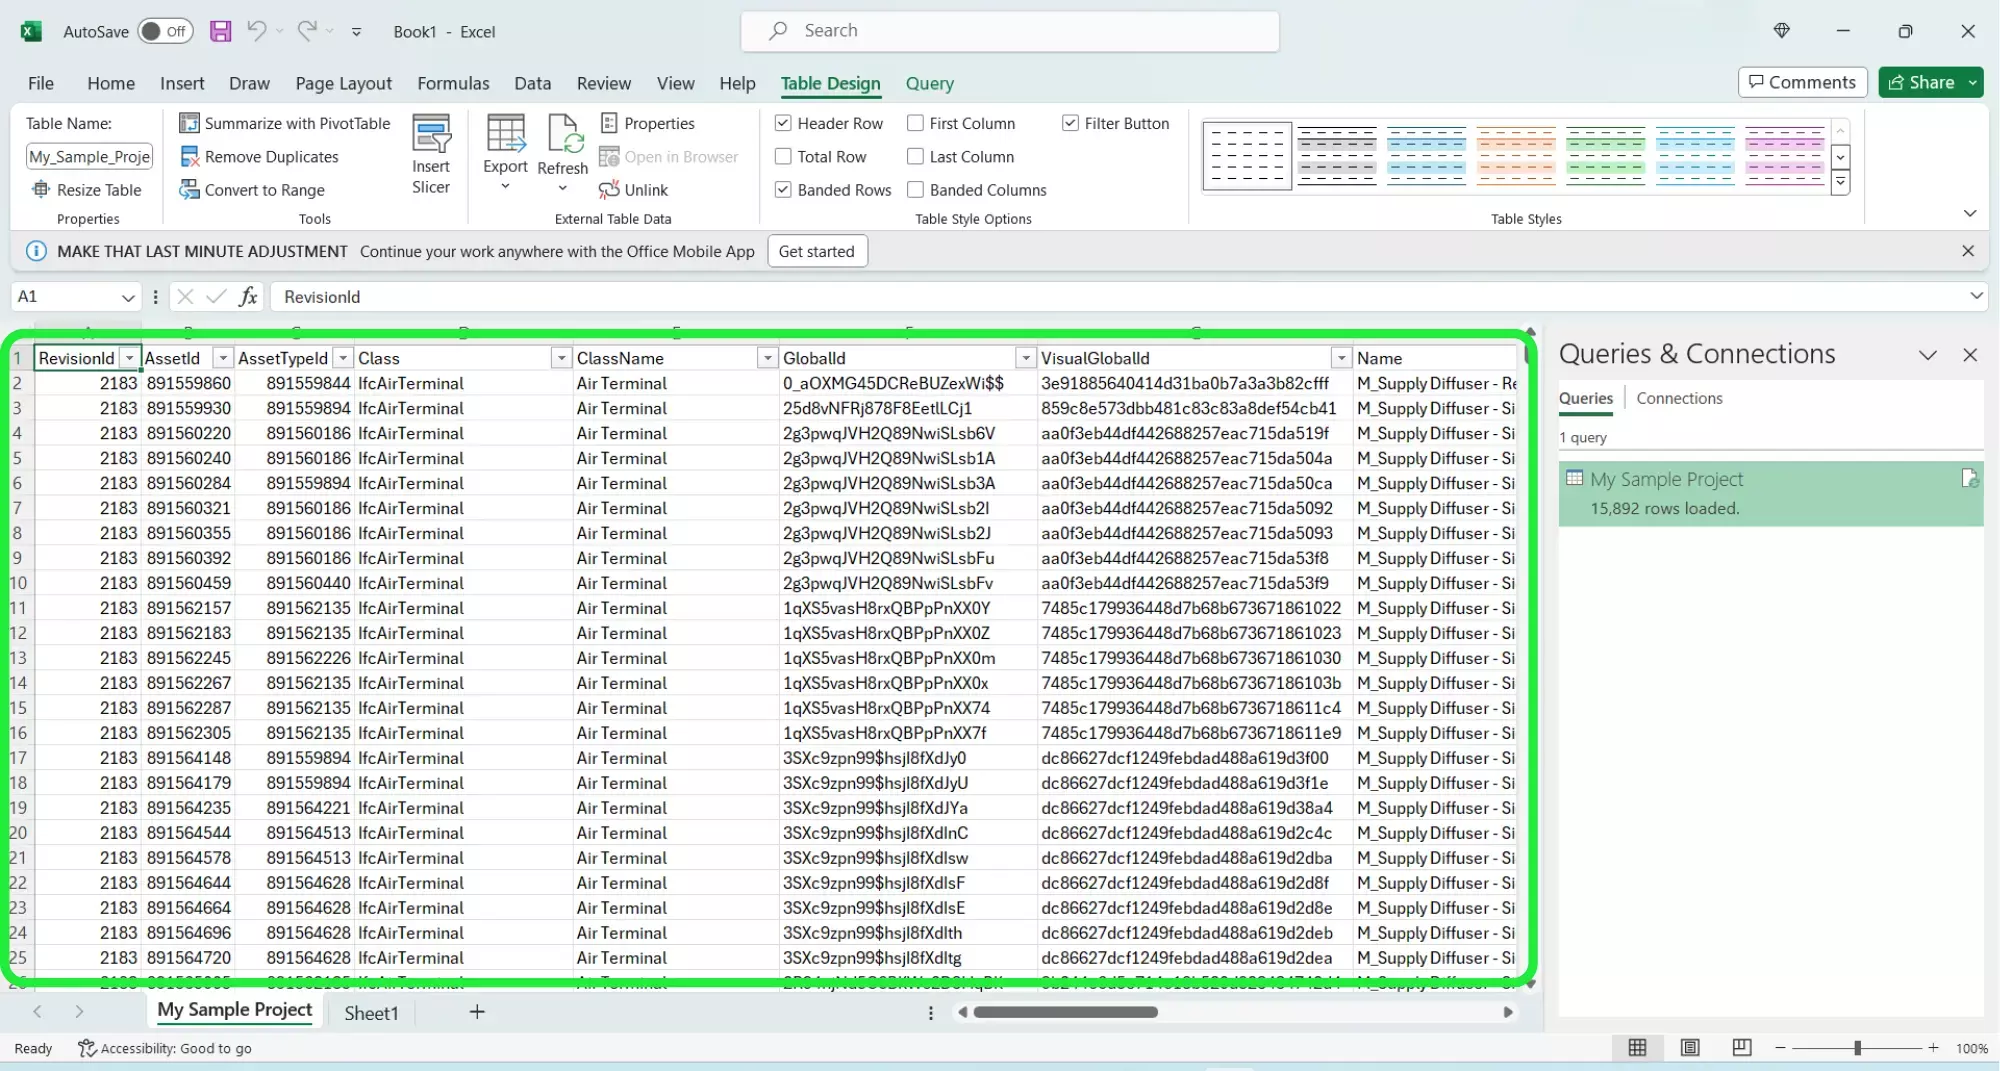
The data will be completely collated into neat columns, separated out by schema and ready for you to explore.
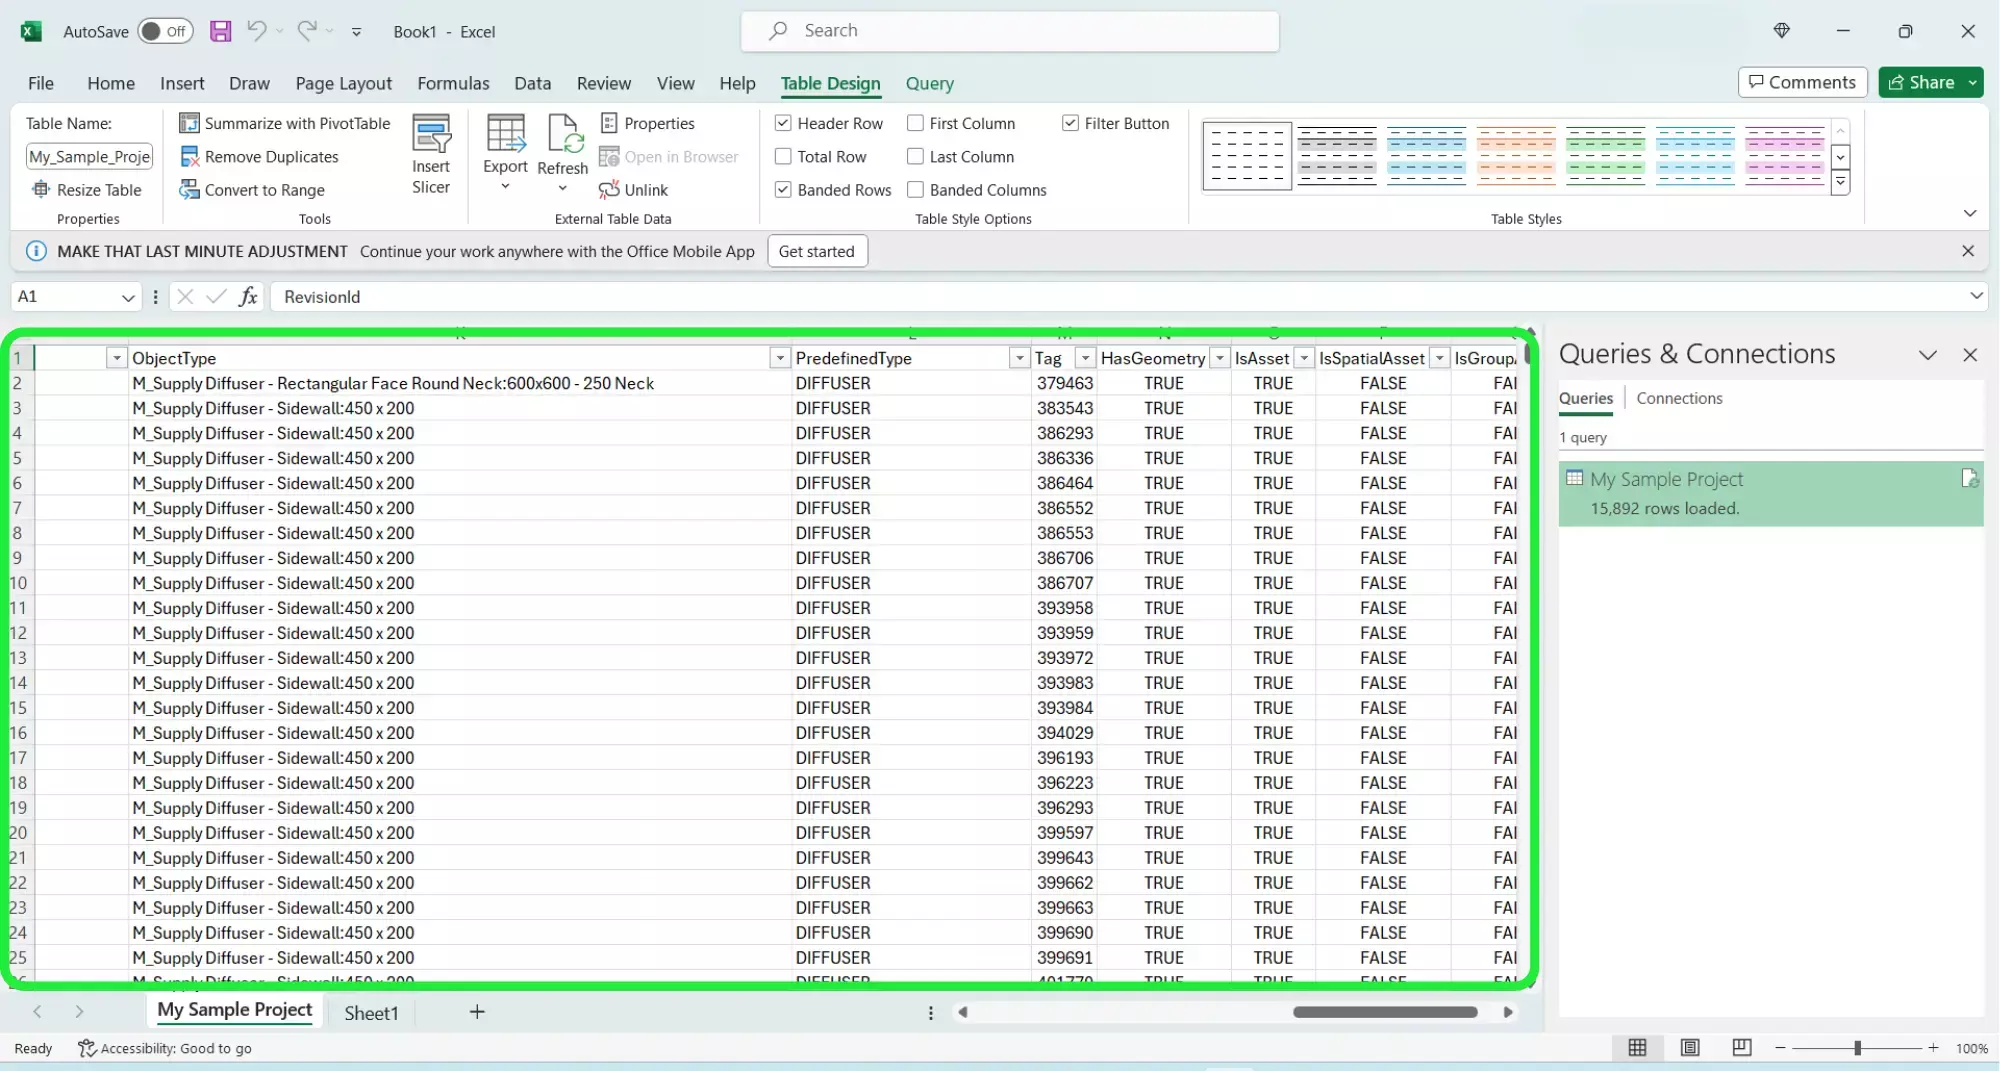
Here is are the steps for an efficient upload of IFC Data: quick and easy methods to apply . This can help you to streamline your BIM process and ensure you work to your maximum efficiency.
And to go even further in mastering these tools, don’t hesitate to consult our tutorials page.
Next step : Want to get started with your very own BIM project? You’ll be surprised by just how easy it is. Create your own free account is SeveUp today and give it a try.
Learn how to automate your BIM model checks and get certified.


🎓 Free BIM Checker Training Learn how to automate your BIM model checks and get certified. Register for Free Click
Learn More🎓 Free BIM Checker Training Learn how to automate your BIM model checks and get certified. Register for Free Click
Learn More🎓 Free BIM Checker Training Learn how to automate your BIM model checks and get certified. Register for Free Choose
Learn More