Trusted by companies
all over the world:
BIM (building information modelling) experts who are helping to push the architecture, engineering, and construction (AEC) industry forward have found that dashboard templates in the software they use can have a huge impact on project management and execution.
The SeveUp app lets everyone, from BIM novices to seasoned BIM experts, build dashboard templates that help visualize BIM data in an infinite number of ways, providing a structured, reusable framework for real-time visualization and analysis. These dashboards offer a 360-degree view of a construction project, letting stakeholders monitor progress, allocate resources effectively, and identify potential bottlenecks with unprecedented precision. The ability to customize SeveUp’s dashboard templates allows for a tailored approach that meets the diverse needs of different projects and ensures optimal alignment with overall objectives and timelines. Being able to combine and simultaneously view detailed spatial, temporal, and financial data on a customized dashboard provides comprehensive insights that empower decision-makers to act proactively and help mitigate risk.
By fostering enhanced collaboration and informed decision-making, dashboard templates are driving efficiency, sustainability, and innovation within the AEC industry. With the SeveUp app and Power BI, you can start making your own tailored templates right now and start making significant strides towards the future of construction.
Let’s show you just how easy it is to download a customized Power BI template from SeveUp. To view our past tutorials, click here. Make sure you have Microsoft Power BI installed correctly on your computer to complete this tutorial. SeveUp provides hassle-free access to custom BIM dashboard templates—no Power BI skills required. Explore BIM QTO, BIM Viewer, and BIM Checker templates effortlessly
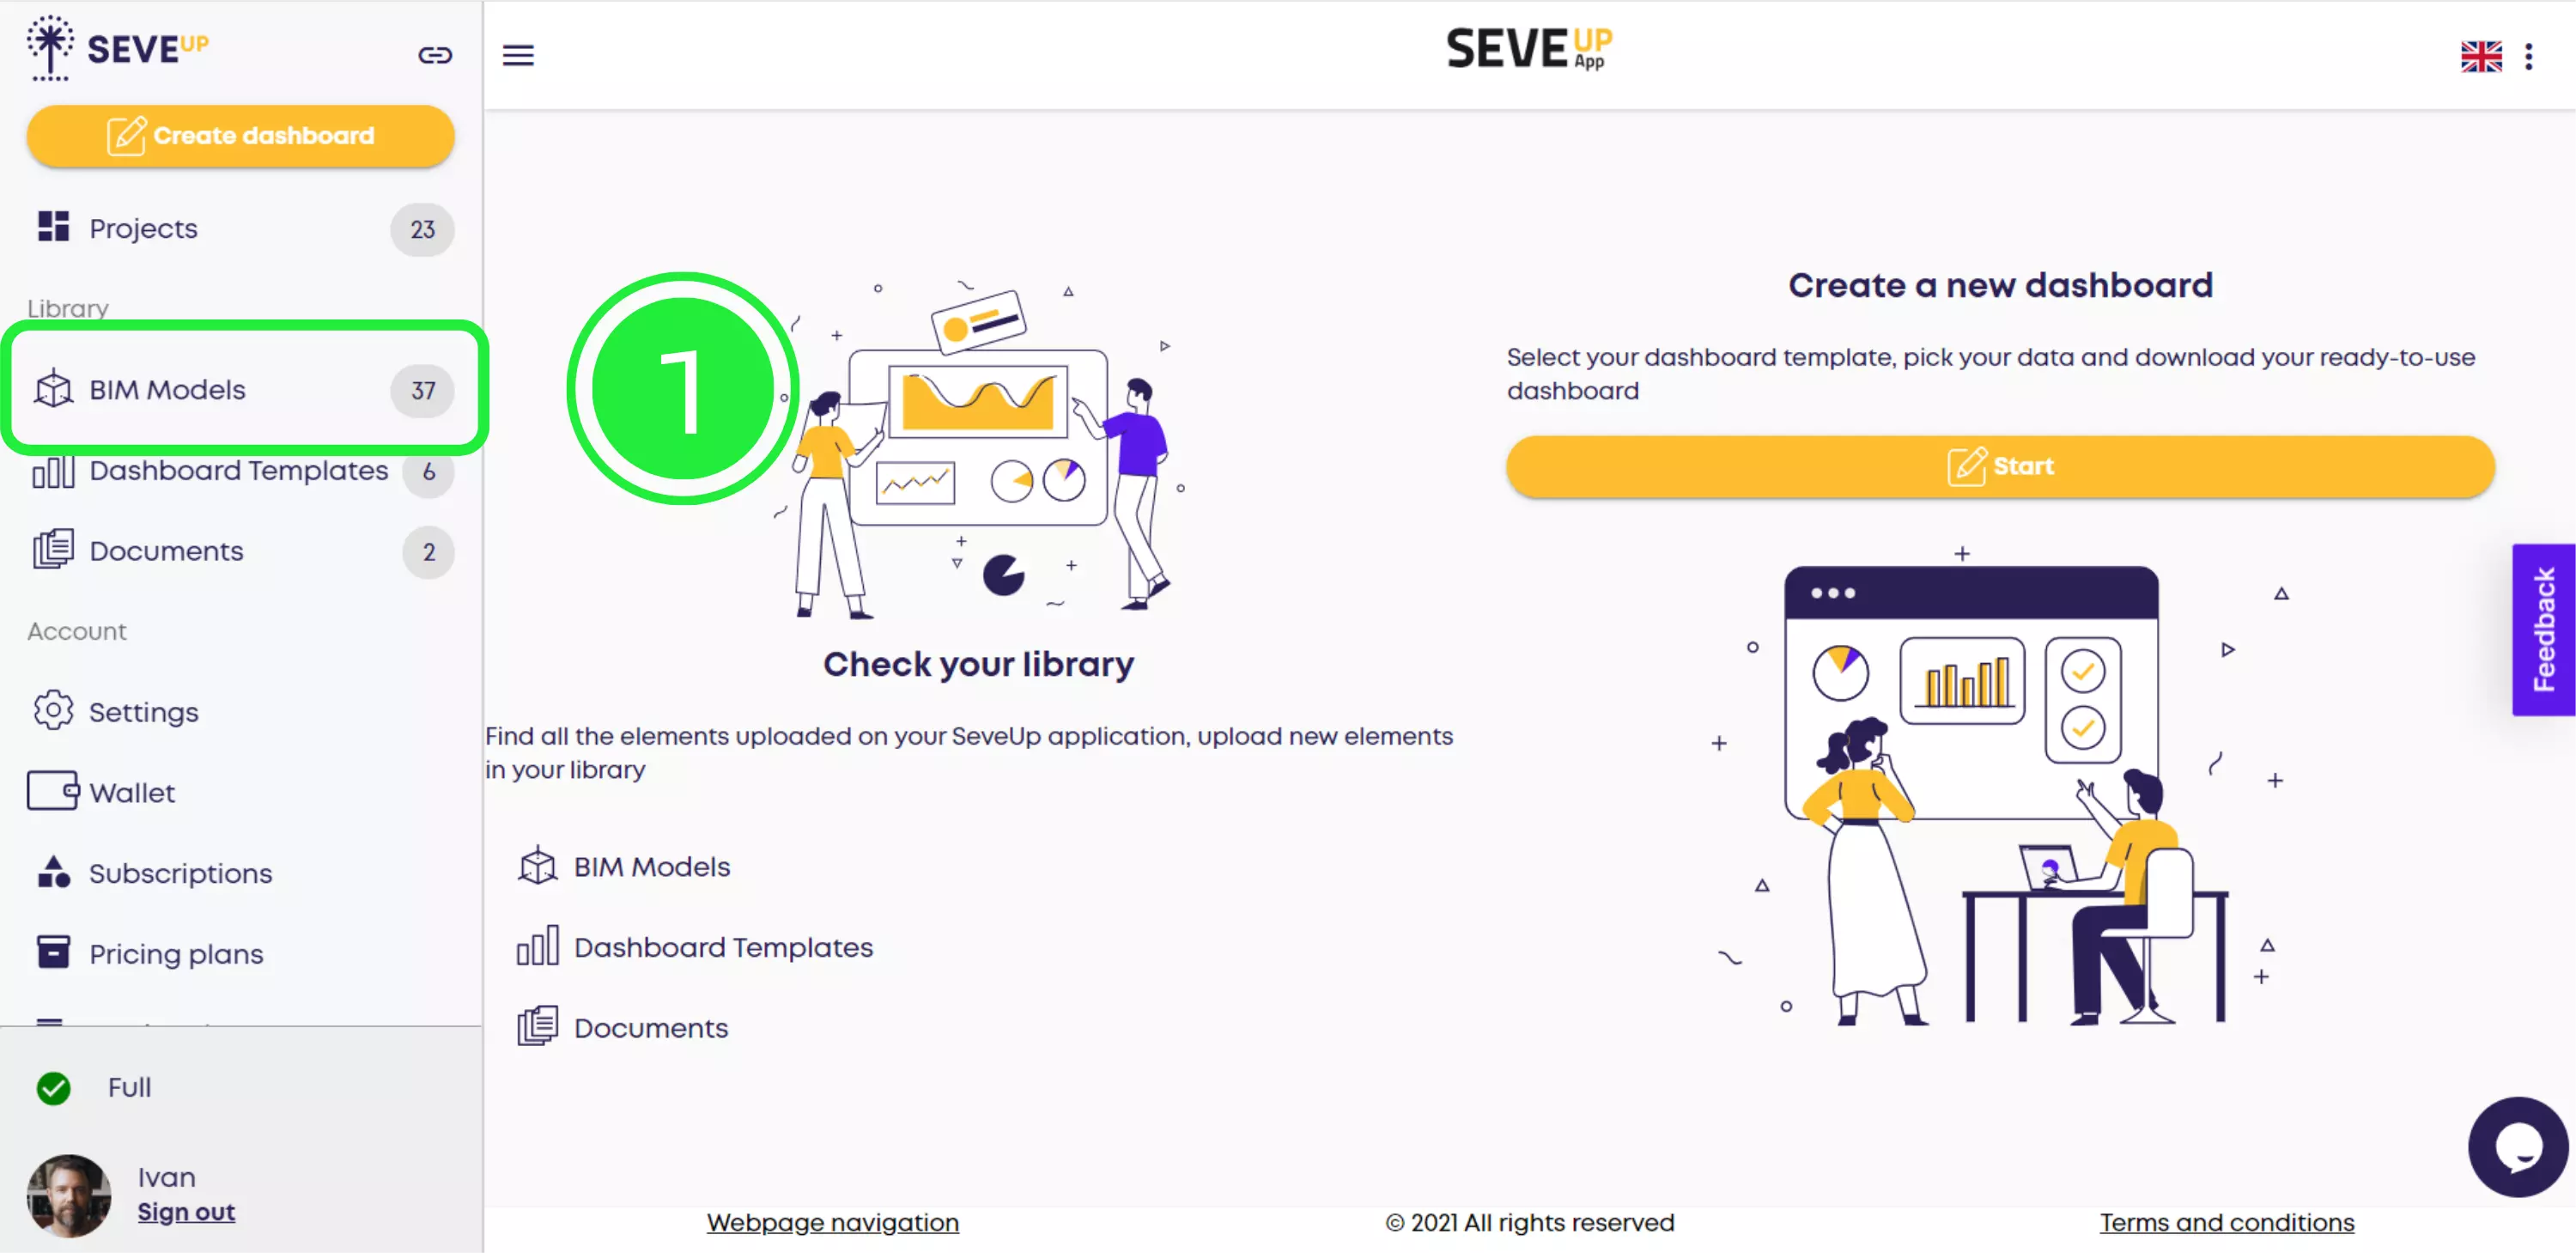
Start by logging in to your SeveUp App account, then click “BIM Models” to be taken to your library of models within SeveUp.
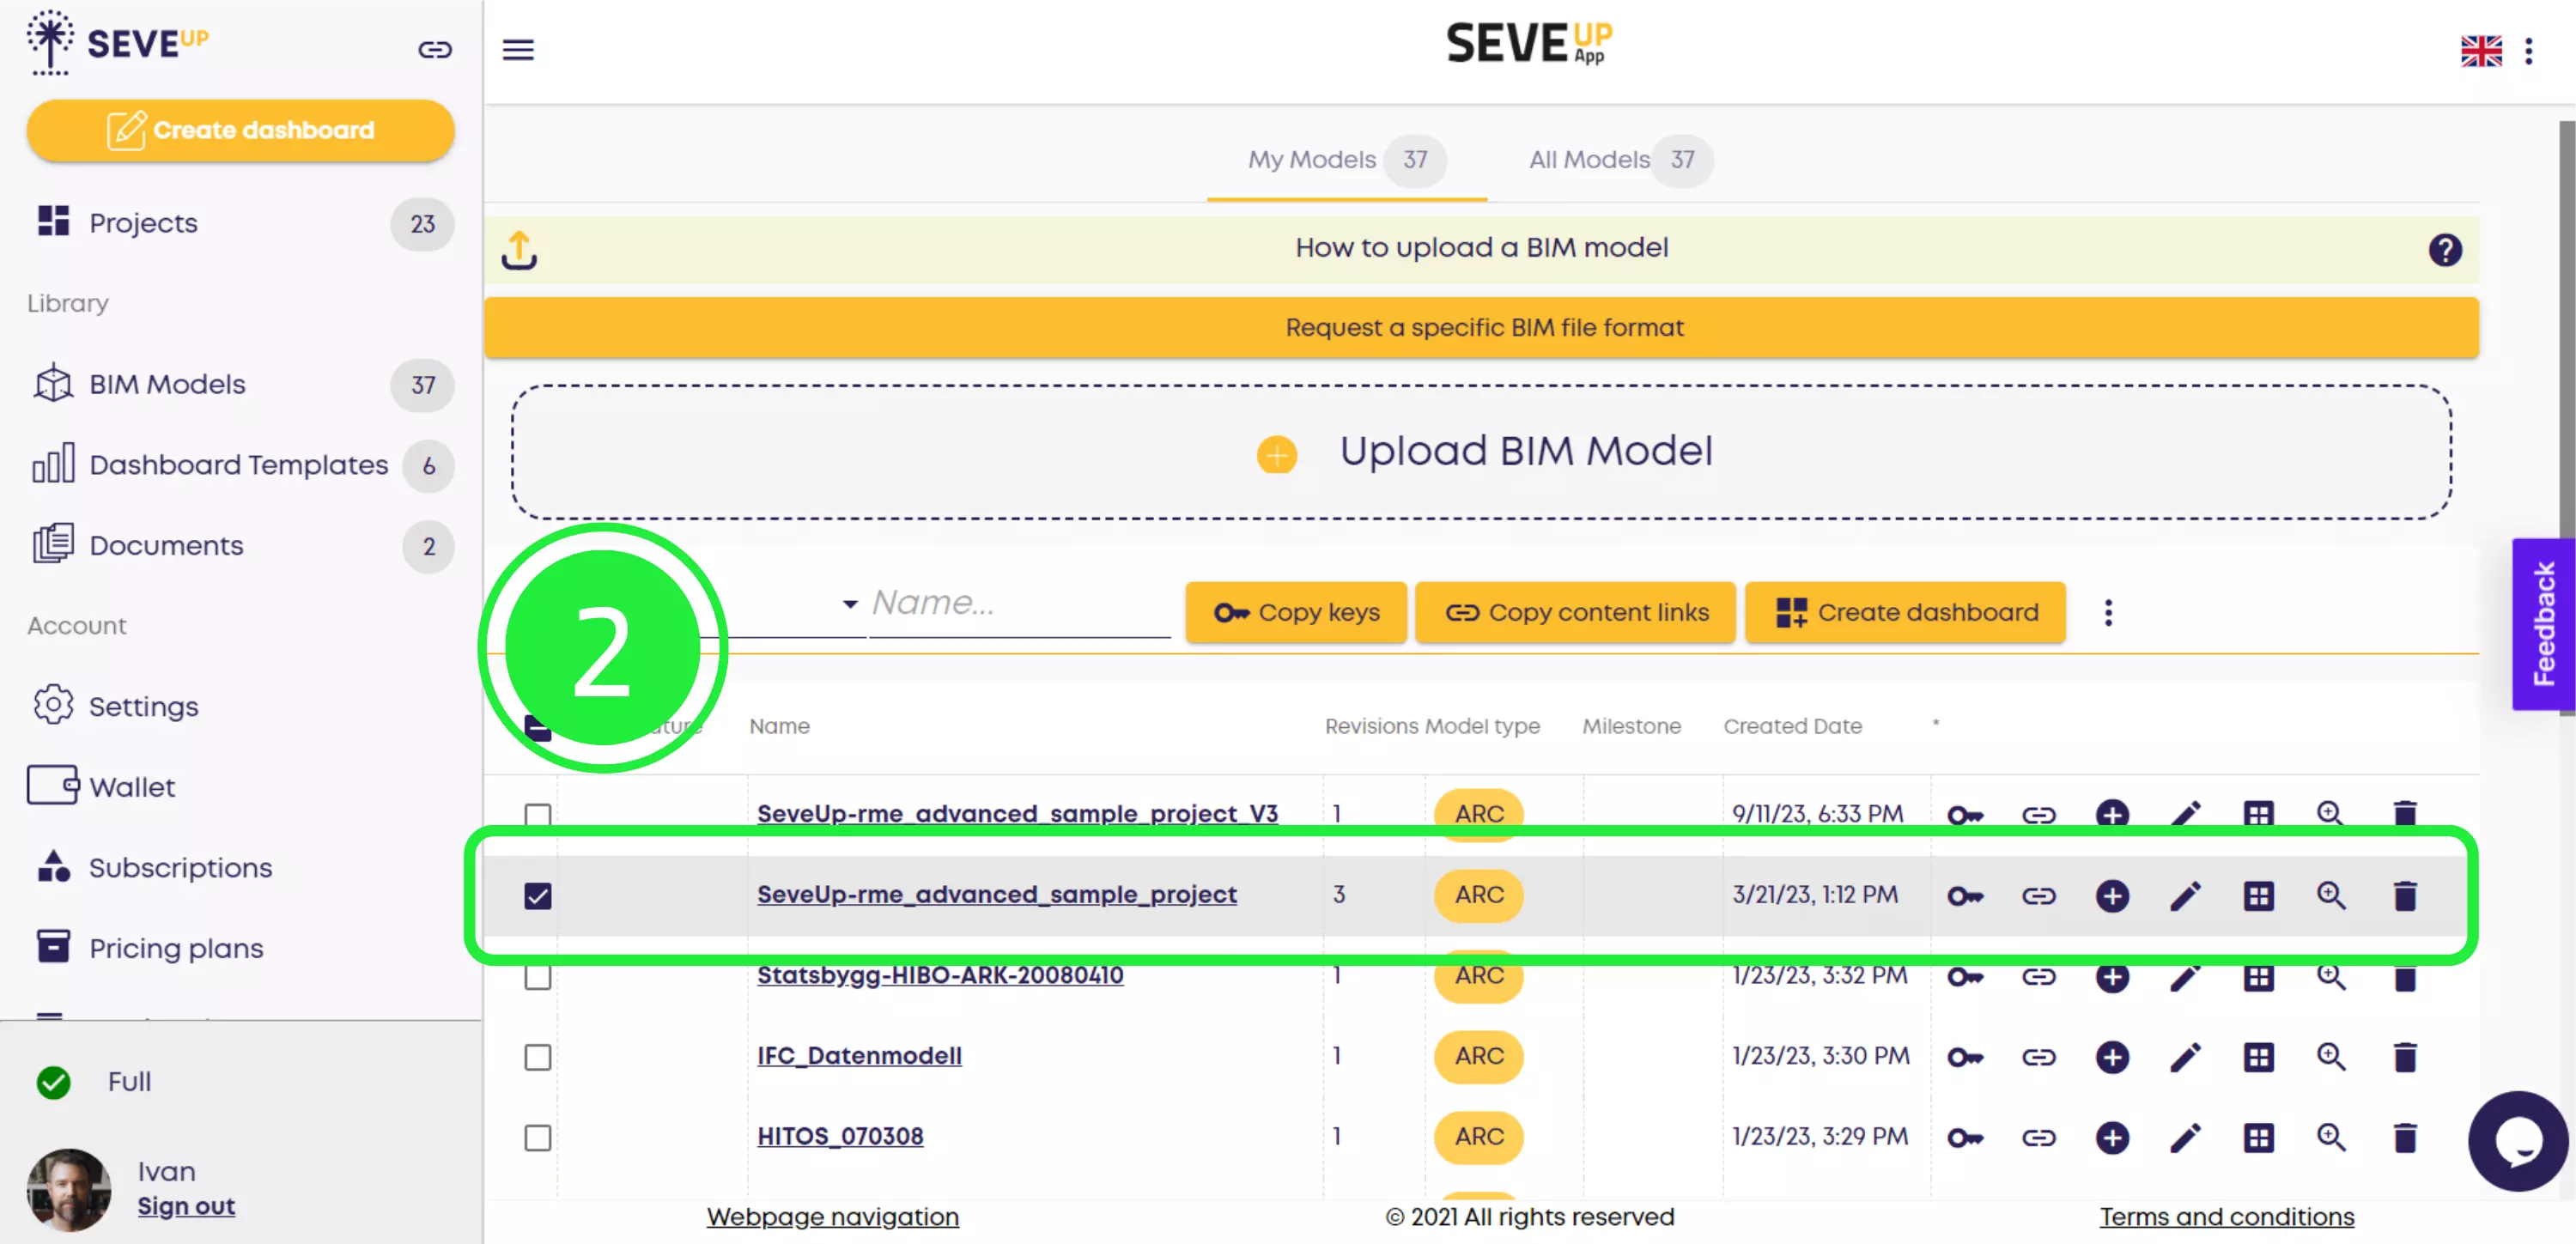
Choose the BIM model you would like to use for your template by checking the box to the left of its name.
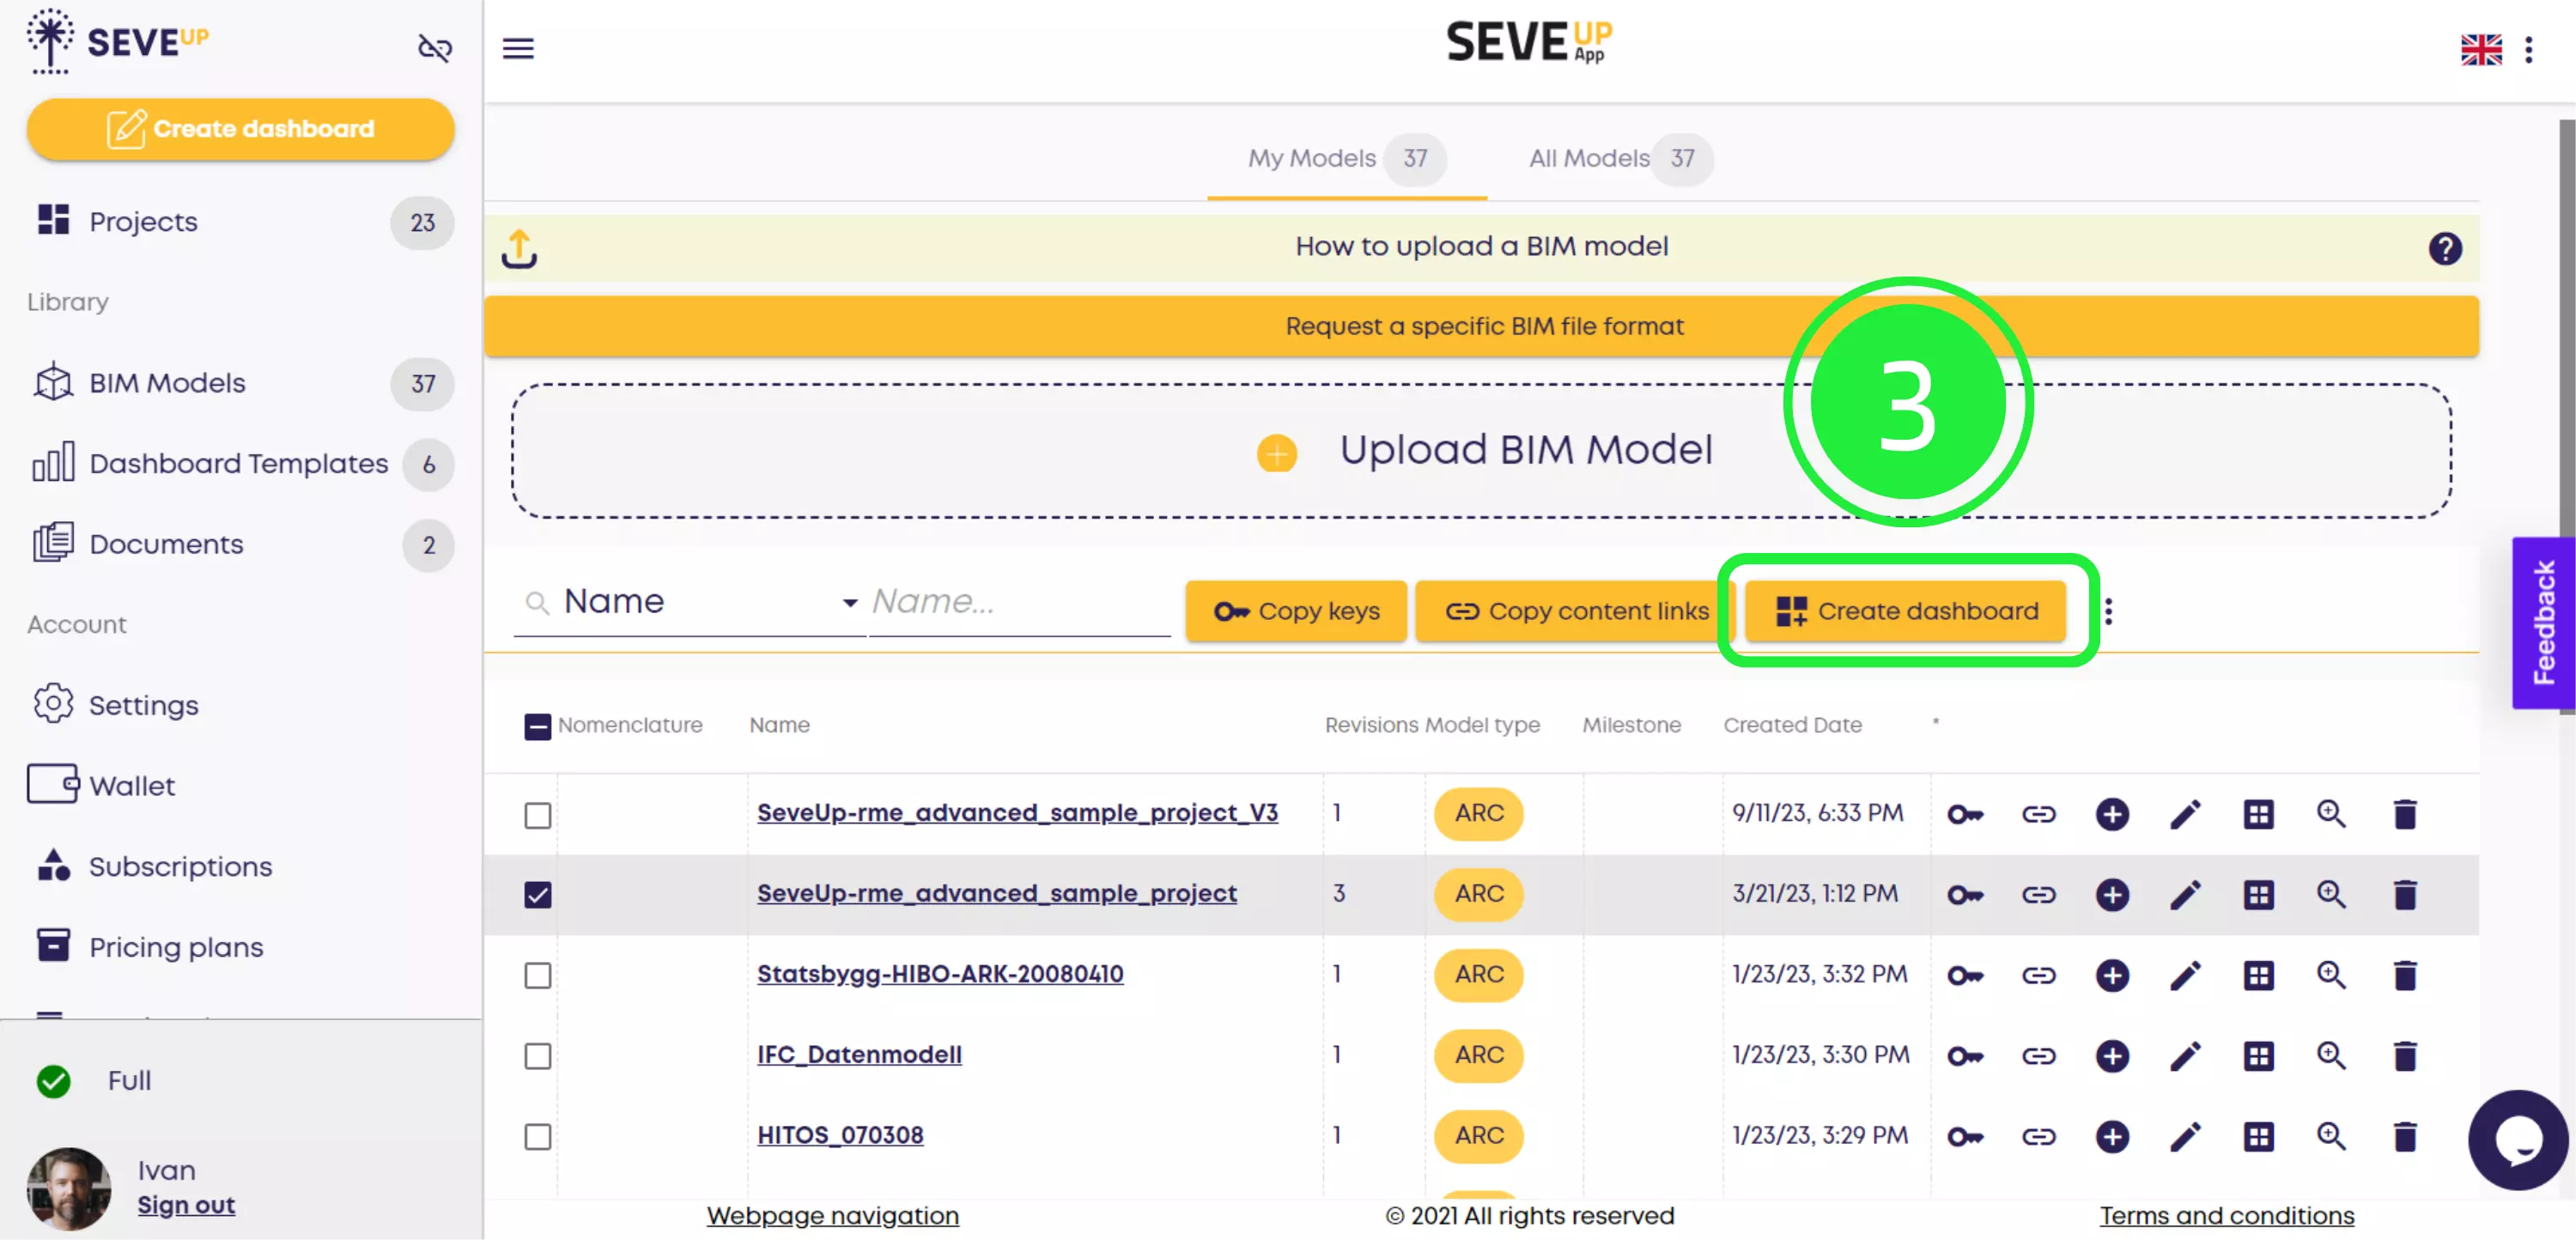
Above the selected BIM models, you’ll see a yellow “Create dashboard” button. To start creating your new dashboard template, click it.
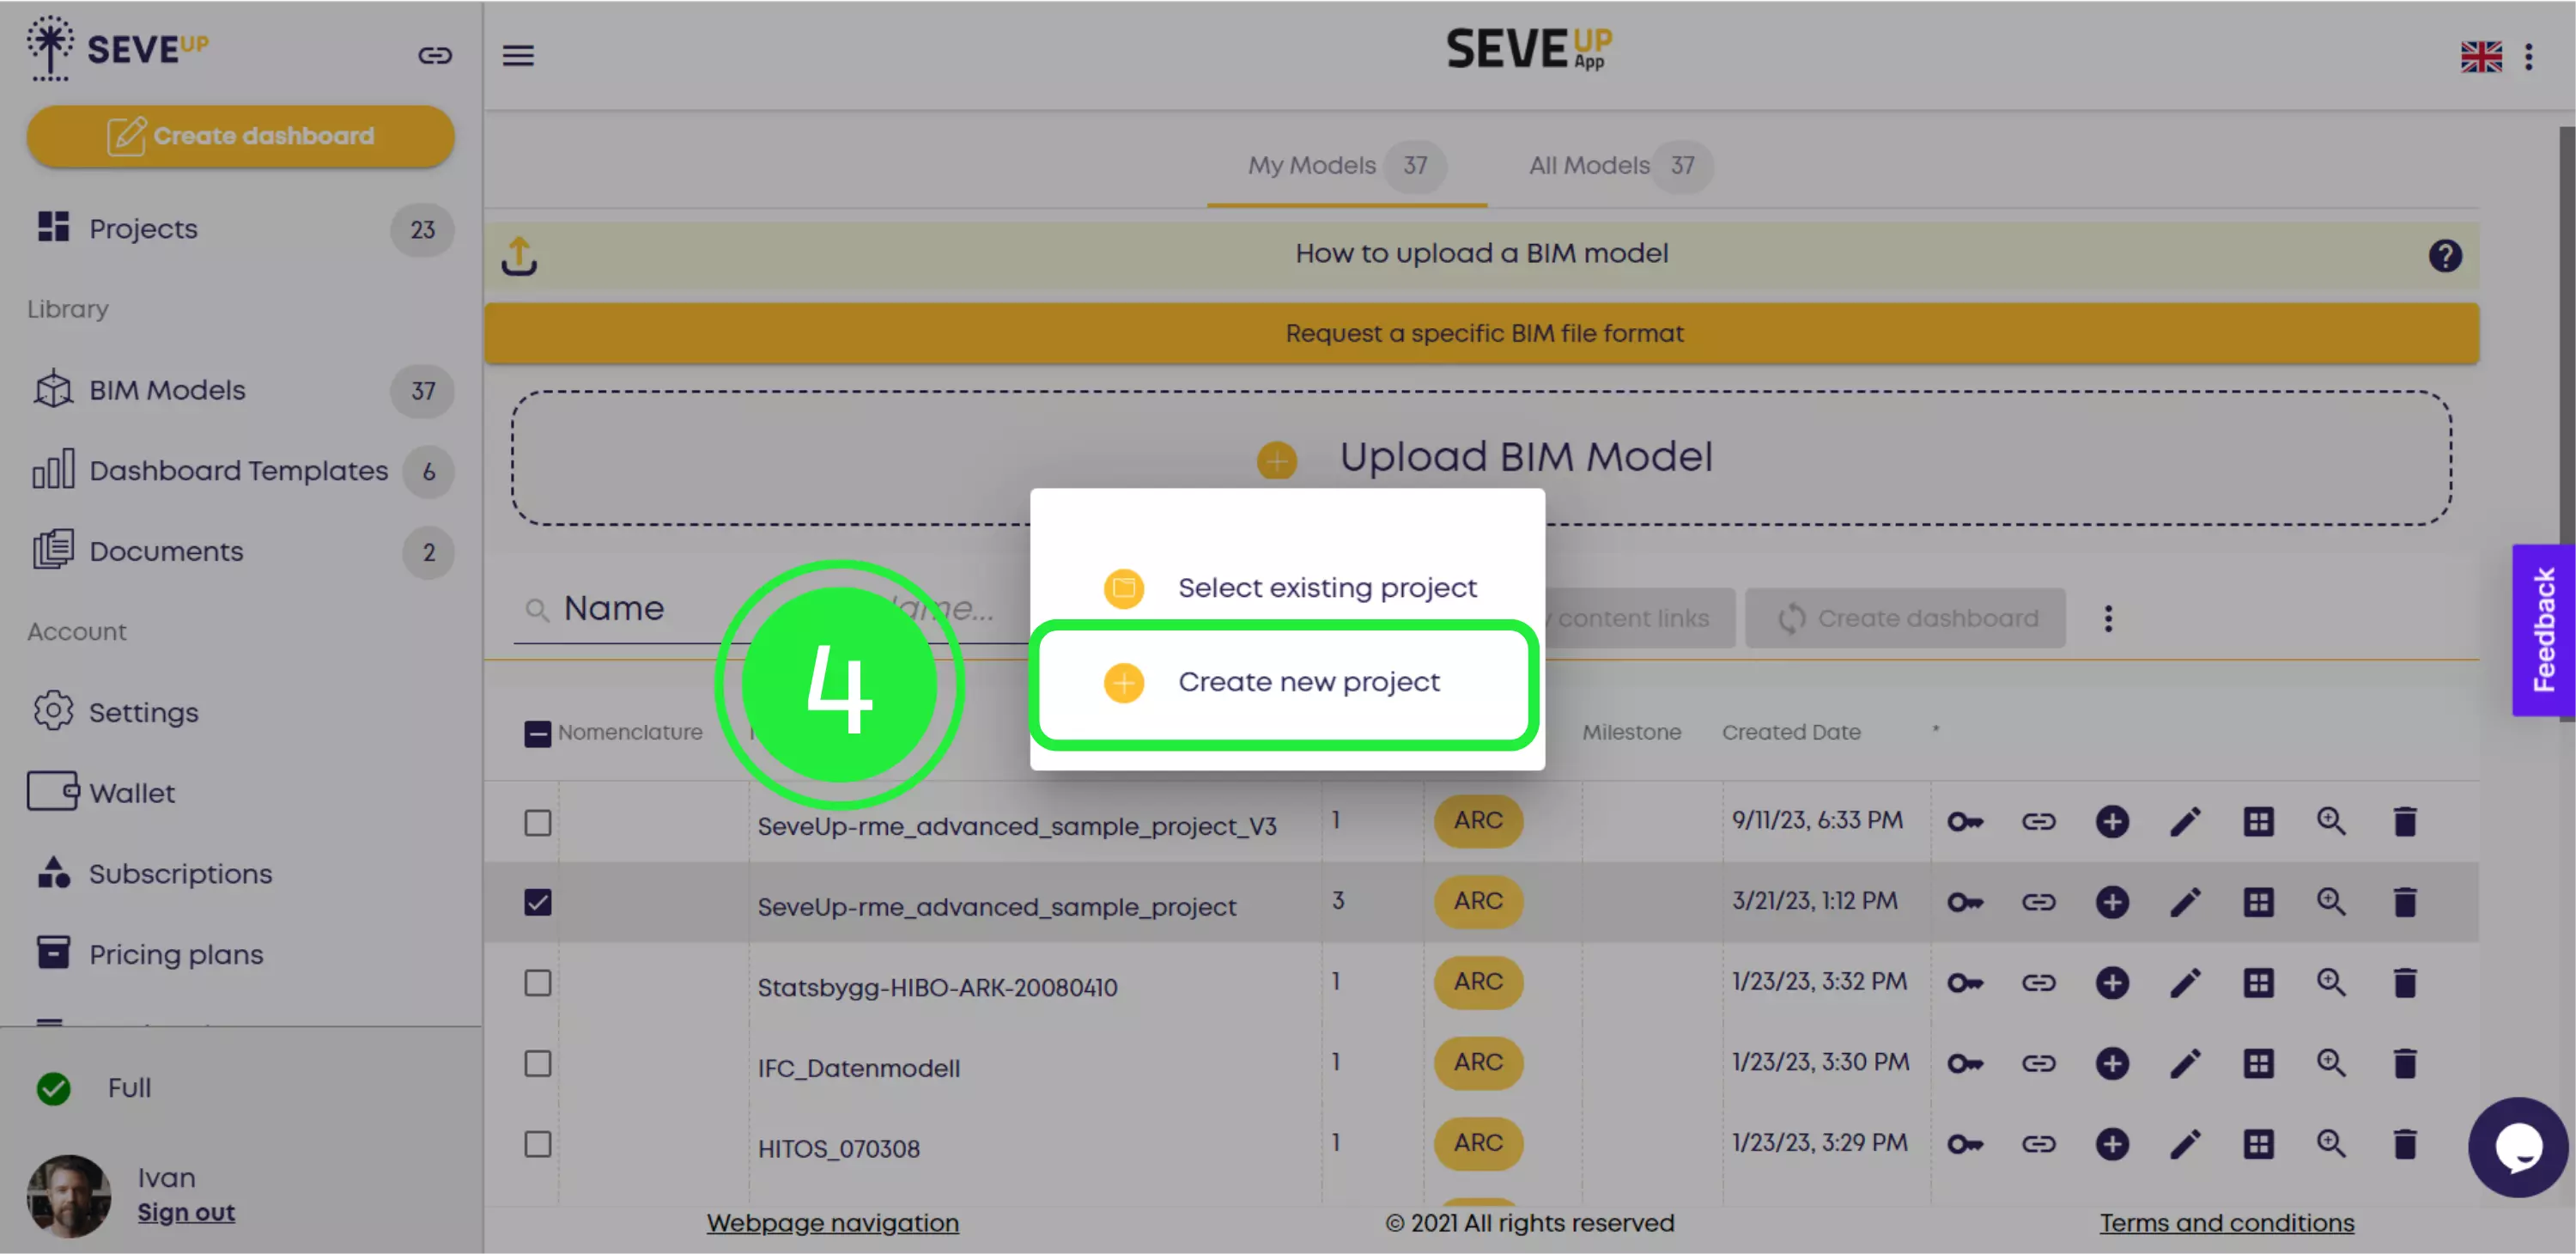
A pop-up will appear allowing you to choose whether to select an existing project or create a new project. For the purposes of this tutorial, click “Create new project”.
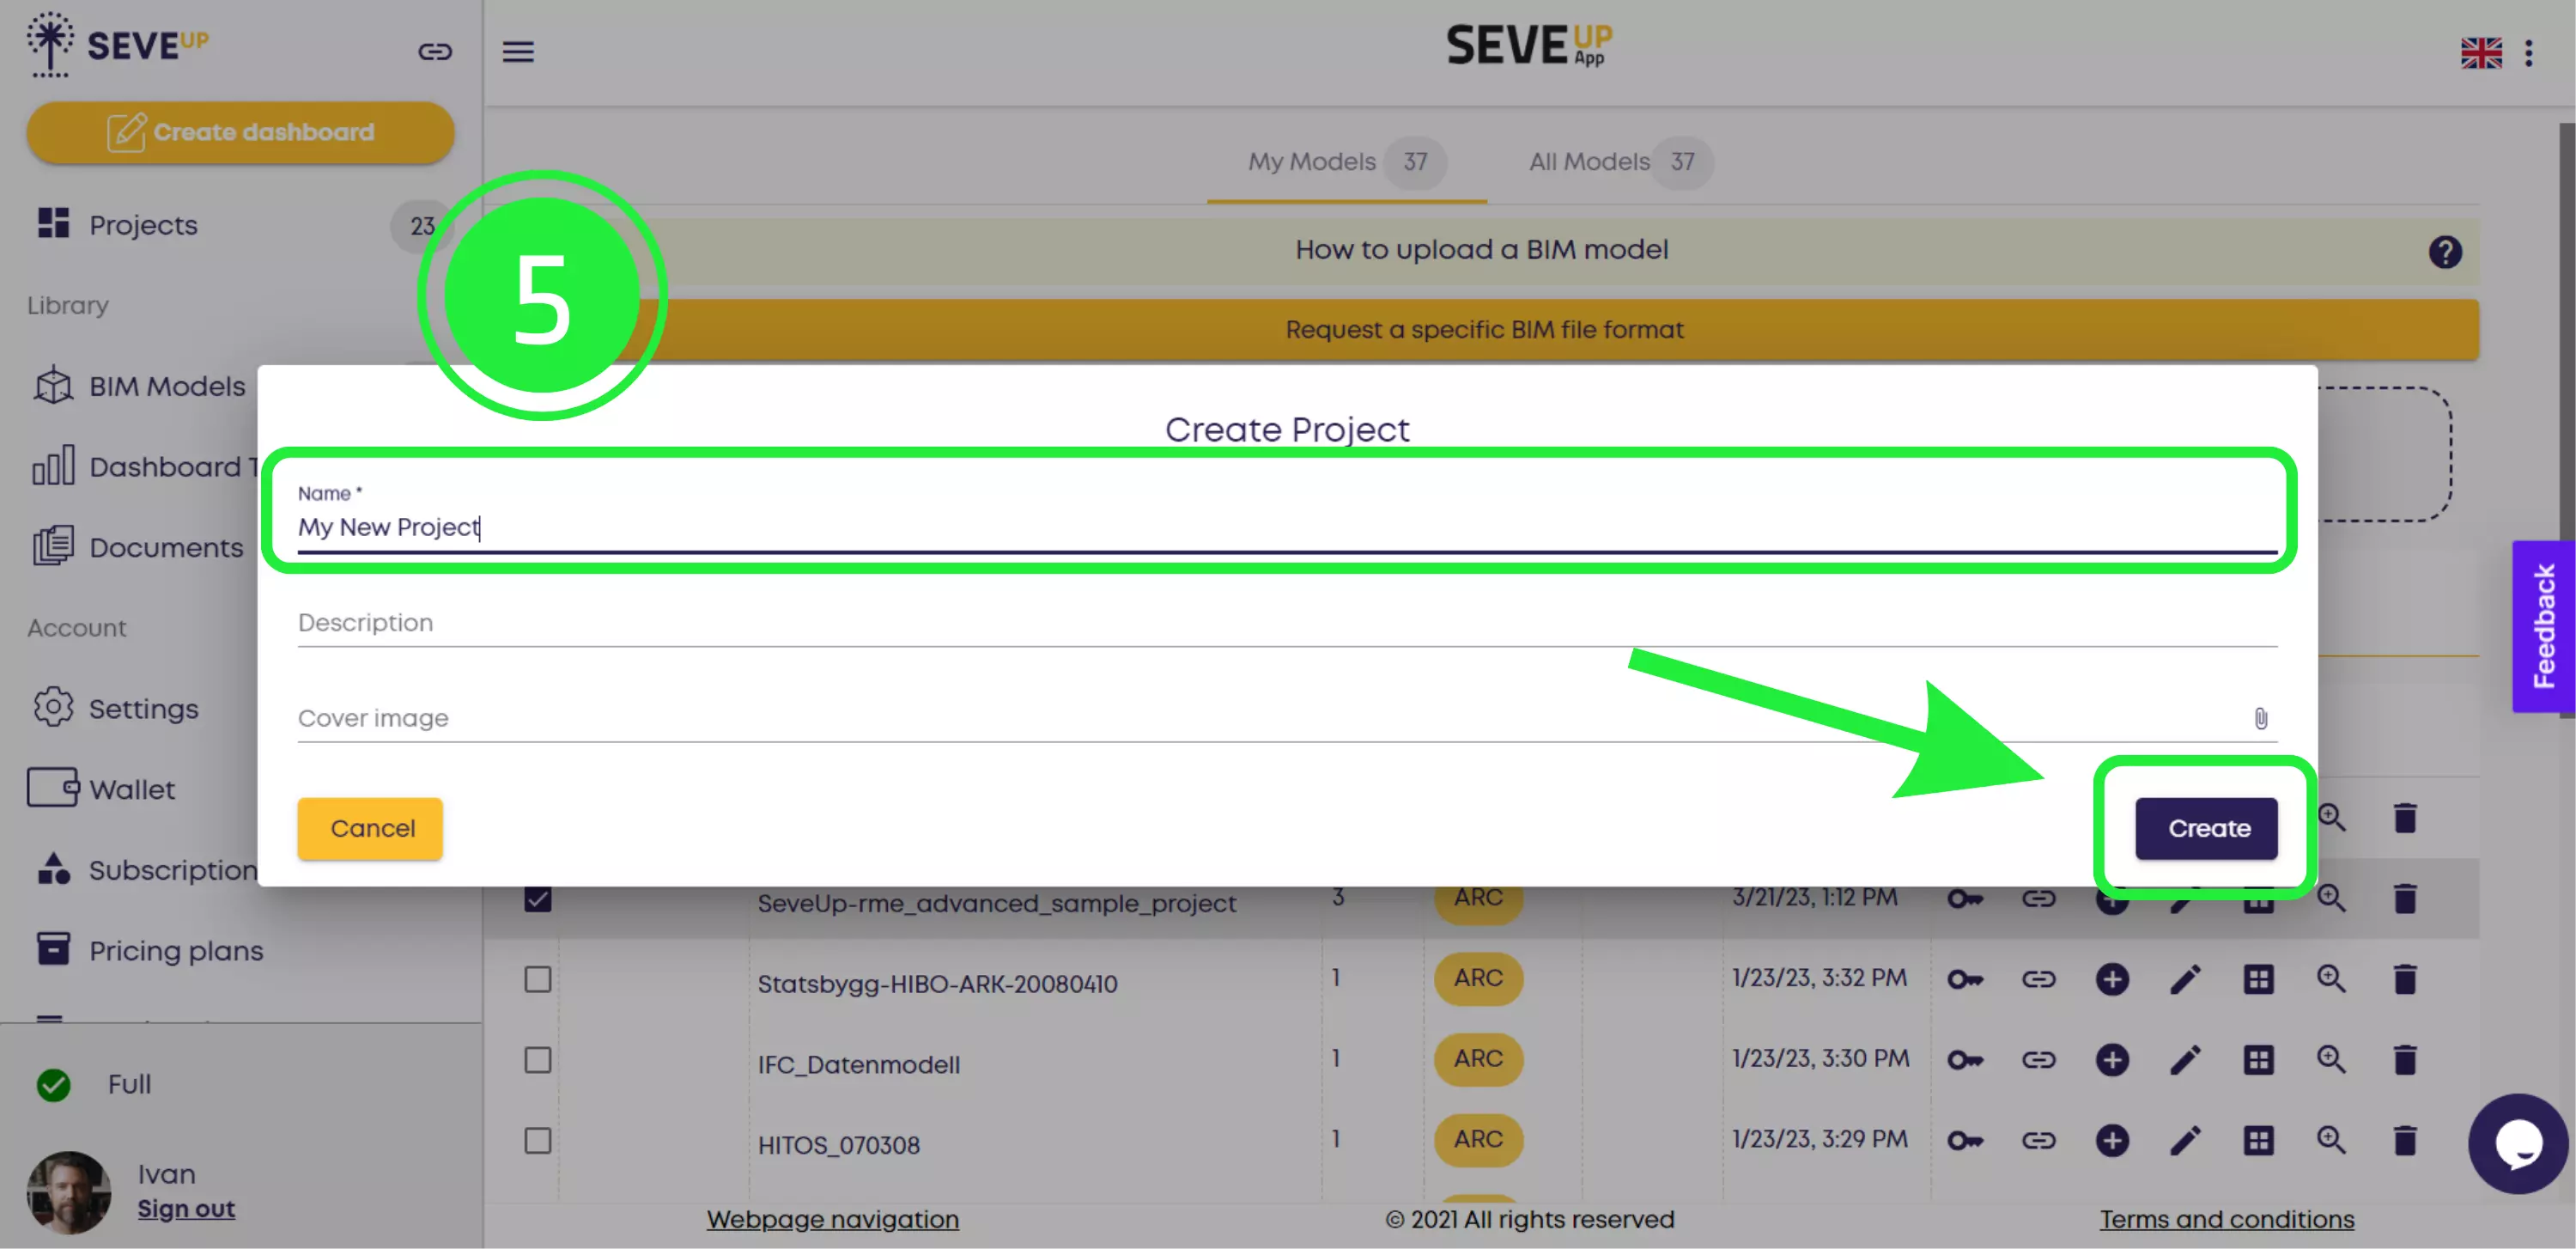
A new pop-up will appear where you can enter a project name and description and upload a cover image. Enter all your desired details, then click “Create” to confirm.
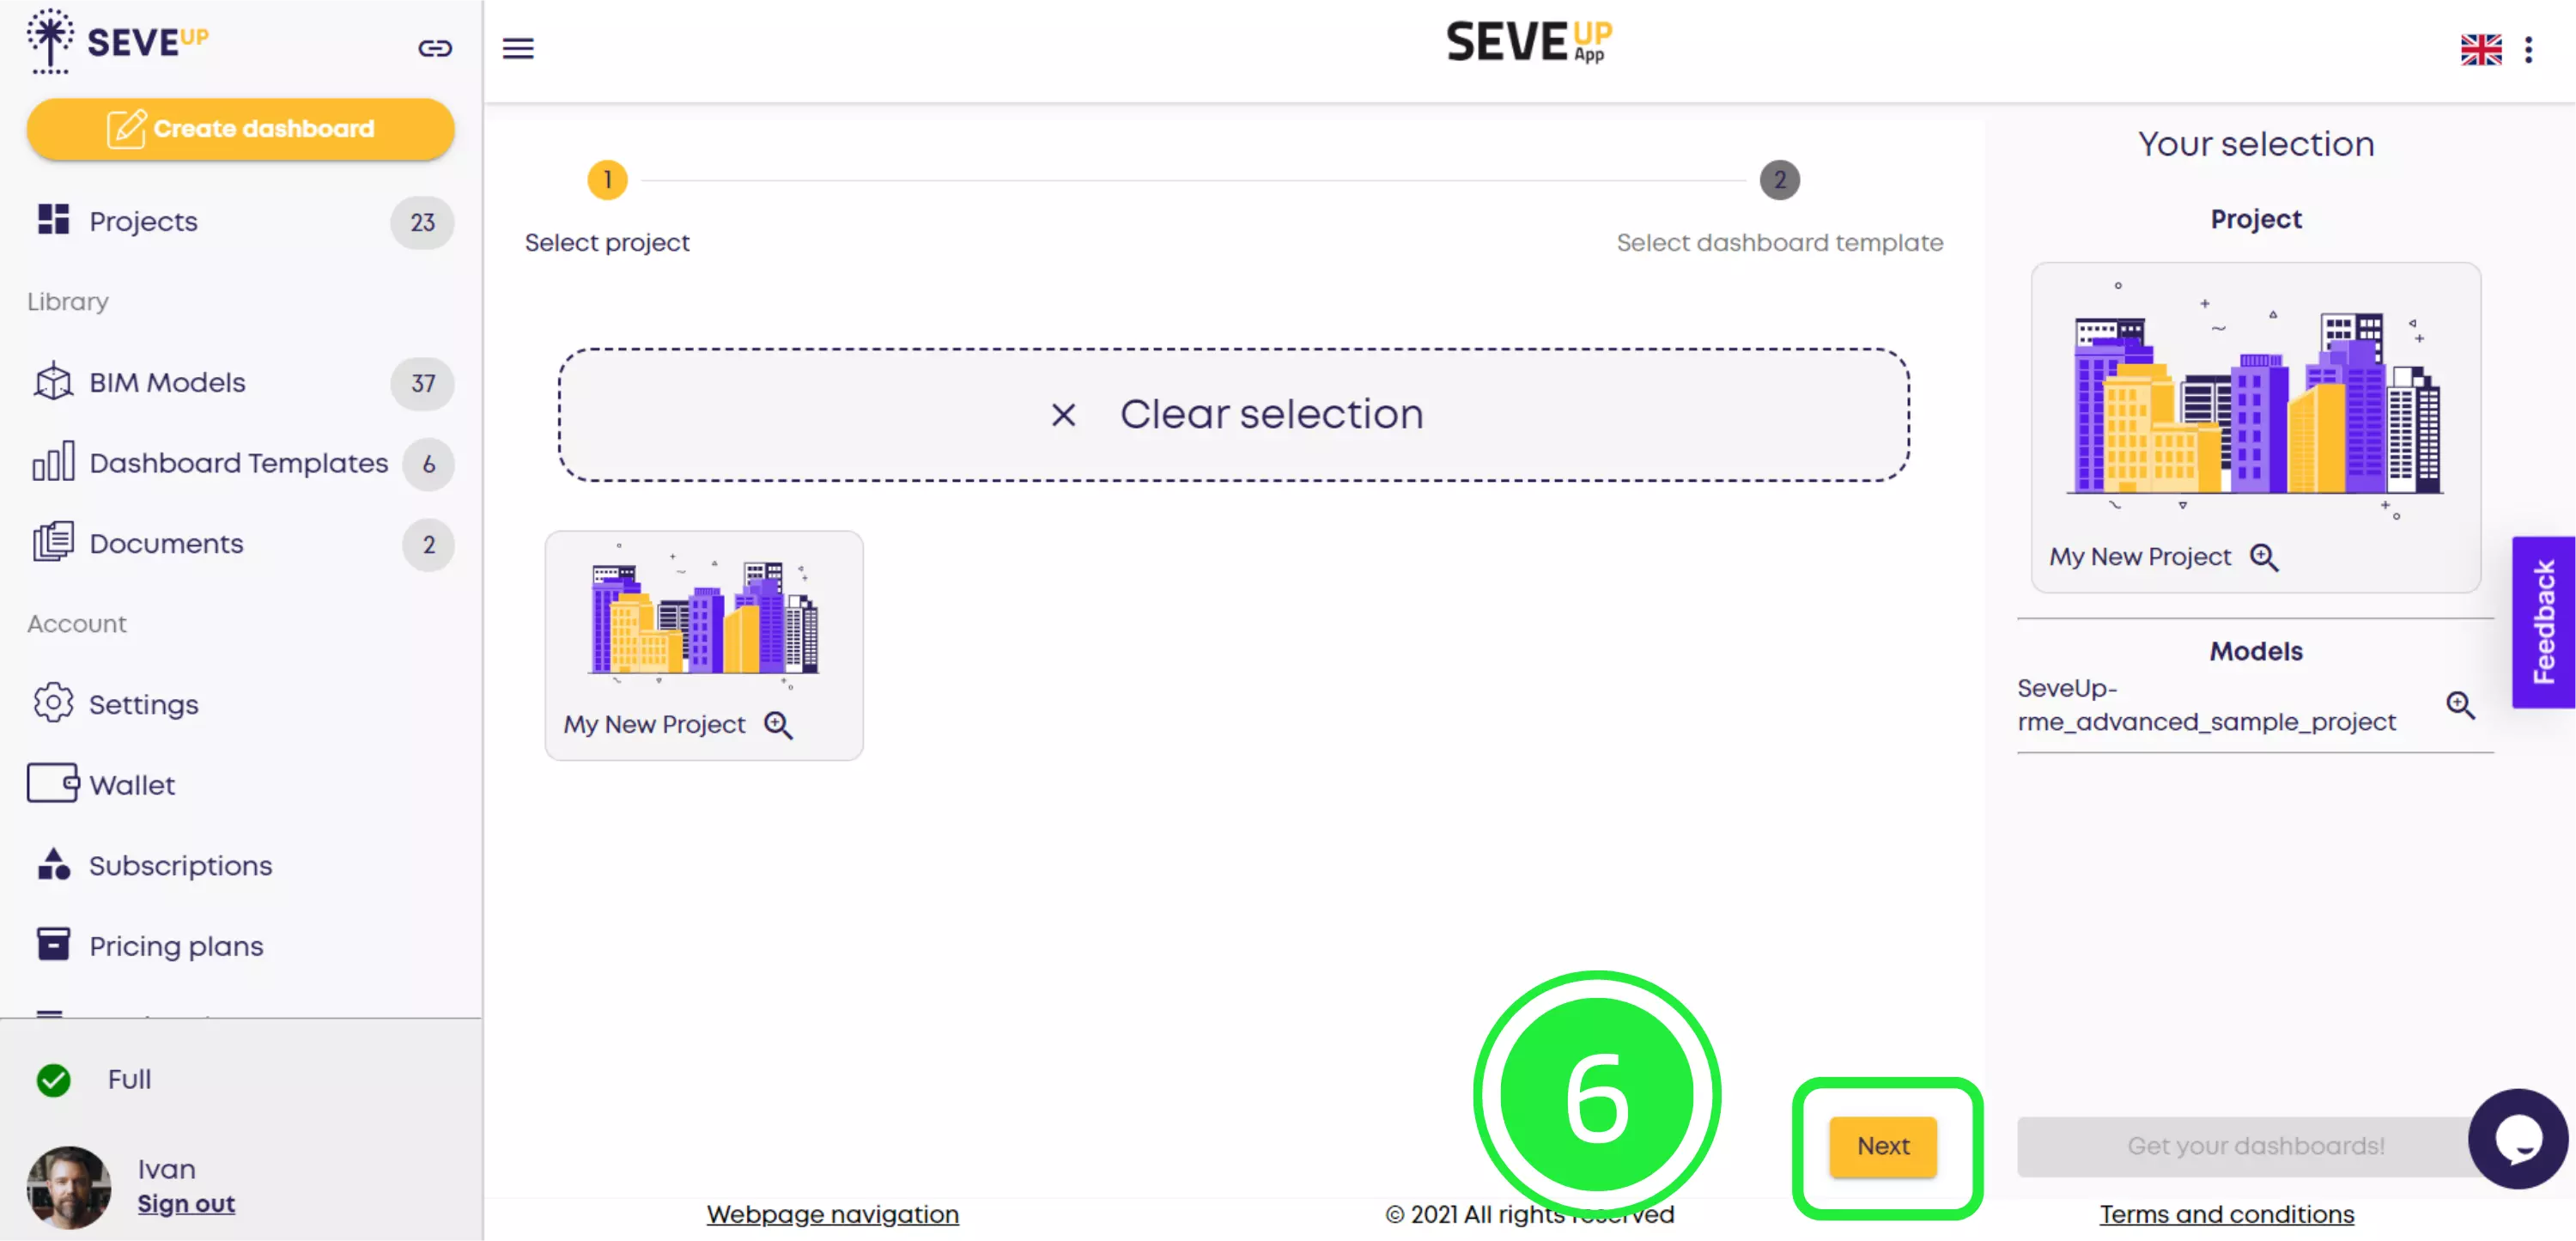
Now you’ll see the project you’ve selected appear in the dashboard creation wizard. To advance to the next step, click “Next” in the bottom-right corner of your screen.
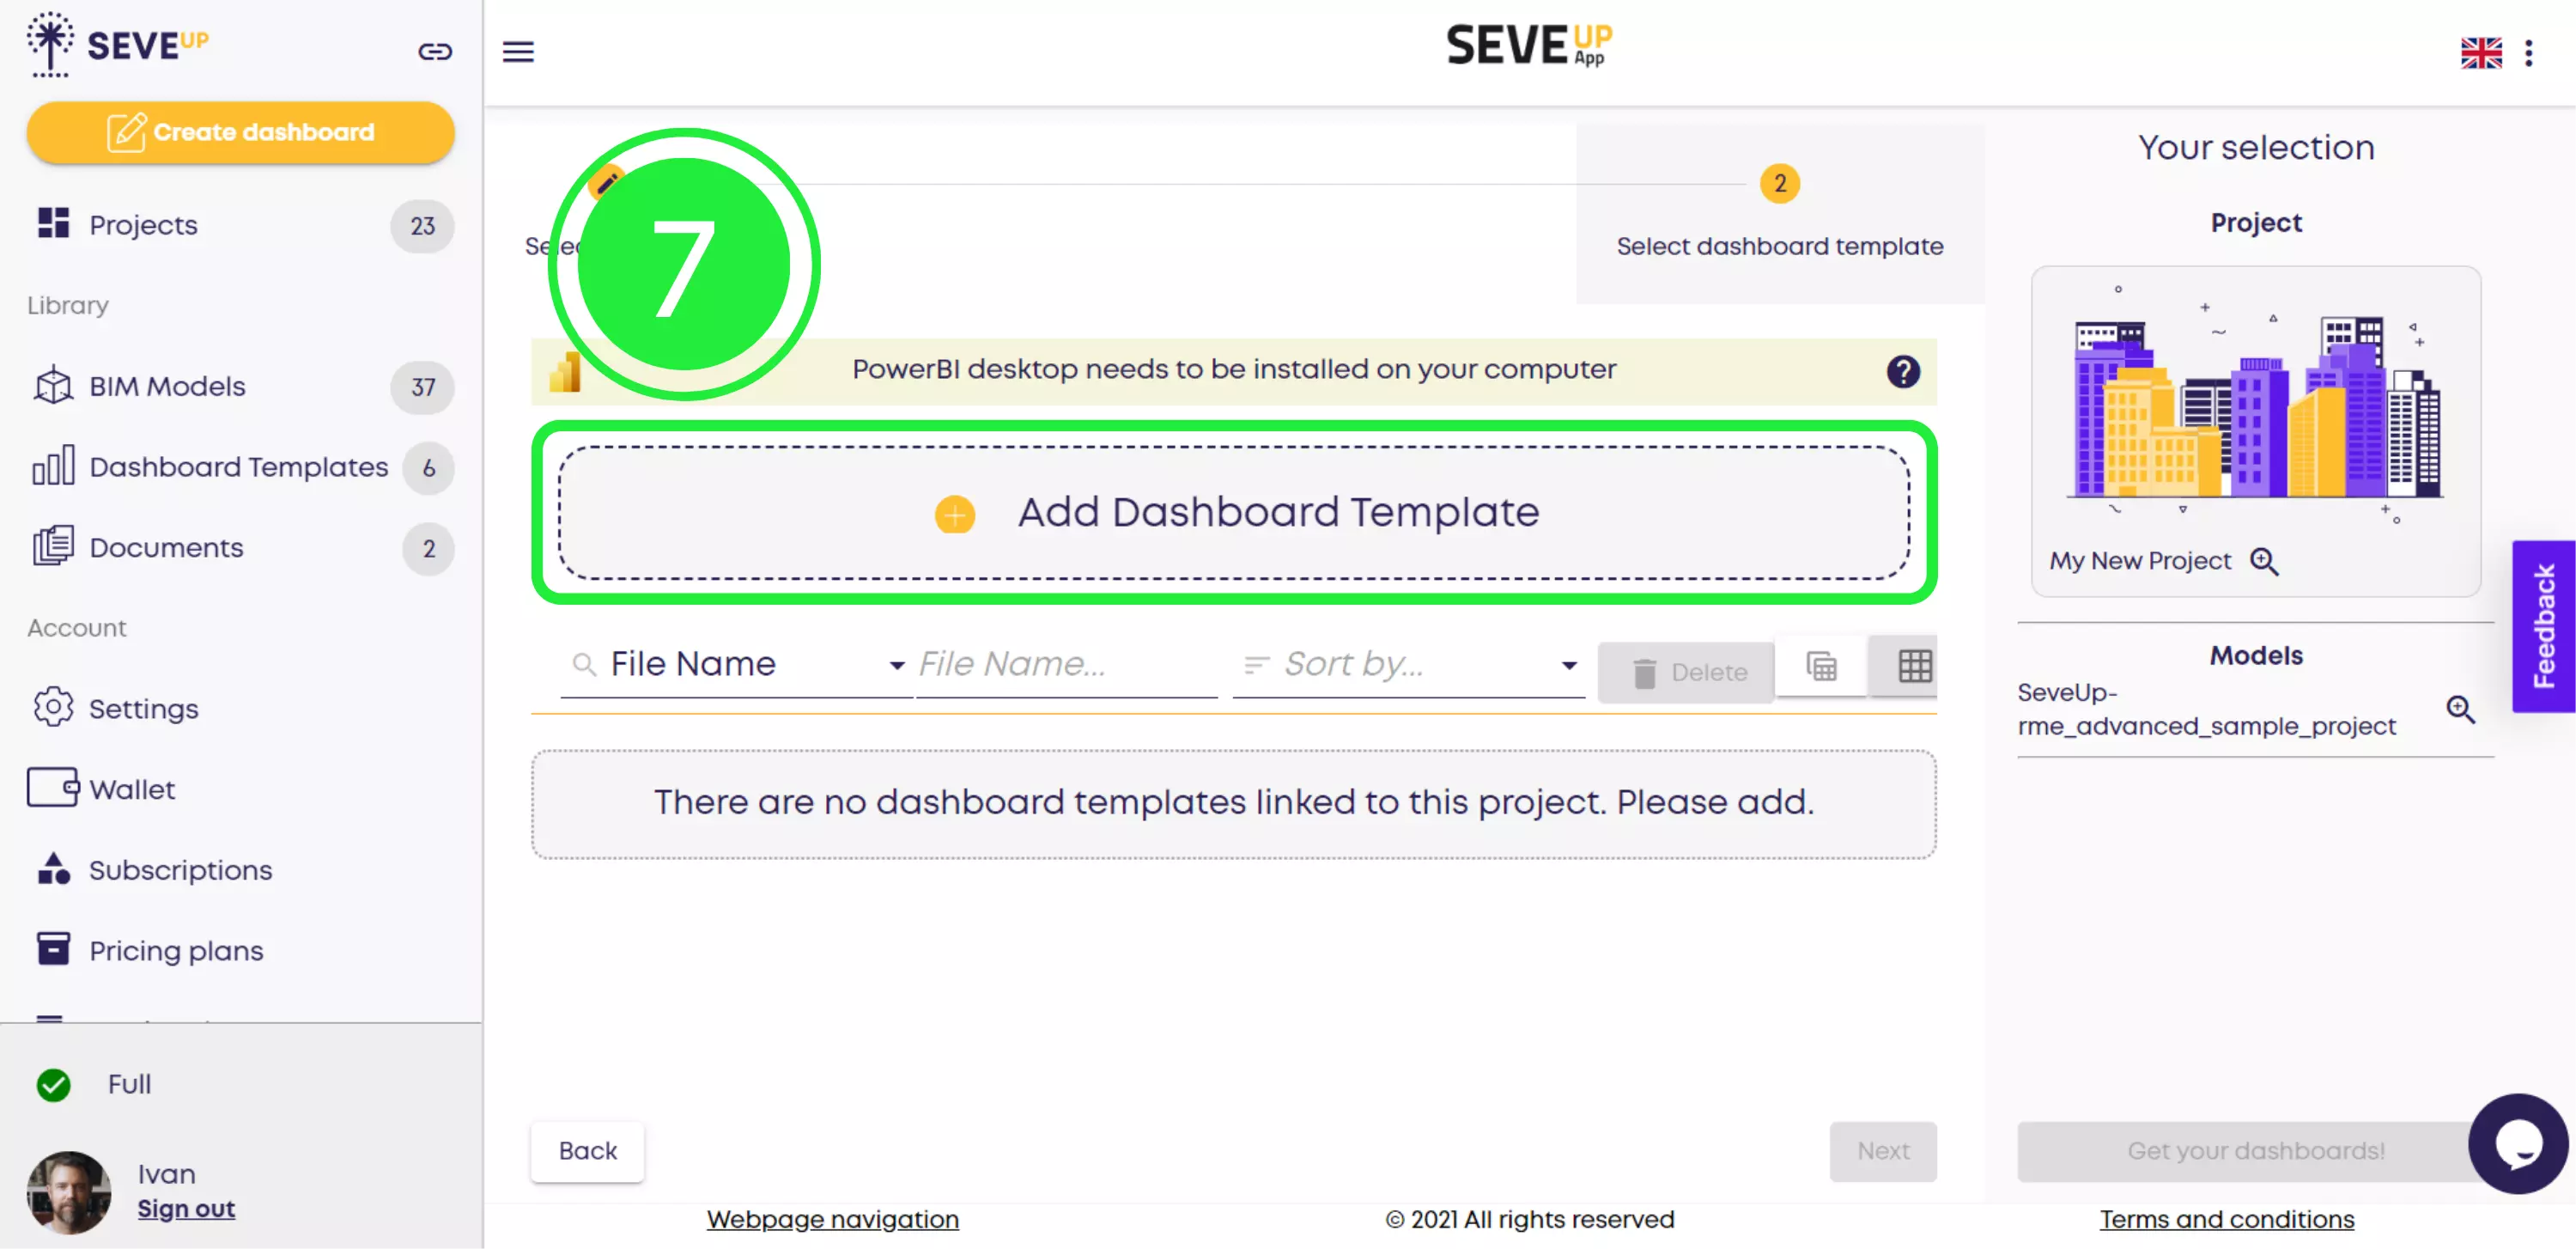
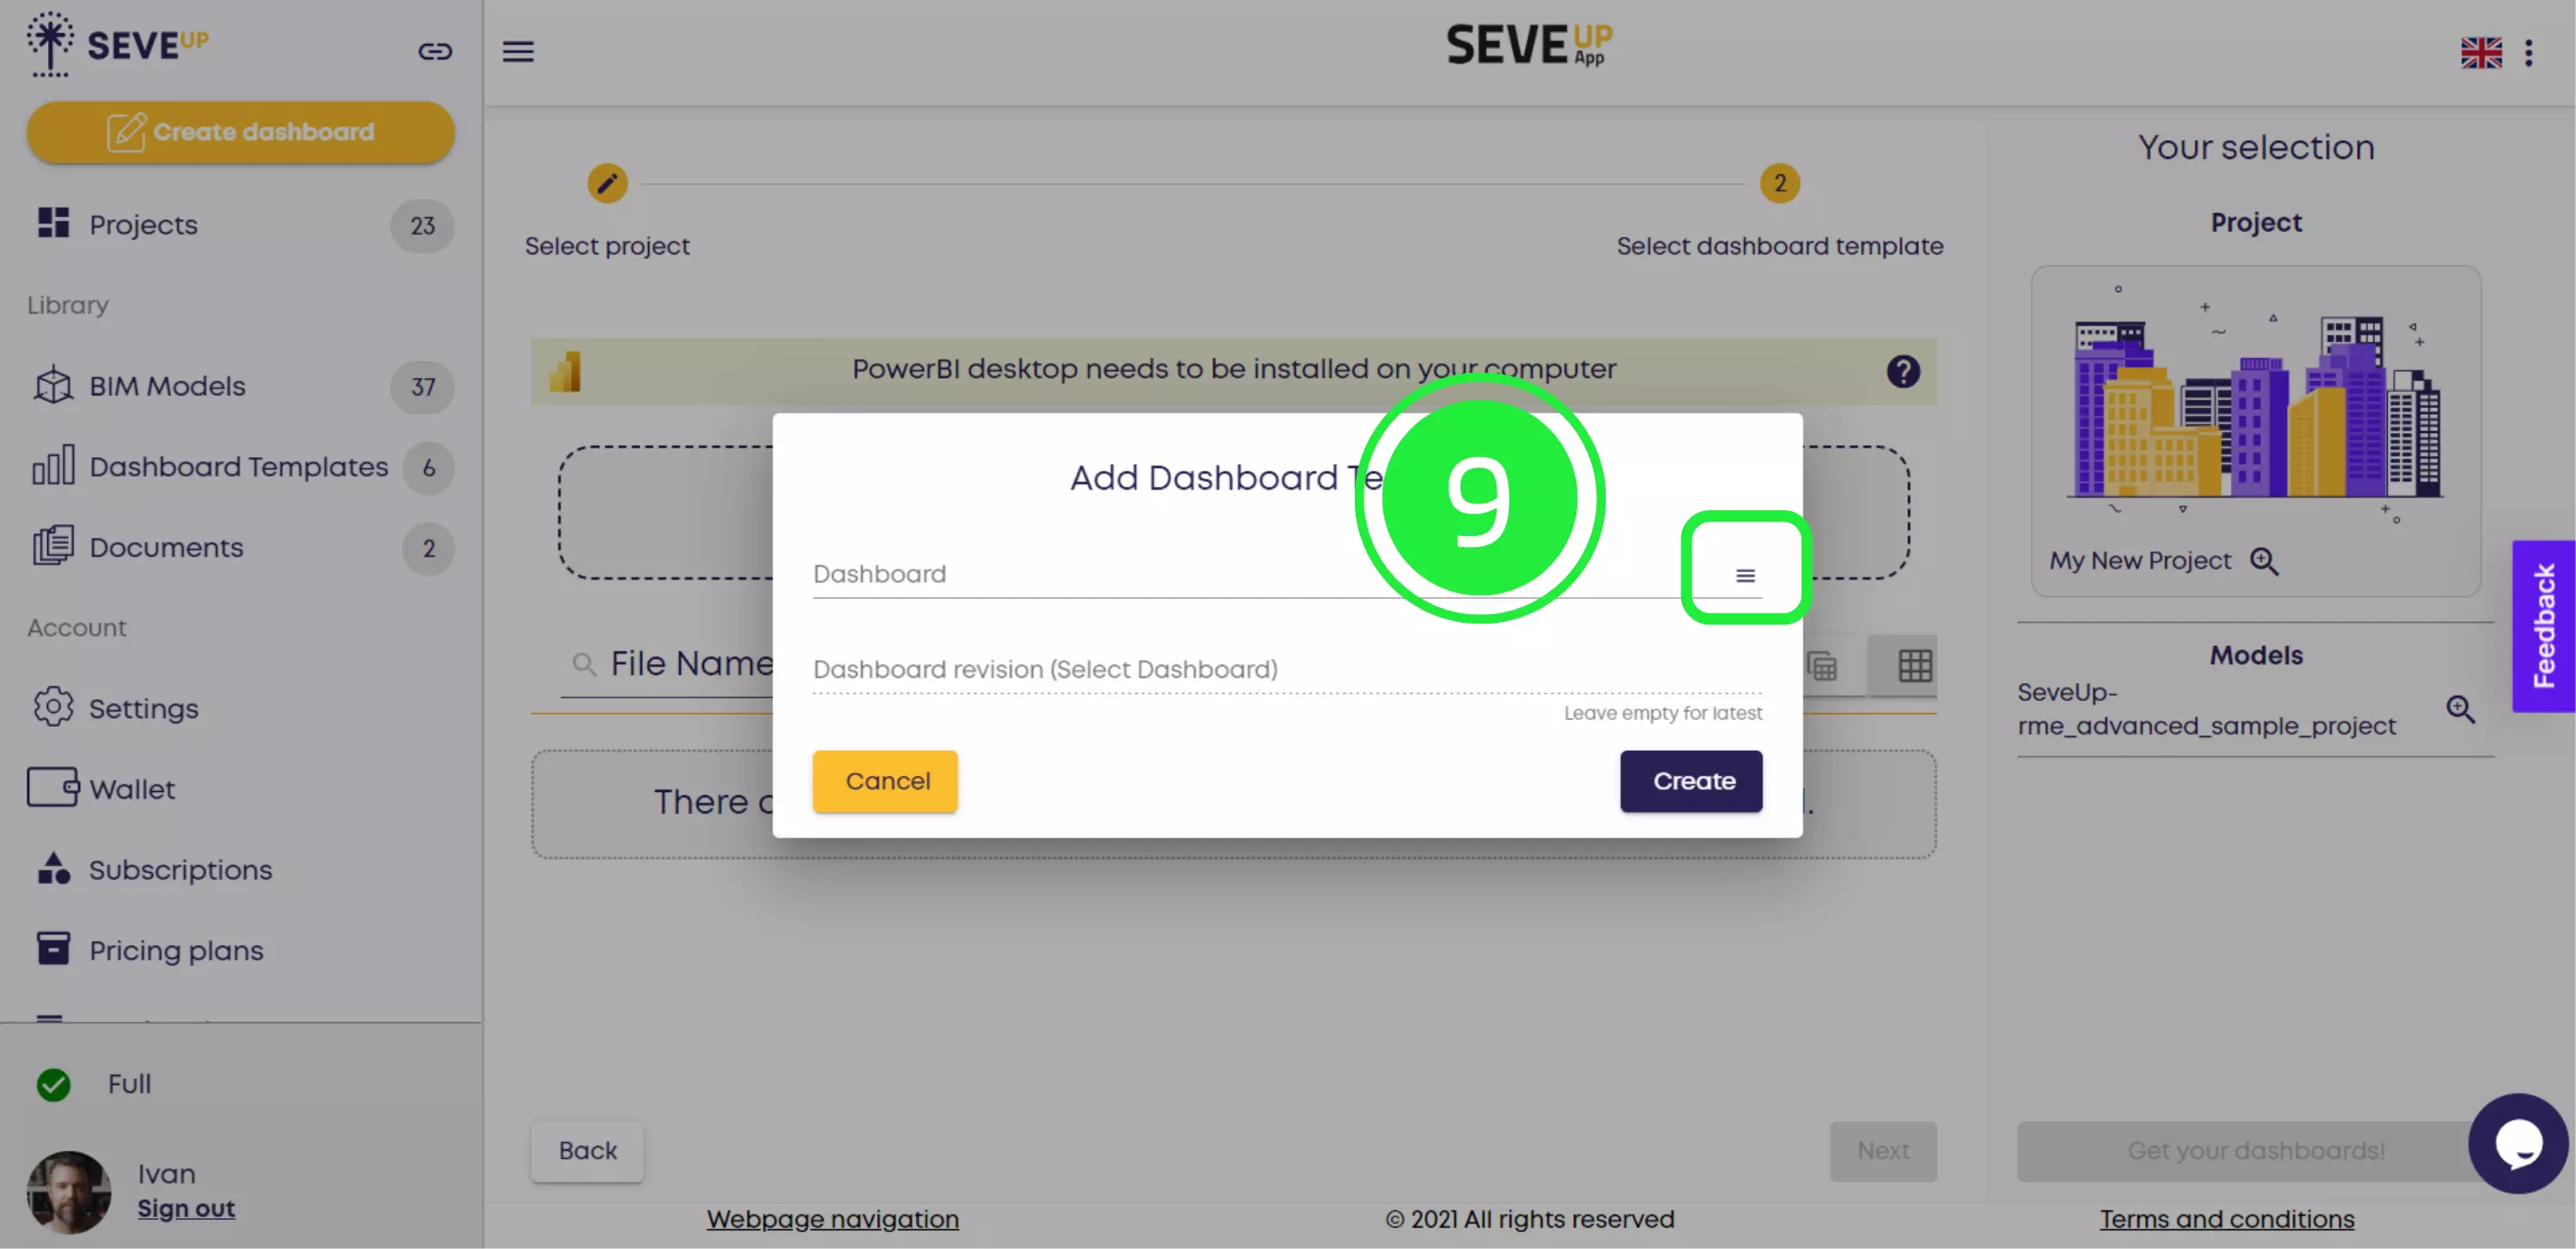
Now you’ll see that the wizard has moved you into the “Select dashboard template” step. At this stage, you haven’t linked a dashboard to this project yet. To do so, click “Add Dashboard Template” at the top of your screen.
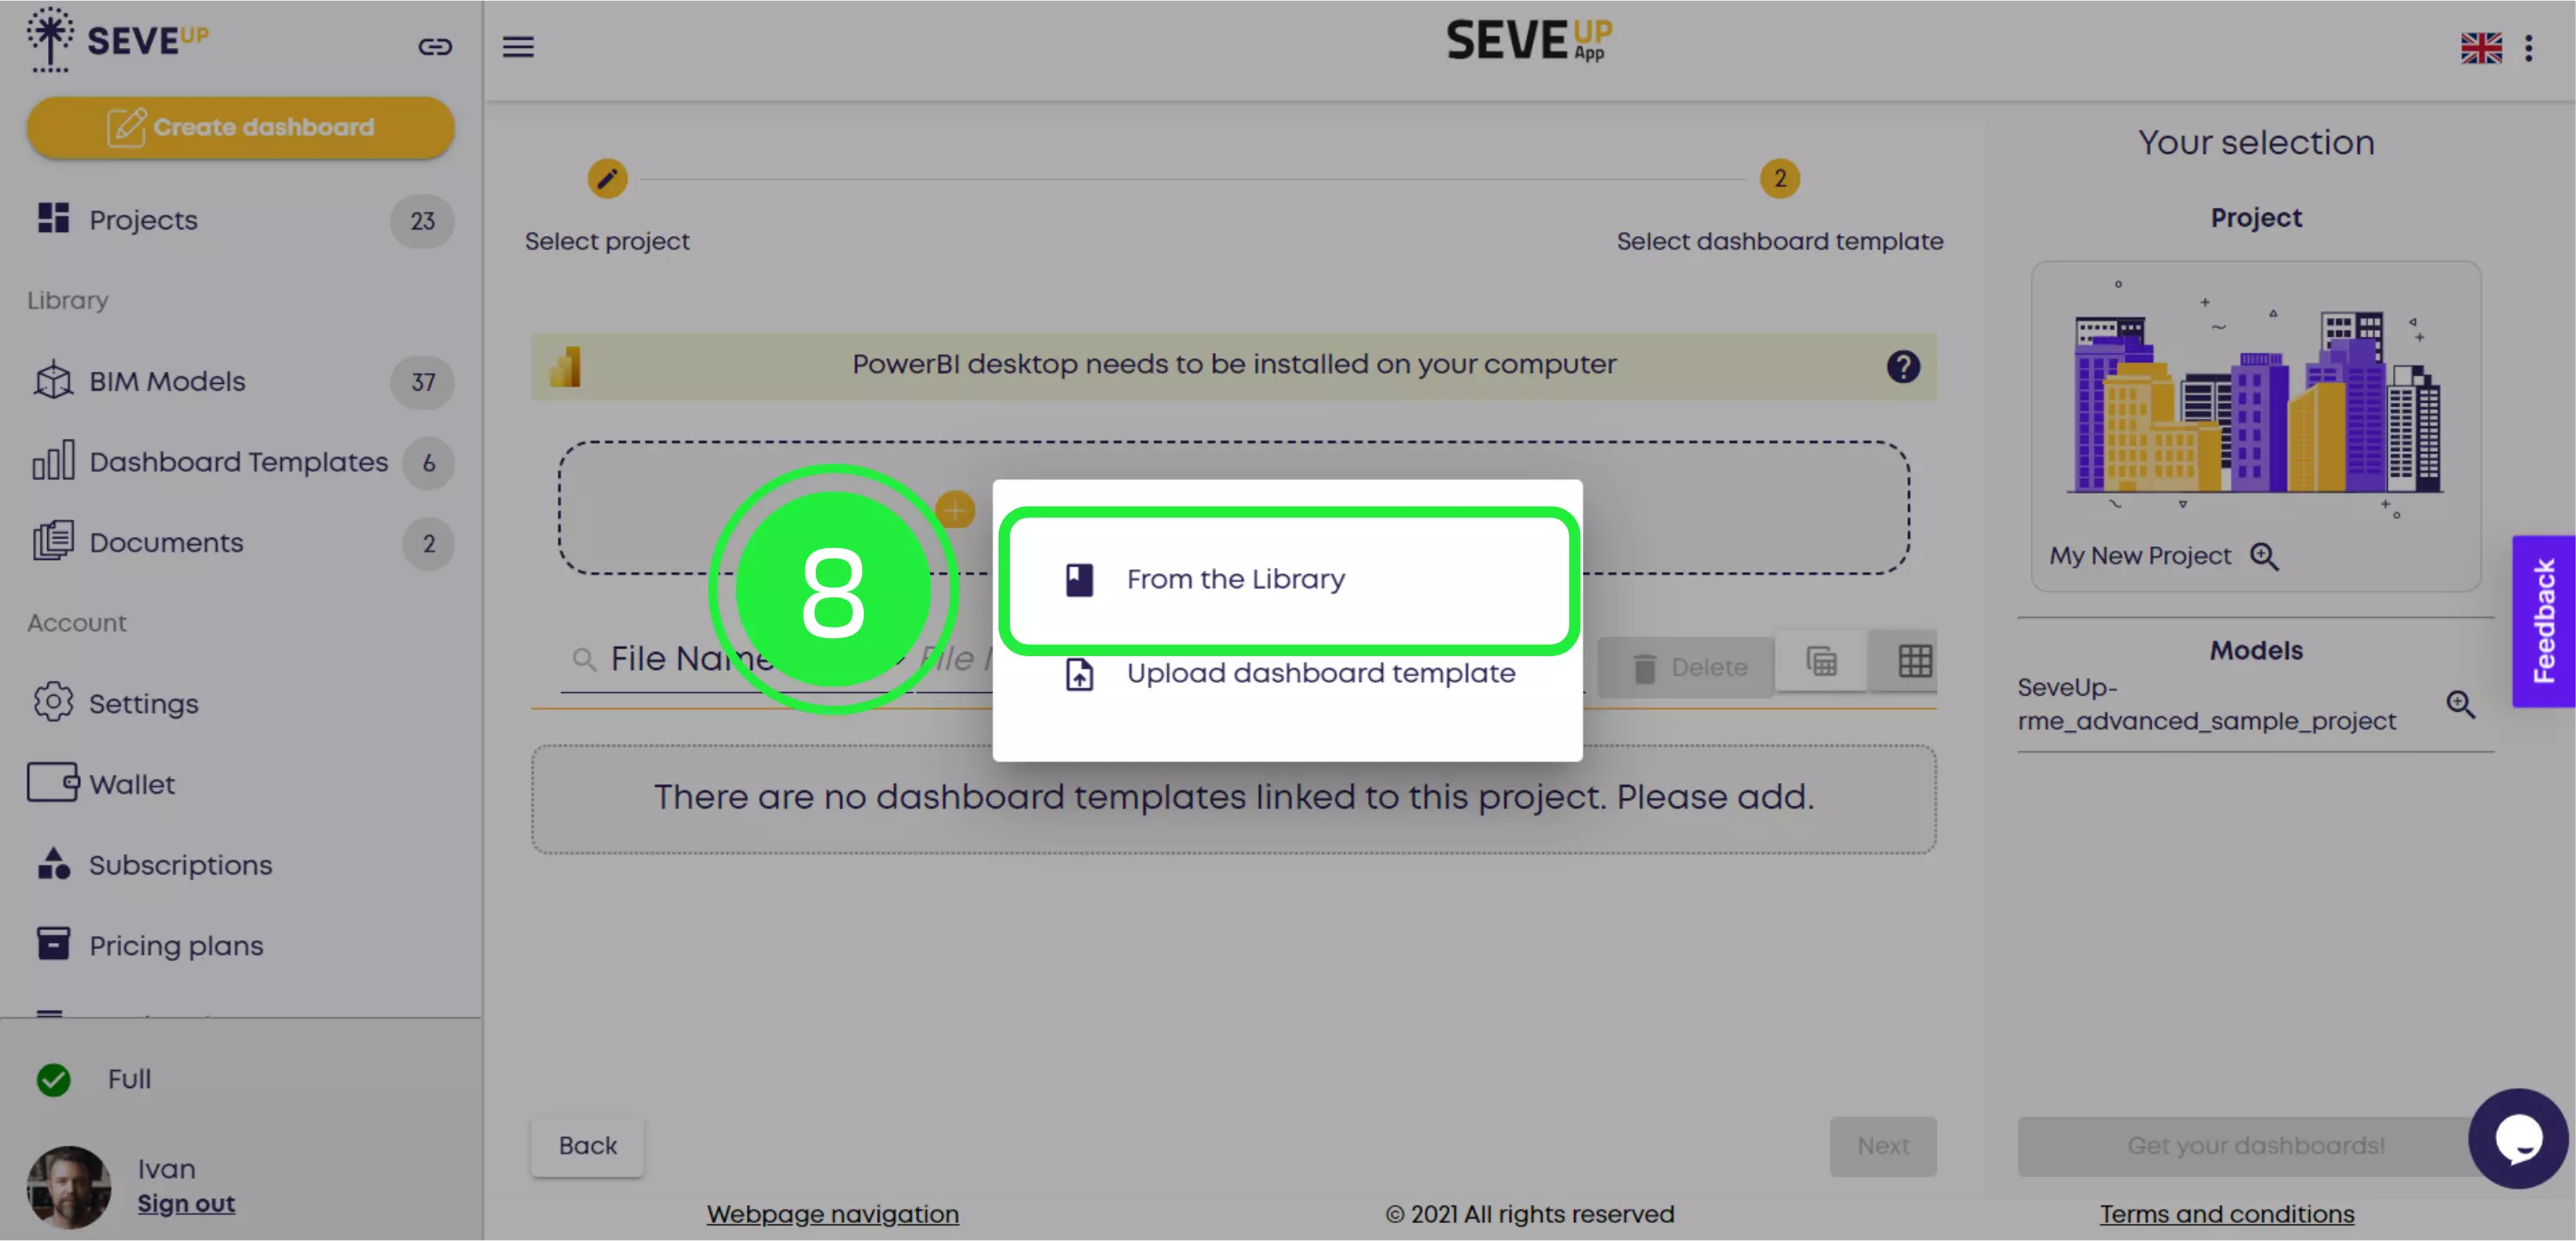
A pop-up will appear allowing you to choose to add a template from your library or to upload one from your computer. Since the template we want is in the Library, select “From the Library”.
Click on the menu button to see all the dashboard templates you can add from the library.
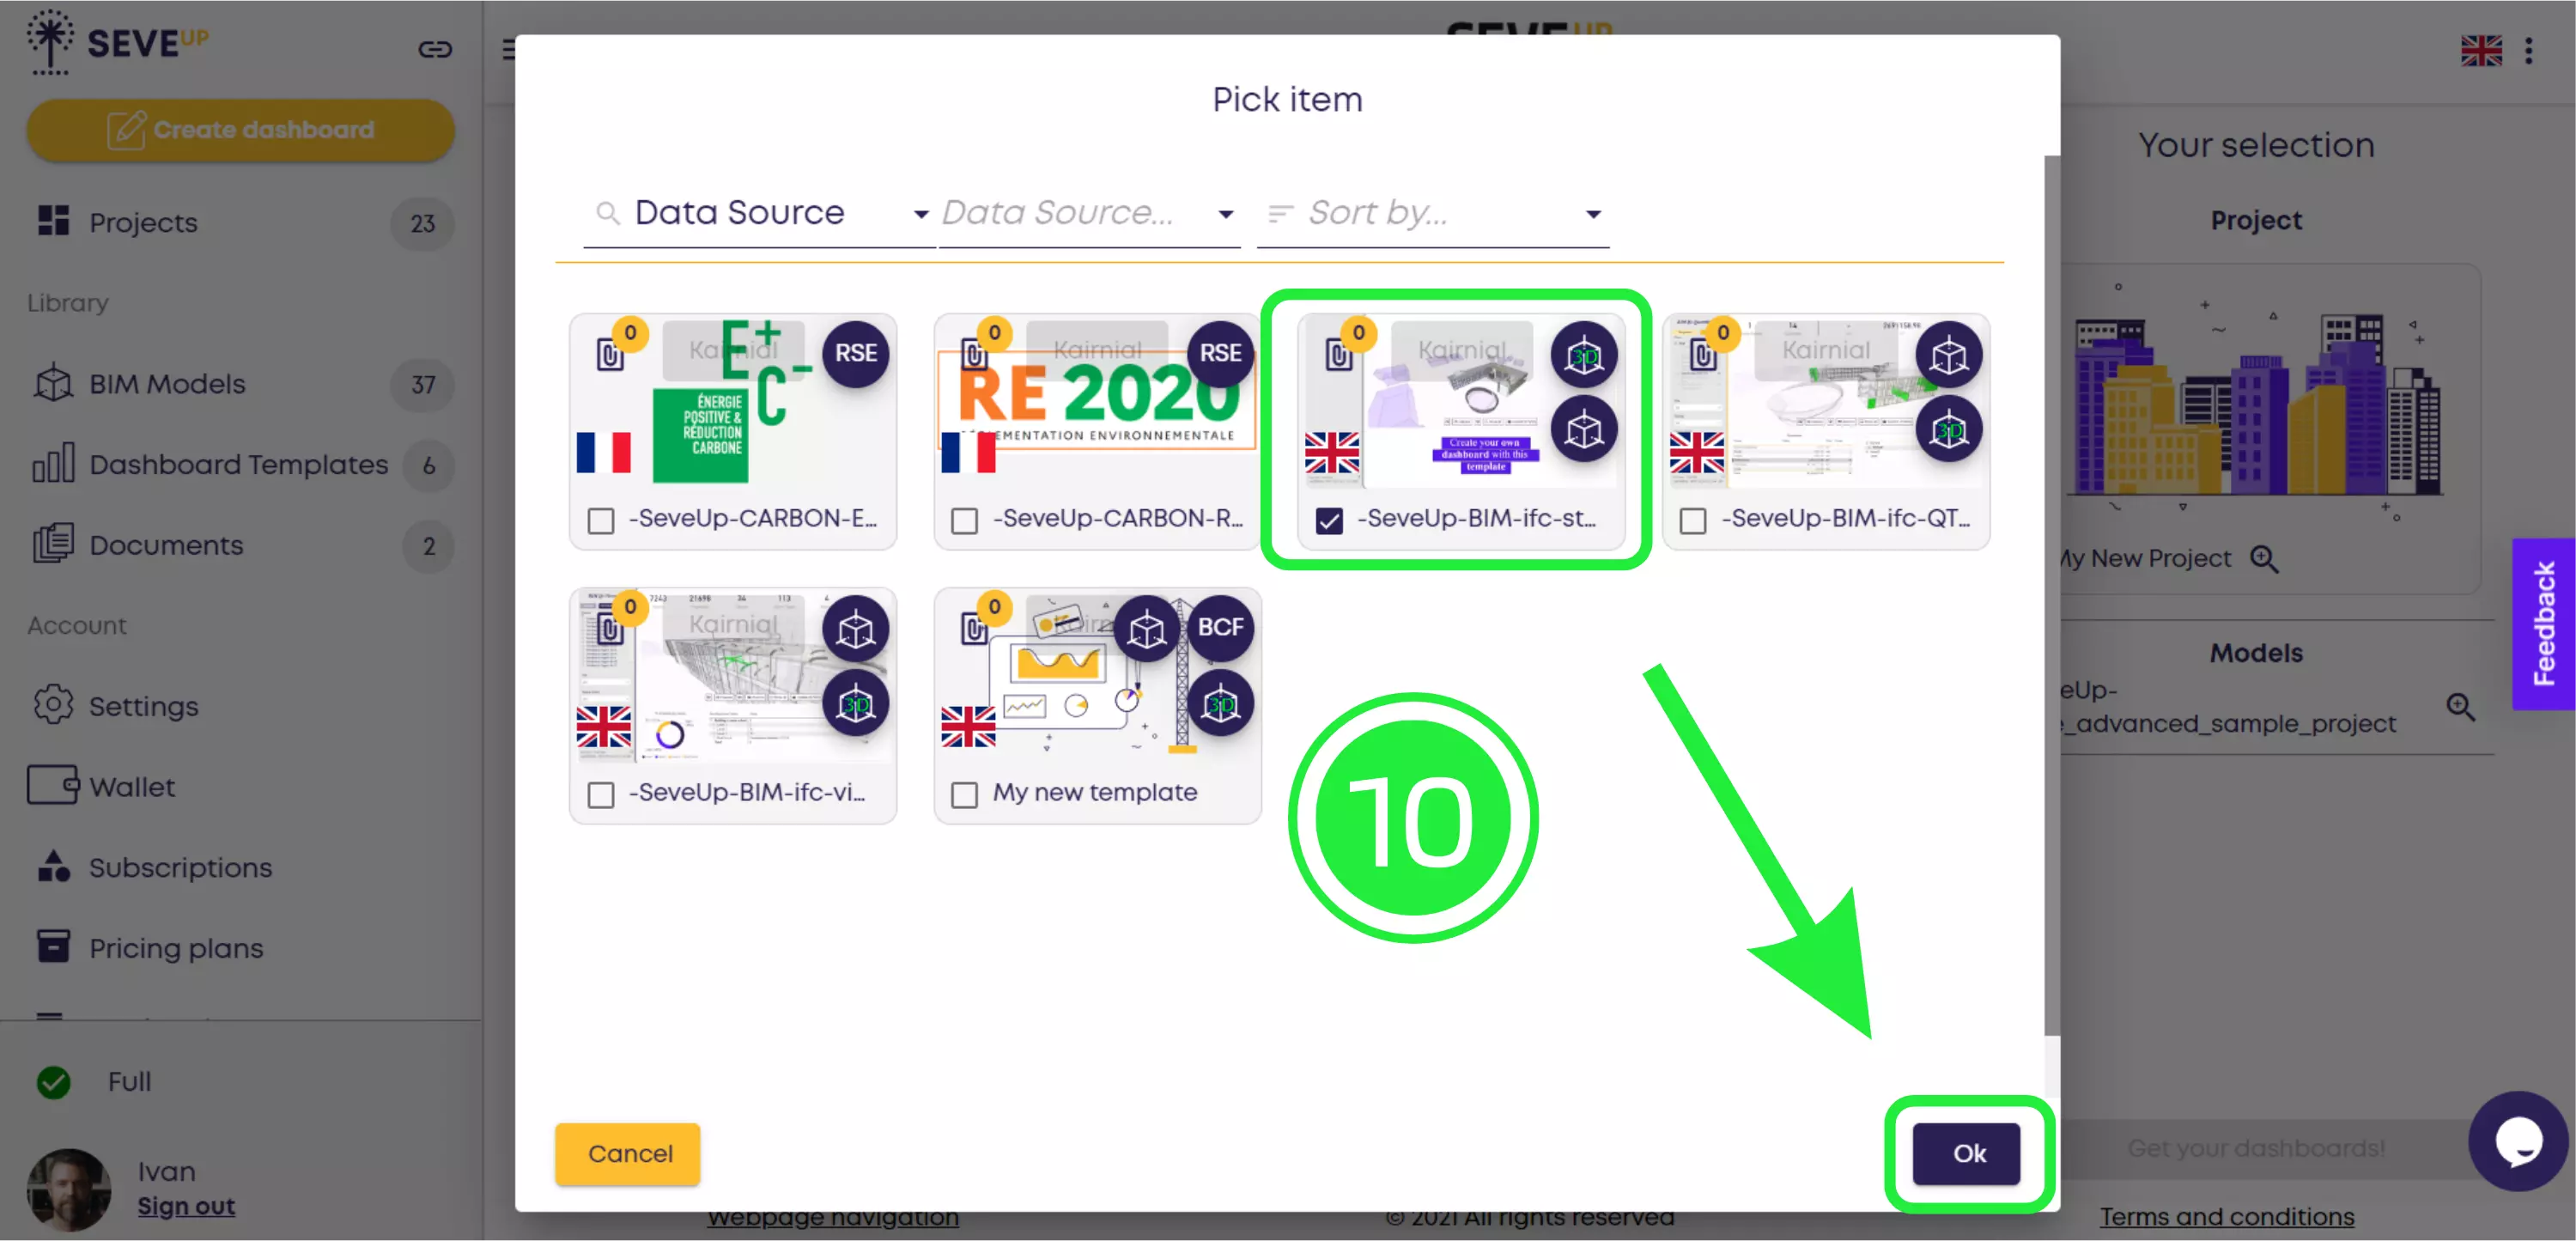
Select the tile of the dashboard template you want by clicking the check box in the bottom-left corner. Confirm your selection by clicking “OK”.
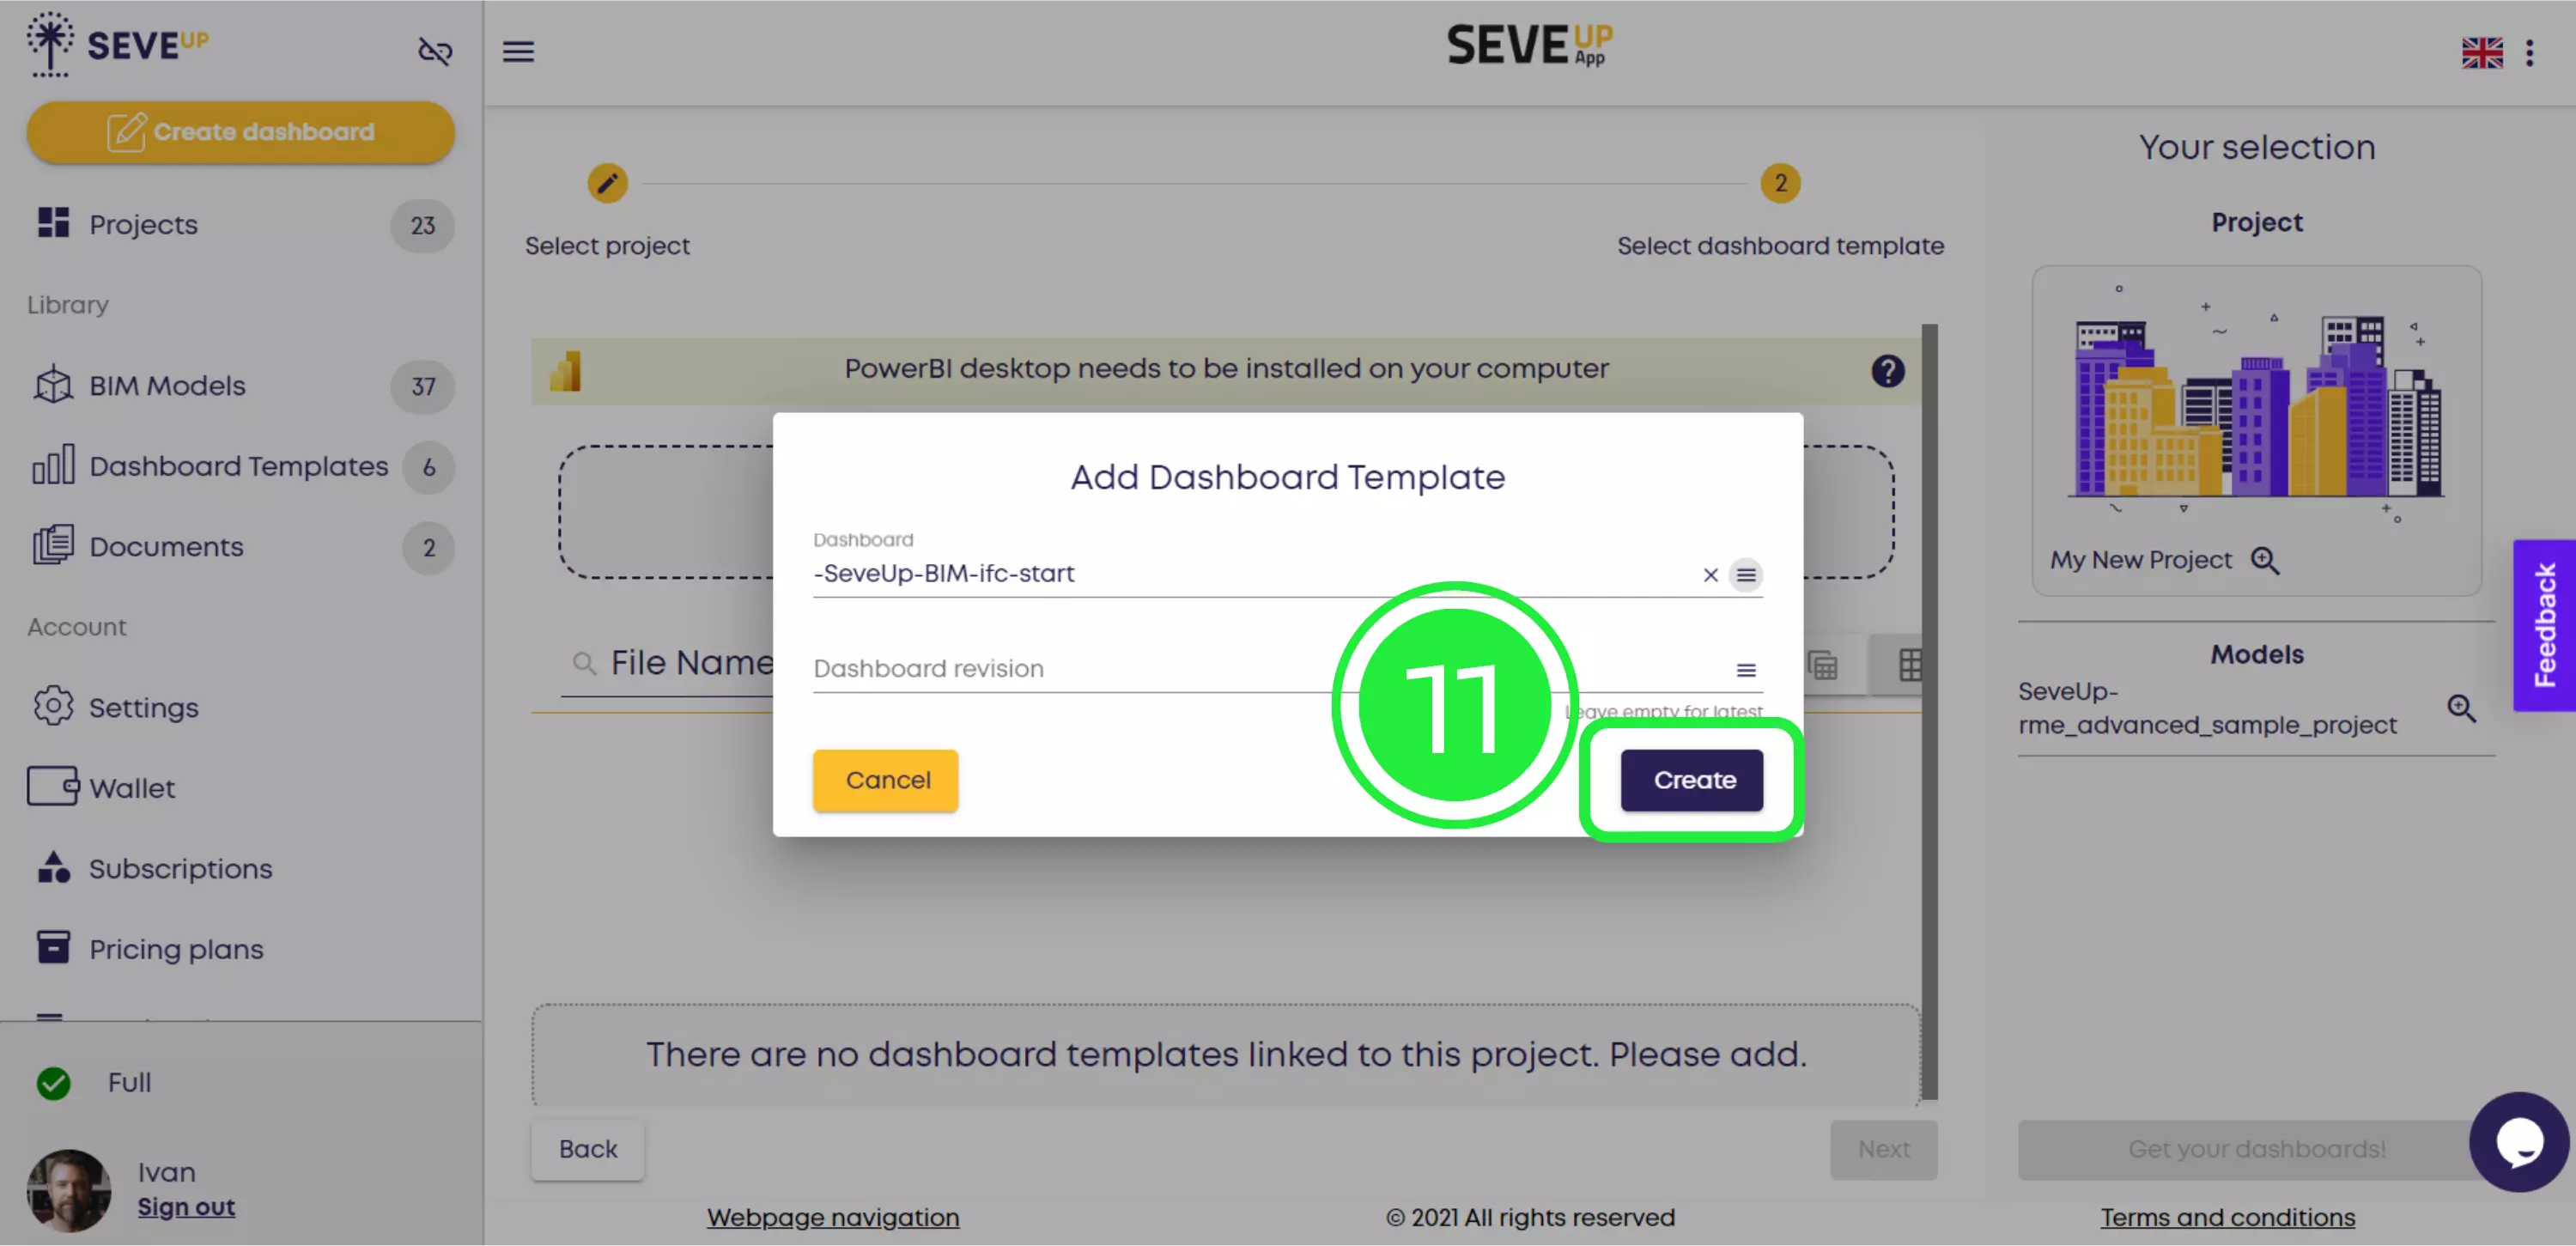
Finally, click “Create”. The selected dashboard template will be added to your project.
Now that you’ve added a dashboard template to your project, you can proceed to the next step of the wizard. Select the template by checking the box in the bottom-left corner of the tile, then click “Next”.

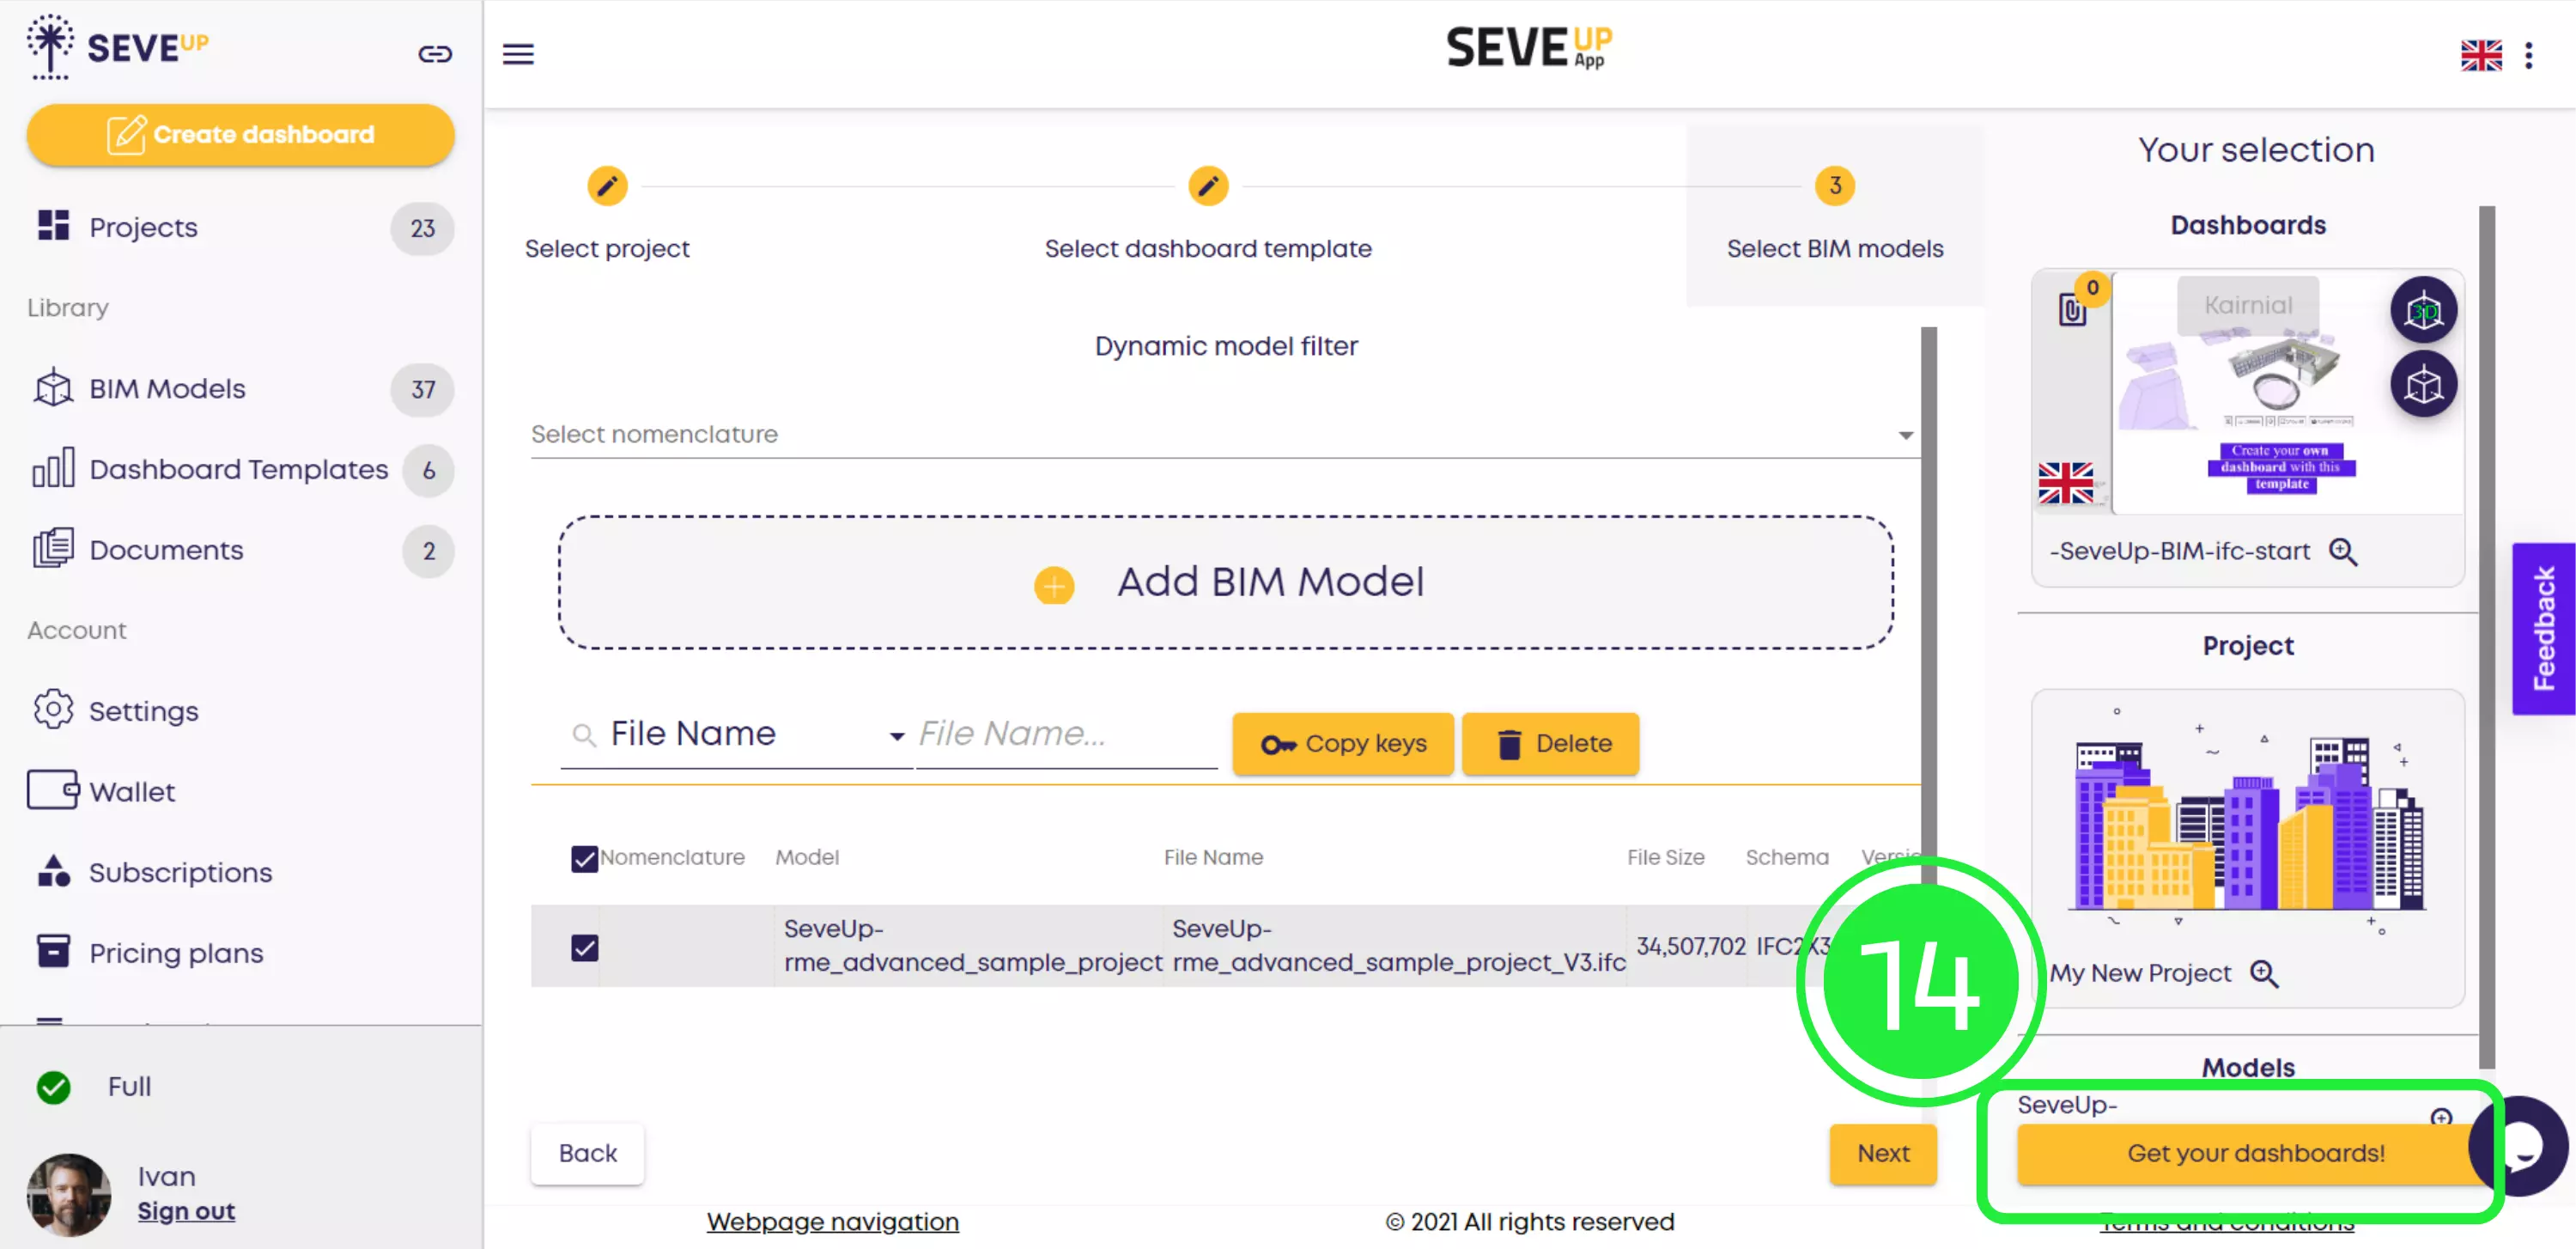
Now you’ll see that the wizard has moved you into the “Select BIM models” step. Select the BIM model you would like to use by checking the box to the left of its name.
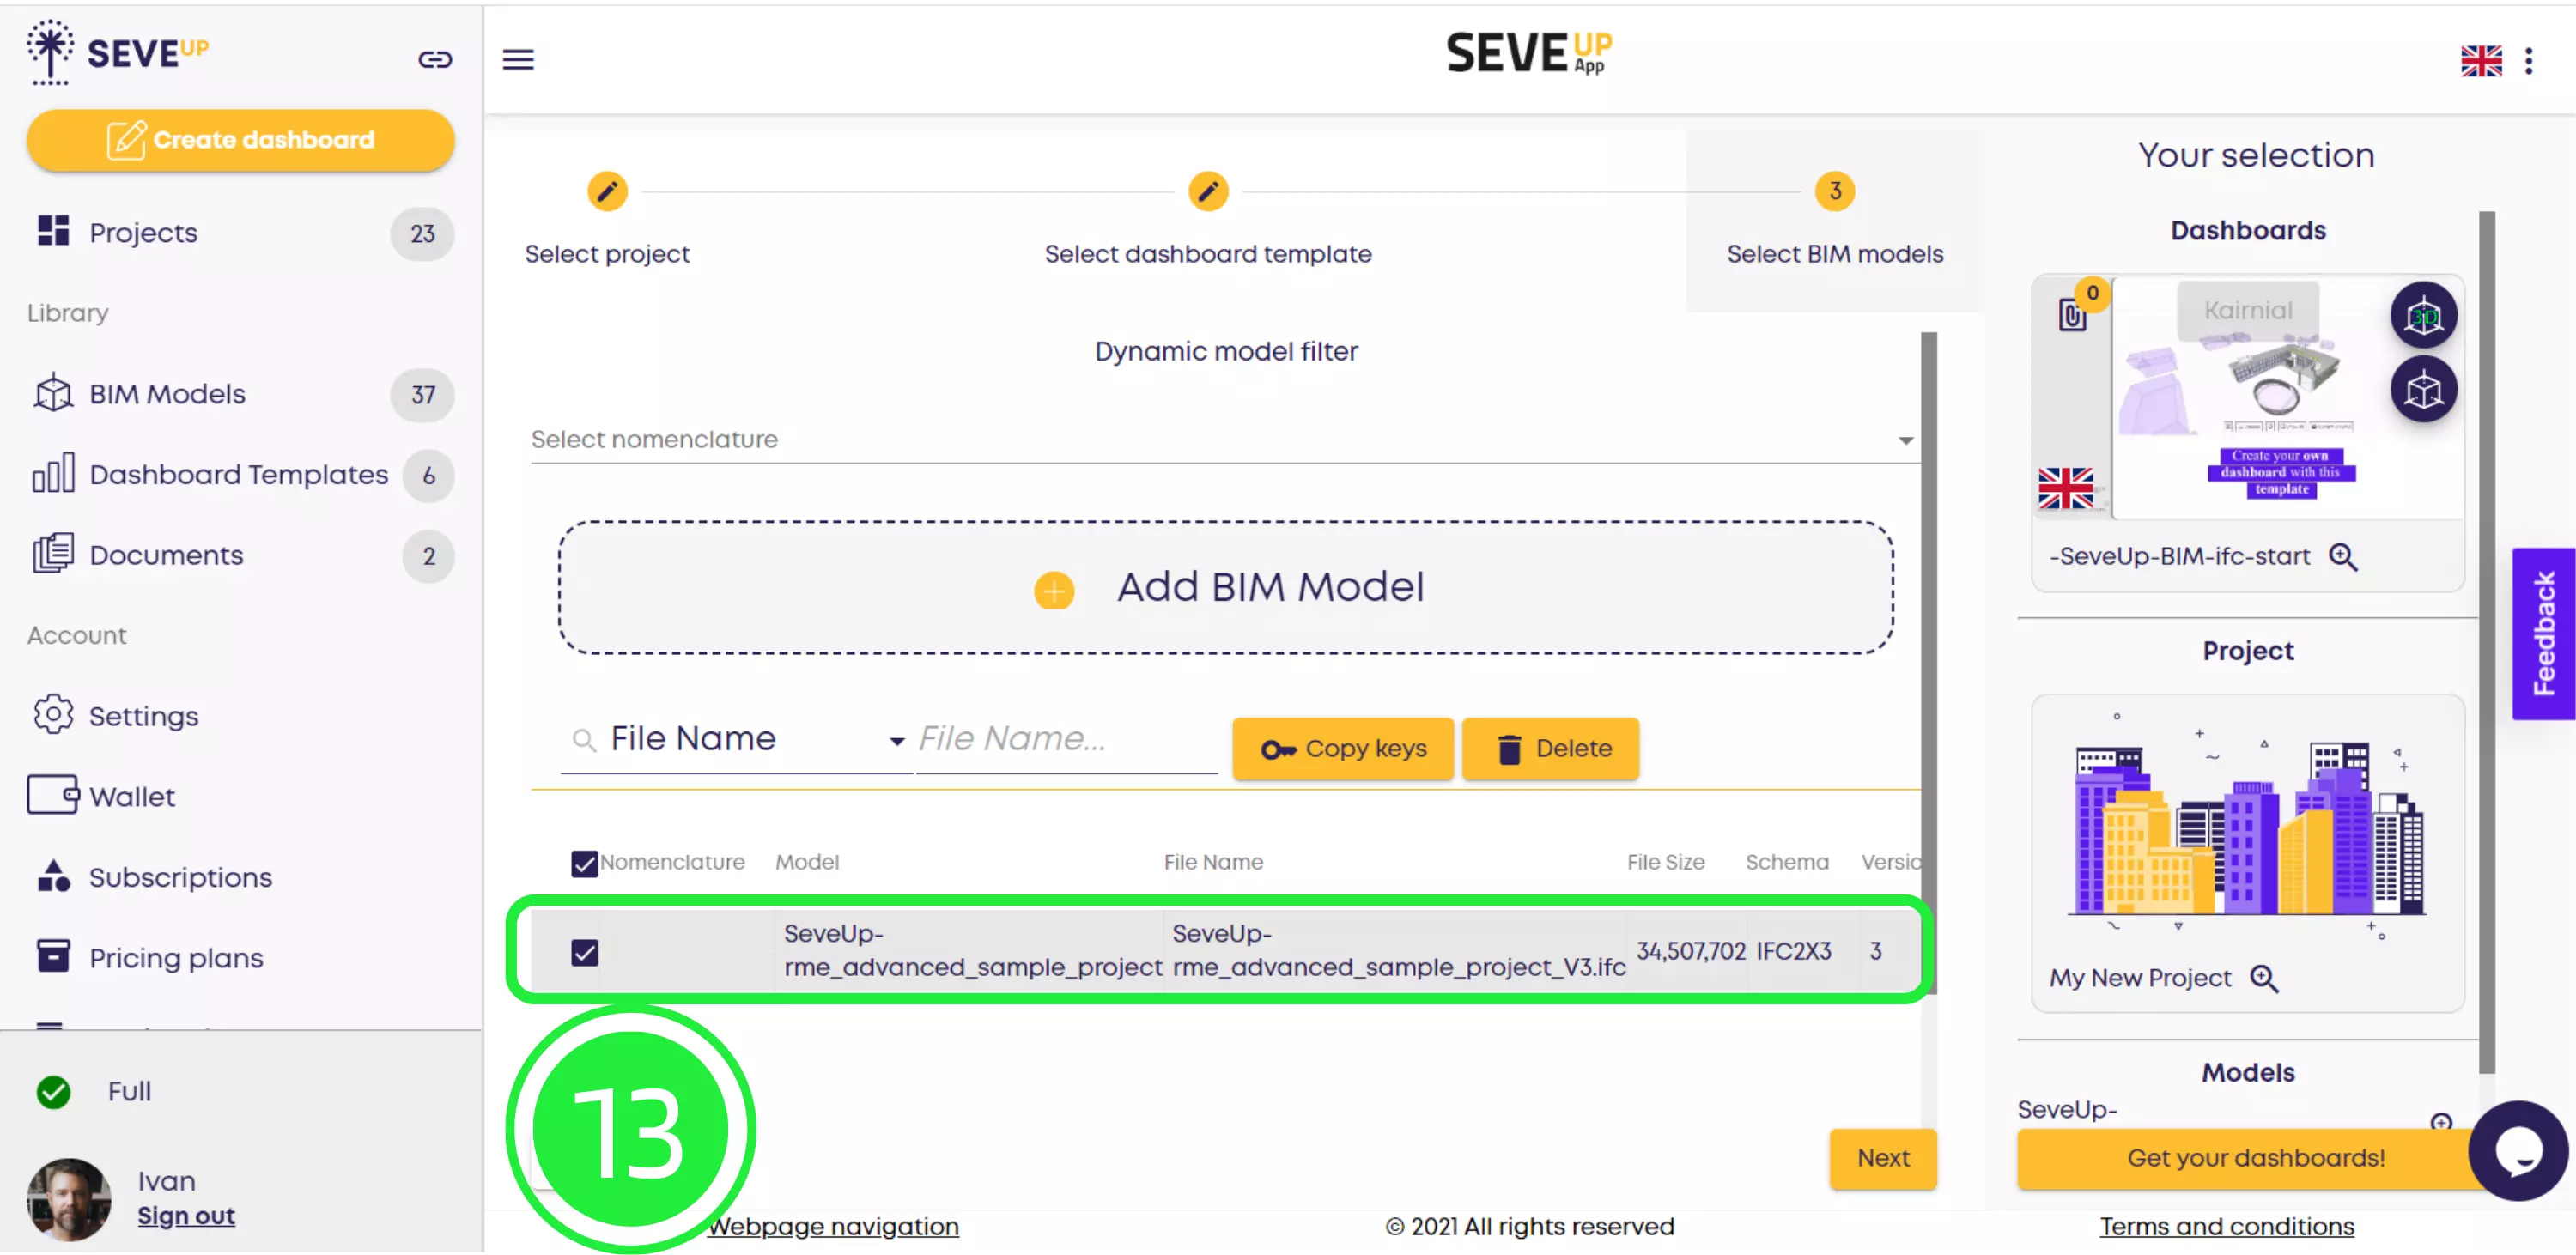
To finish the wizard and automatically download your new dashboard to your computer, click the “Get your dashboards!” button in the bottom-right corner of the screen.
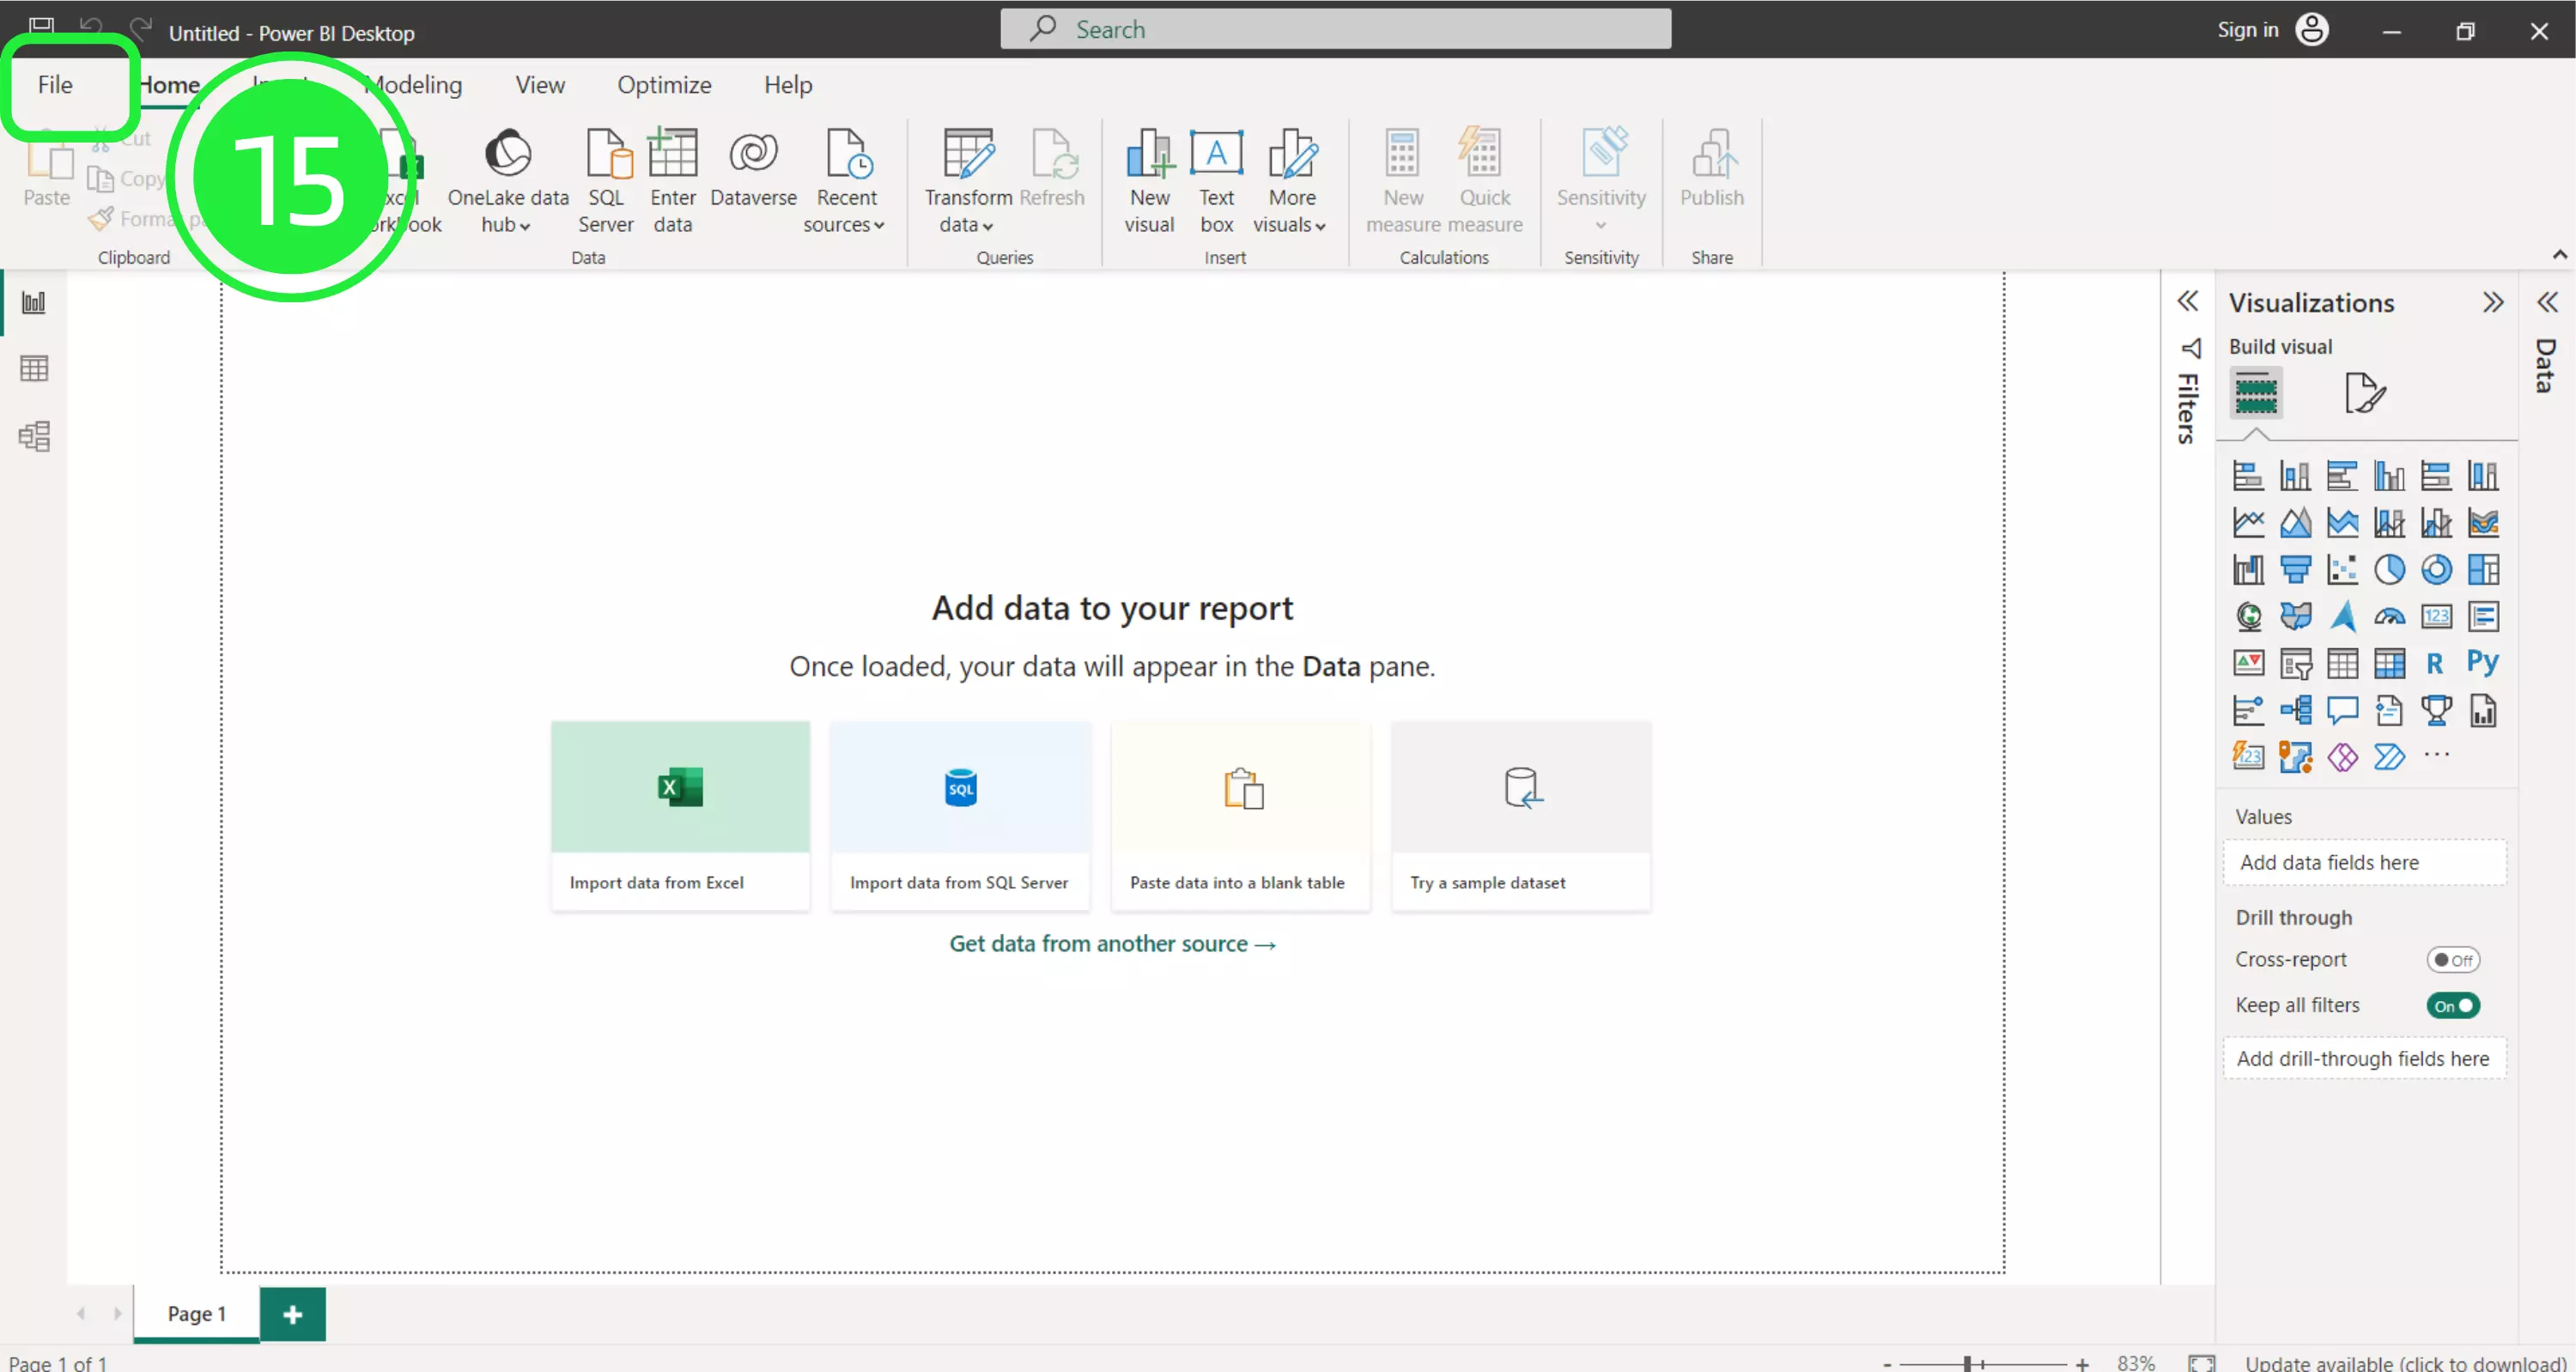
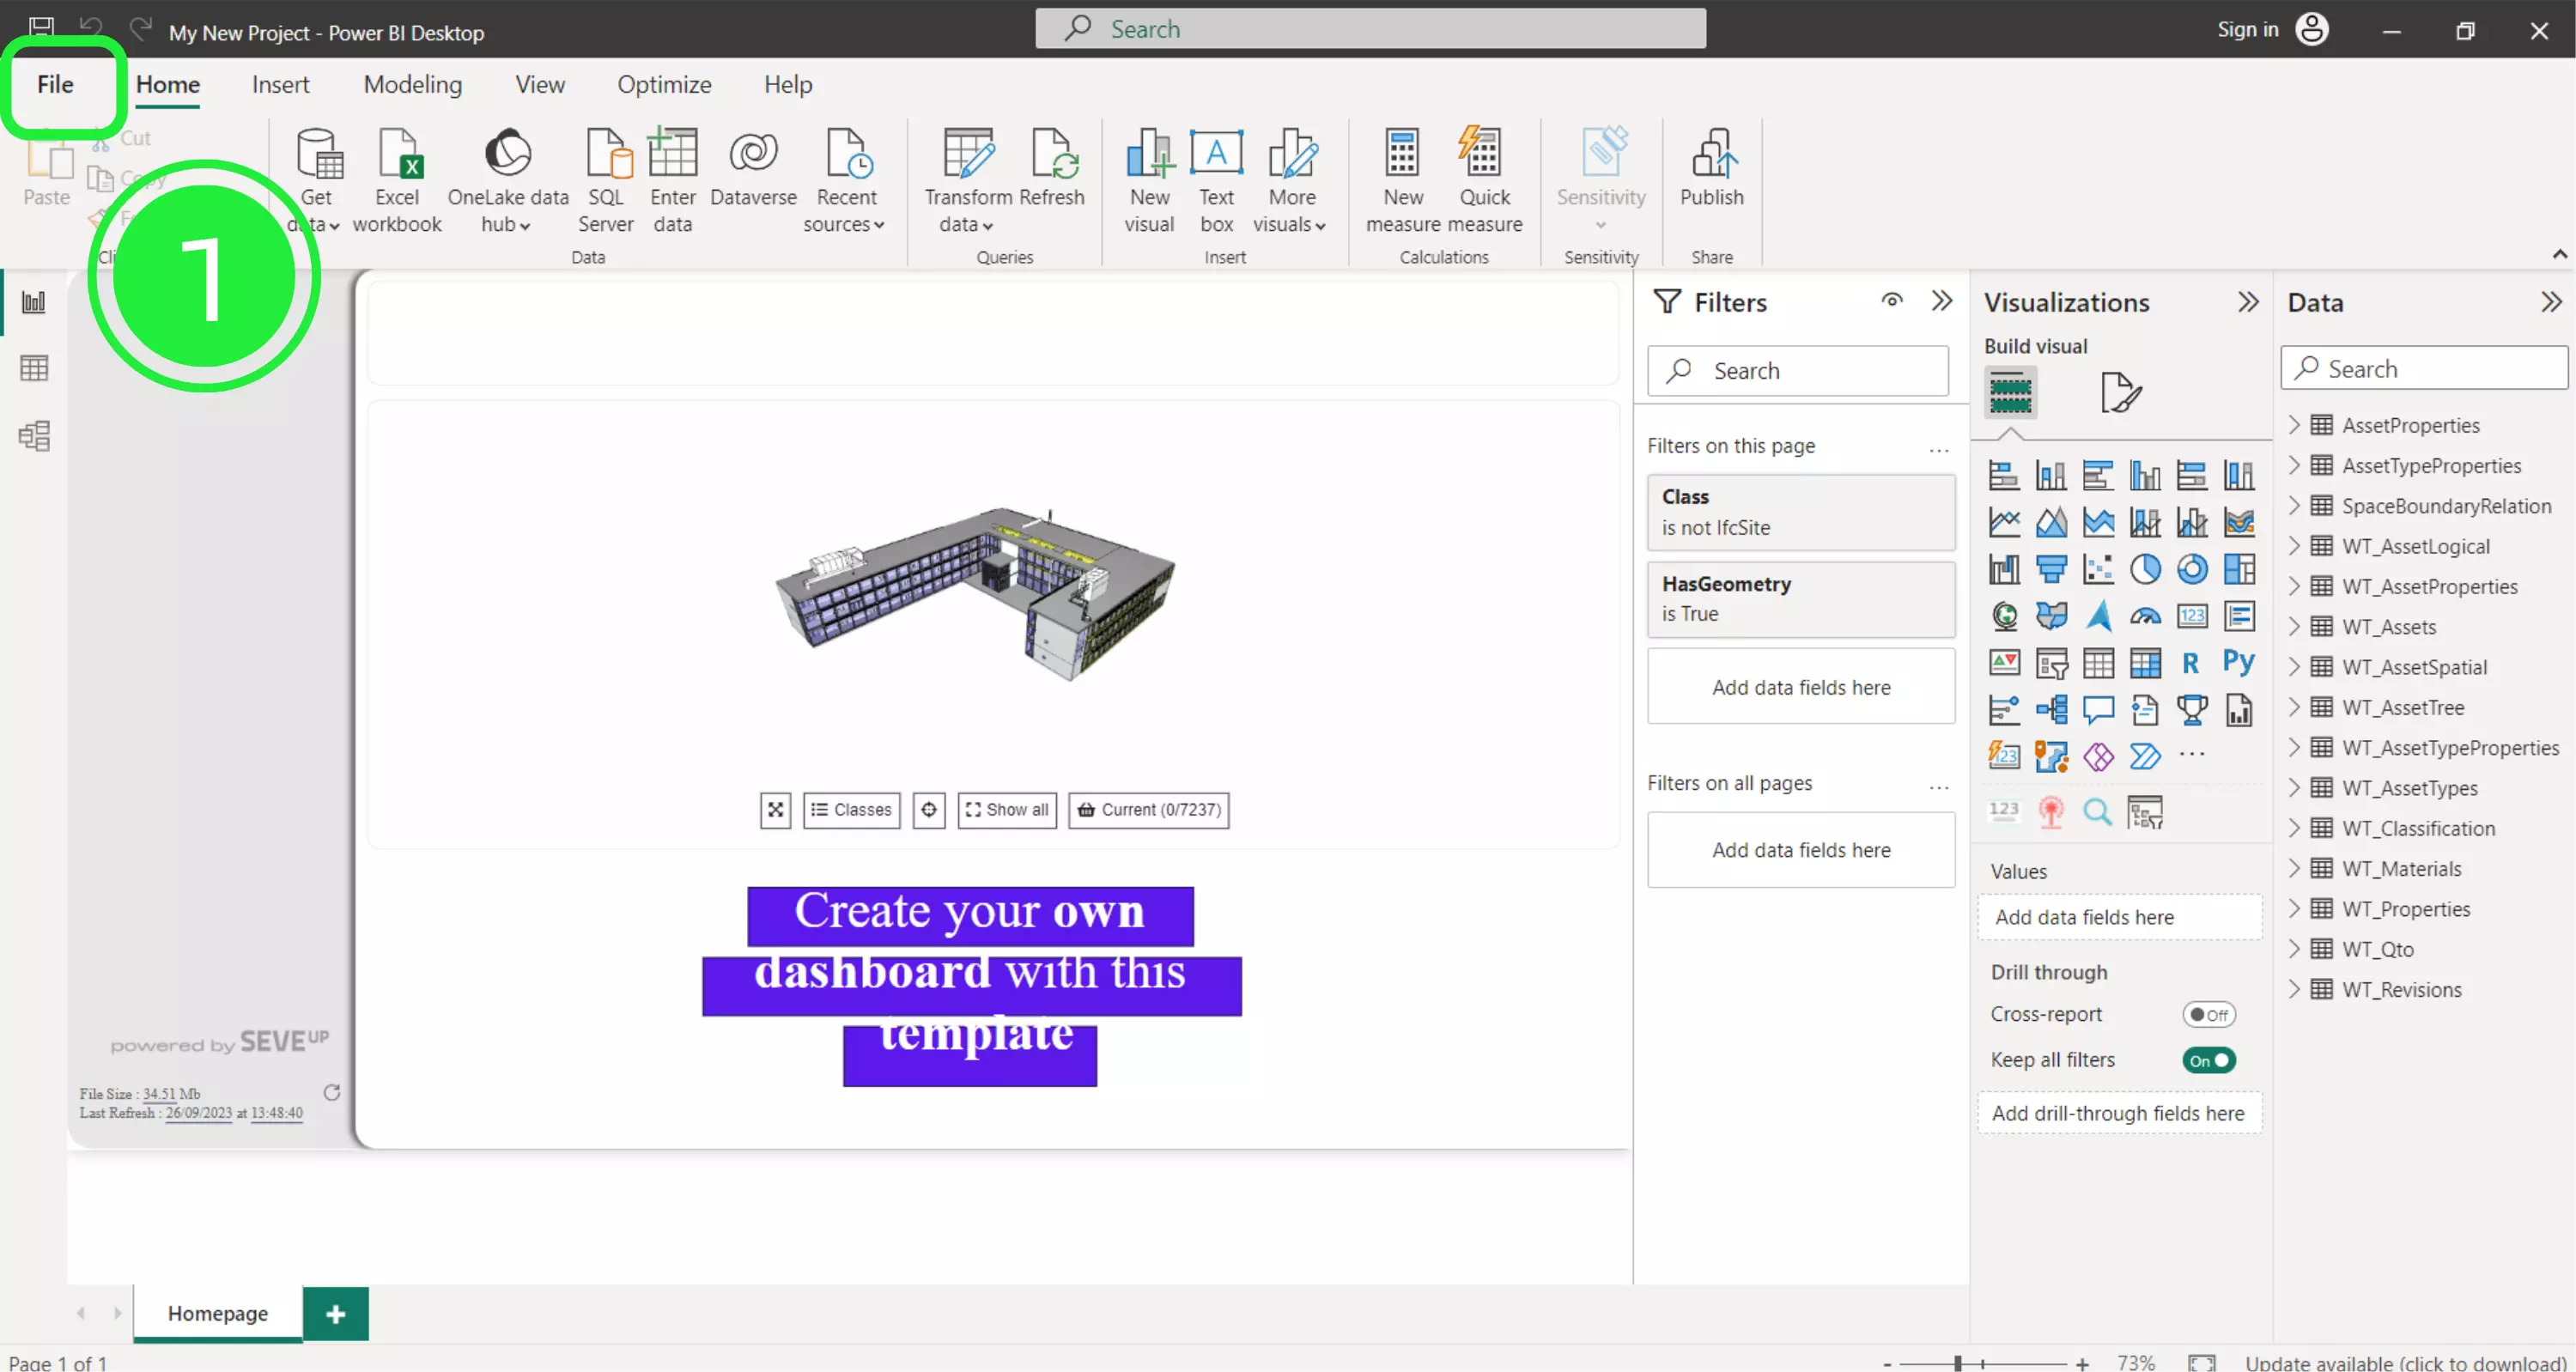
To be able to import your new dashboard to Microsoft Power BI, you’ll first have to open Microsoft Power BI. Then click “File” in the navigation menu in the top-left corner of the page.
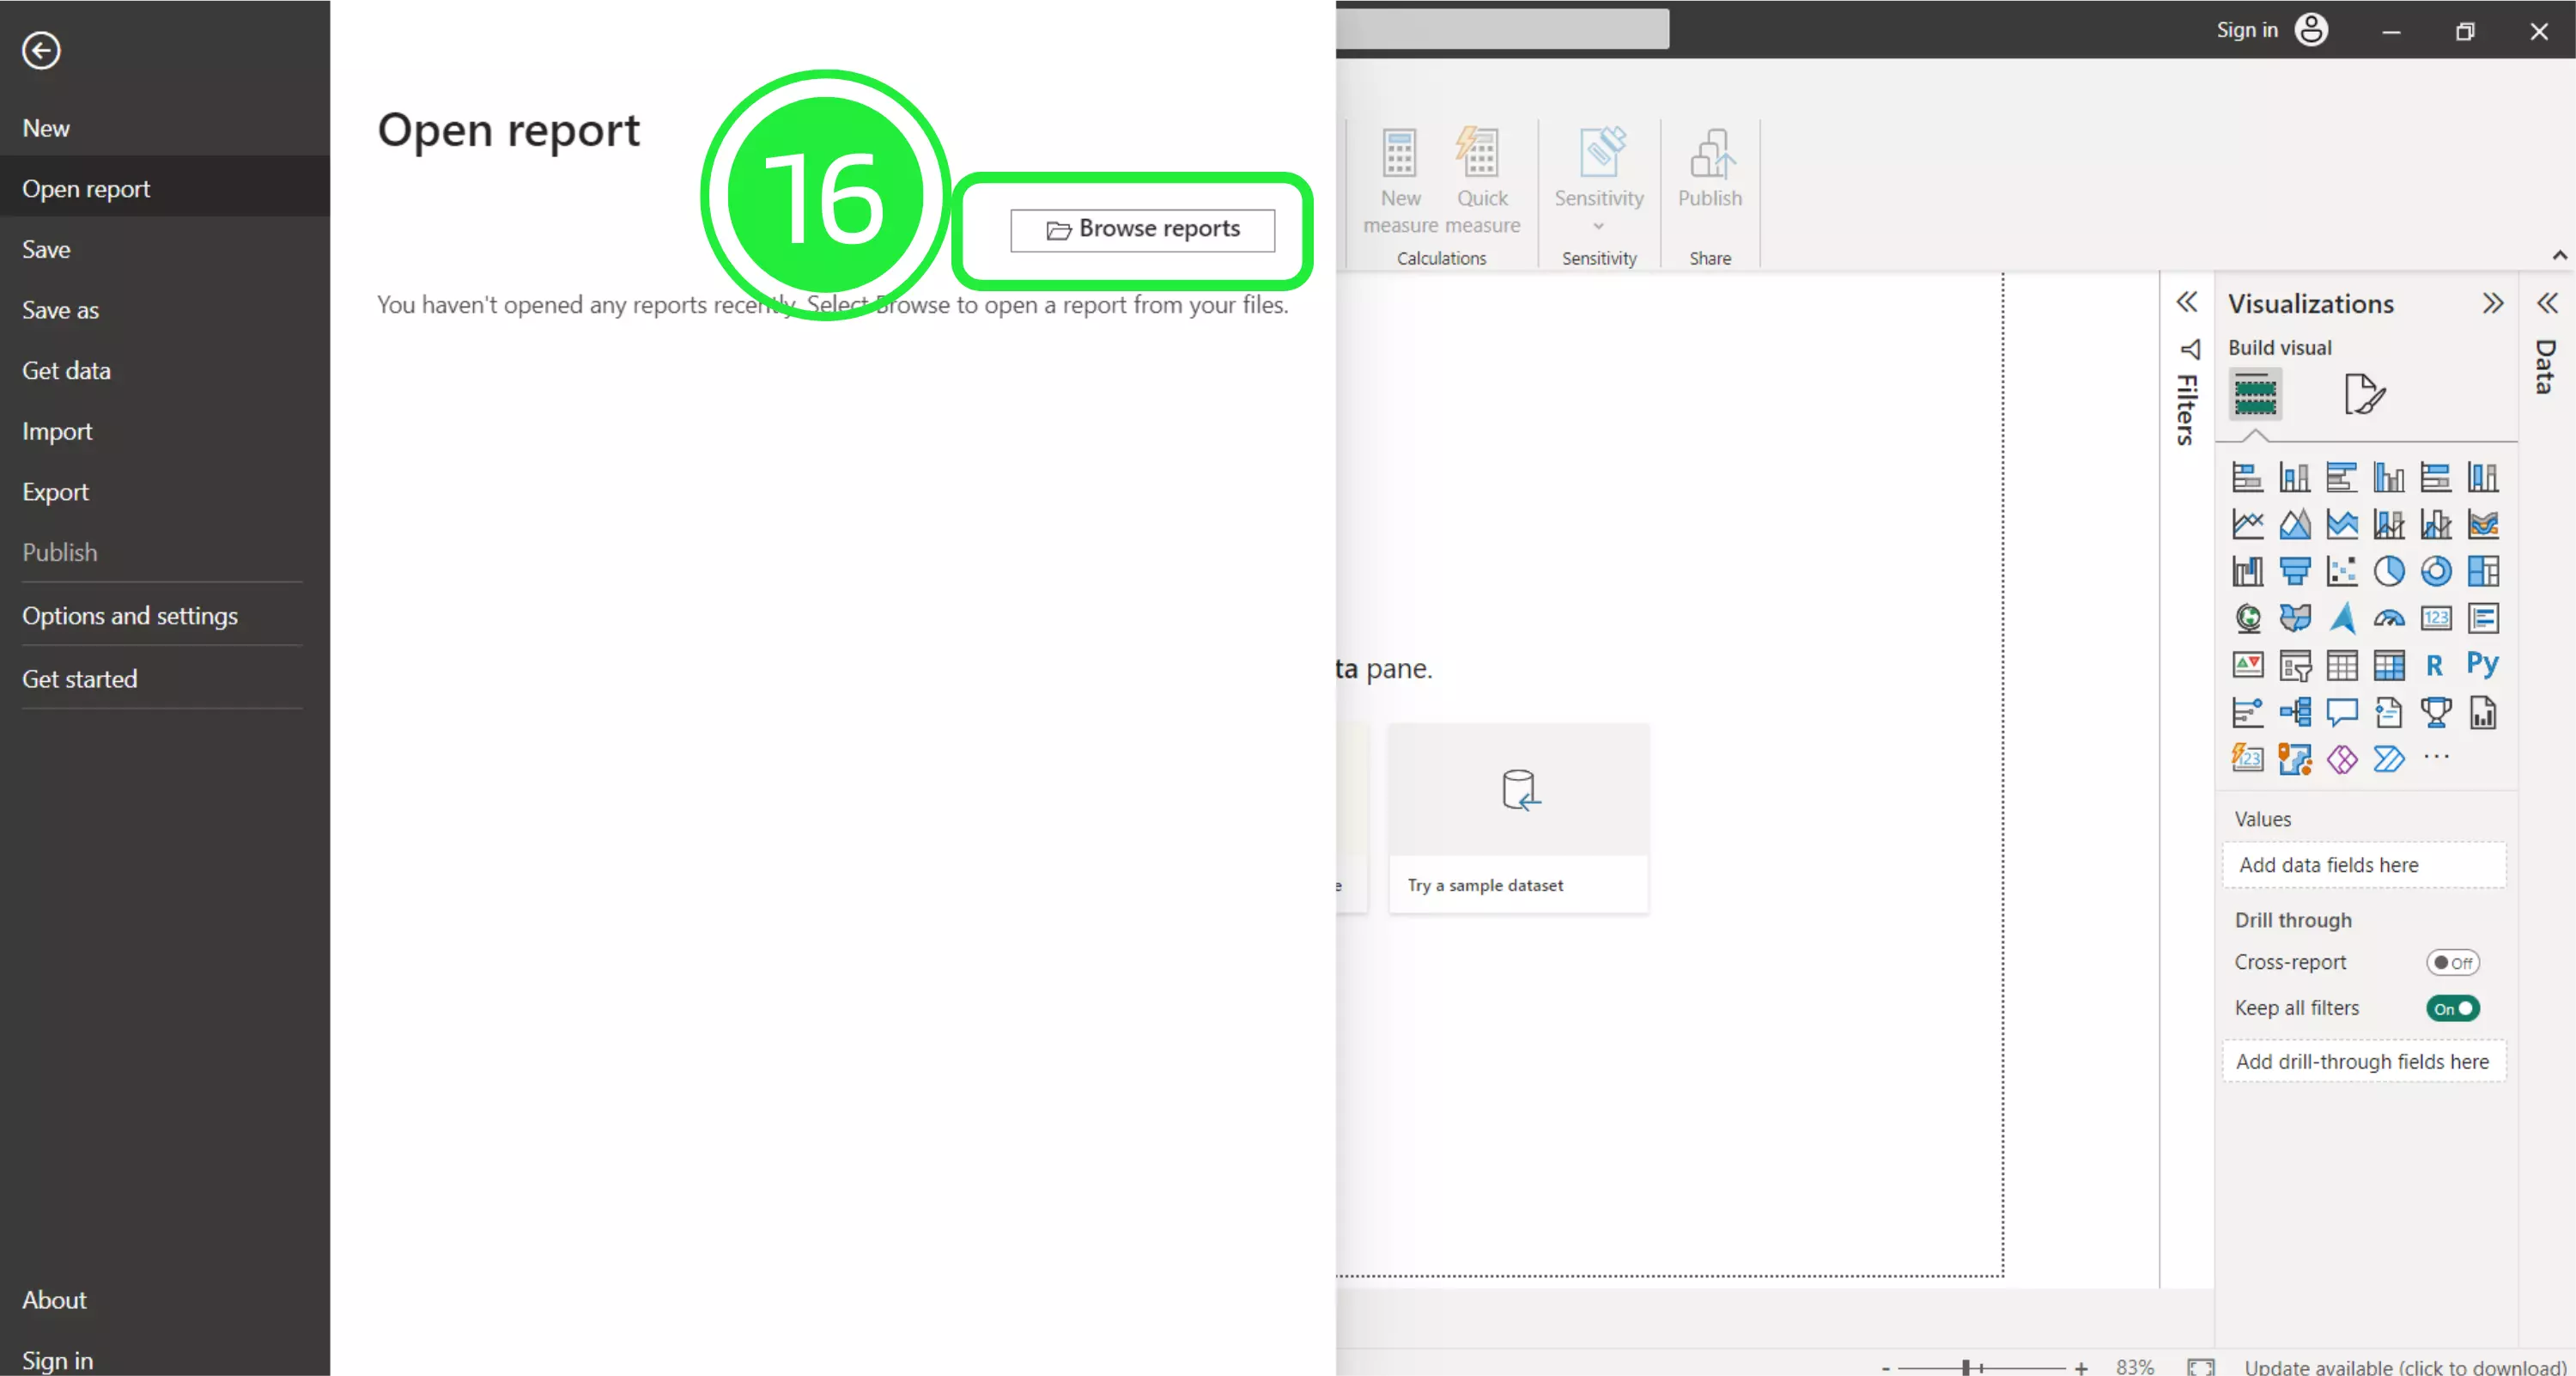
To find your dashboard file, go to Open report and click the “Browse reports” button to search for your newly downloaded dashboard file.
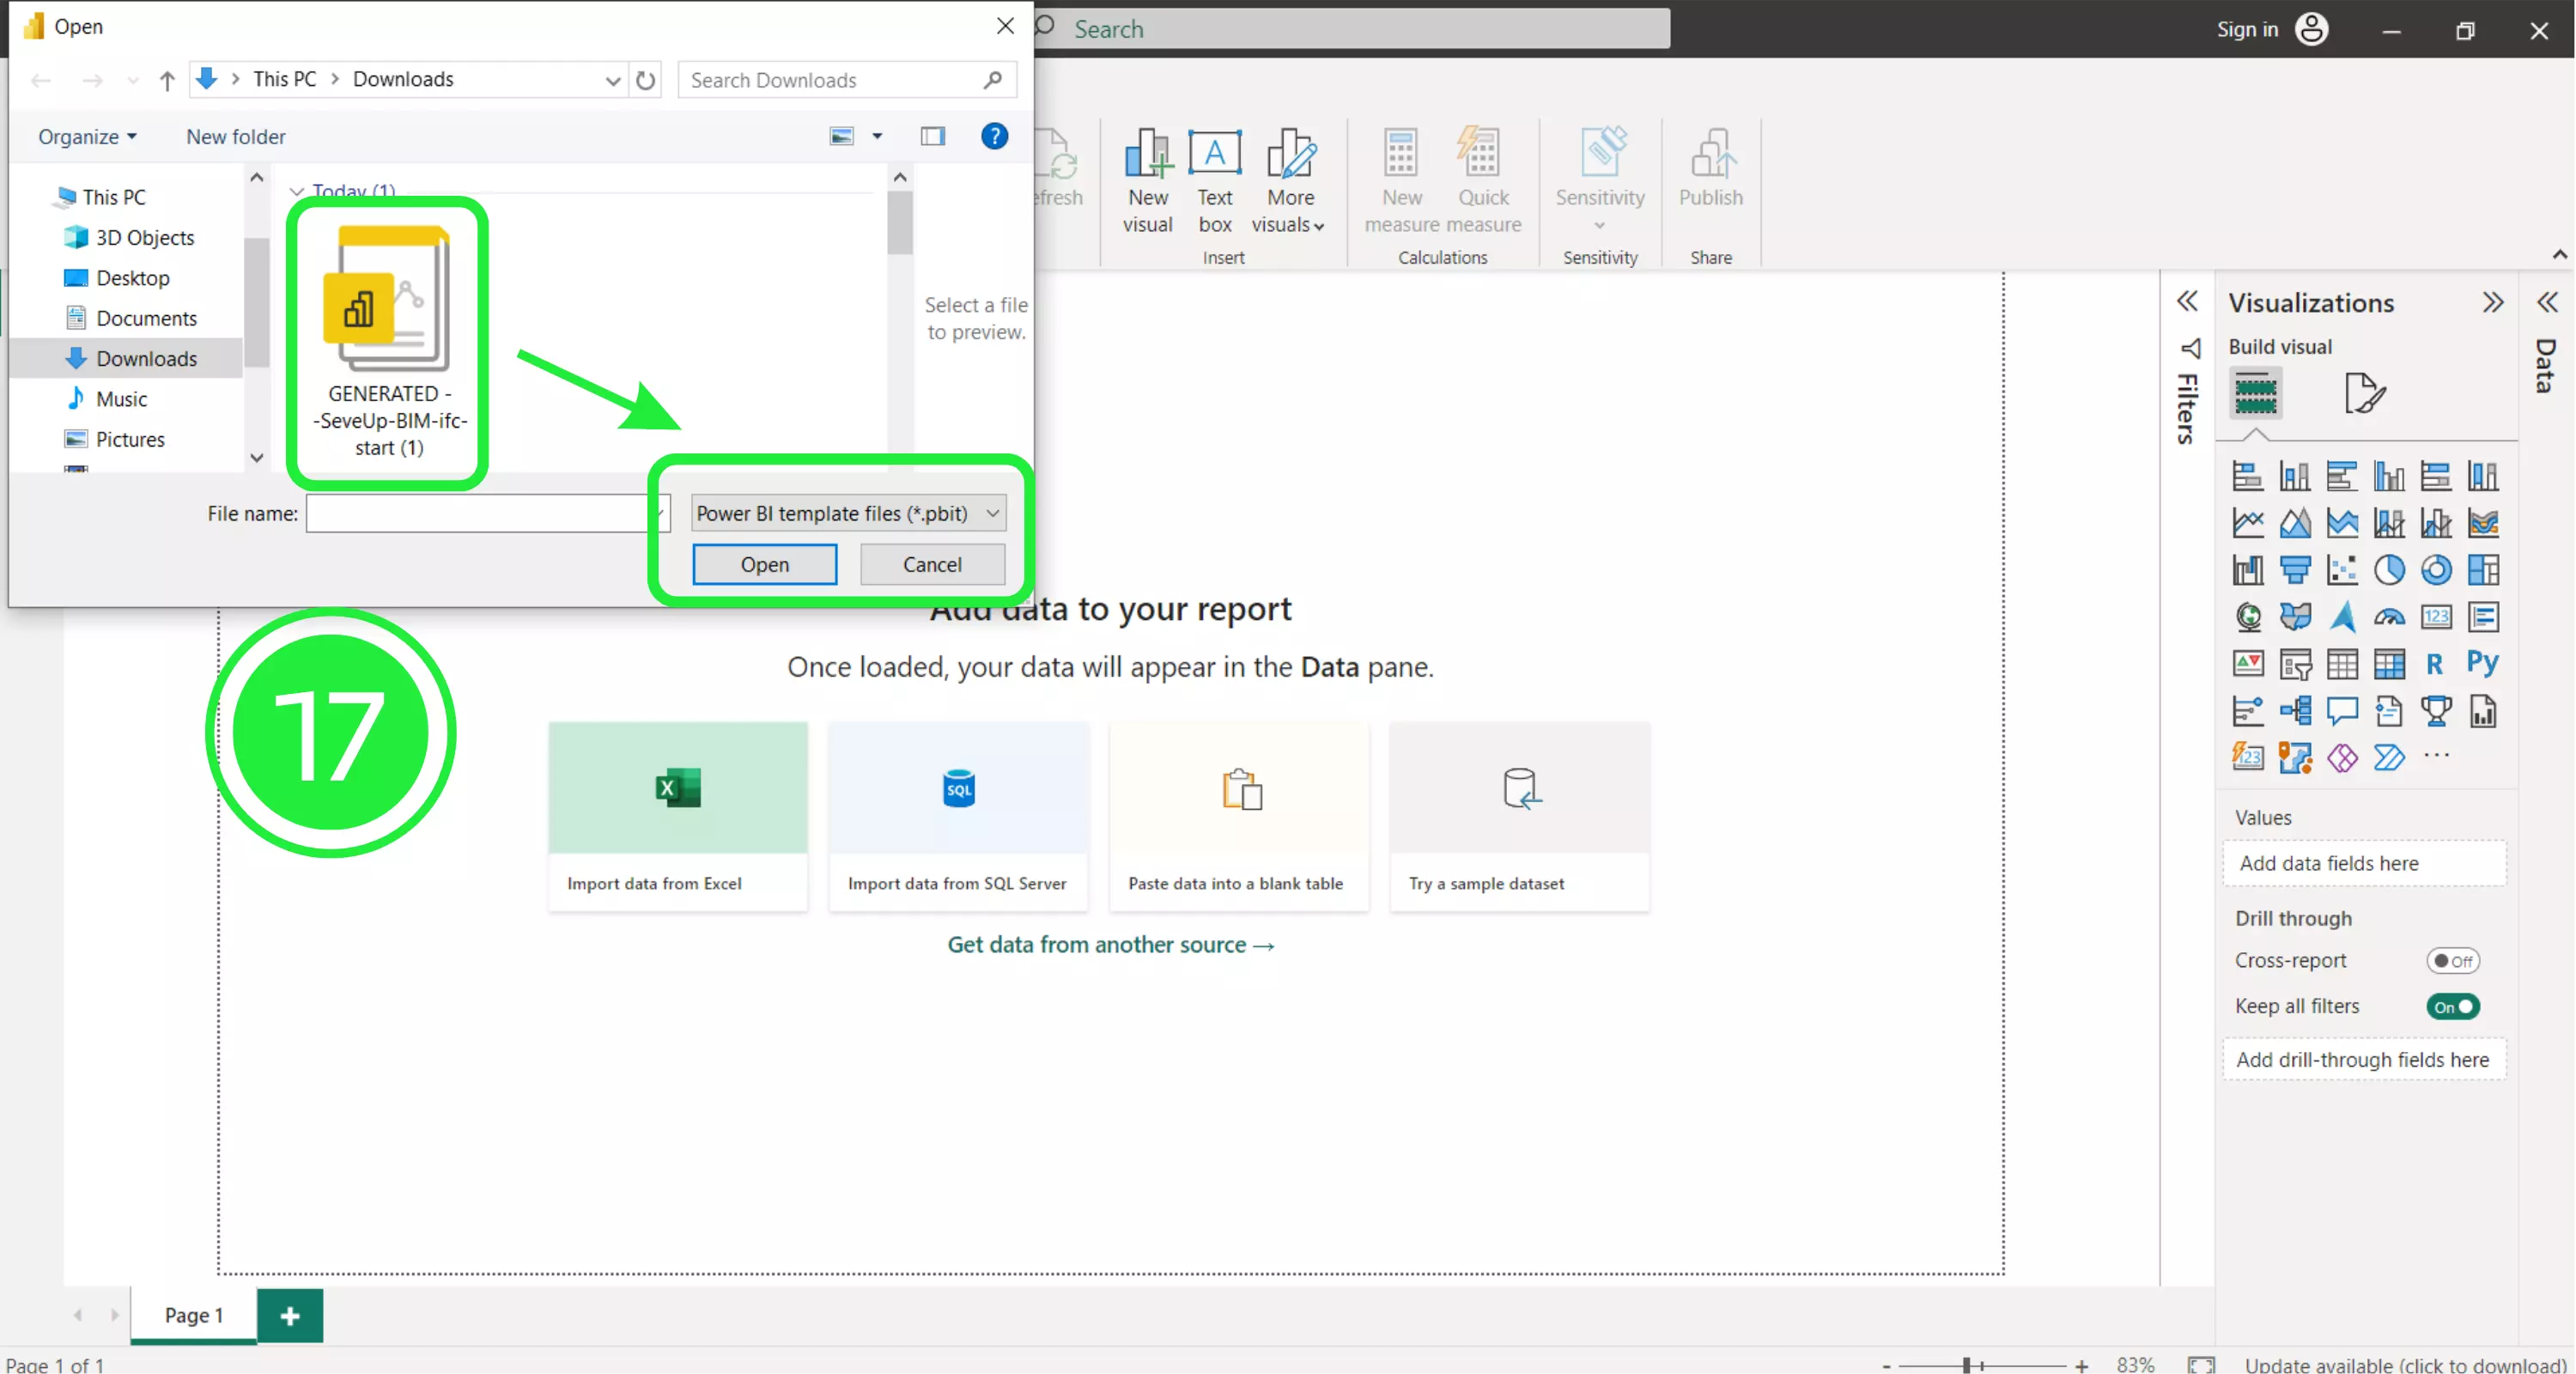
A file browser window will open. In the bottom-right corner next to the file name field, click on the File type dropdown and choose the correct file extension: Power BI Template Files (*pbit). Once selected, all the files of this type will now show in the browser window. Your template from SeveUp automatically downloaded to your system’s Downloads folder. To find it, click “Downloads” in the left navigation menu and look for your file. Select it with your cursor, then click “Open”.
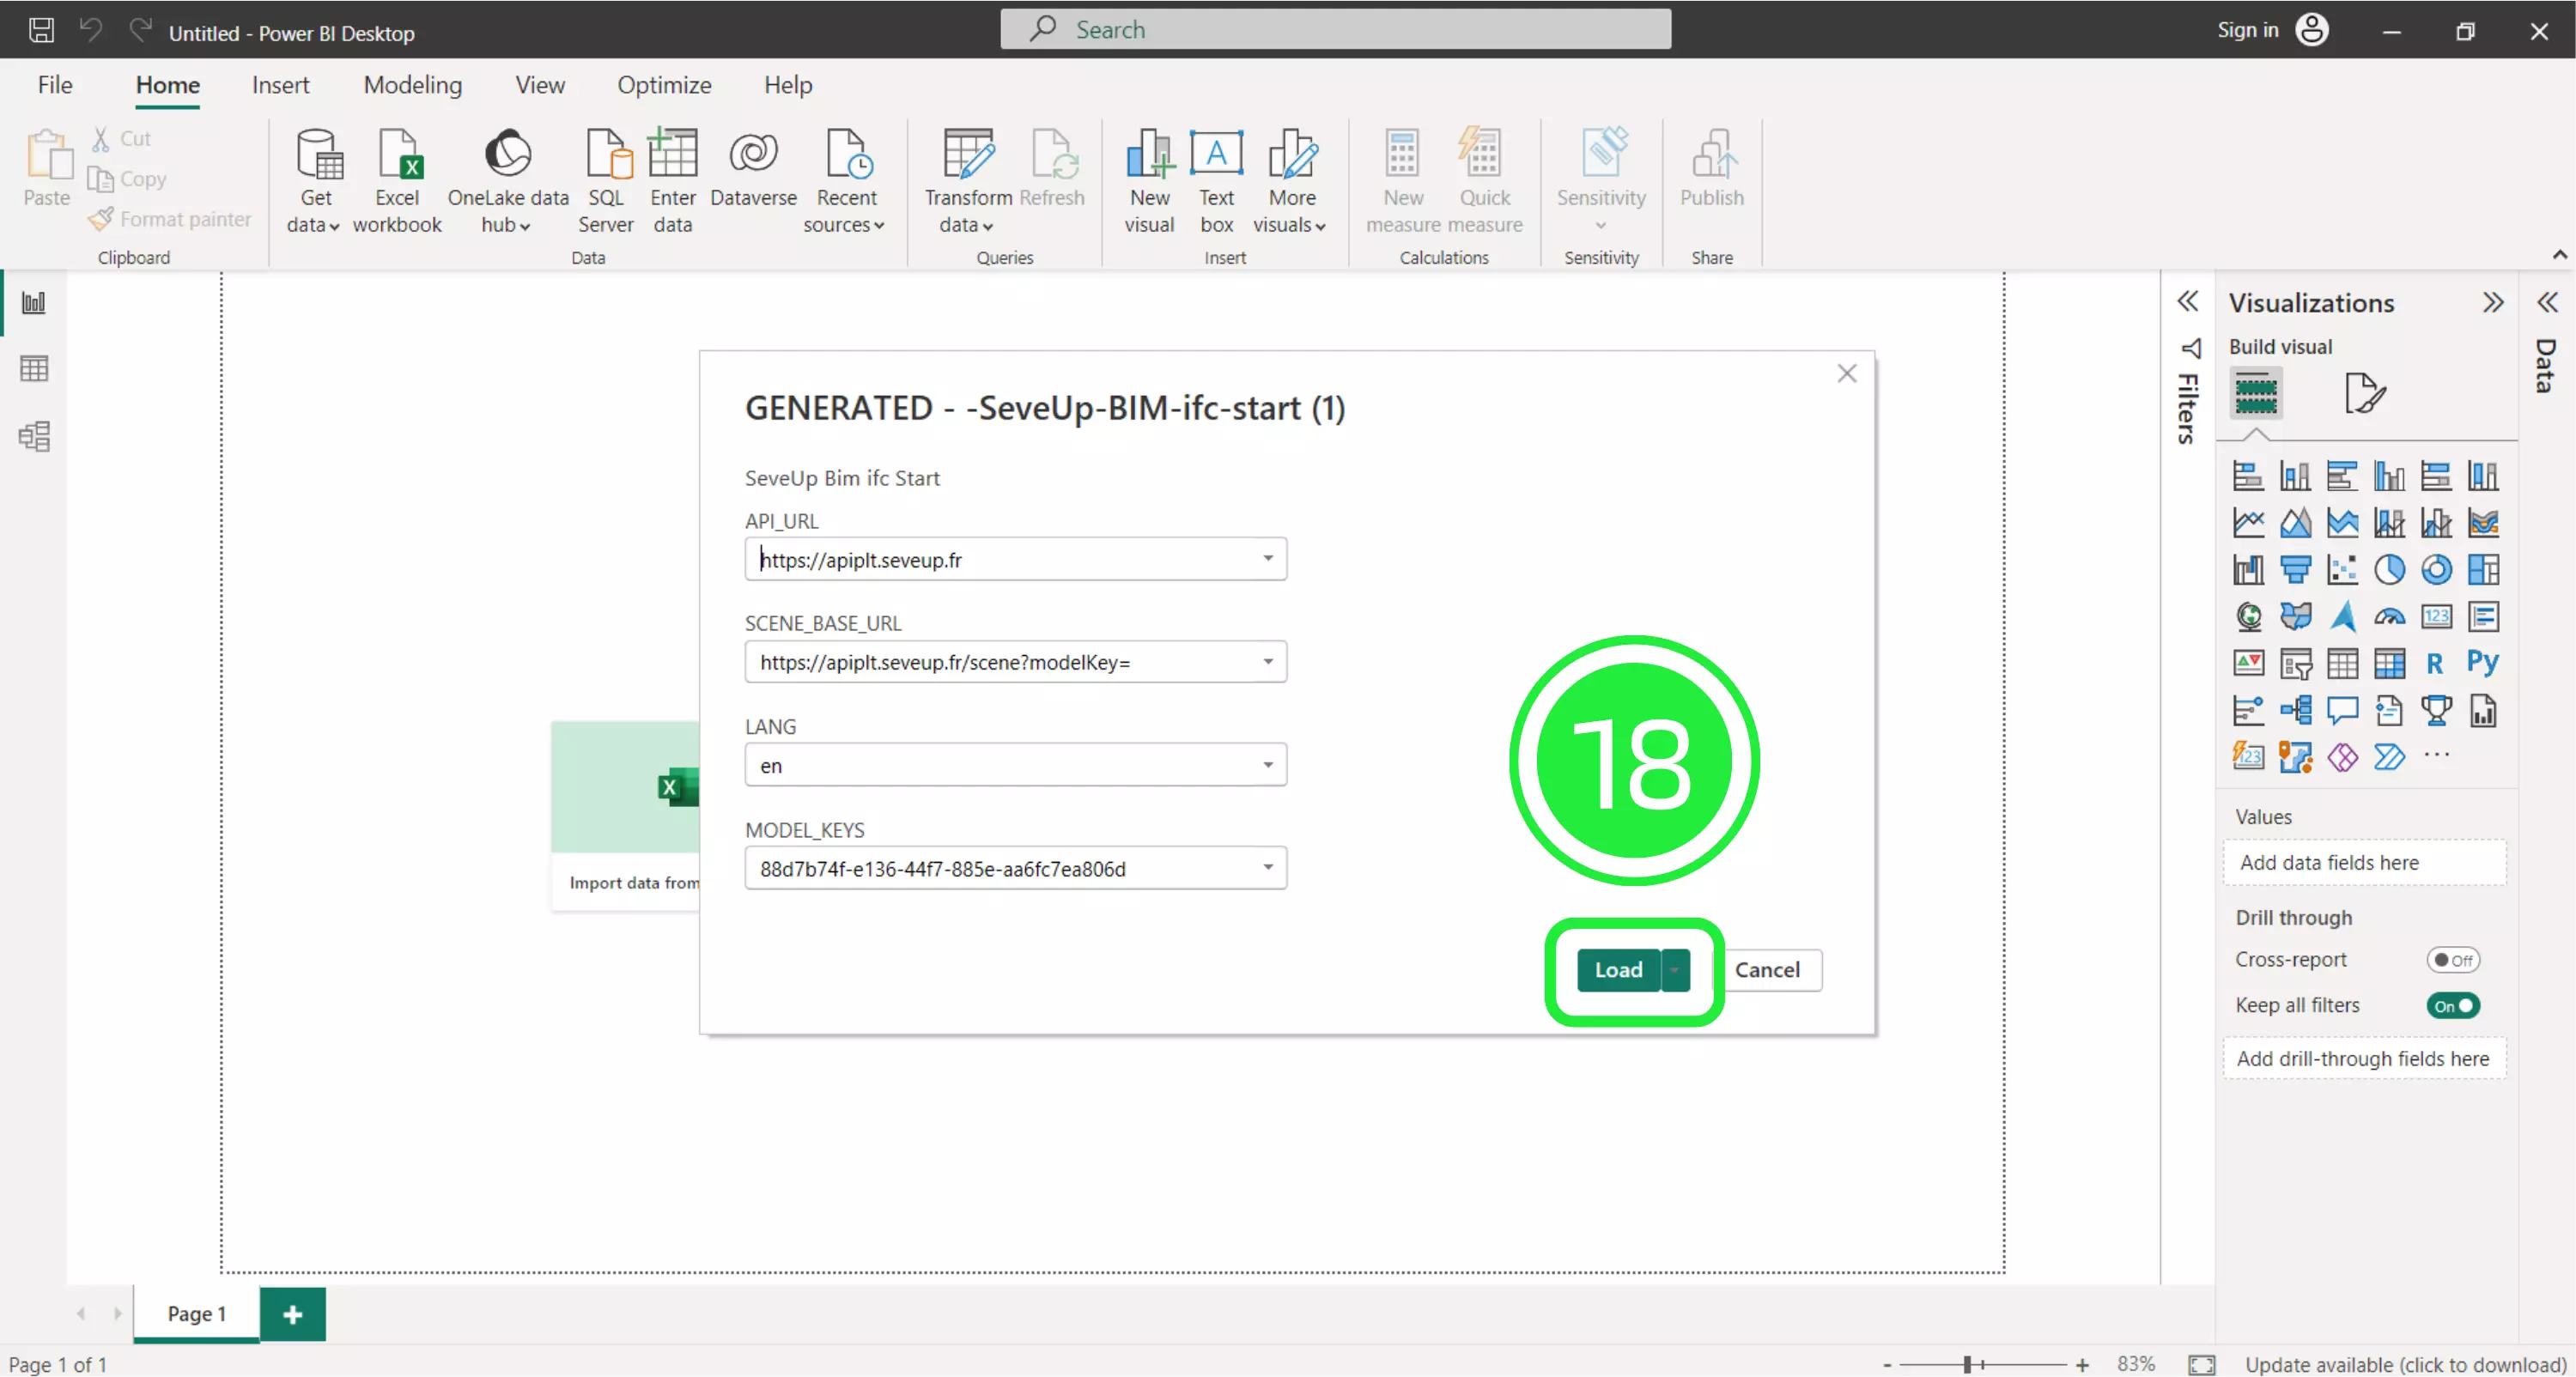
A popup will appear showing the file details. To start loading the file in Power BI, click “Load”. Once your new dashboard template has loaded, it will populate the Power BI interface with all the BIM data that was in the files you added.
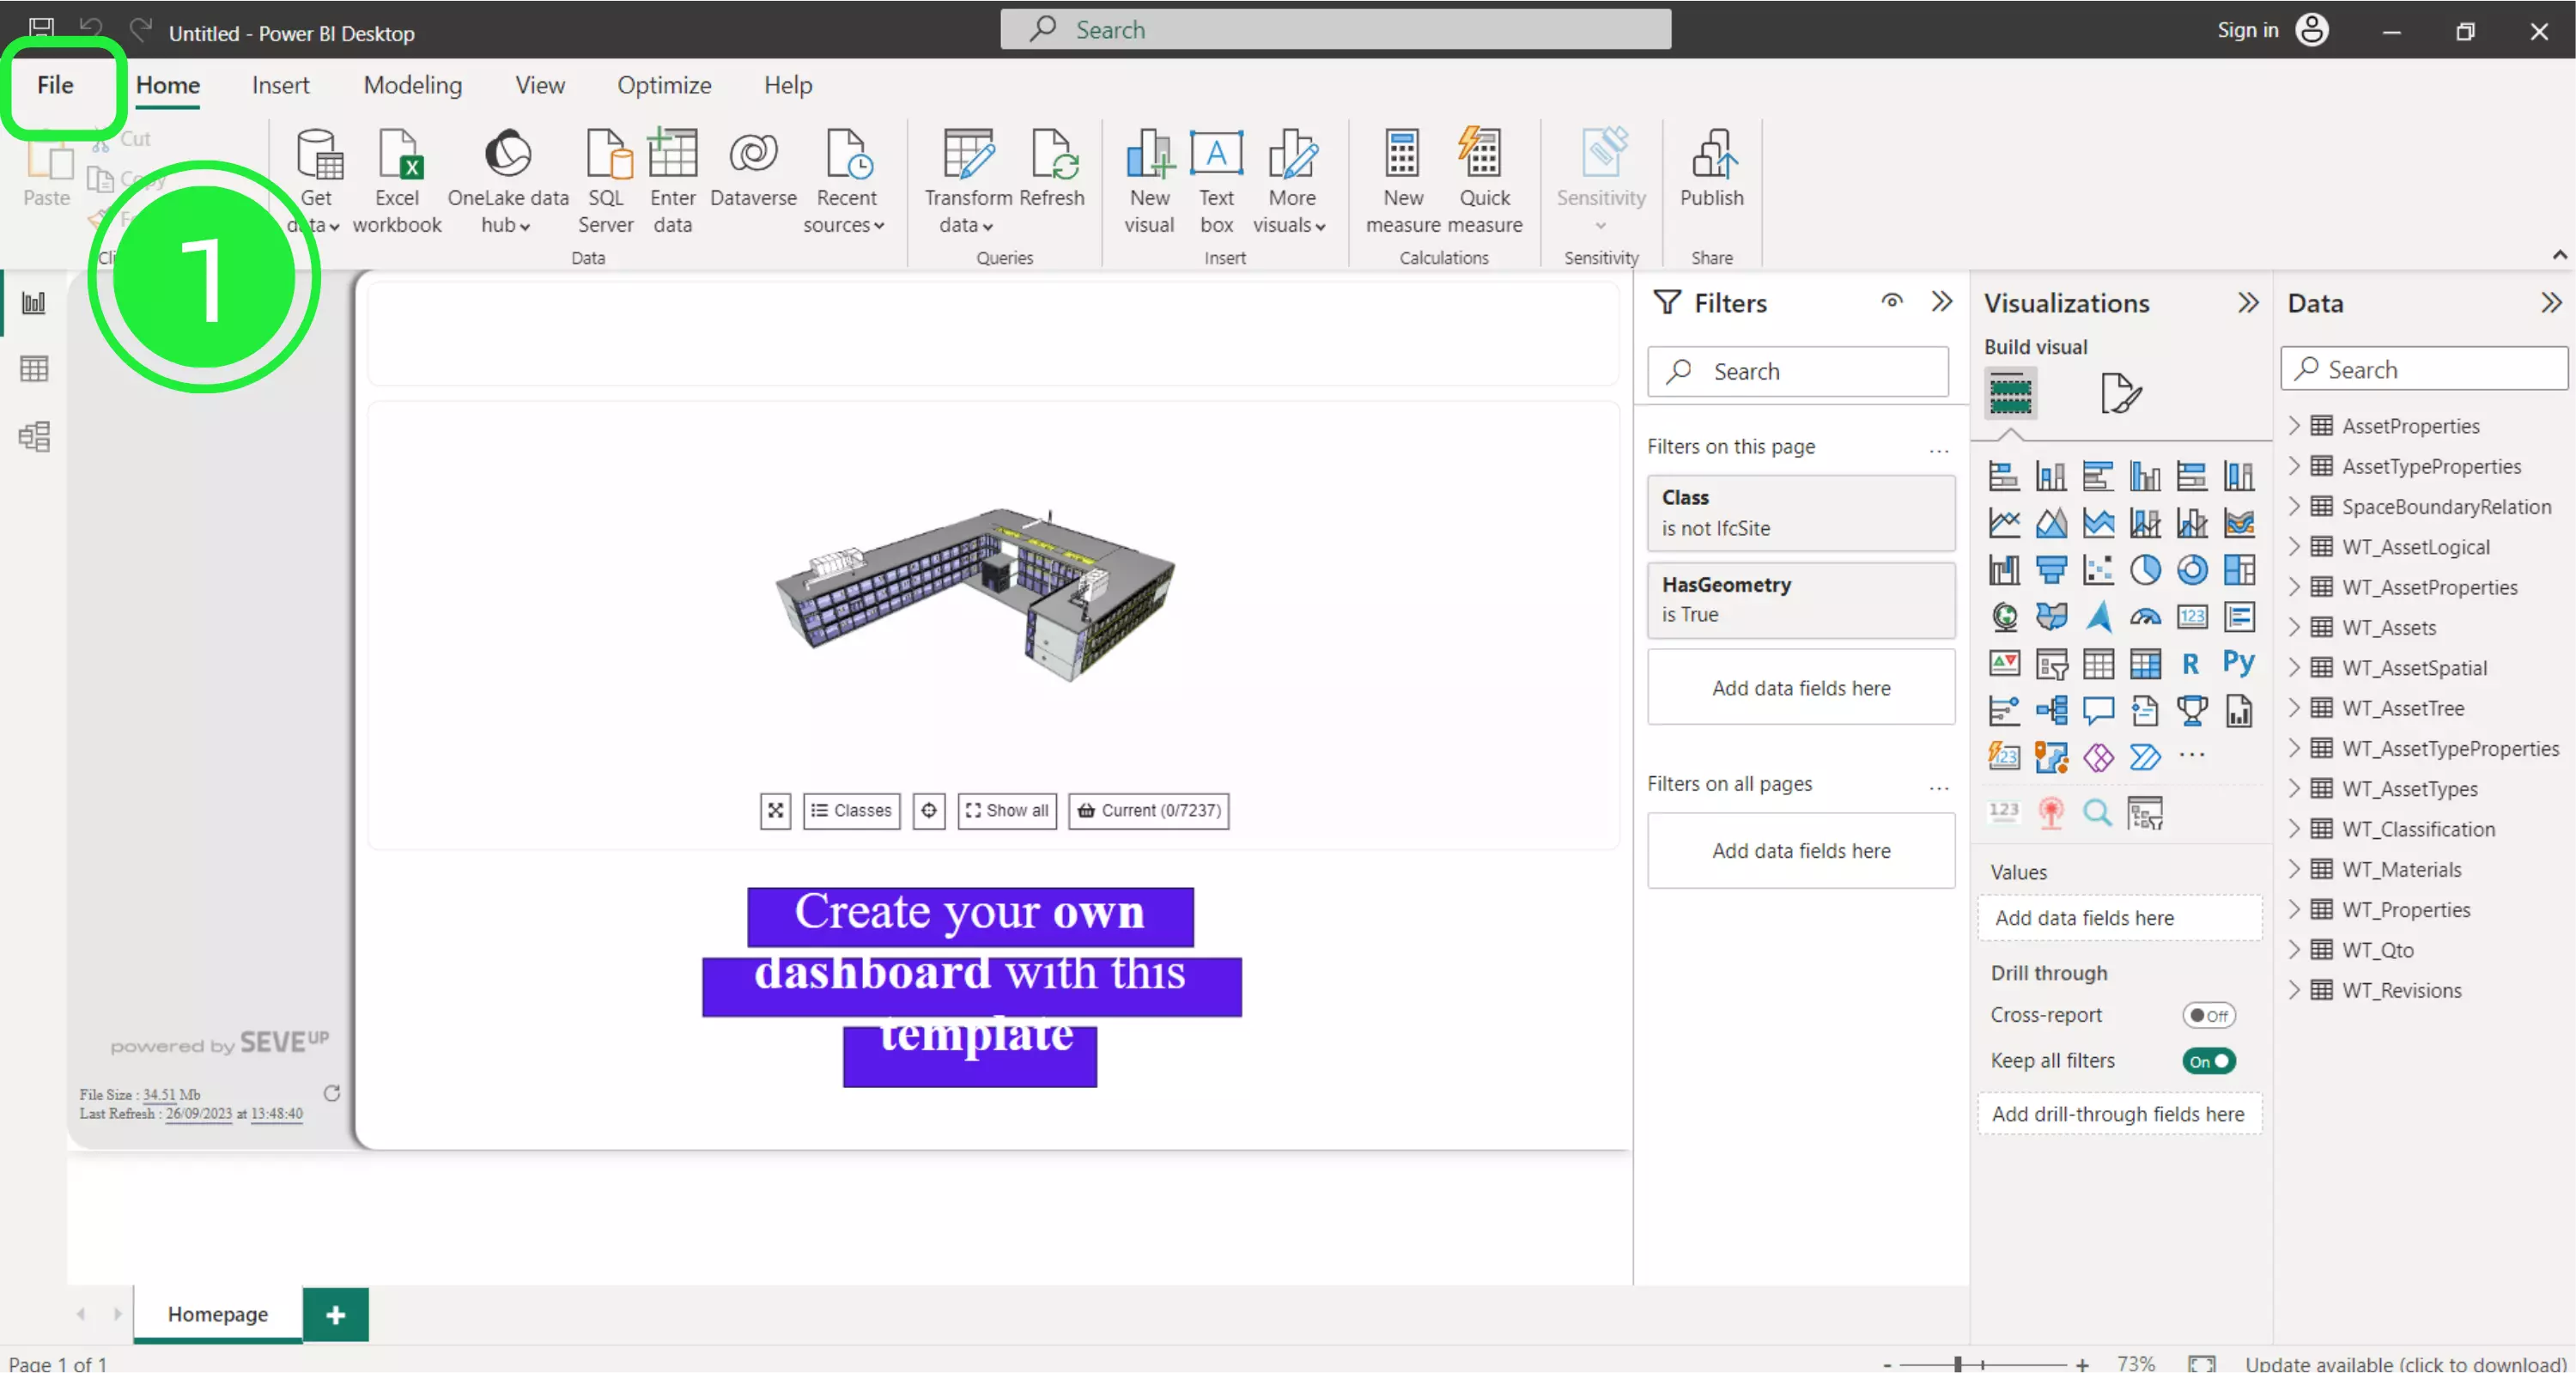
To save your imported SeveUp template as a Power BI project file that you can work on in Power BI, click on “File” in the top-left corner of the Power BI window.
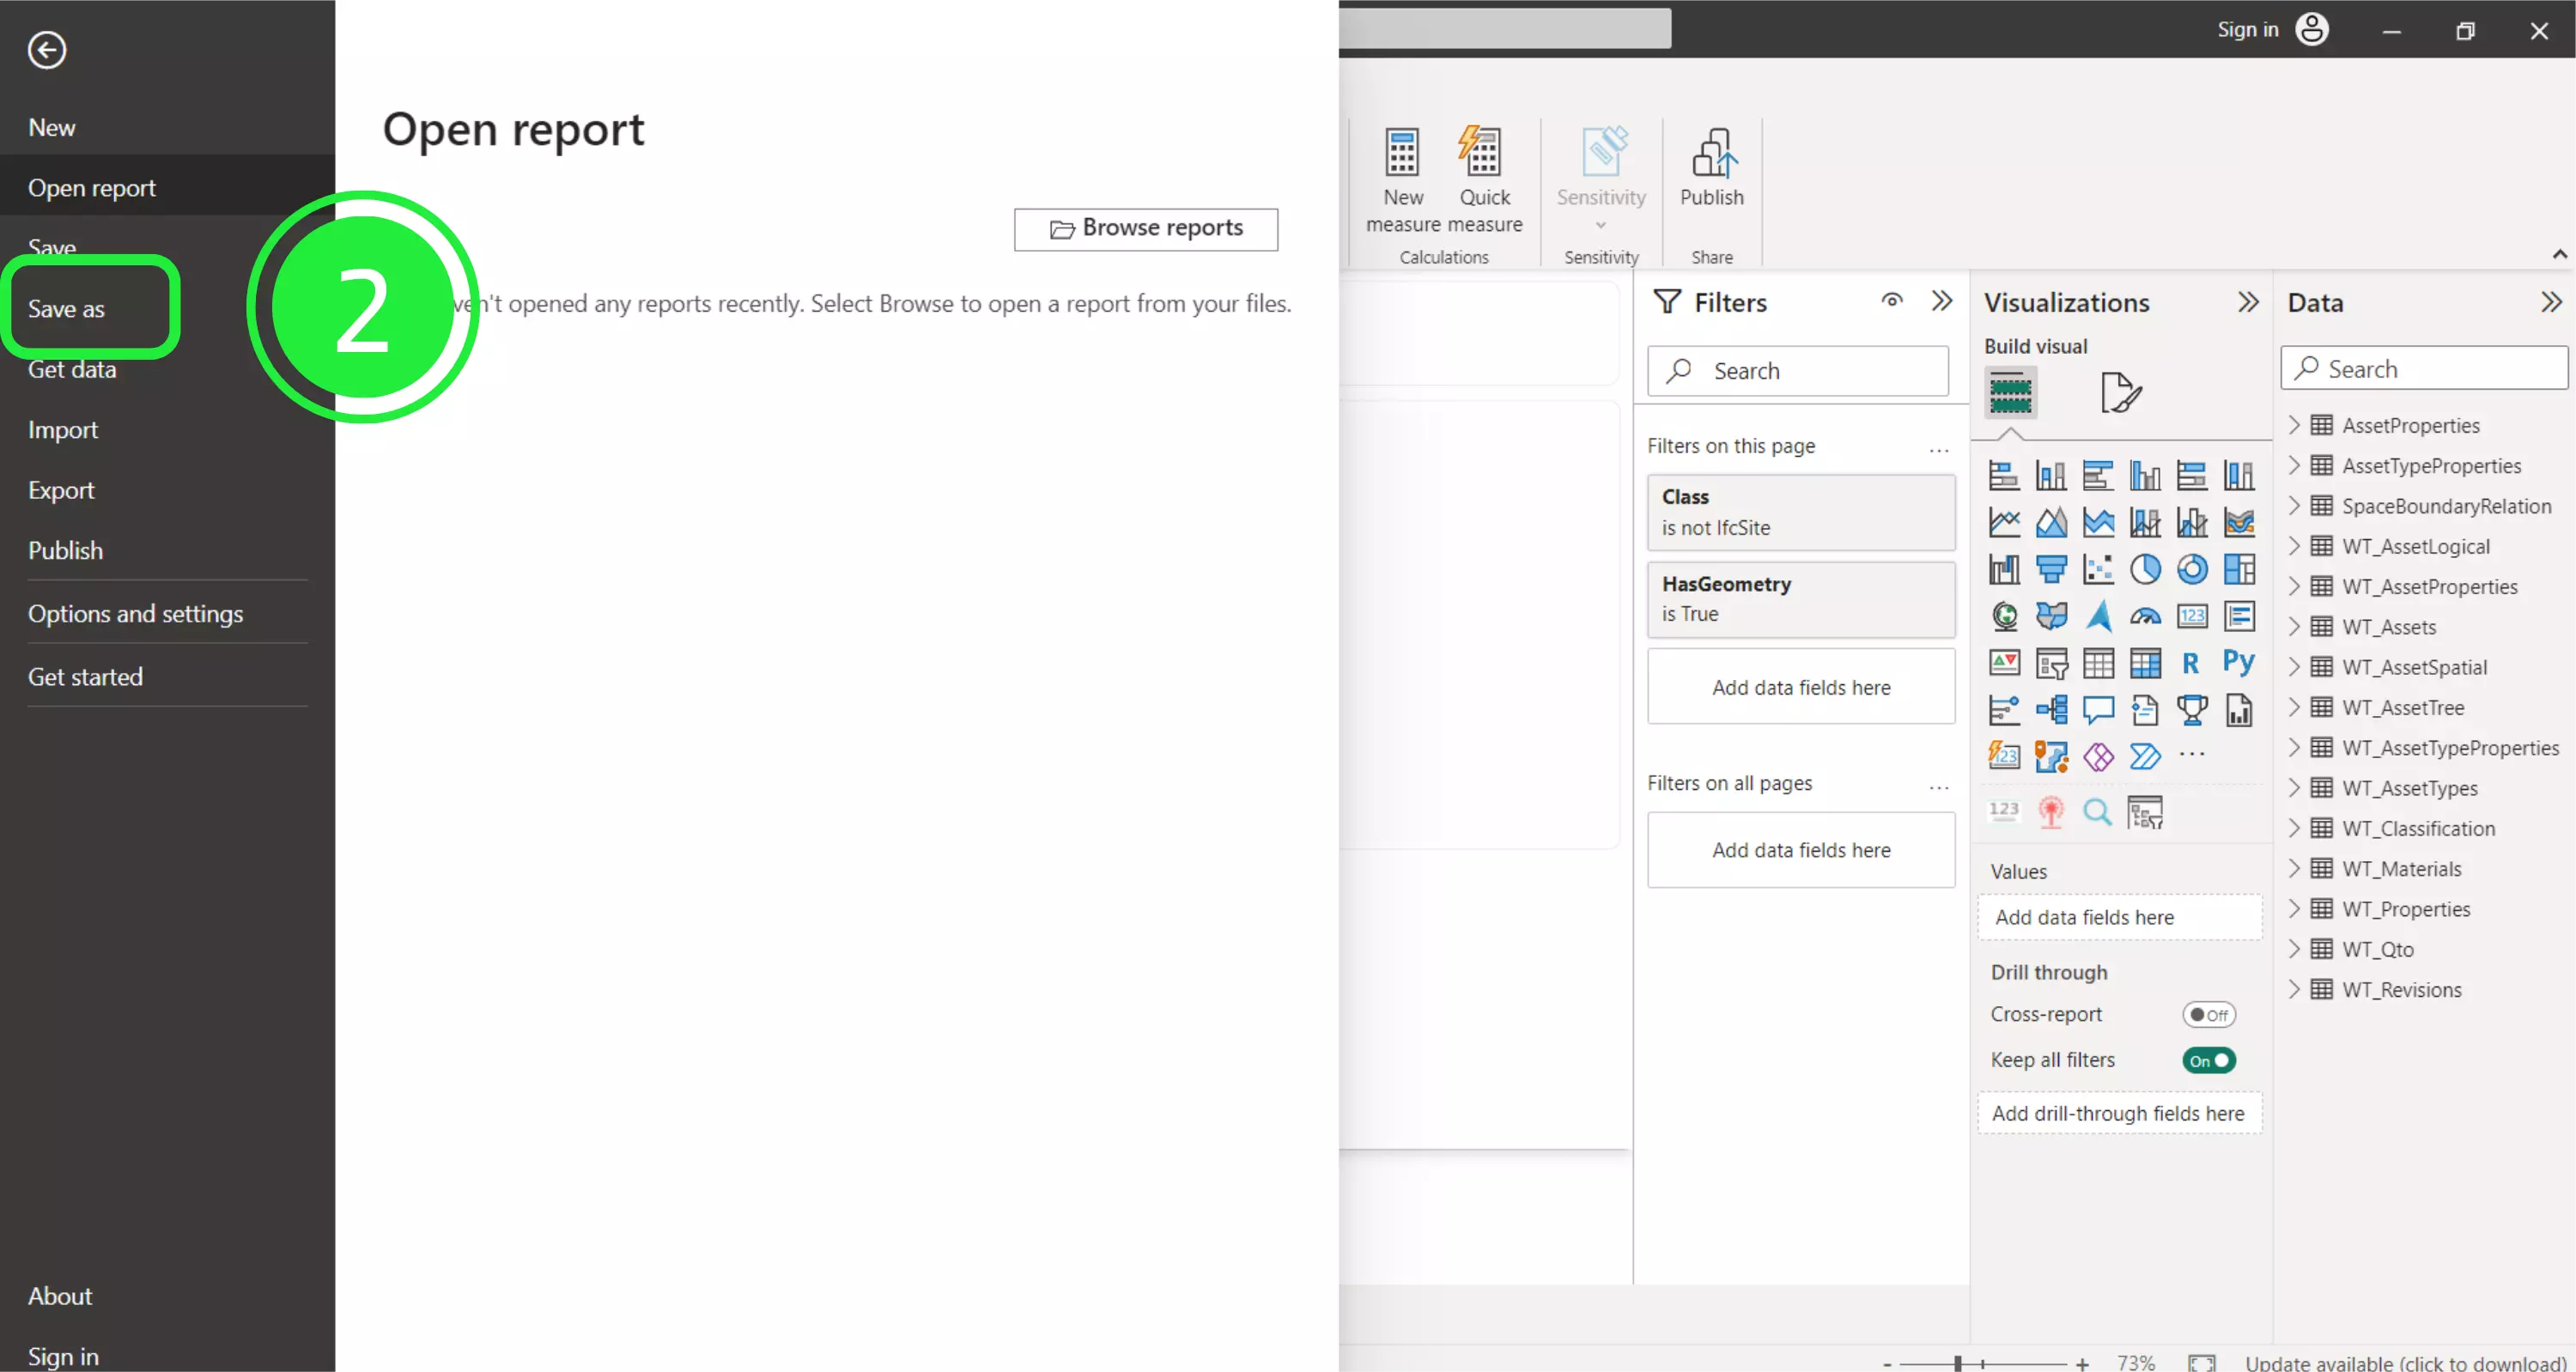
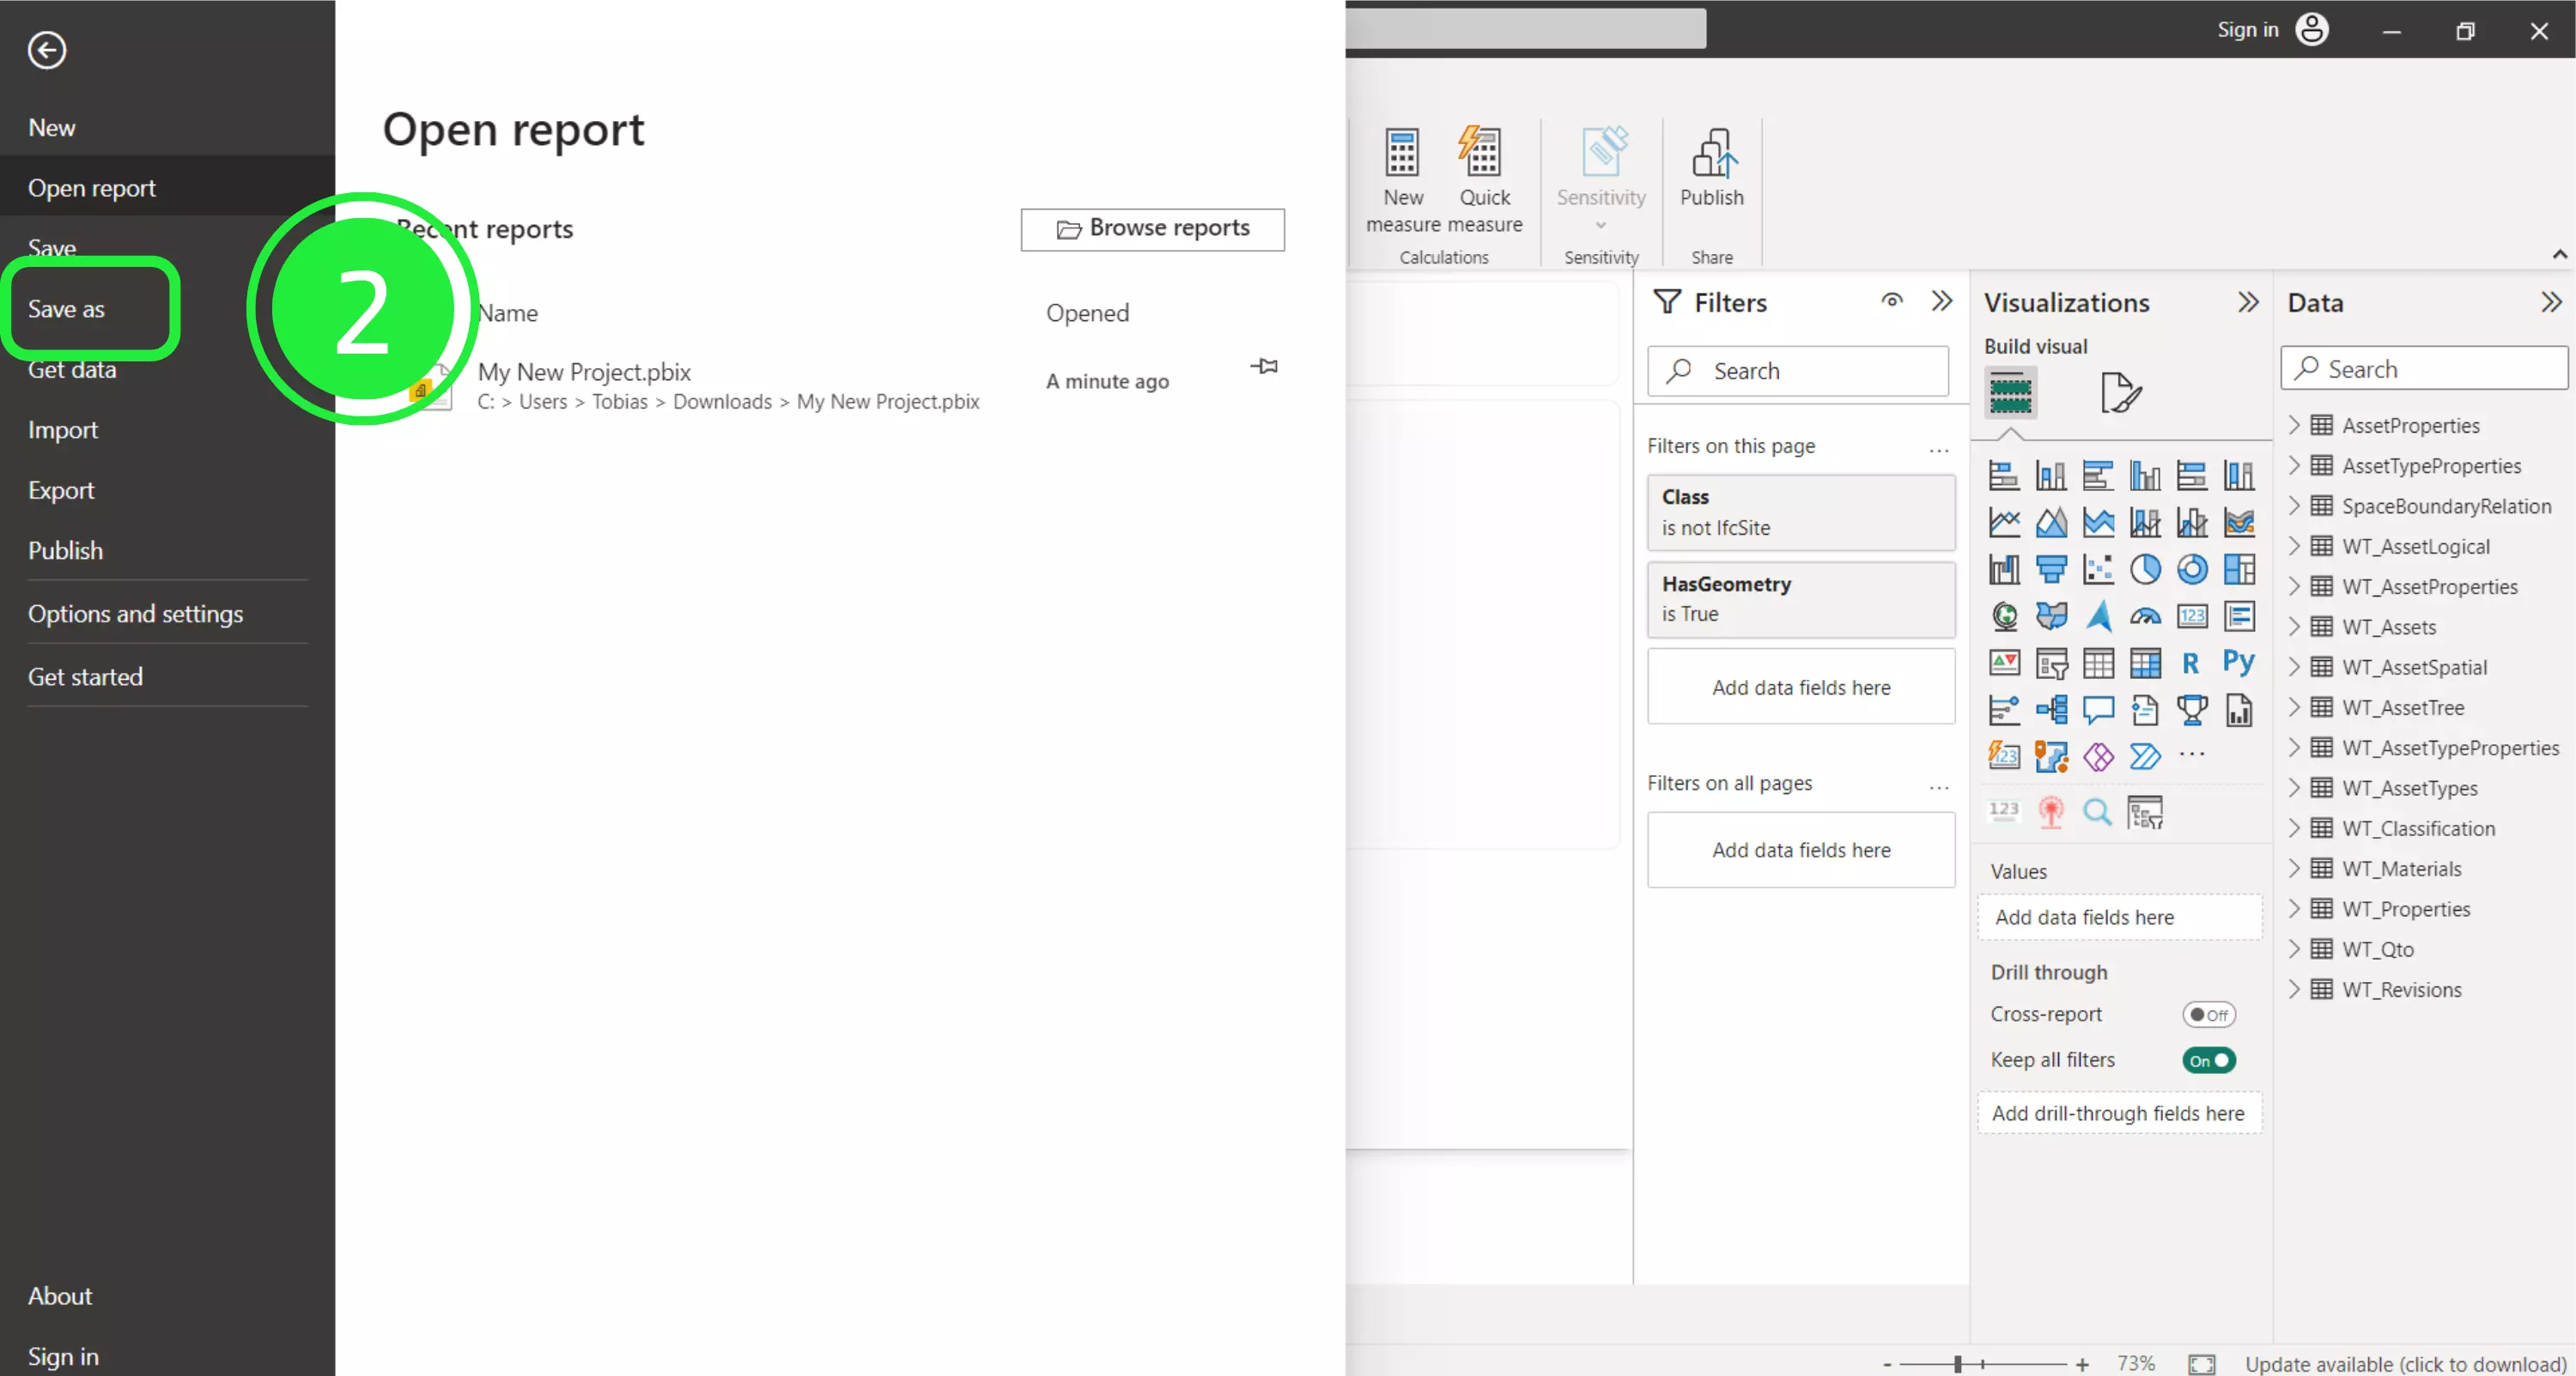
To save the project file while keeping the original intact, click “Save as”.
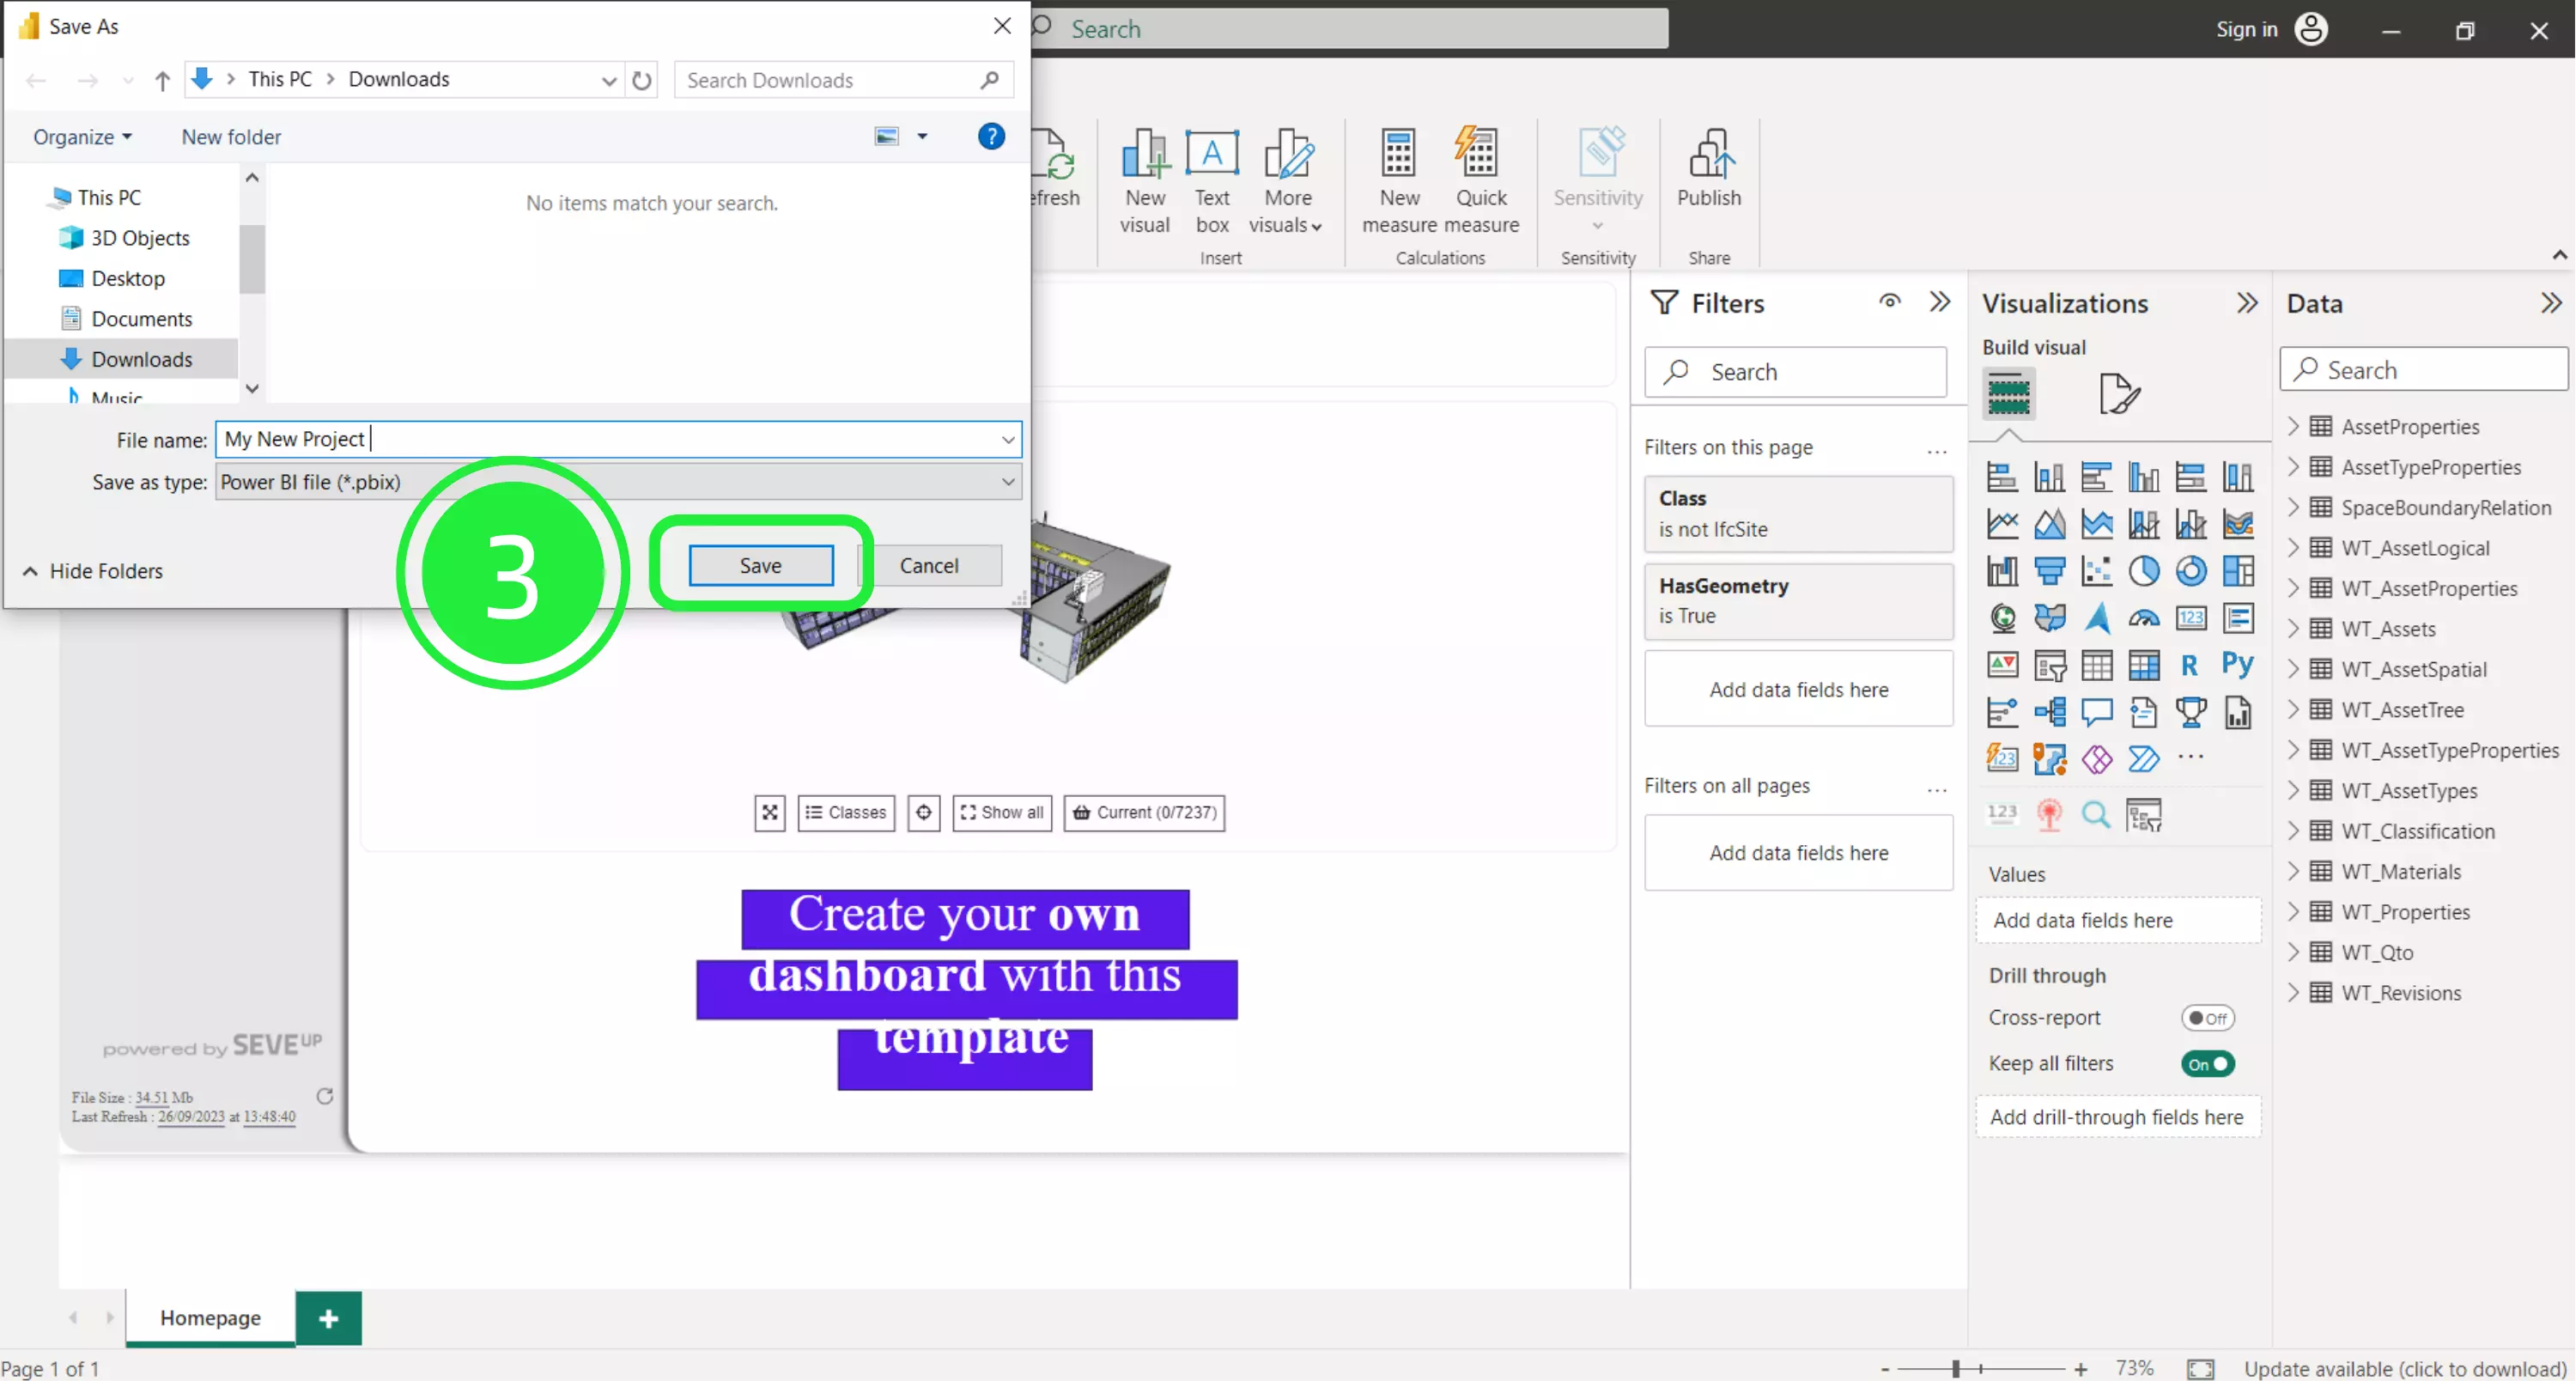
Choose a meaningful name for your new project and make sure the “Save as type” is Power BI file (*.pbix). You can also choose where you want to save this new version. Once you’ve determined where to save it and under what name, click “Save”.
Next, to save your project file as a Power BI template file, click on “File” in the top-left corner of the Power BI window.
We now want to save this template version of the file without affecting the project file. To do this, click “Save as”.
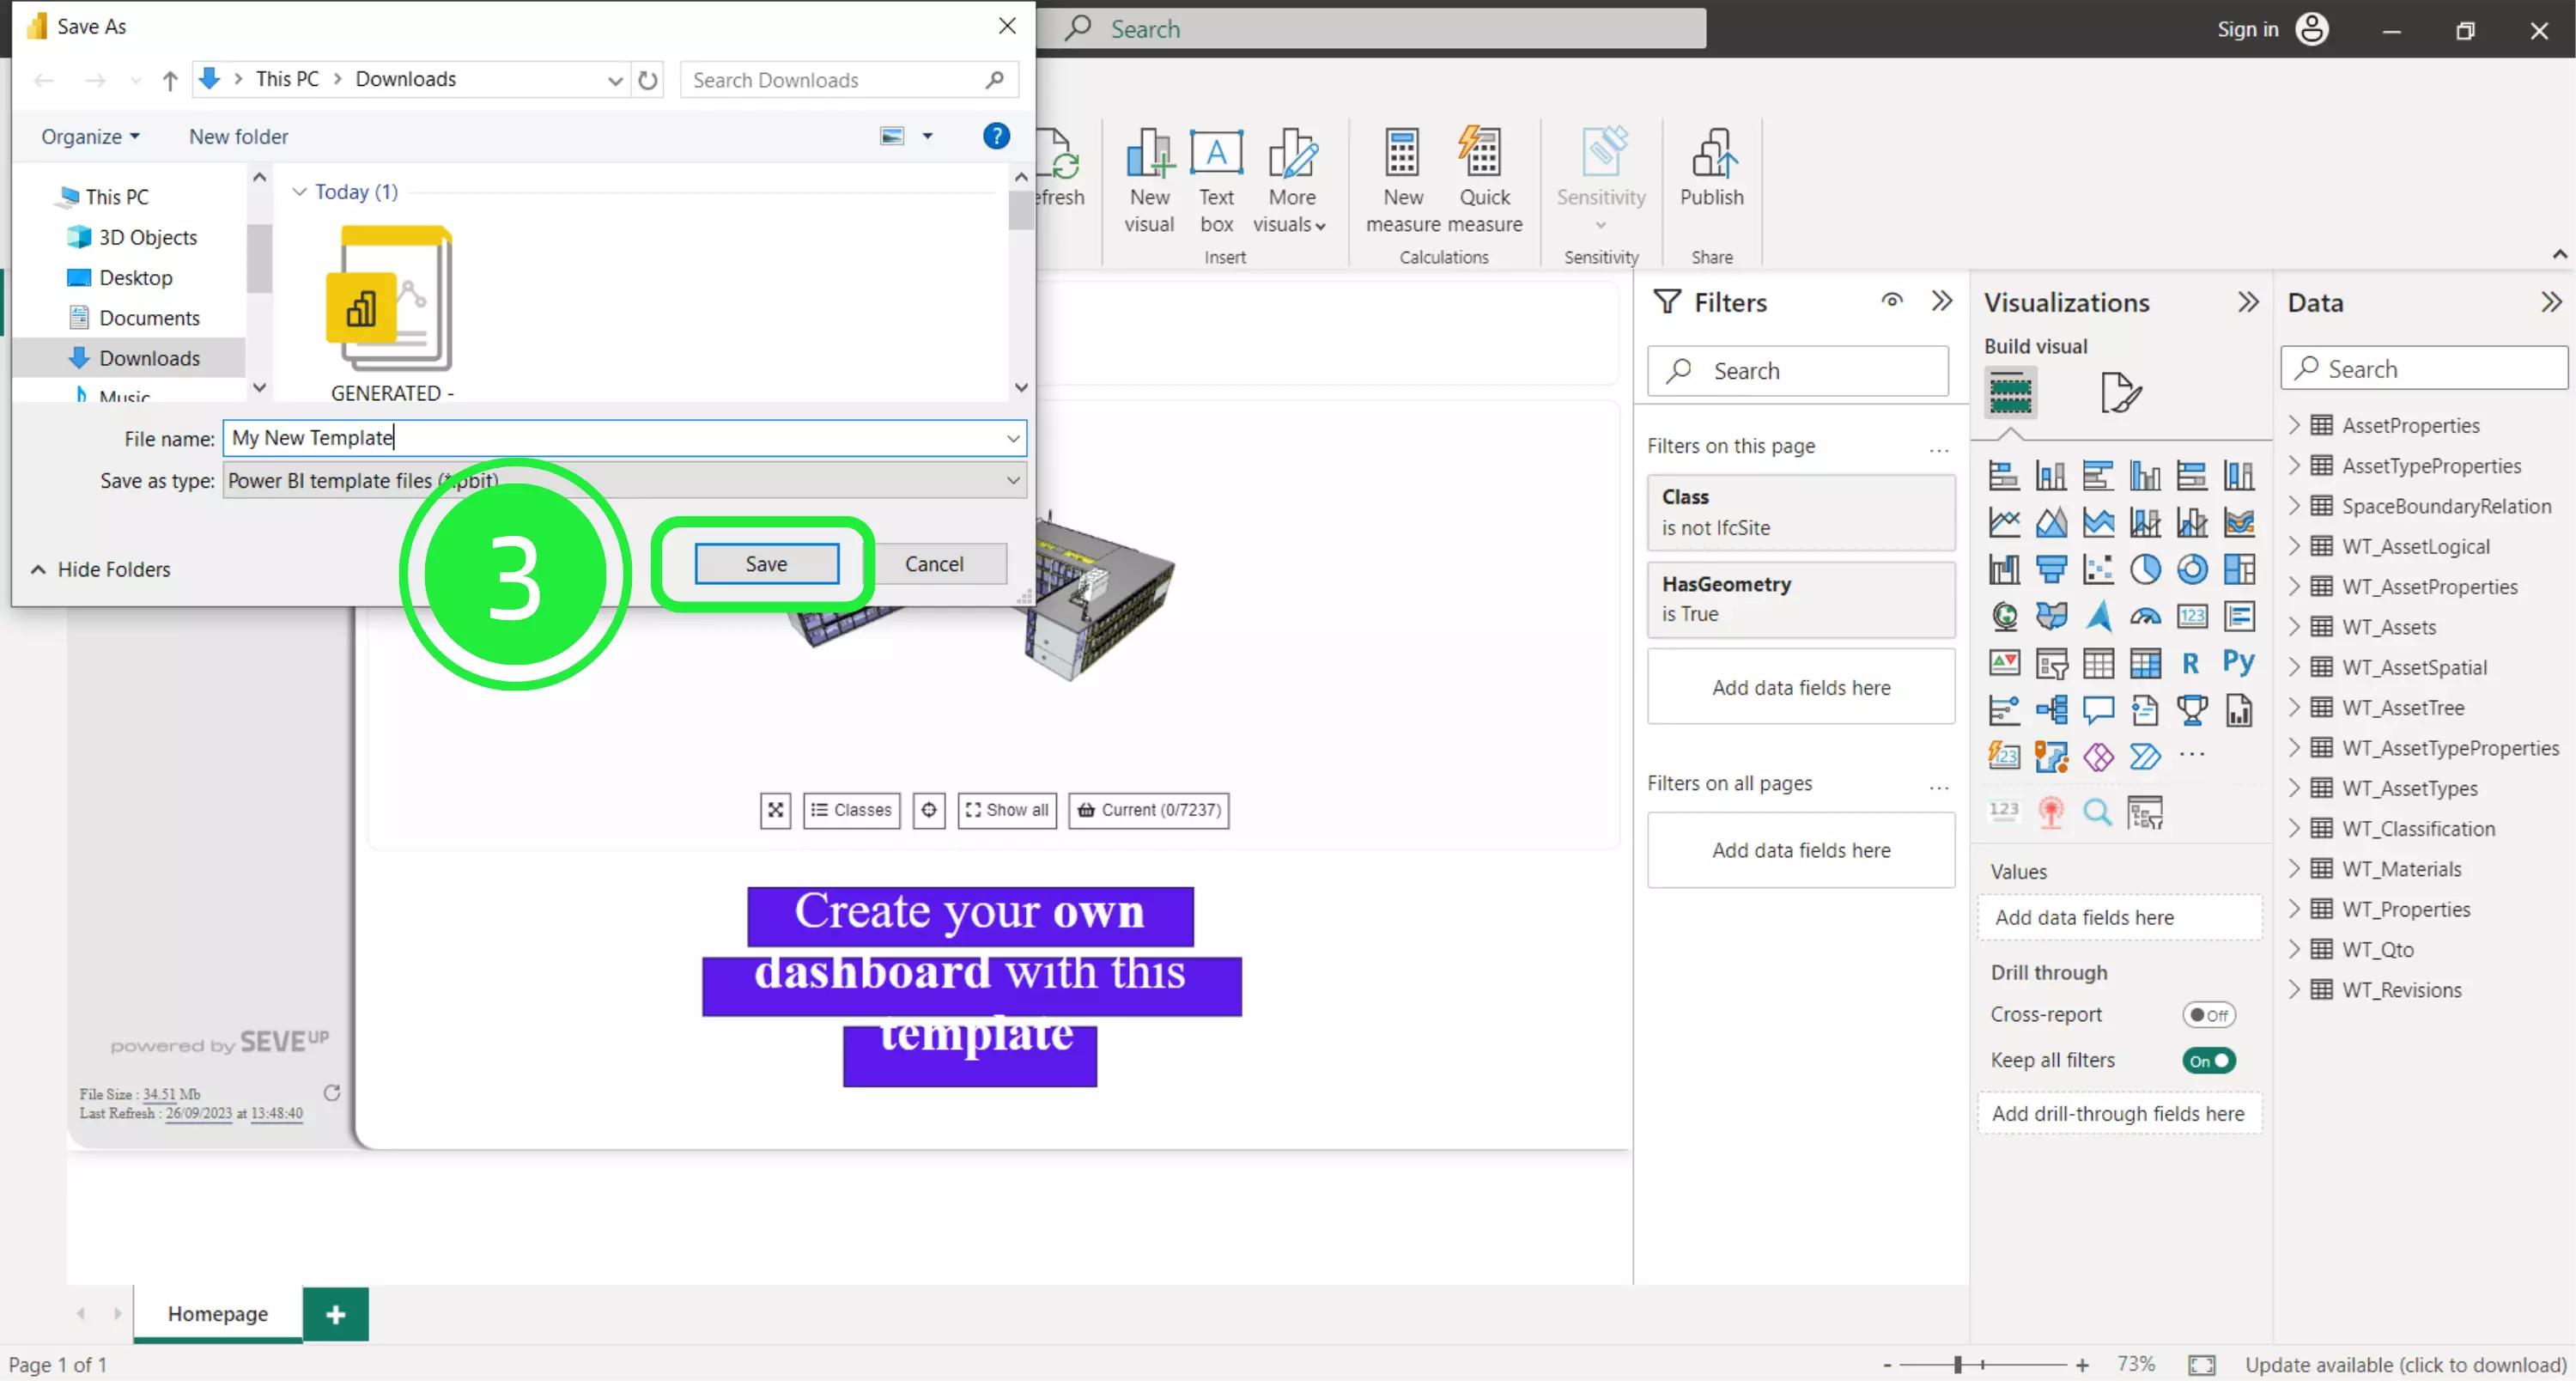
Choose a meaningful name and location for your new template file and make sure the “Save as type” is Power BI template files (*.pbit). Once you’ve determined where to save it and under what name, click “Save”.
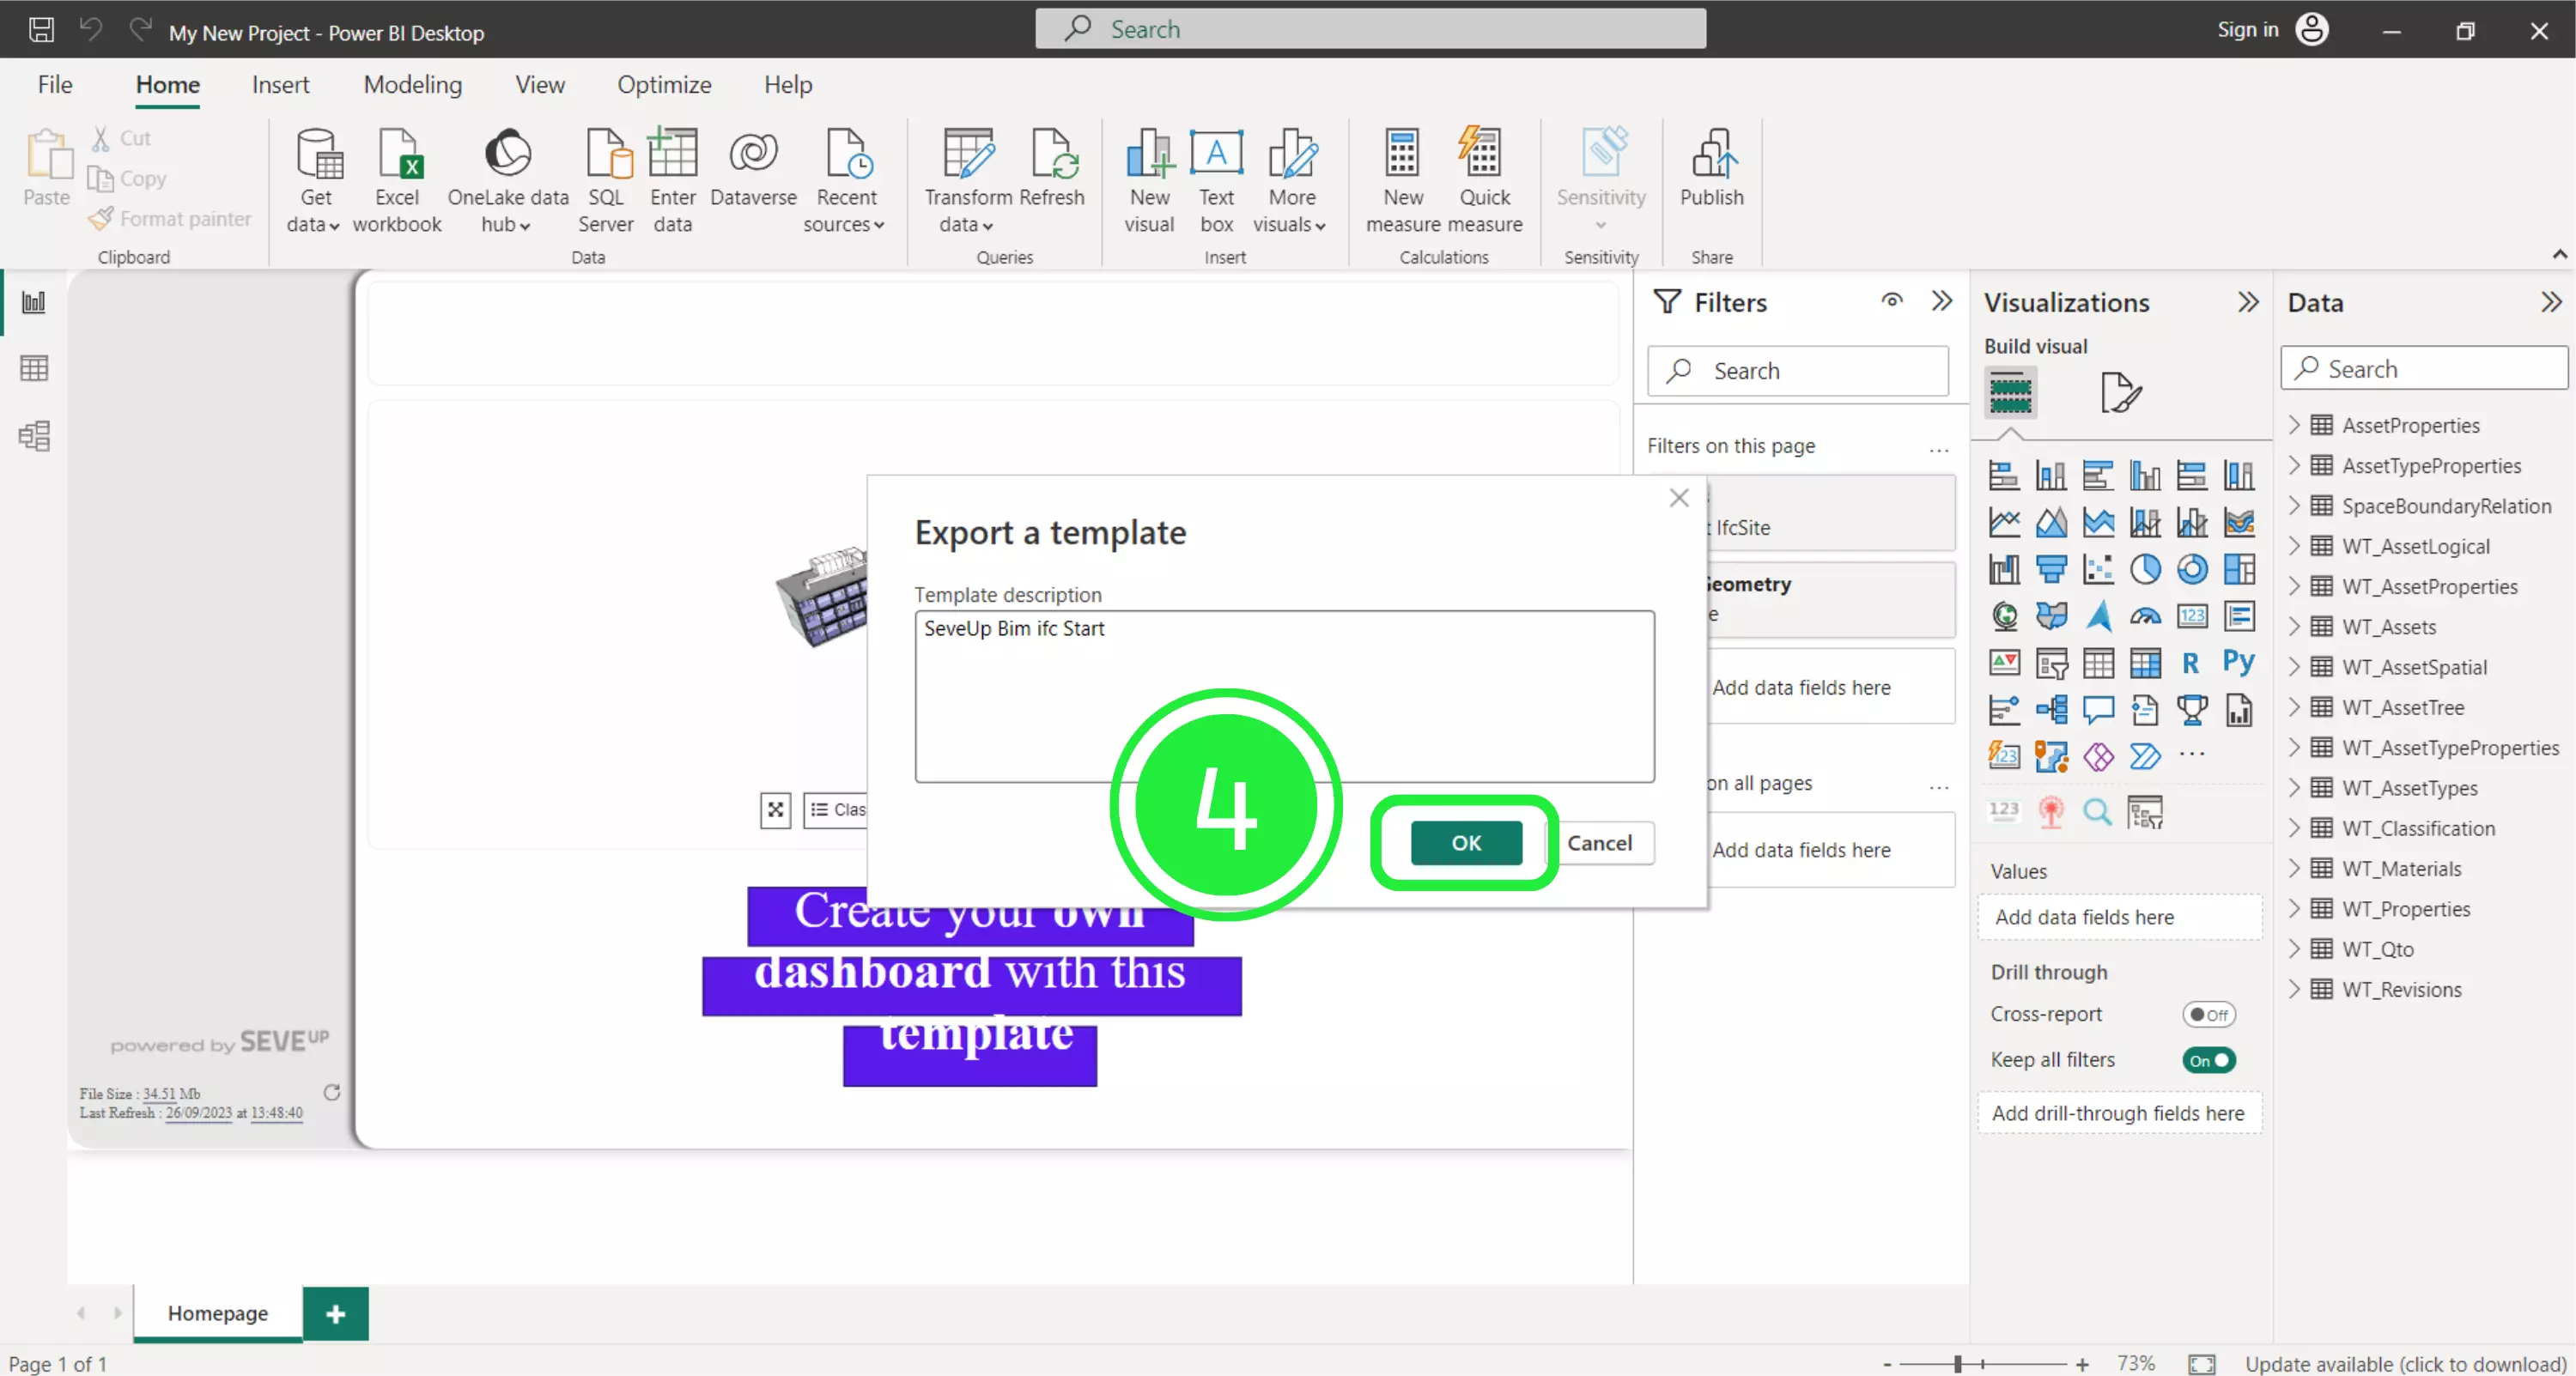
A pop-up will appear prompting you to export the template. It will include a brief description of the template. To proceed, click “OK”.
Now you can import your Power BI template back into SeveUp.
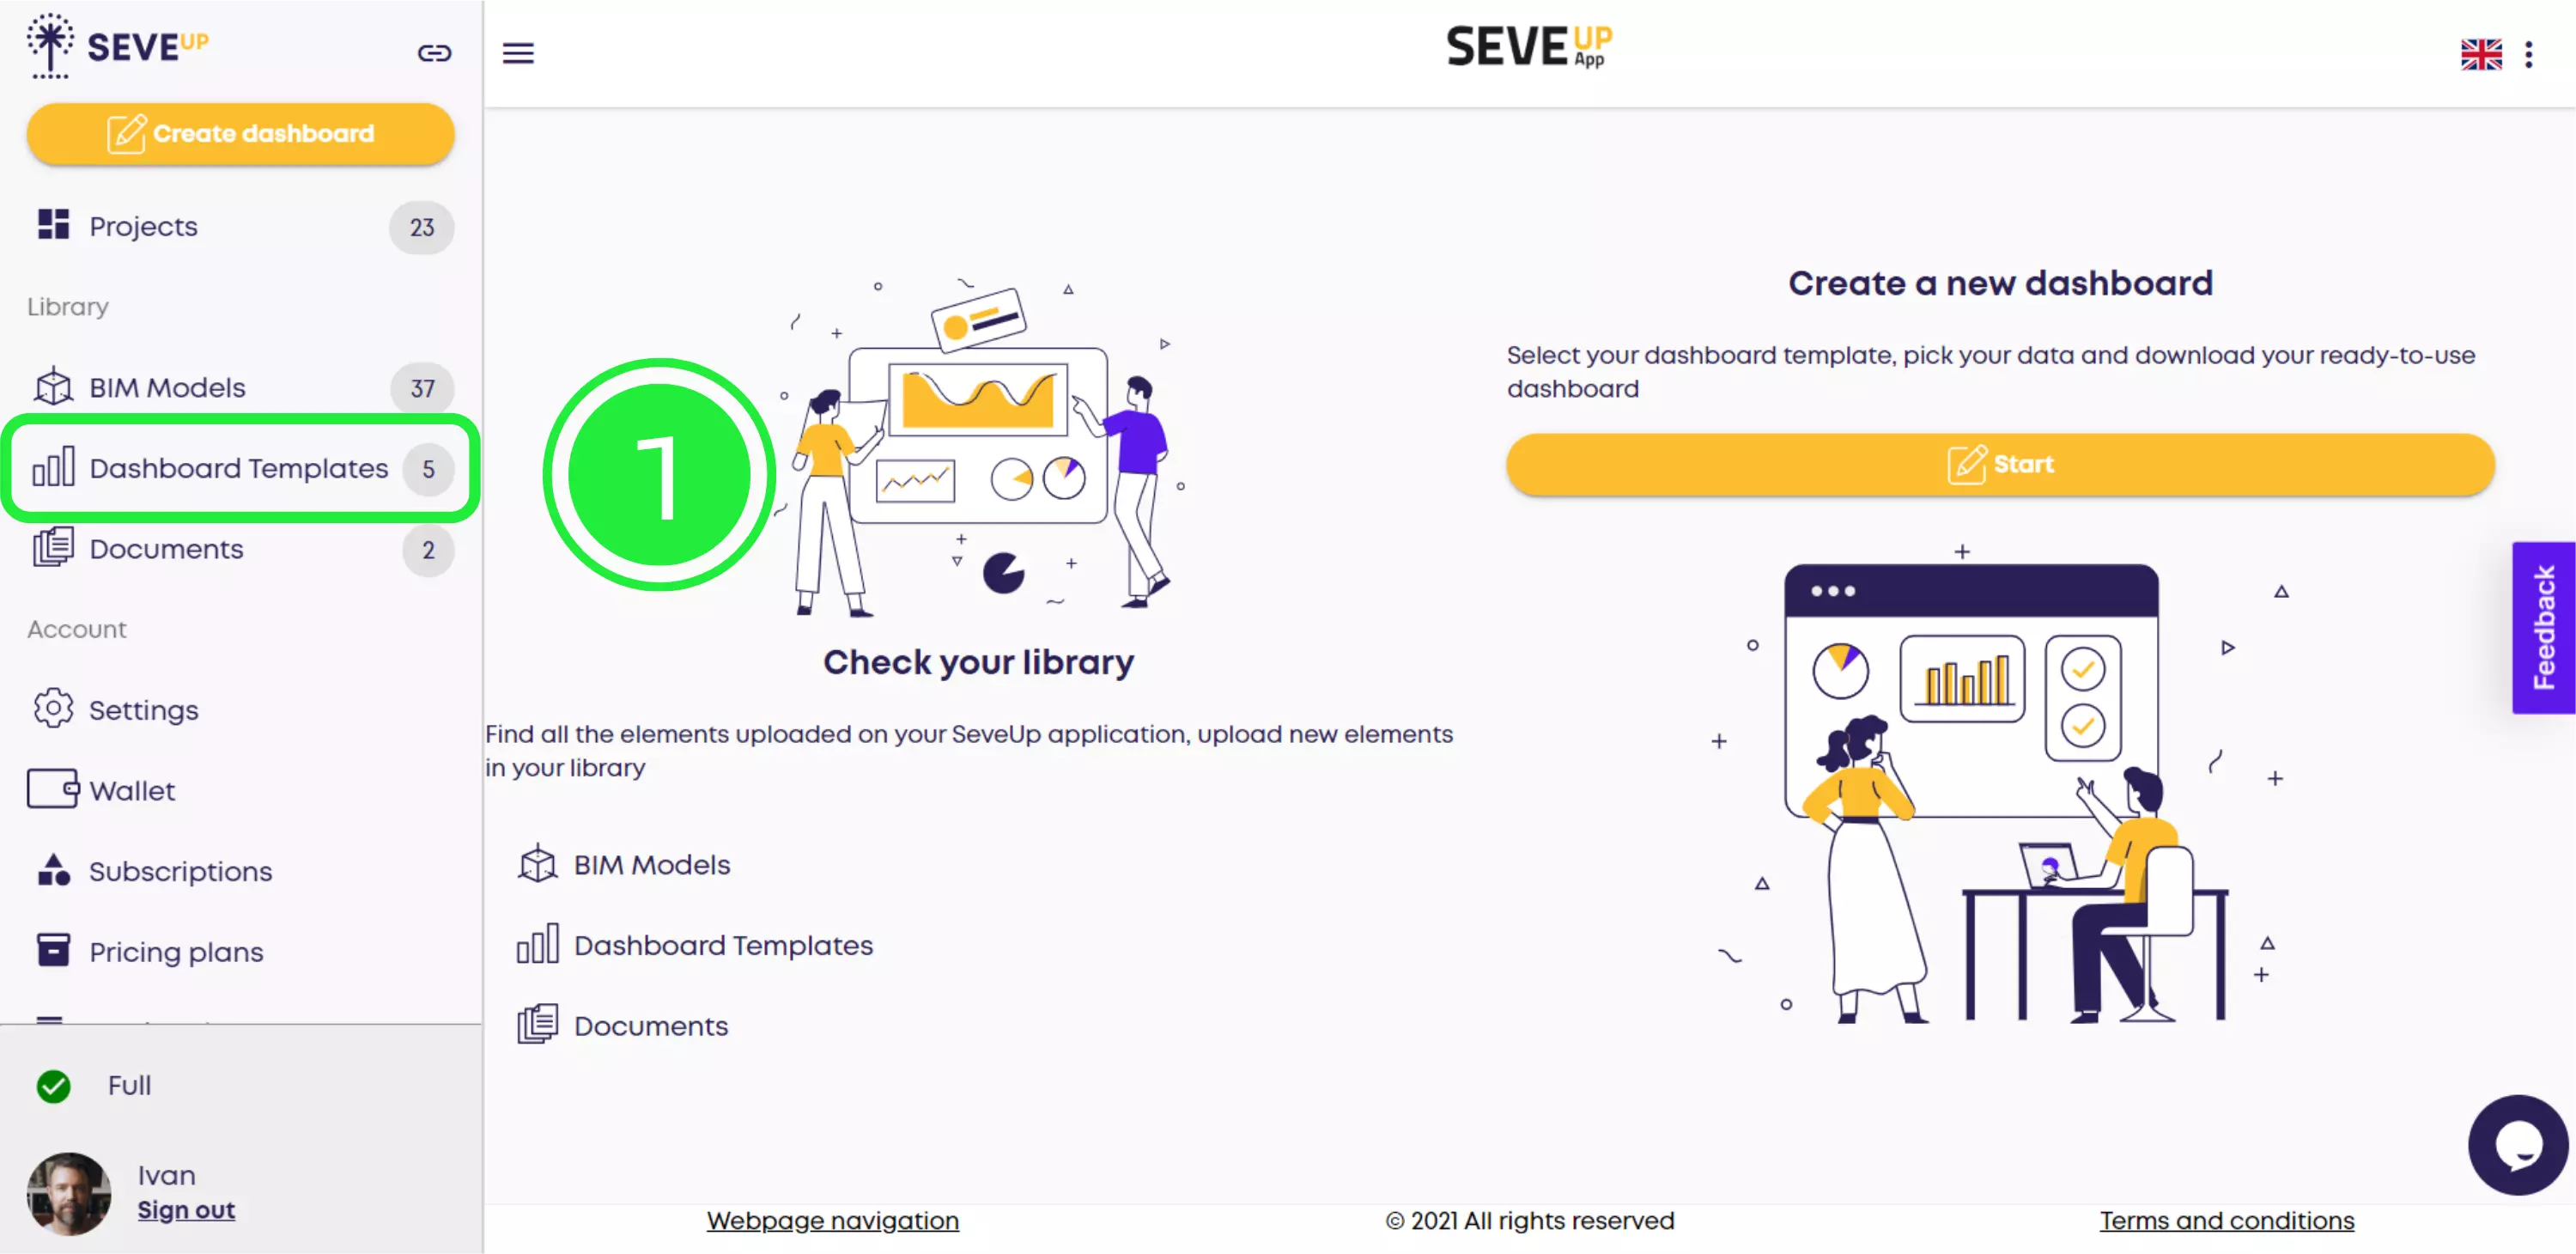
Open the SeveUp app and click the “Dashboard Templates” button in the left navigation menu.
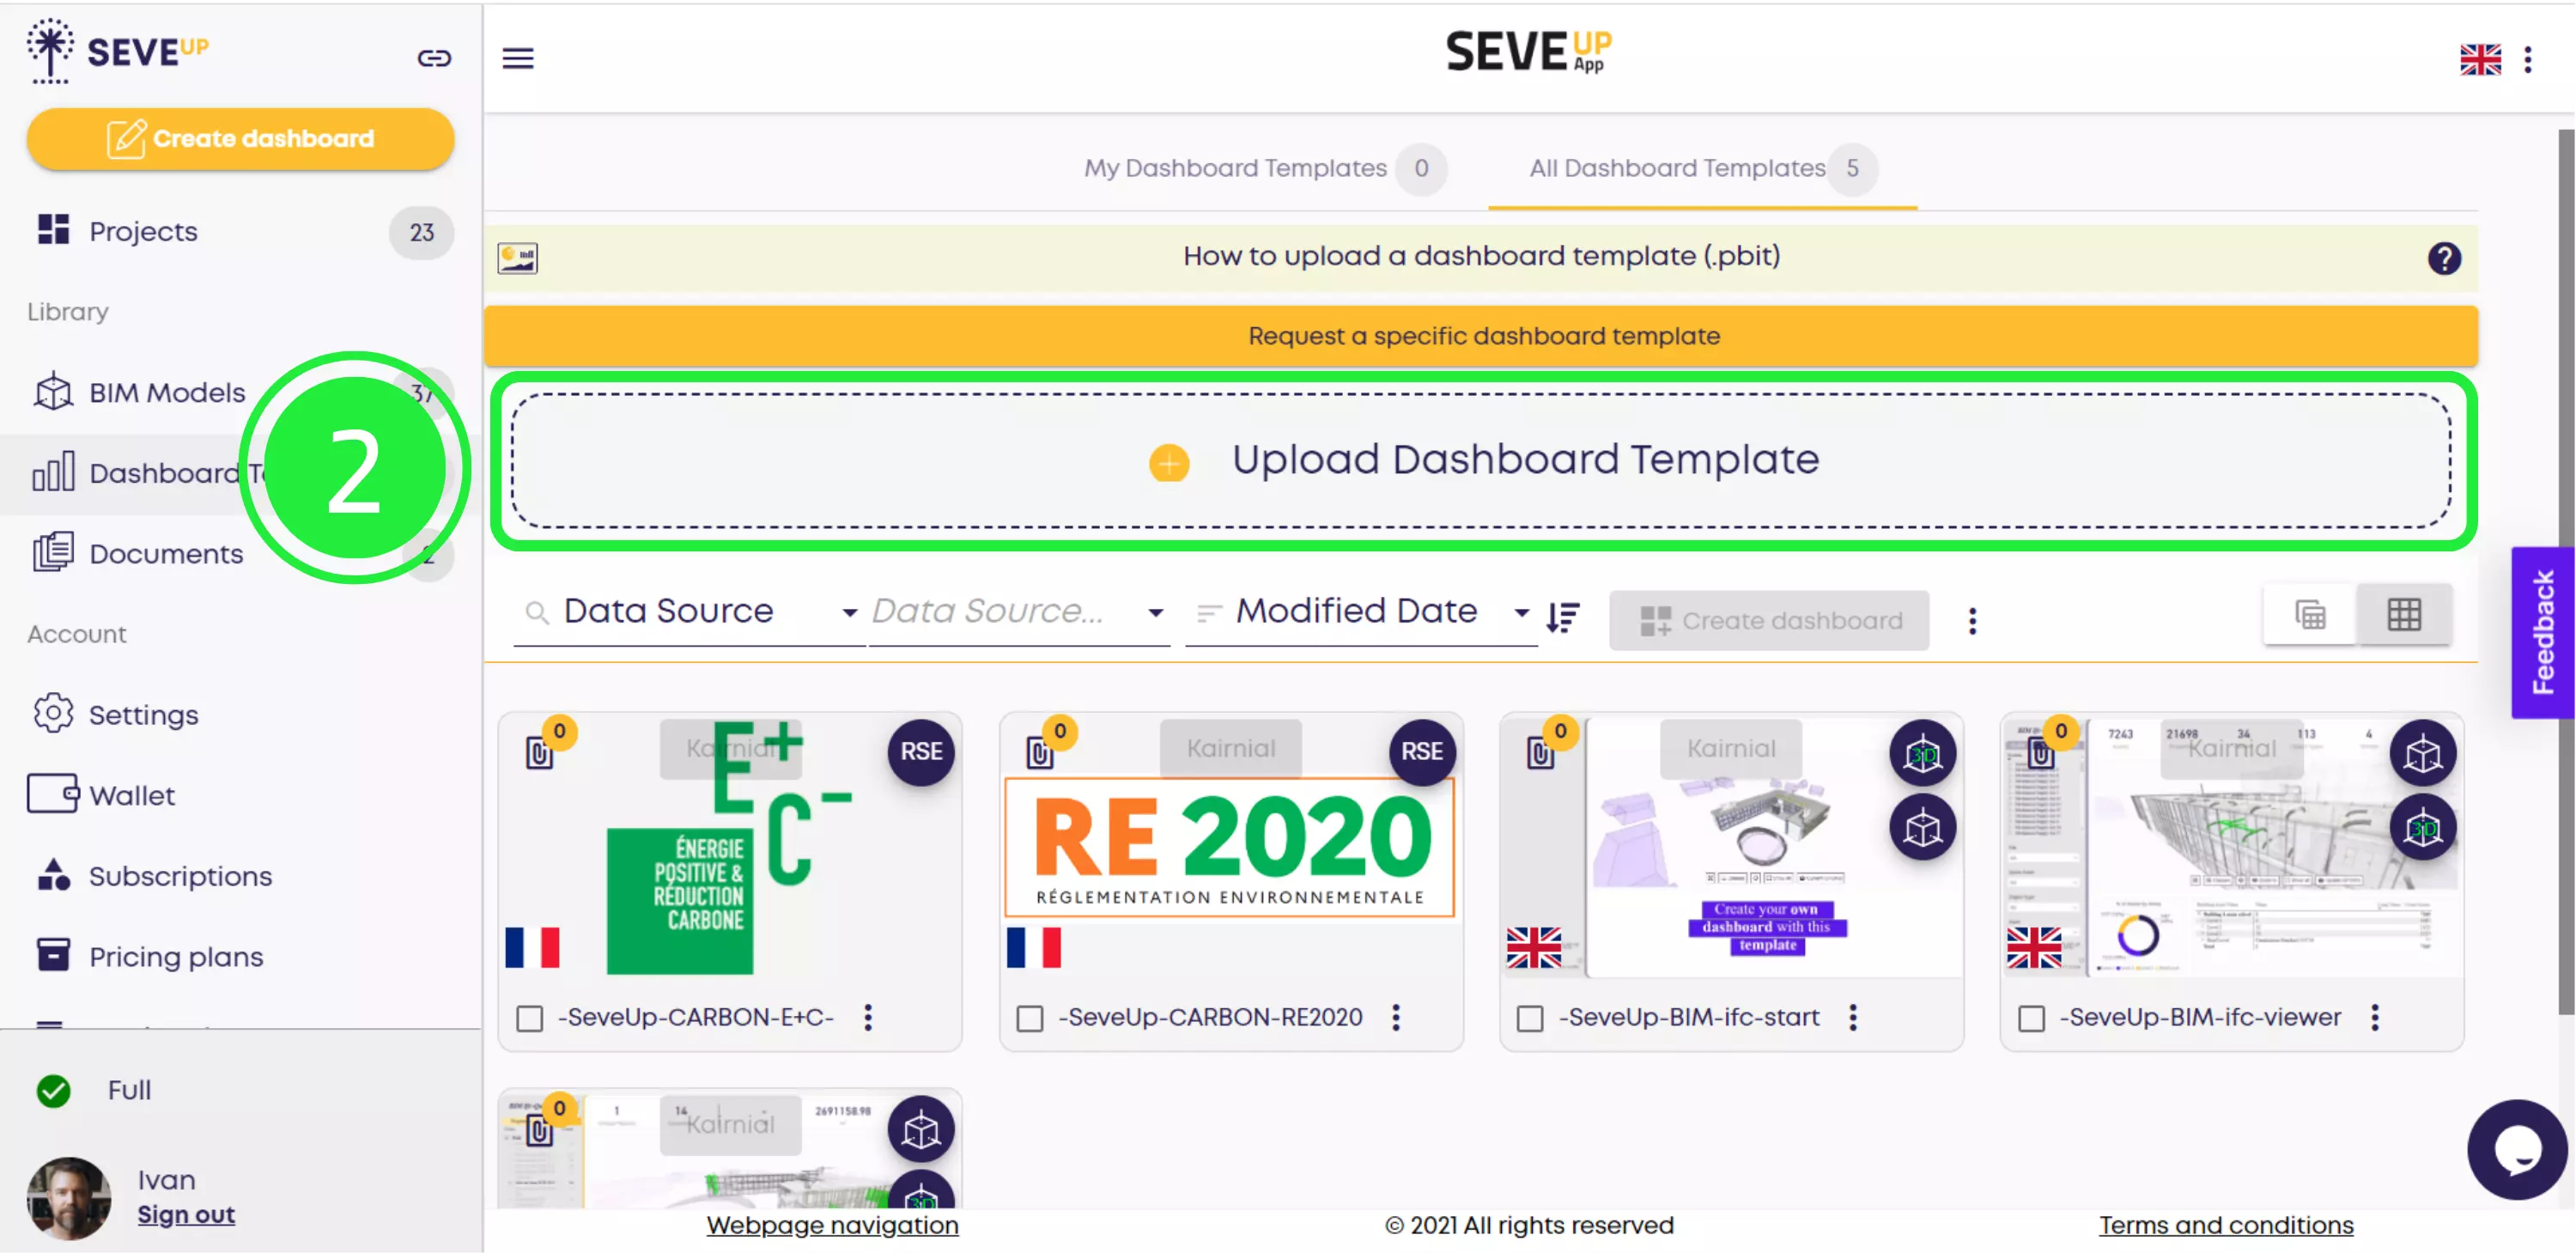
To start uploading the template file, click the “Upload Dashboard Template” button in the center of the page.
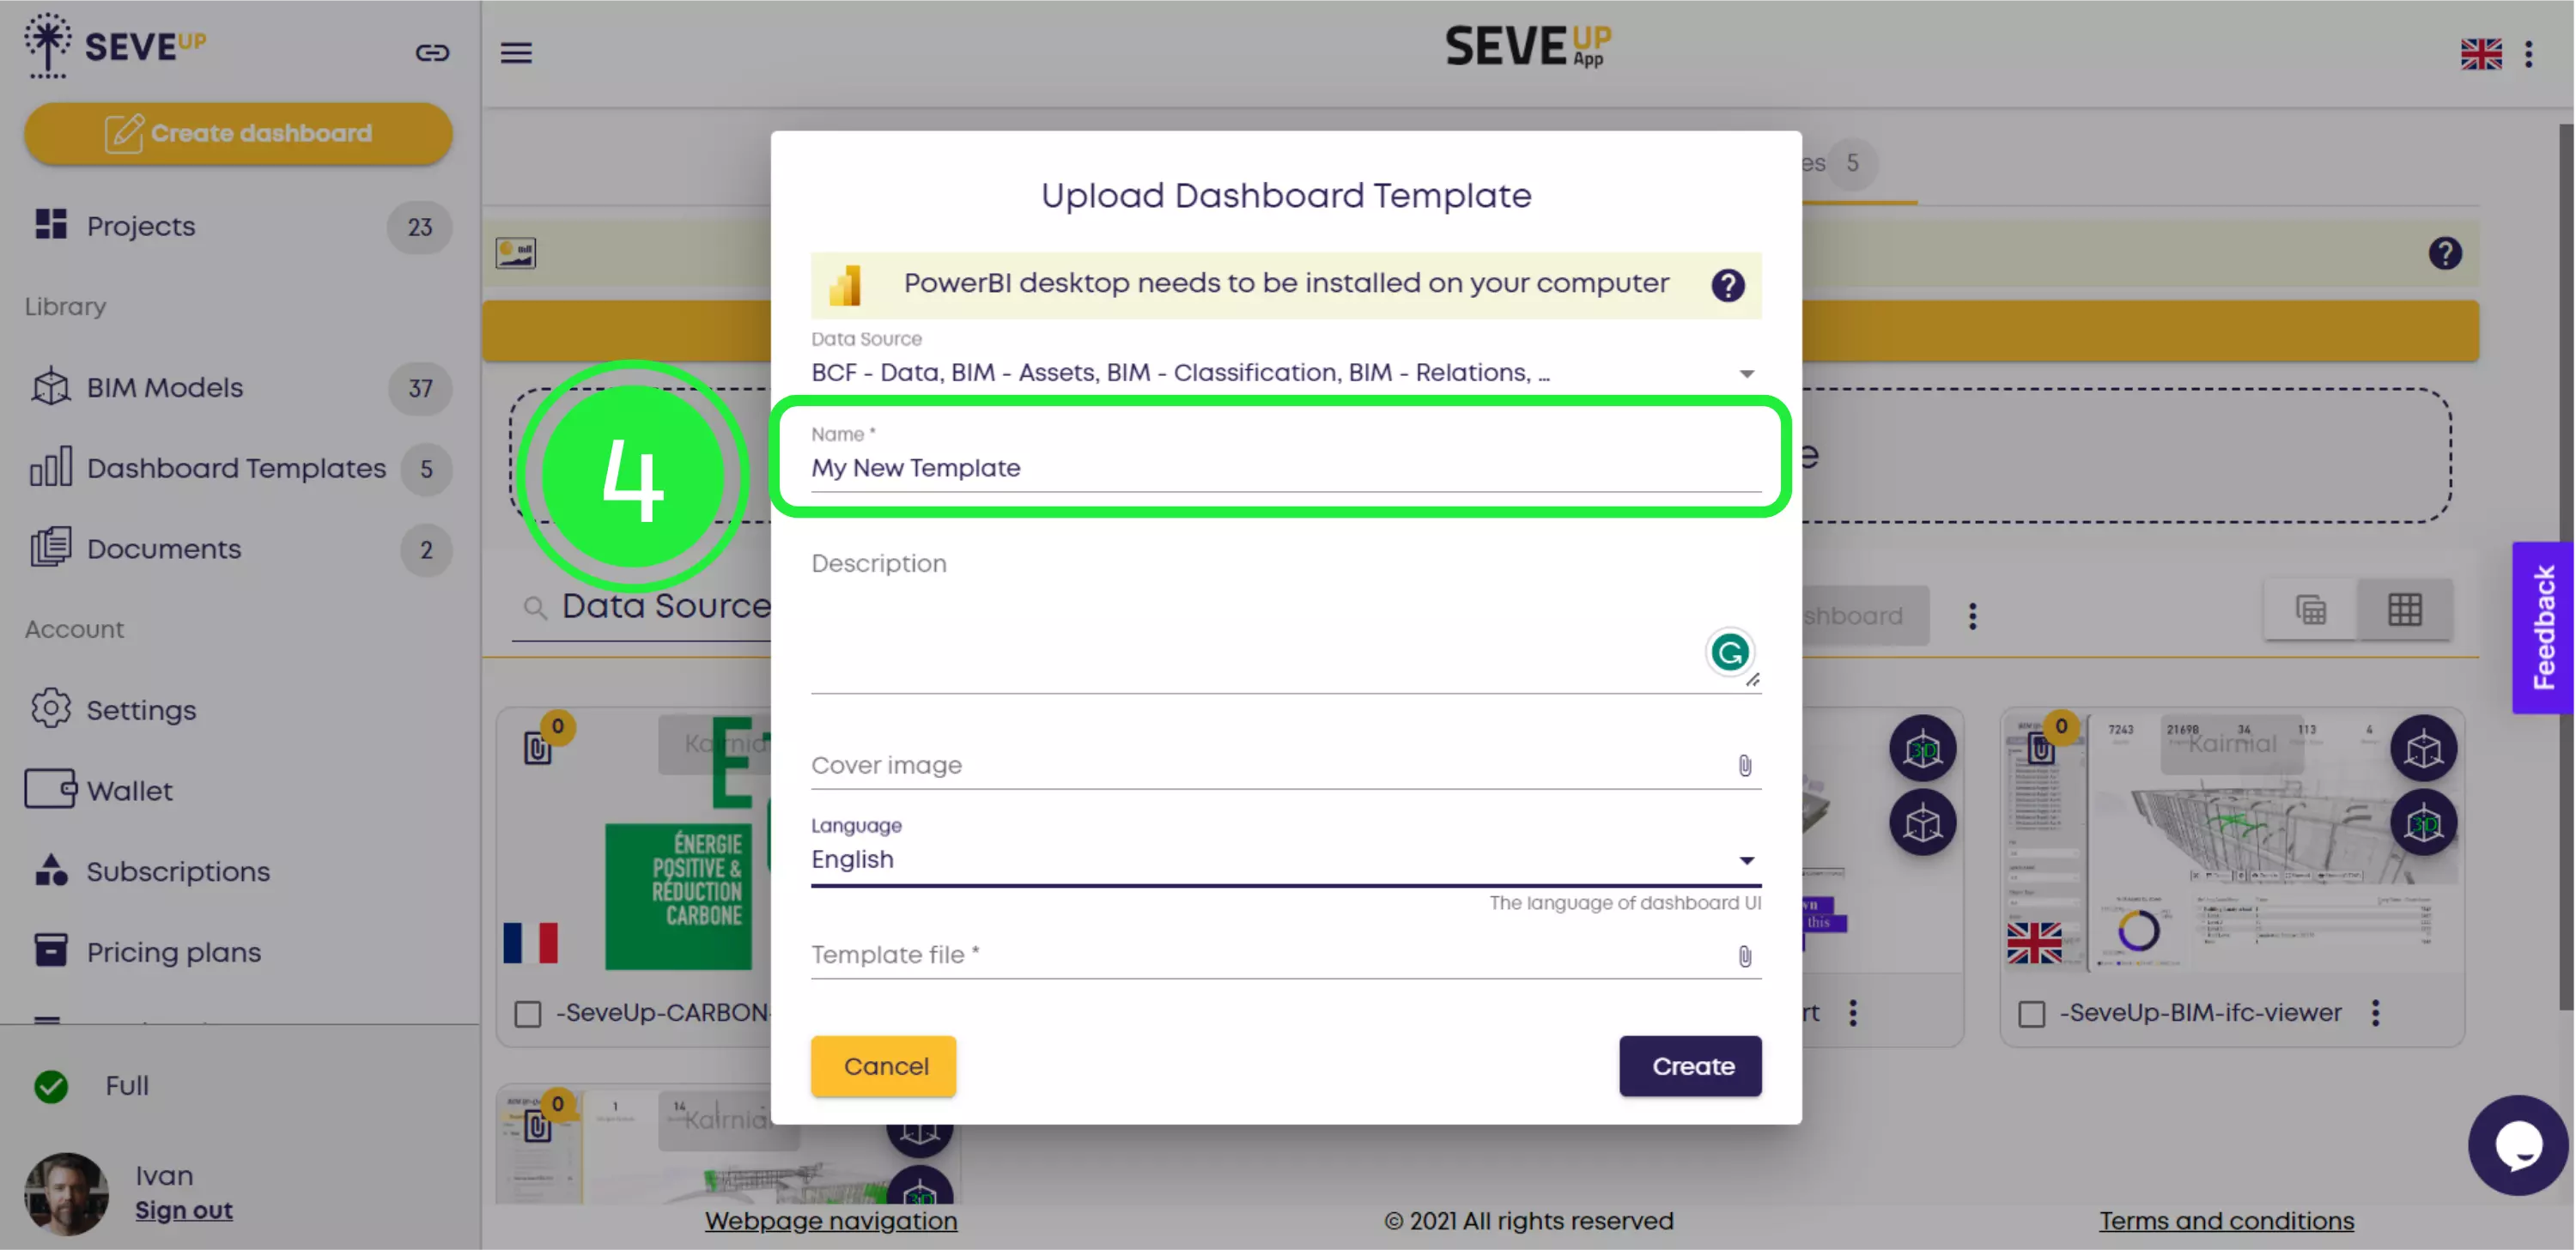
A pop-up will appear where you can choose what data you would like to include from the template file. Select an item by checking the corresponding box. Make sure to check the “3D Model” box.

Next, name your template. If you want, you can also add a description and cover image. If you’d like to change the template language, you can also do so at this stage.
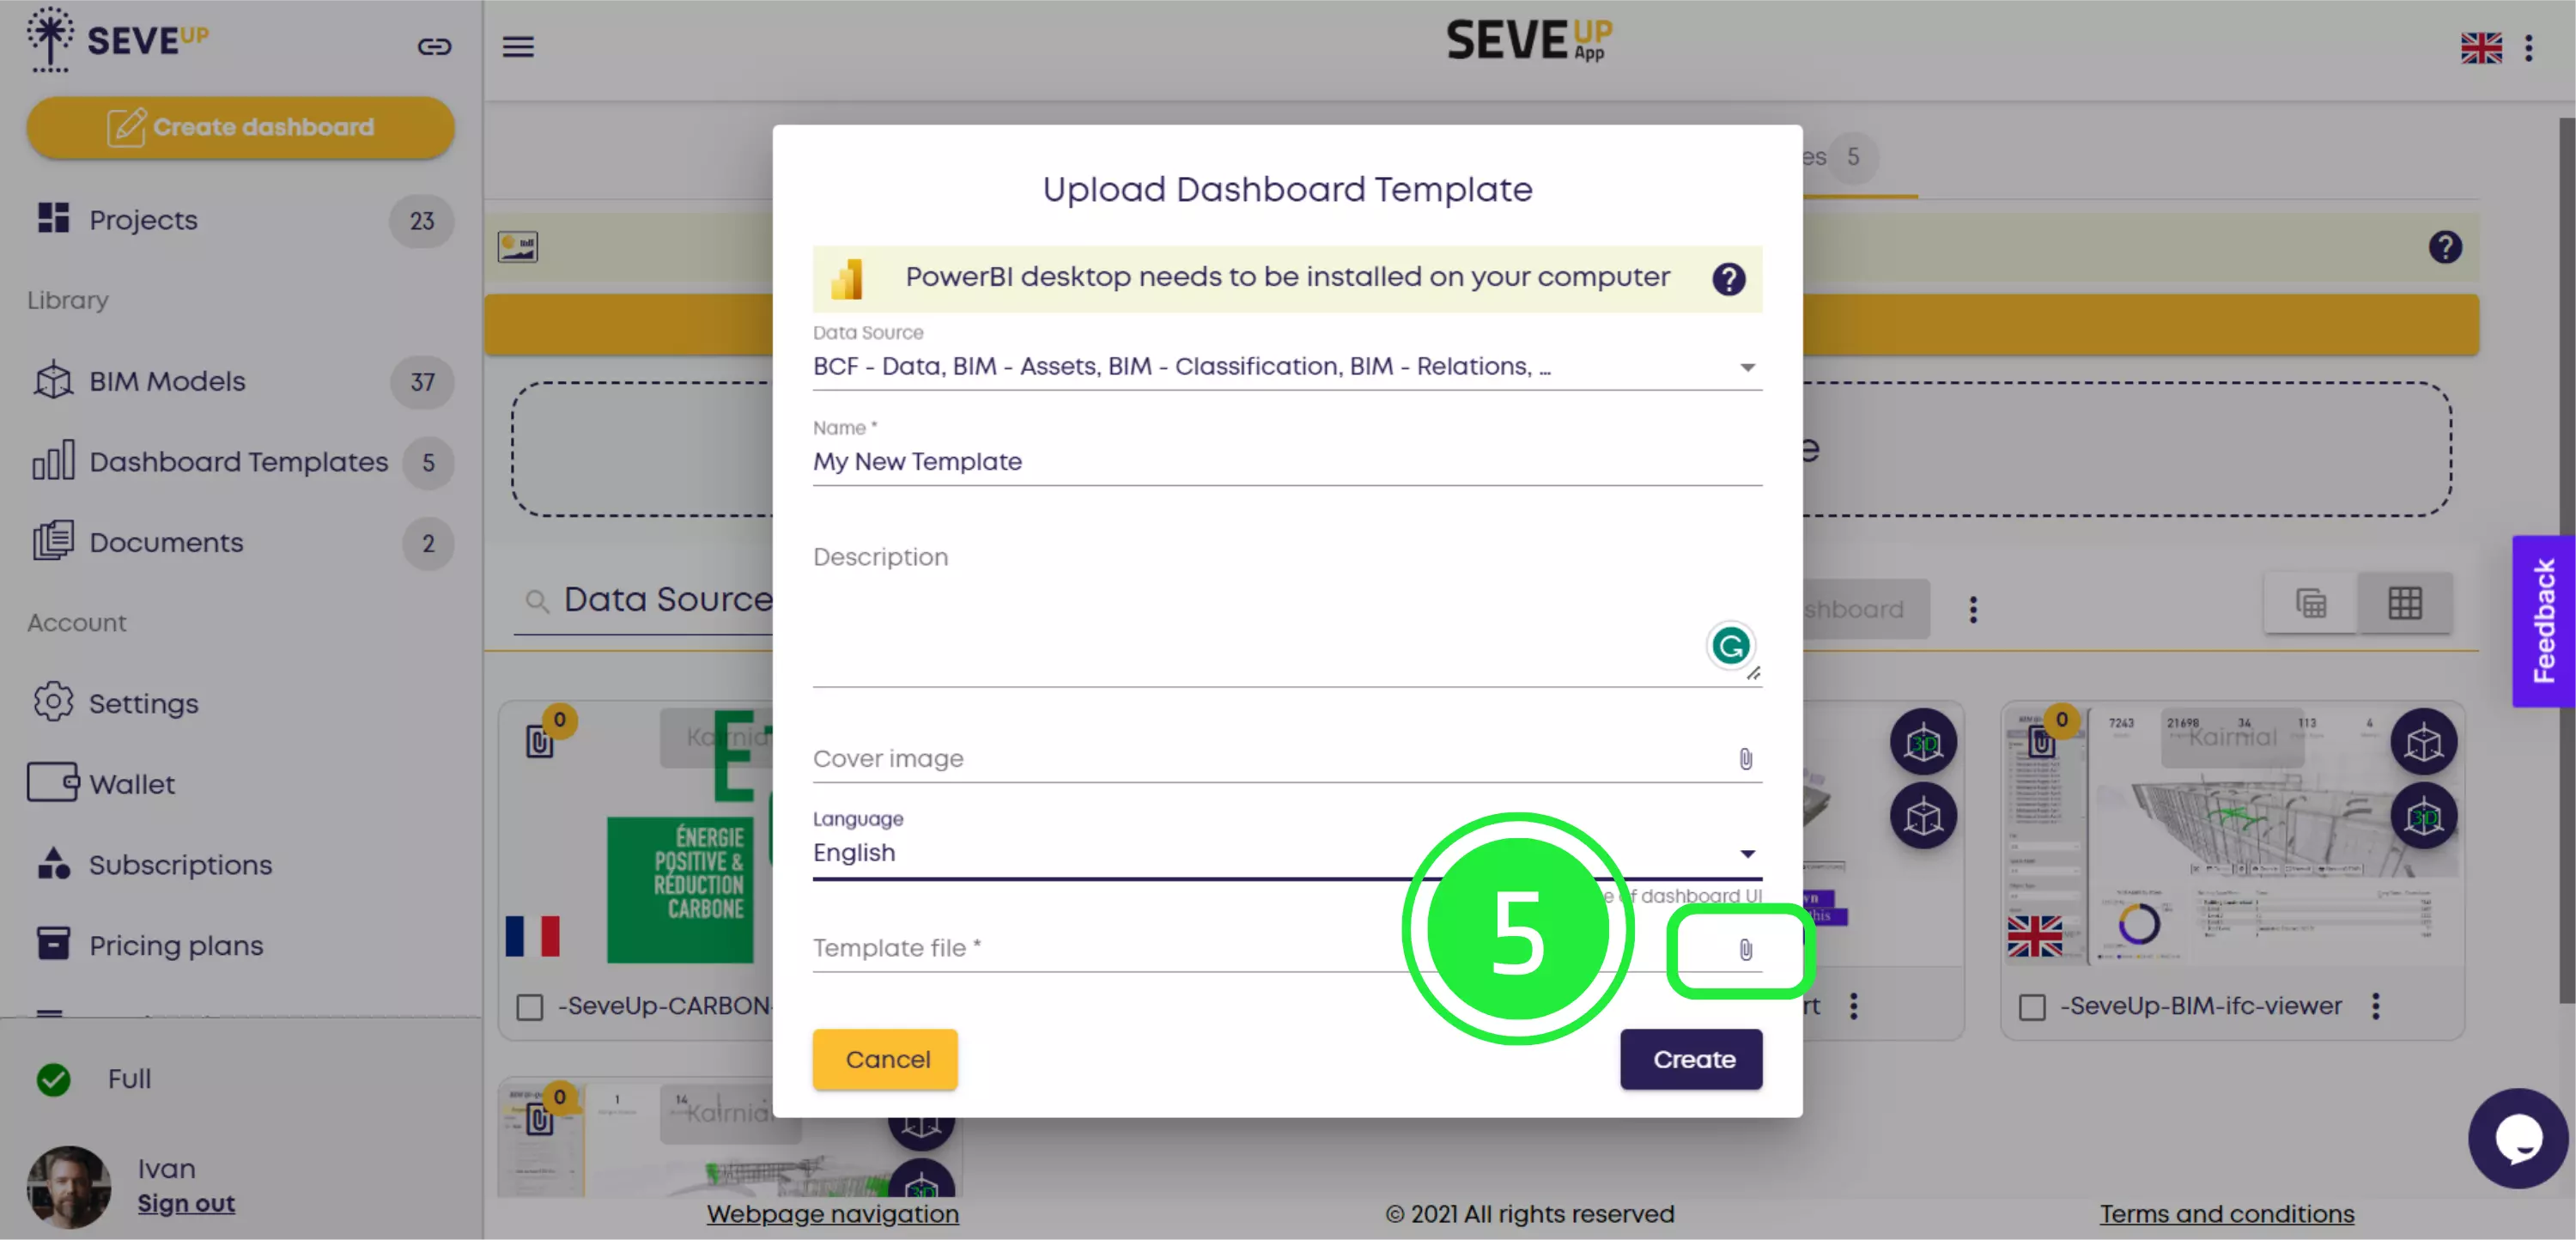
To browse for the template file you’d like to upload, click the “Attach File” (paperclip) icon in the “Template file” field.
A pop-up will appear where you can choose where you’d like to add your template from. Since the BIM Power BI template file is saved to your computer, click “Local source”.

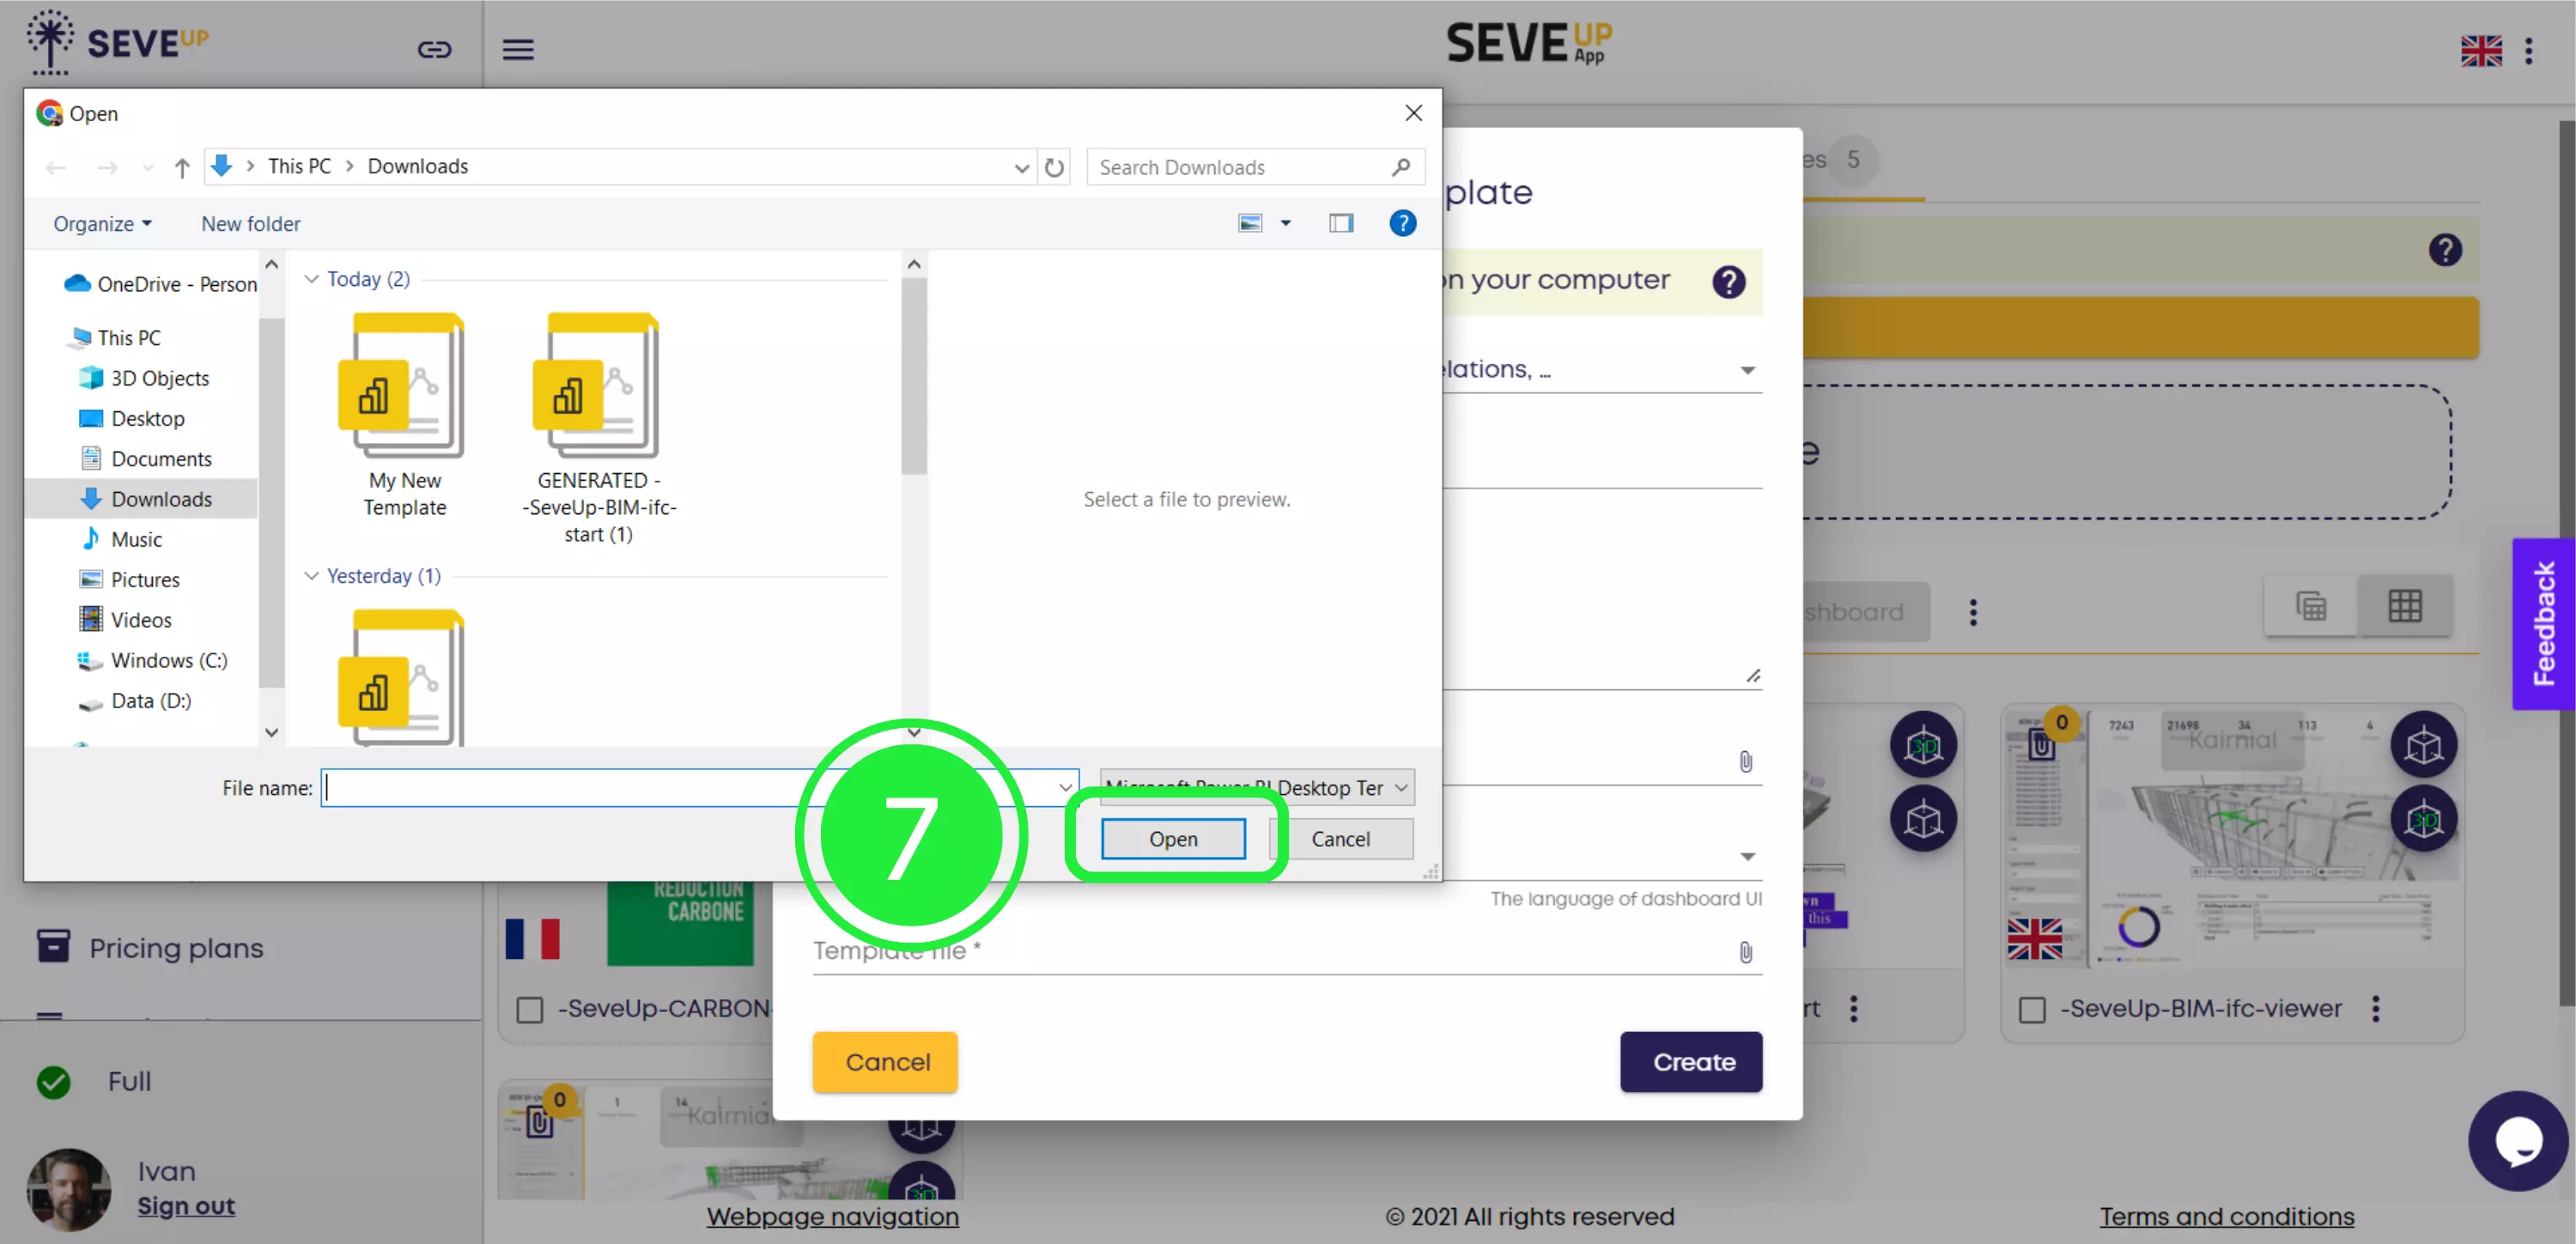
A browser window will open. Using the file location and meaningful file name you chose when saving the template in Power BI, navigate to and select the file you want to upload, then click “Open”.
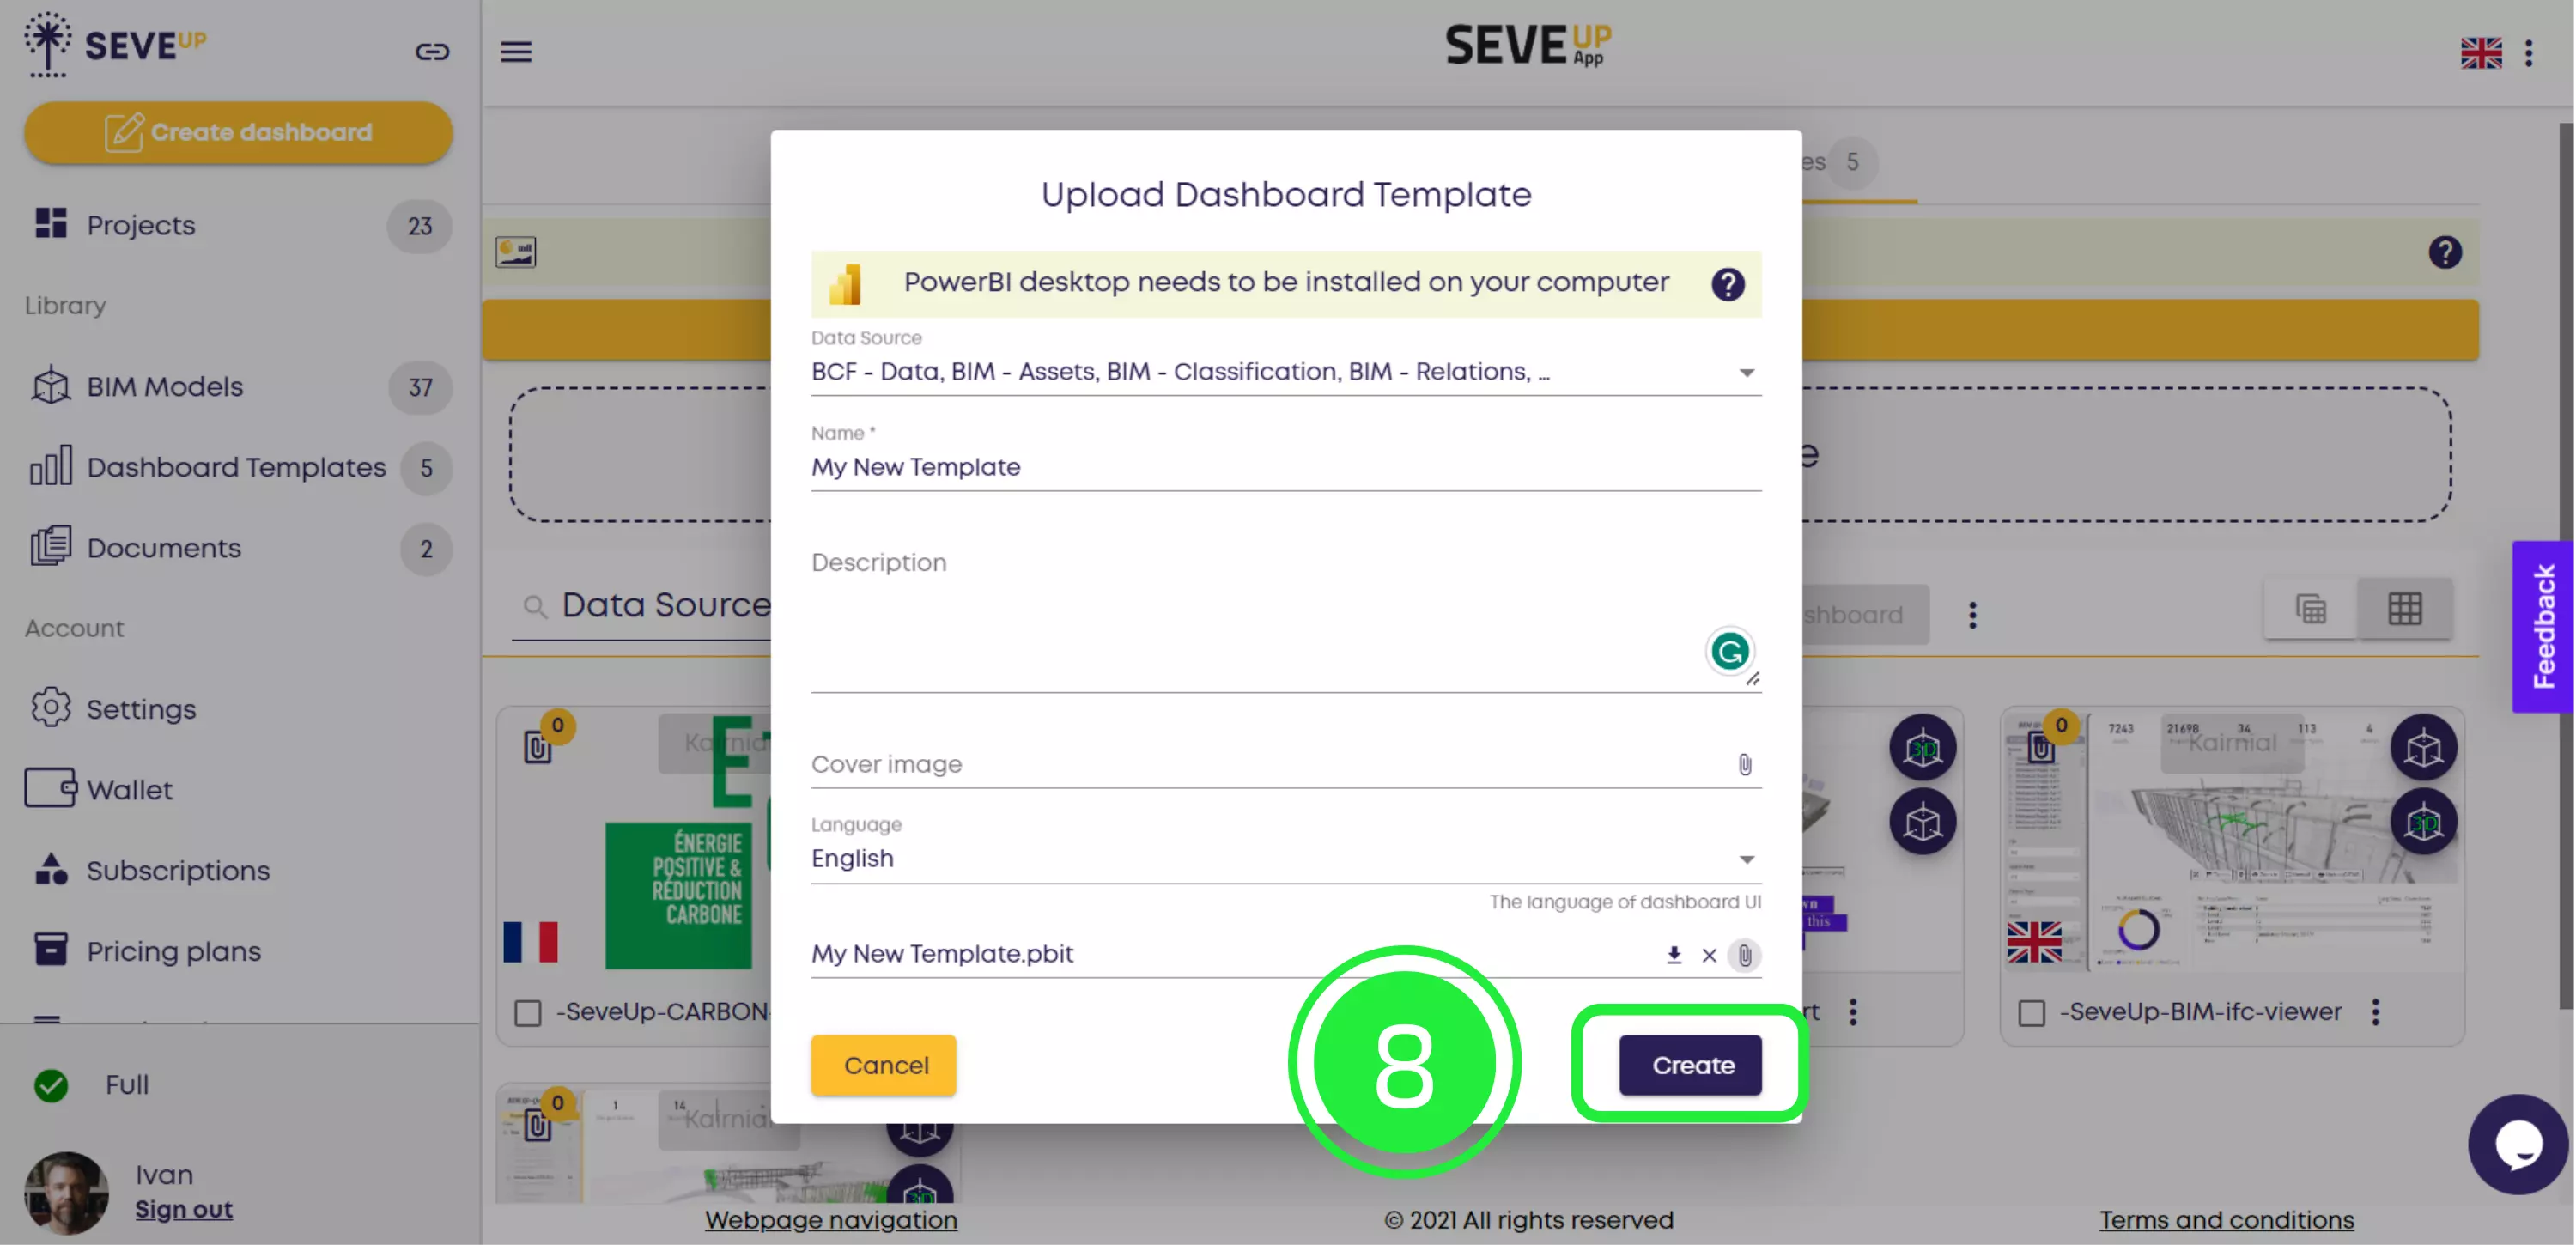
To finish the uploading process and create your new BIM power BI dashboard template in SeveUp, click “Create” in the bottom-right corner of the pop-up.
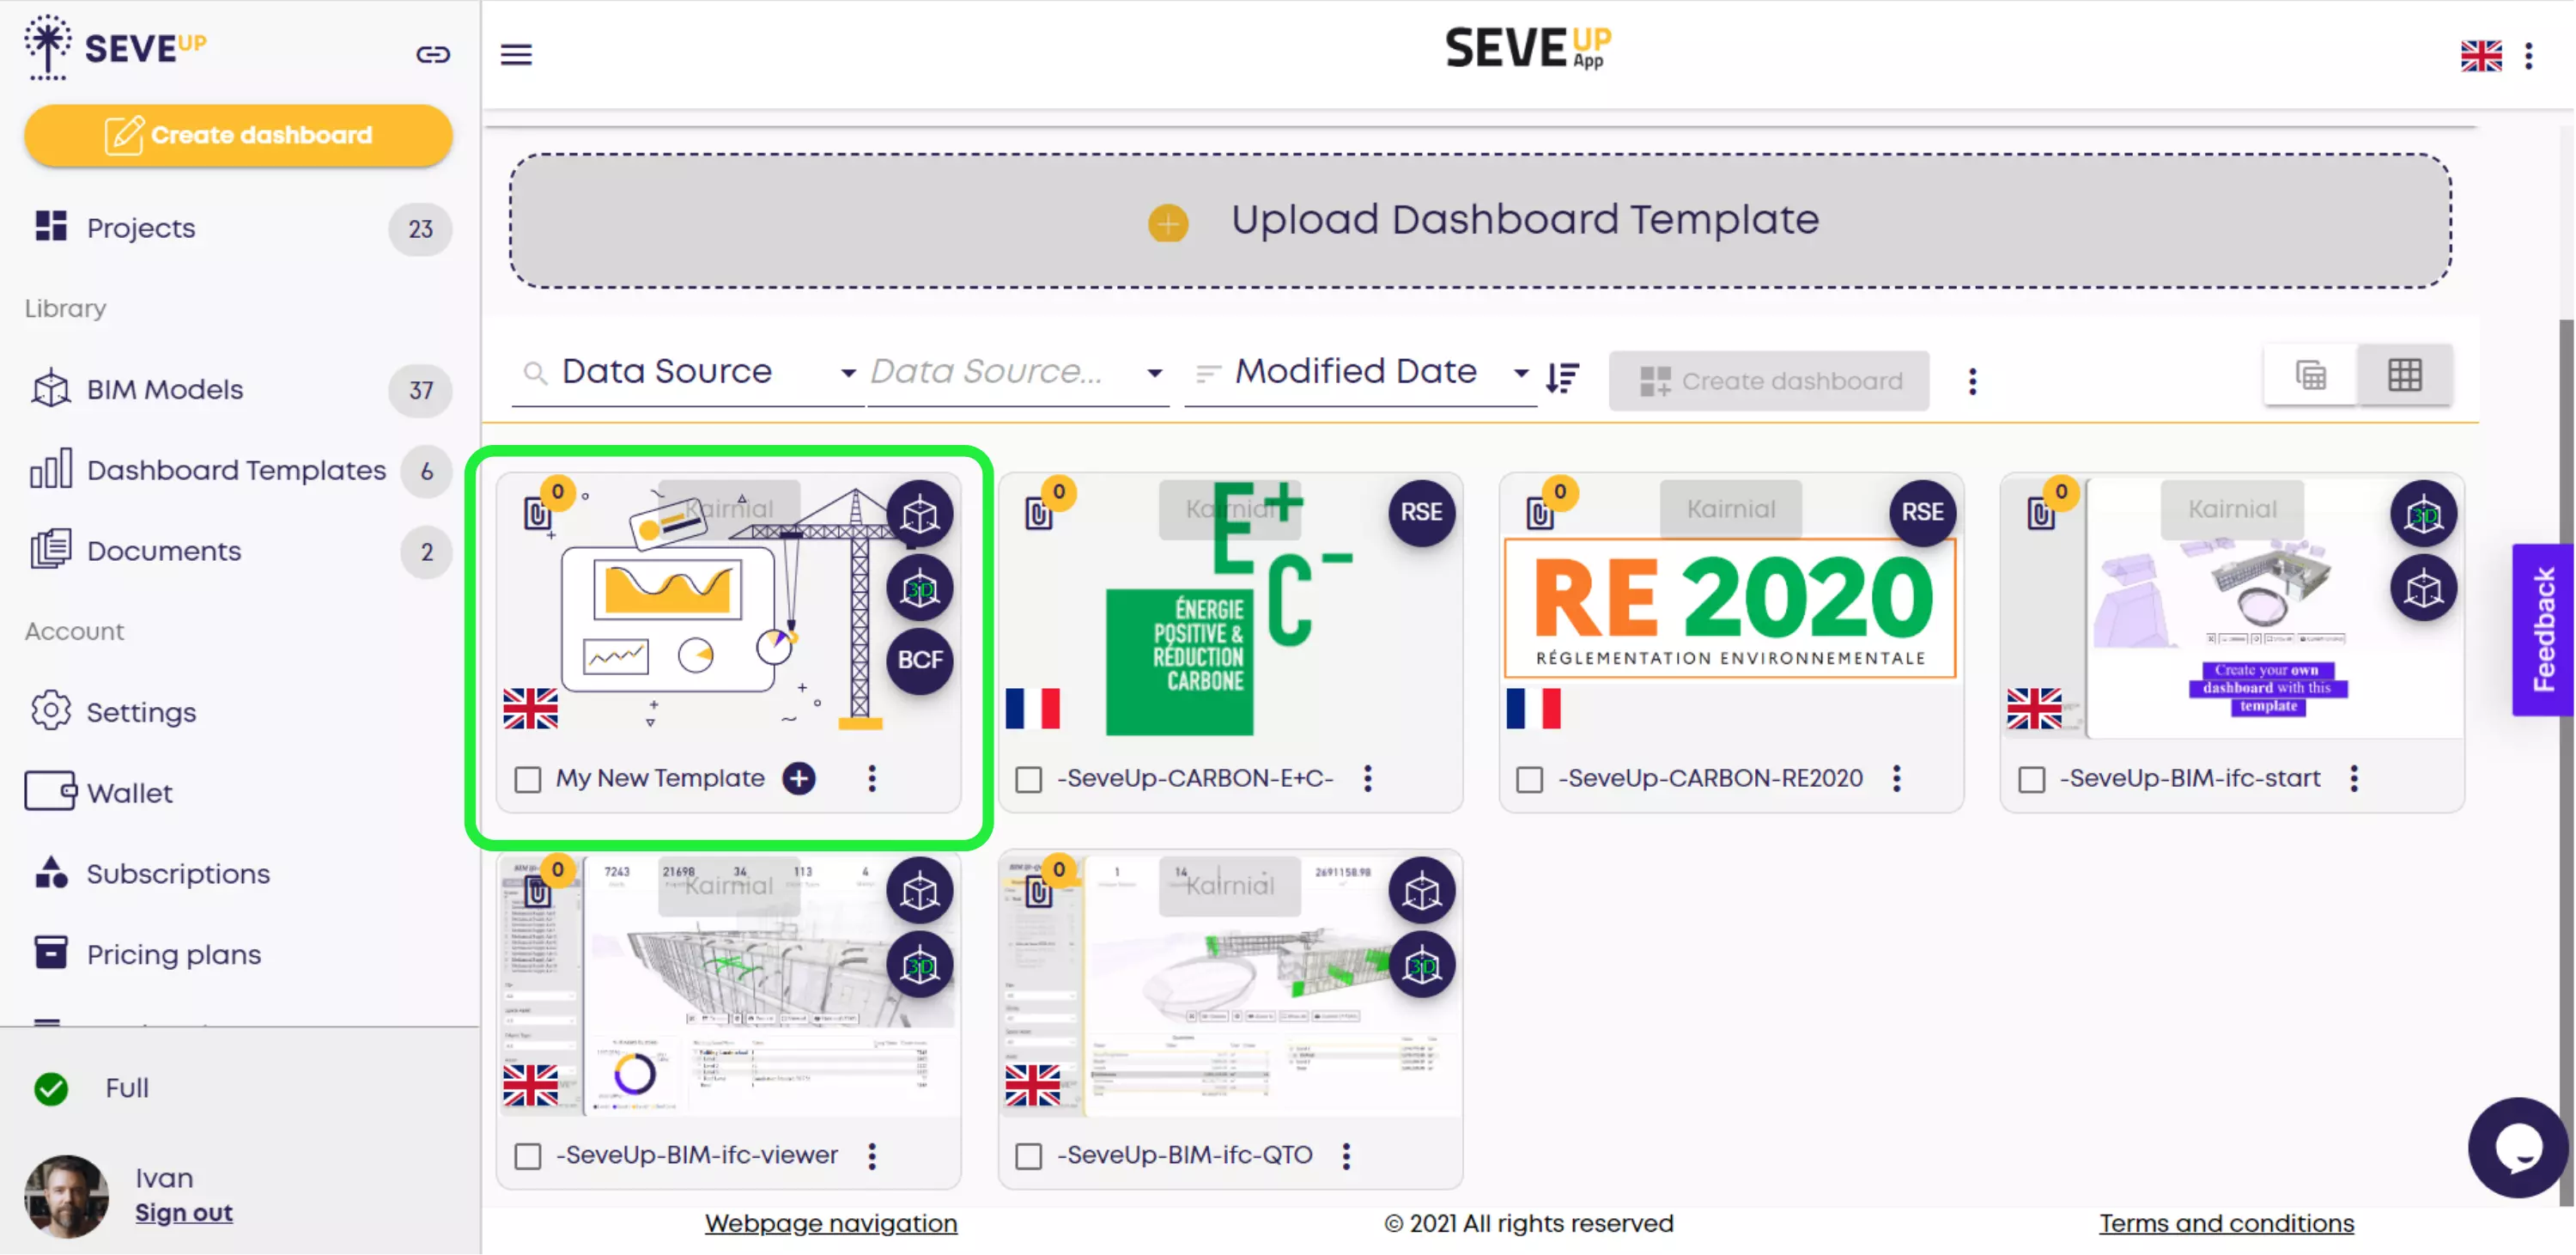
Your new Power BI dashboard template will now appear alongside your other dashboard templates in the Dashboard Template section. You can then use our previous tutorial to link your dashboard to any project you choose.
To elevate your BIM process with SeveUp app, follow these steps and reclaim the full power of your BIM capabilities
Power BI Quick Tutorial: Mastering Insights in Minutes!


Want to get started with your very own BIM project? You’ll be surprised by just how easy it is. Create your own free account is SeveUp today and give it a try.

Unlock the power of your building data with SeveUp. Tailored dashboards, seamless integration
🎓 Free BIM Checker Training Learn how to automate your BIM model checks and get certified. Register for Free Click
Learn More🎓 Free BIM Checker Training Learn how to automate your BIM model checks and get certified. Register for Free Click
Learn More🎓 Free BIM Checker Training Learn how to automate your BIM model checks and get certified. Register for Free Choose
Learn More