Trusted by companies
all over the world:
In the fast-paced architecture, engineering, and construction (AEC) industry, mastering building information modeling (BIM) is no longer a luxury, but a necessity. Central to this mastery is the ability to seamlessly integrate your BIM model into a streamlined project management platform. Enter the SeveUp App—an intuitive application designed to make your BIM experience as effortless as it is impactful. This comprehensive article will guide you through the steps of creating, uploading, and linking a BIM model to a new project in the SeveUp App. With this comprehensive walkthrough, you'll not only acquire a deeper understanding of the SeveUp interface, but also see just how efficiently you can work with your BIM projects in an innovative tool like SeveUp.
Let’s demonstrate how straightforward it is to create a project from scratch in the SeveUp app. Firstly, just log in to your SeveUp App account, prepare a BIM model in .ifc format, and then follow these steps:
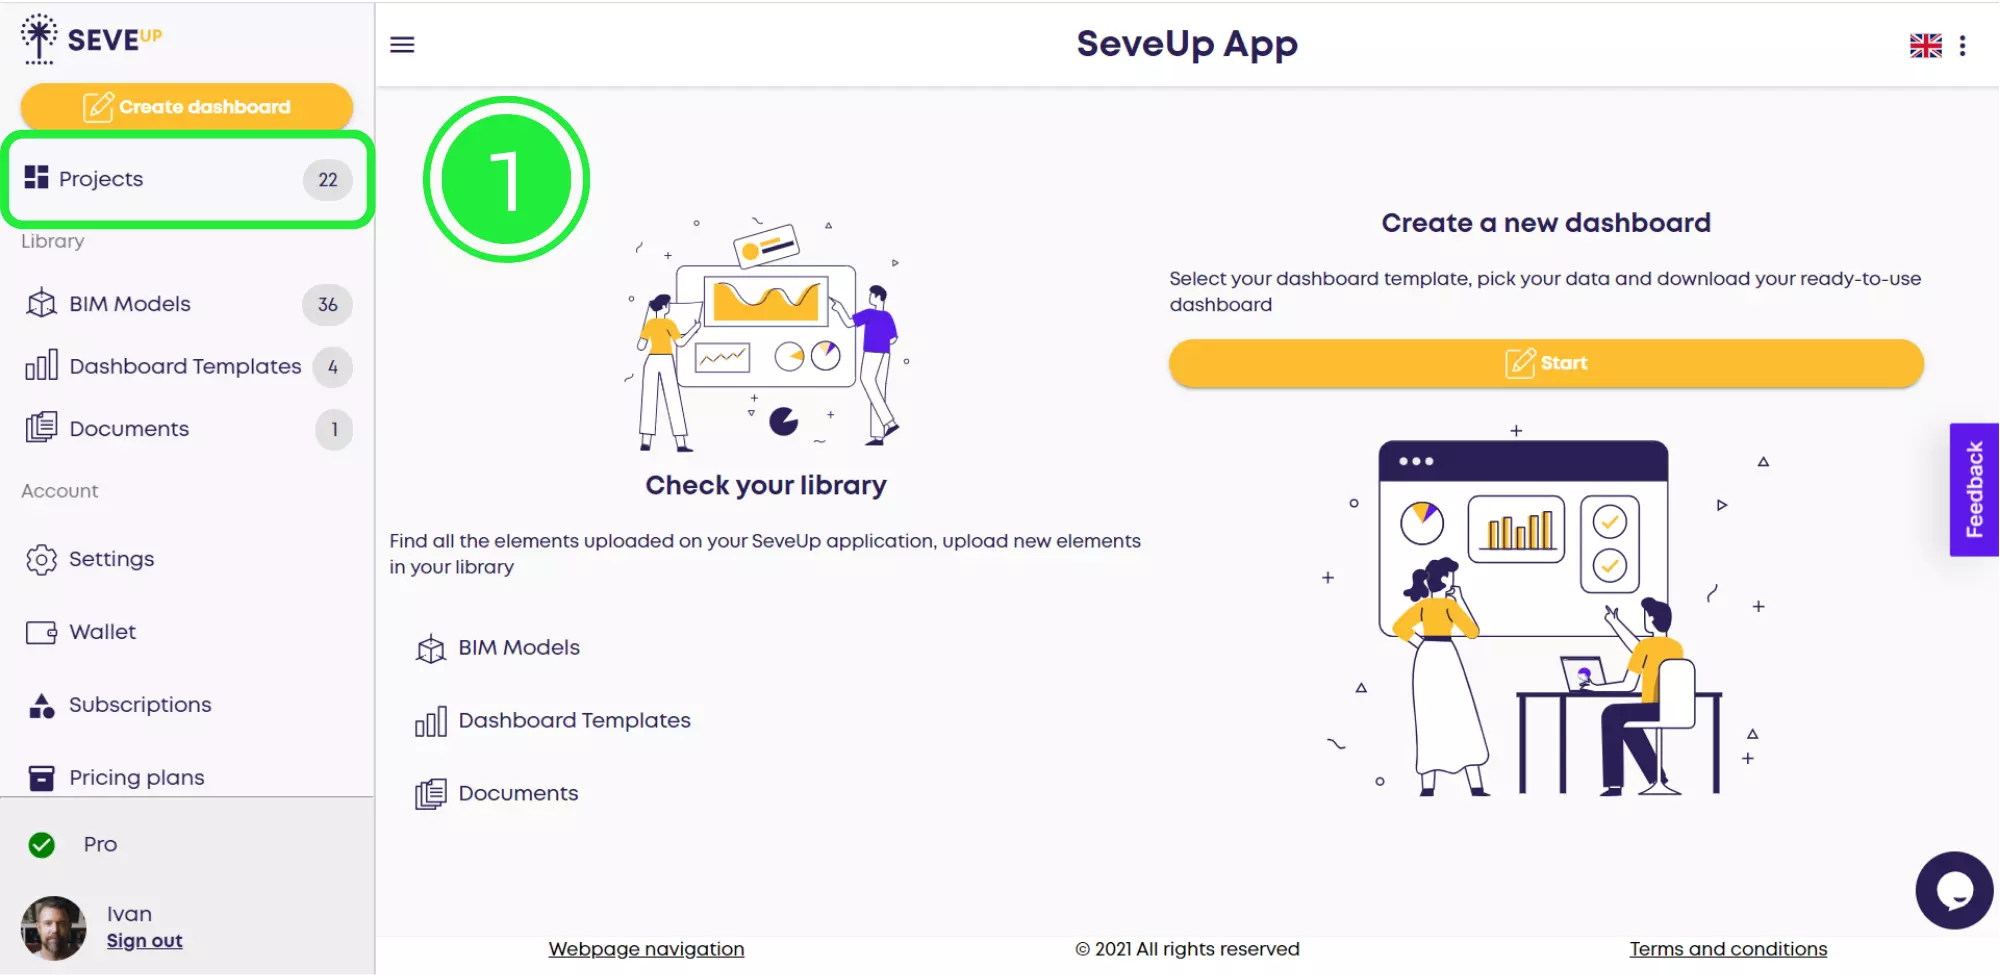
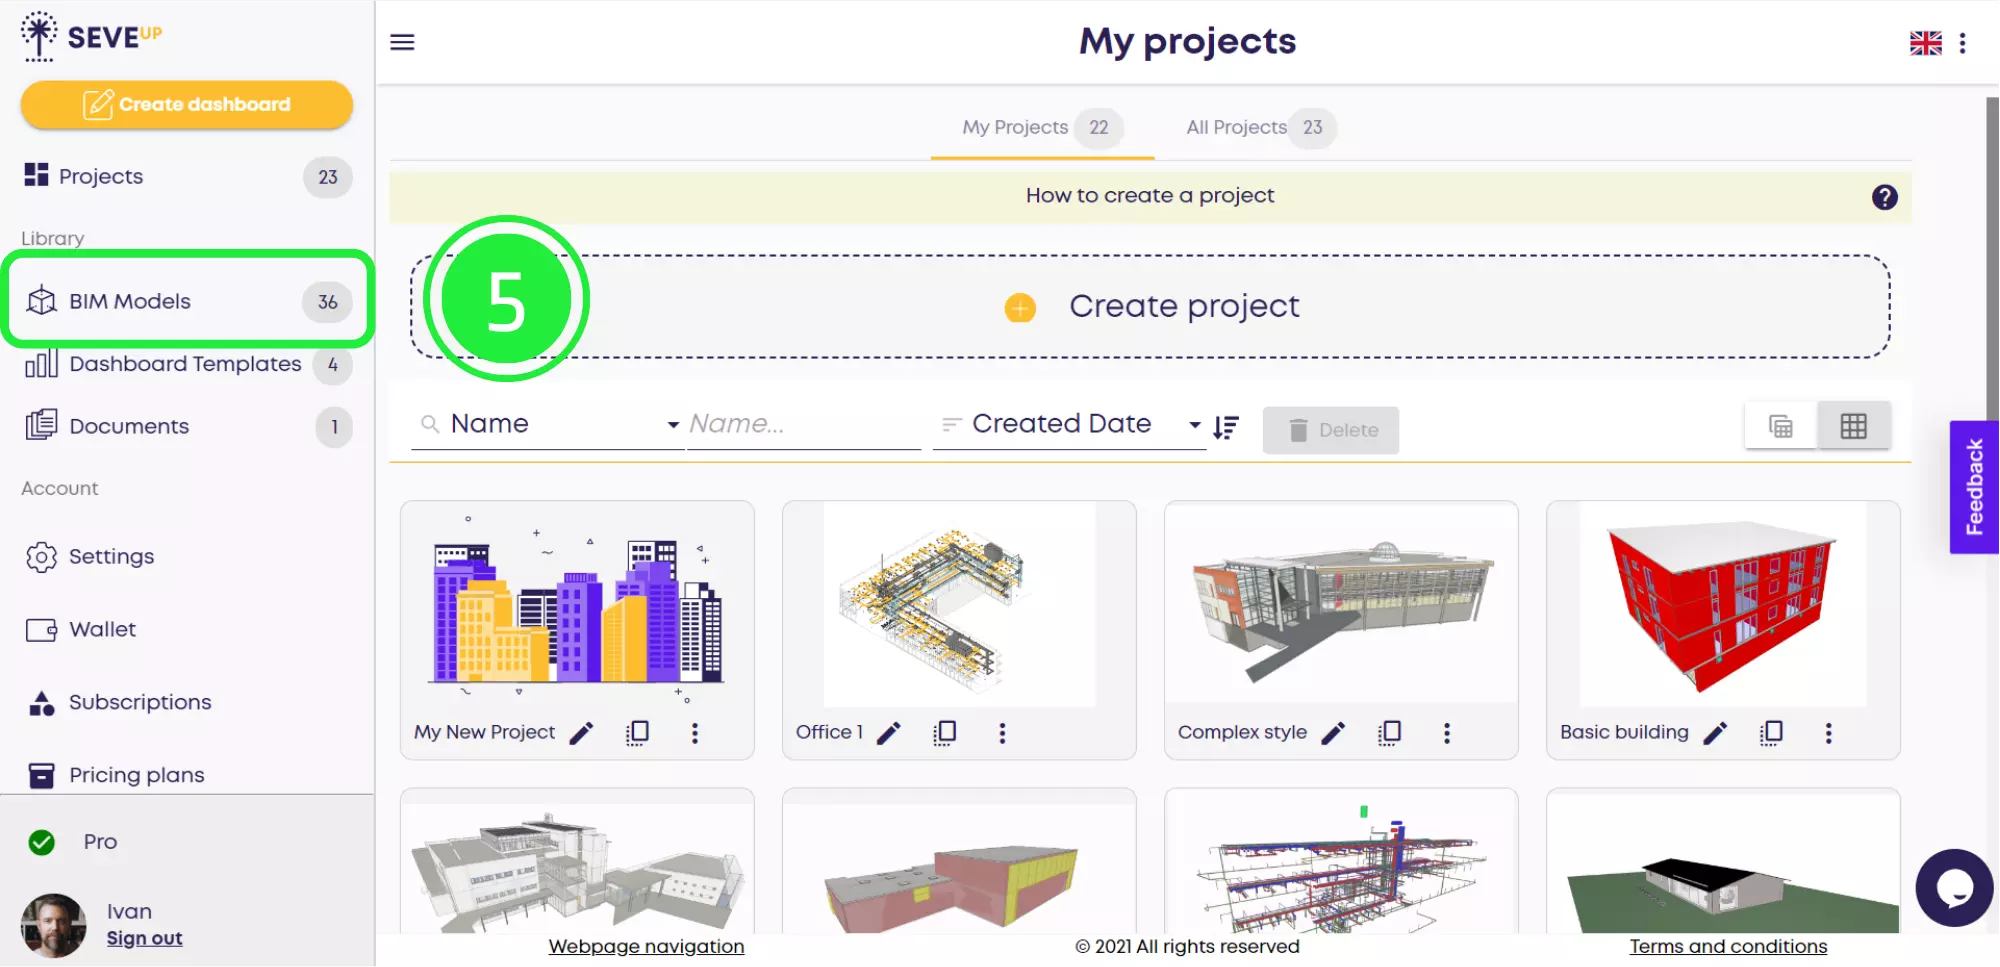
You’ll find the “Projects” button toward the top of the left navigation bar. Click it to proceed to the Projects page.
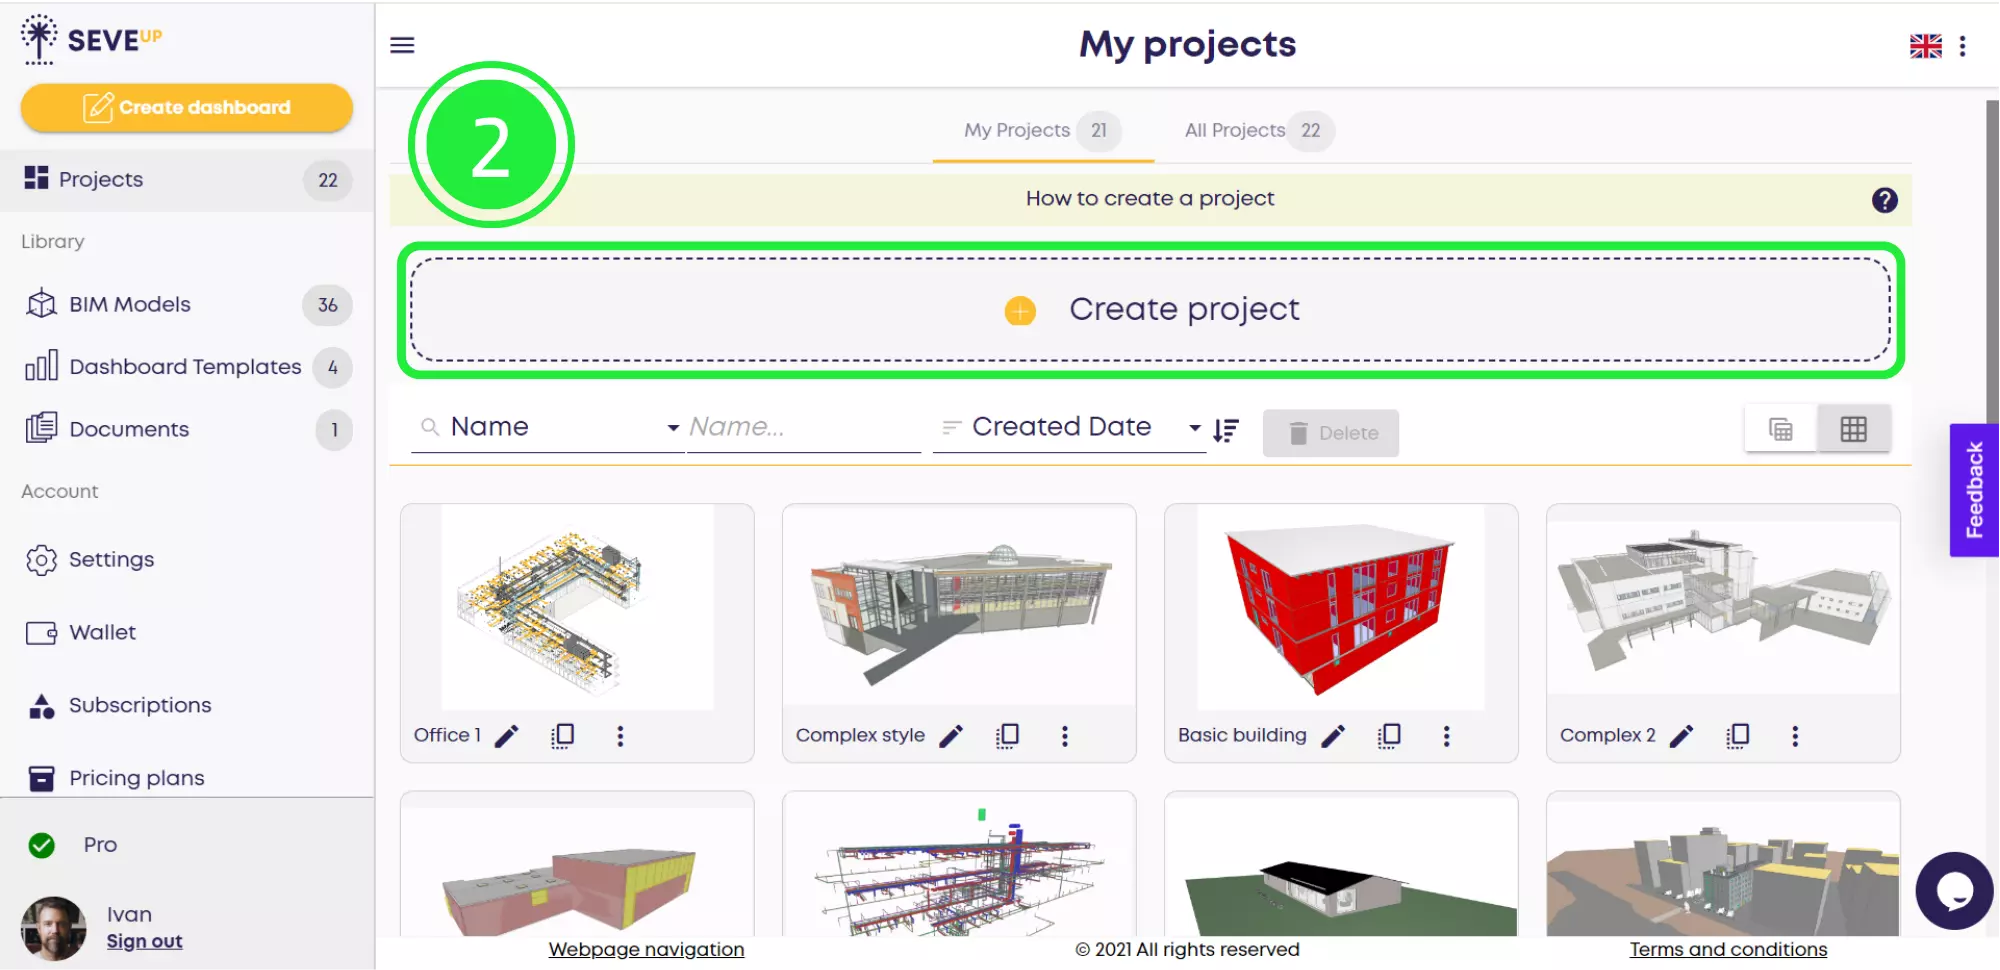
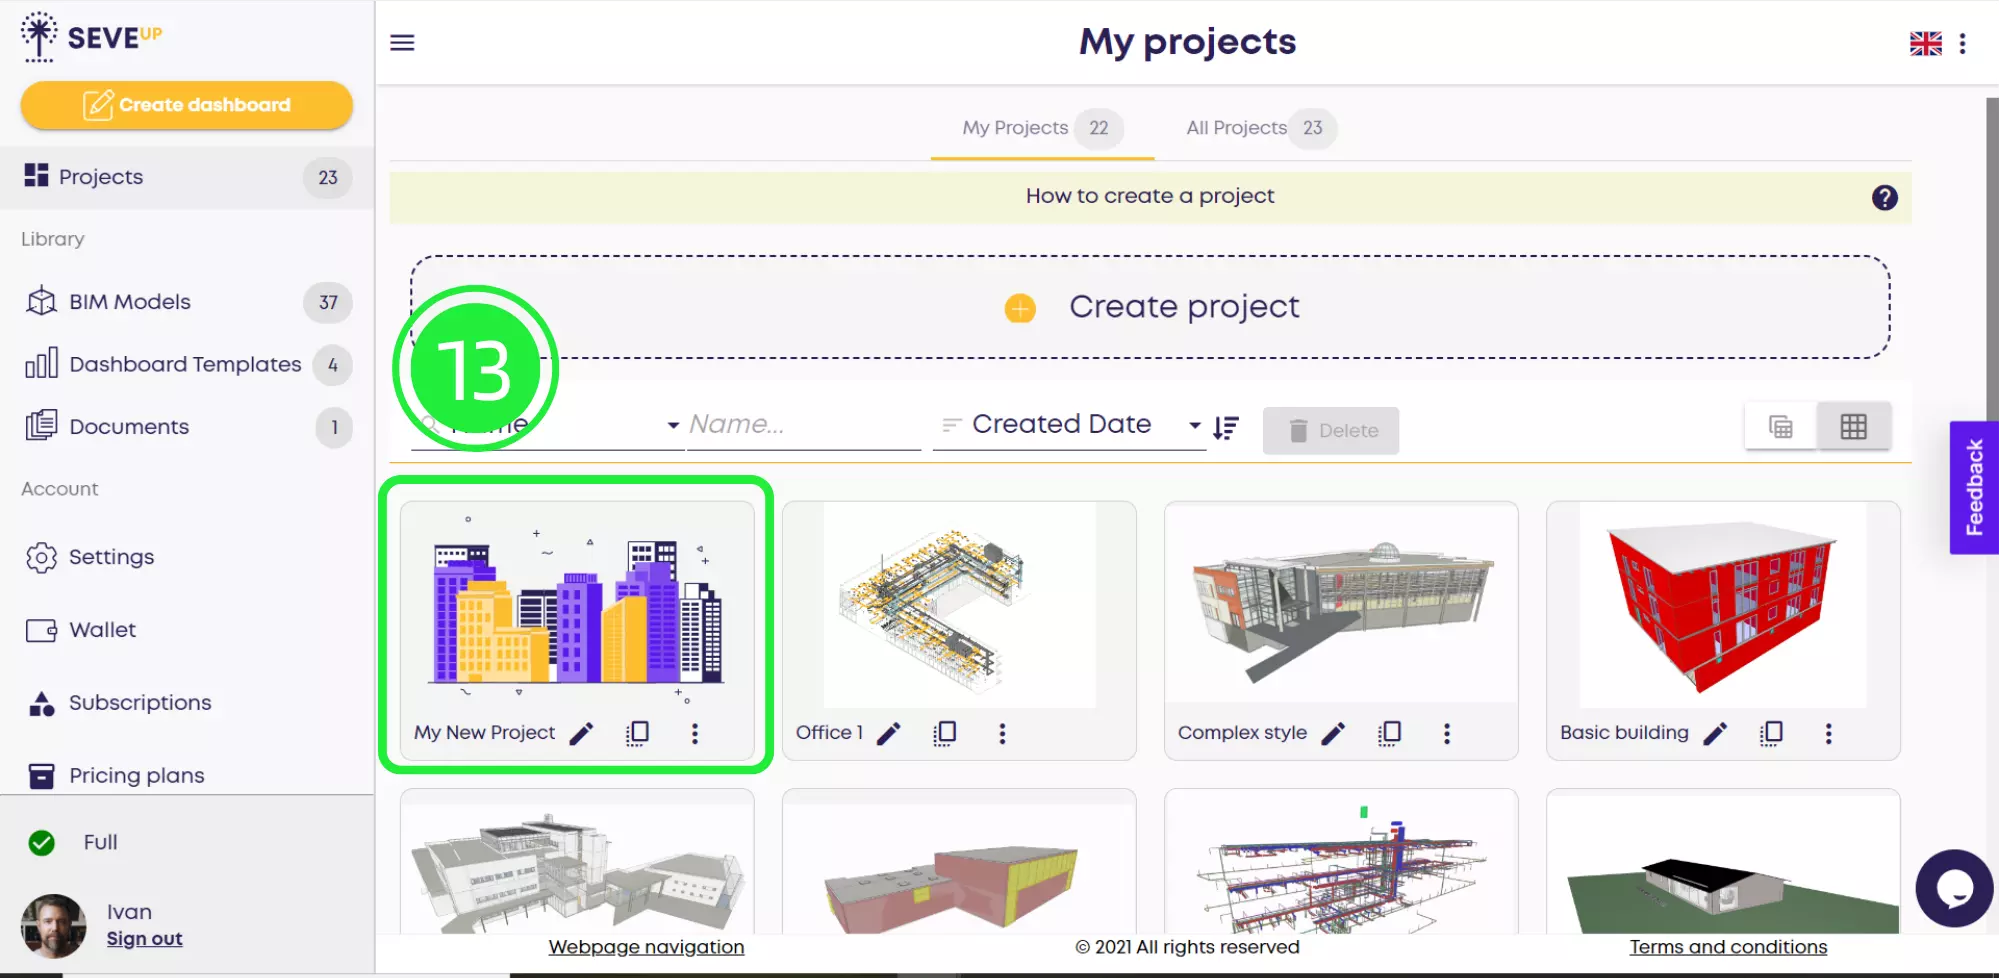
After clicking “Projects,” you’ll be directed to the My projects page. At the top of this page, you’ll find a “Create project” button. Click it to initiate a new project in the SeveUp app.
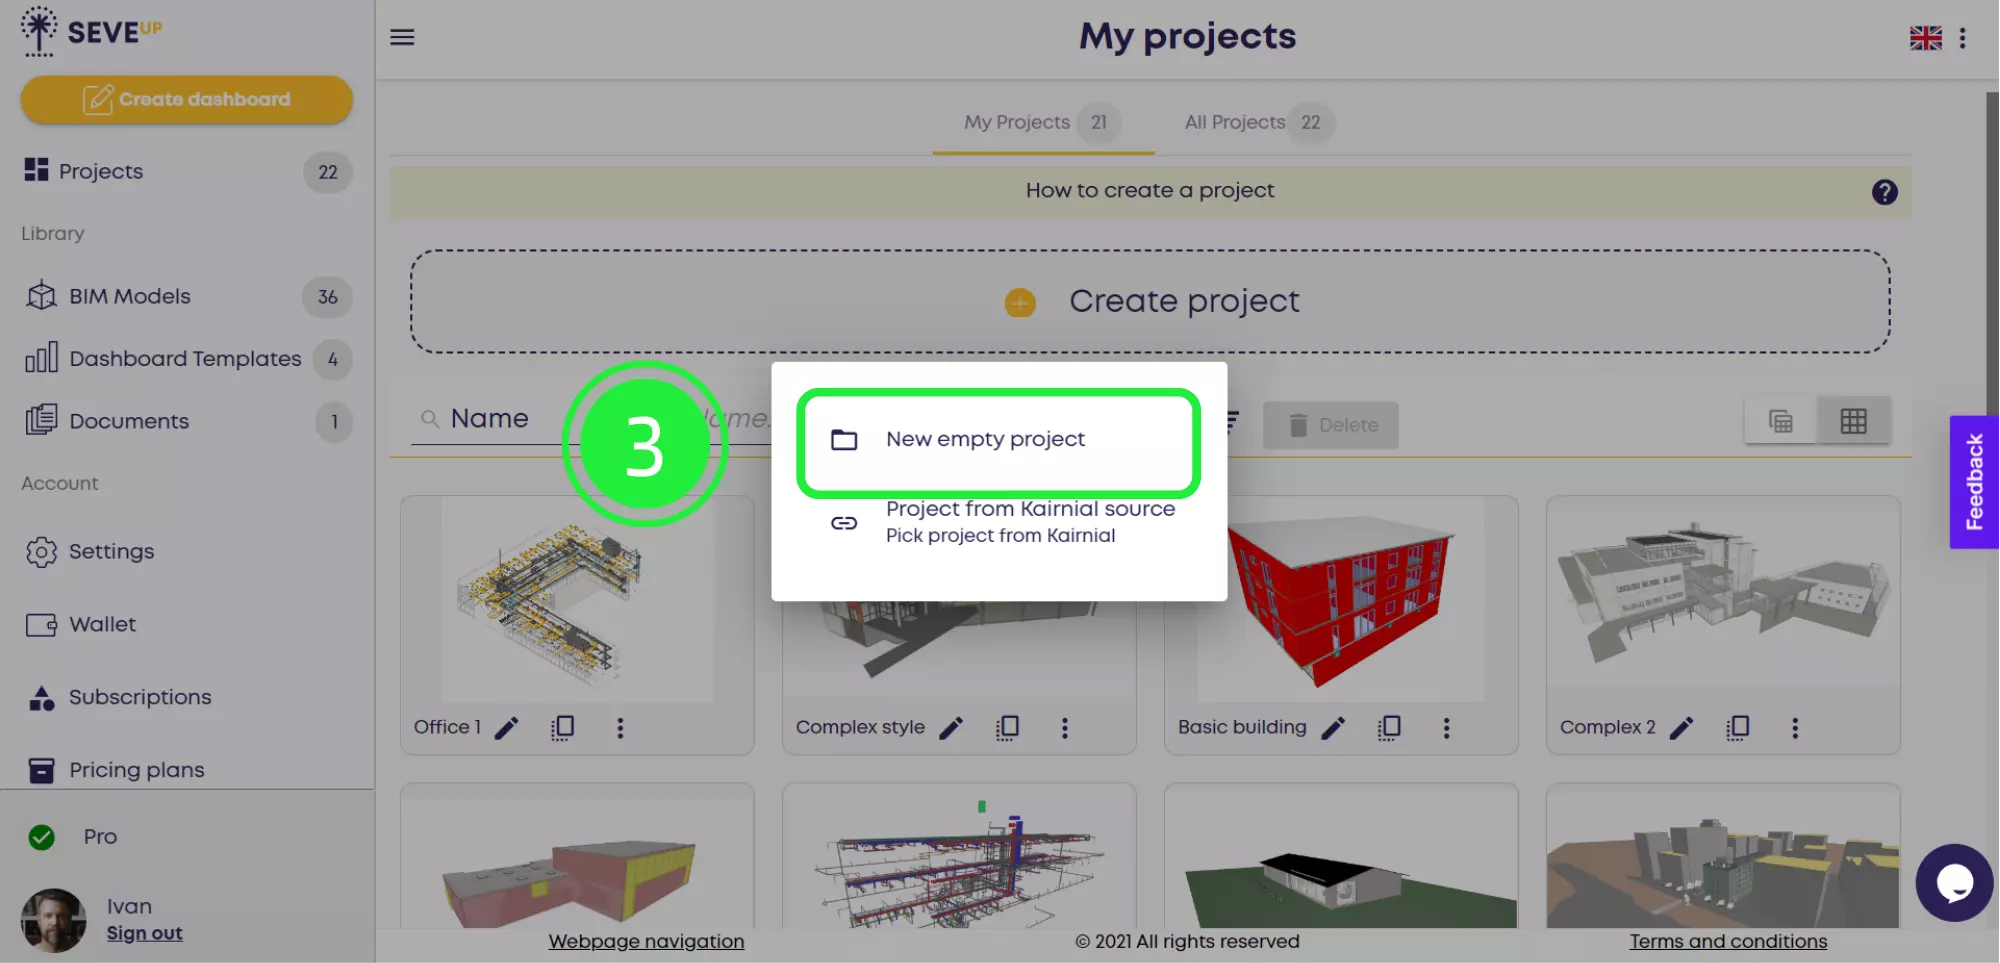
A pop-up will appear with various options. Click “New empty project” to start a new project where you can add your BIM files.
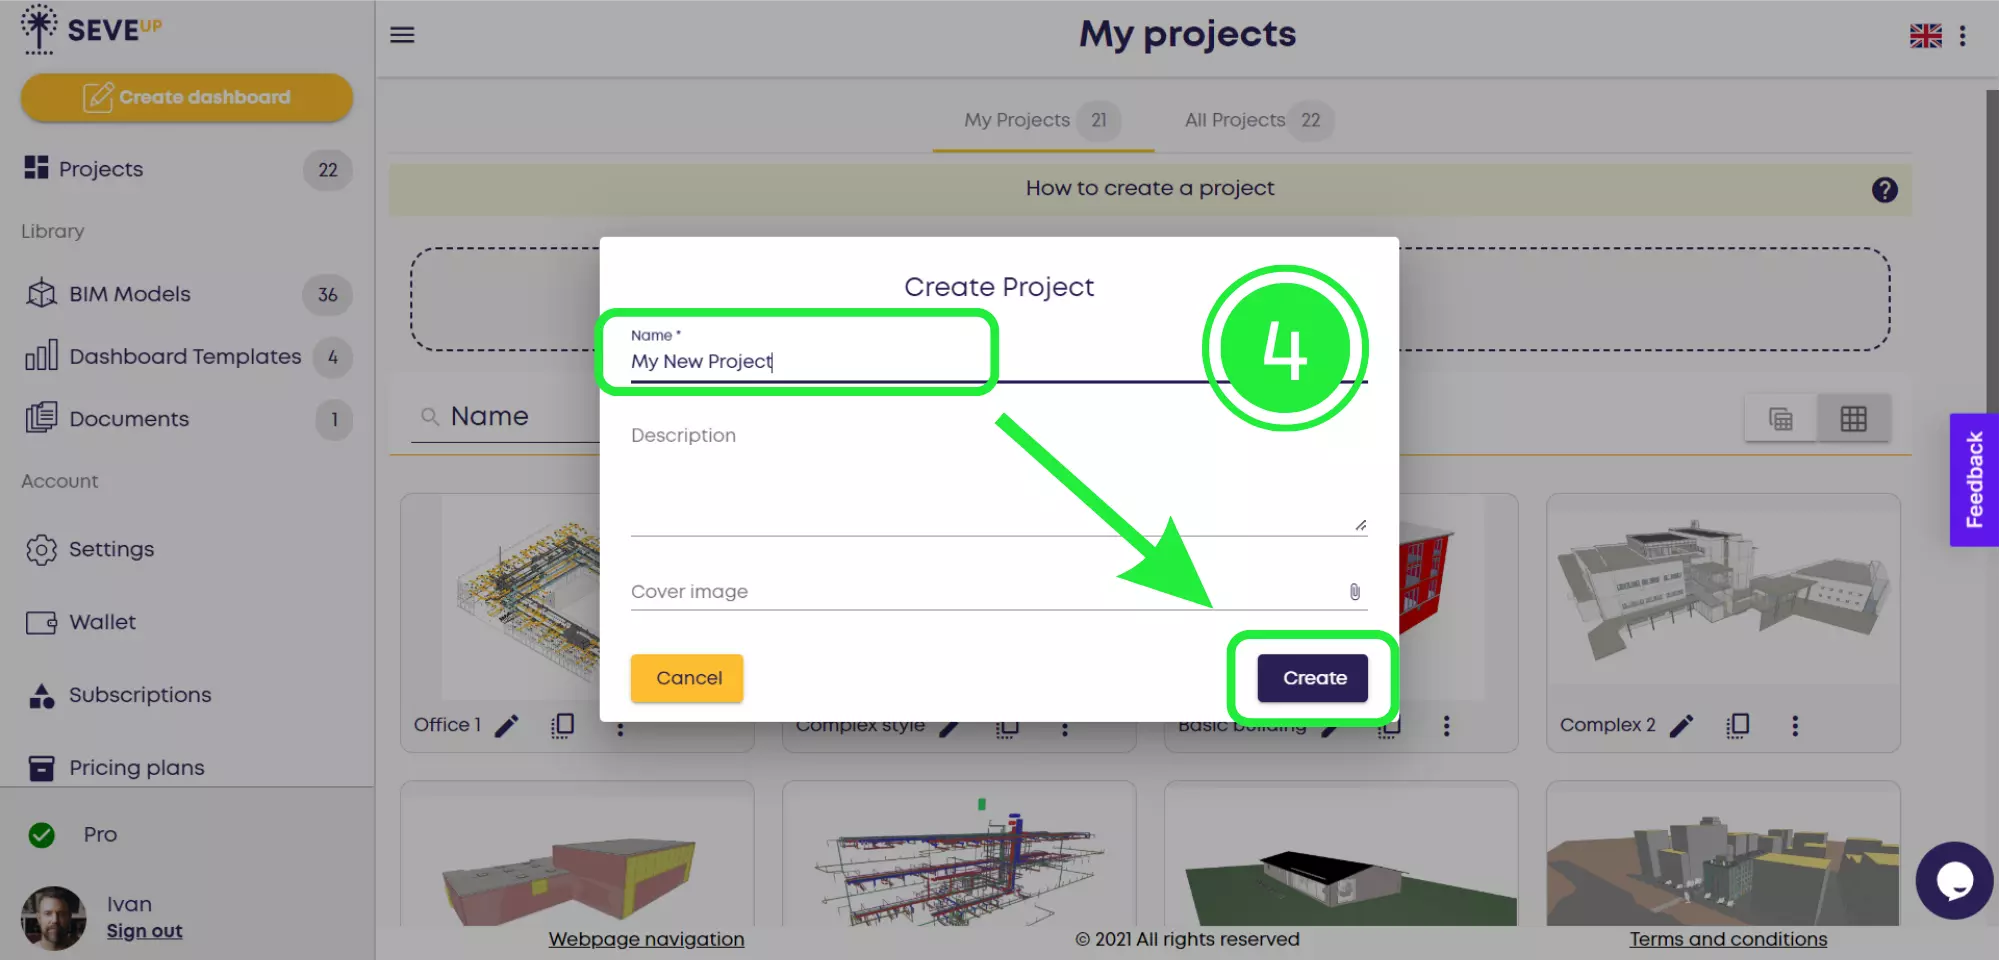
Firstly, personalize your project with a name, description, and a cover image to help you distinguish it from your other projects. Then, once you’re done, click ‘Create,’ and subsequently, your project will be prepared for action!
Now it’s time to add your existing BIM file to your newly created project.
On the My projects page, select the “BIM Models” option in the left navigation bar.
At the top of the page, choose “Upload BIM Model” to upload your model.

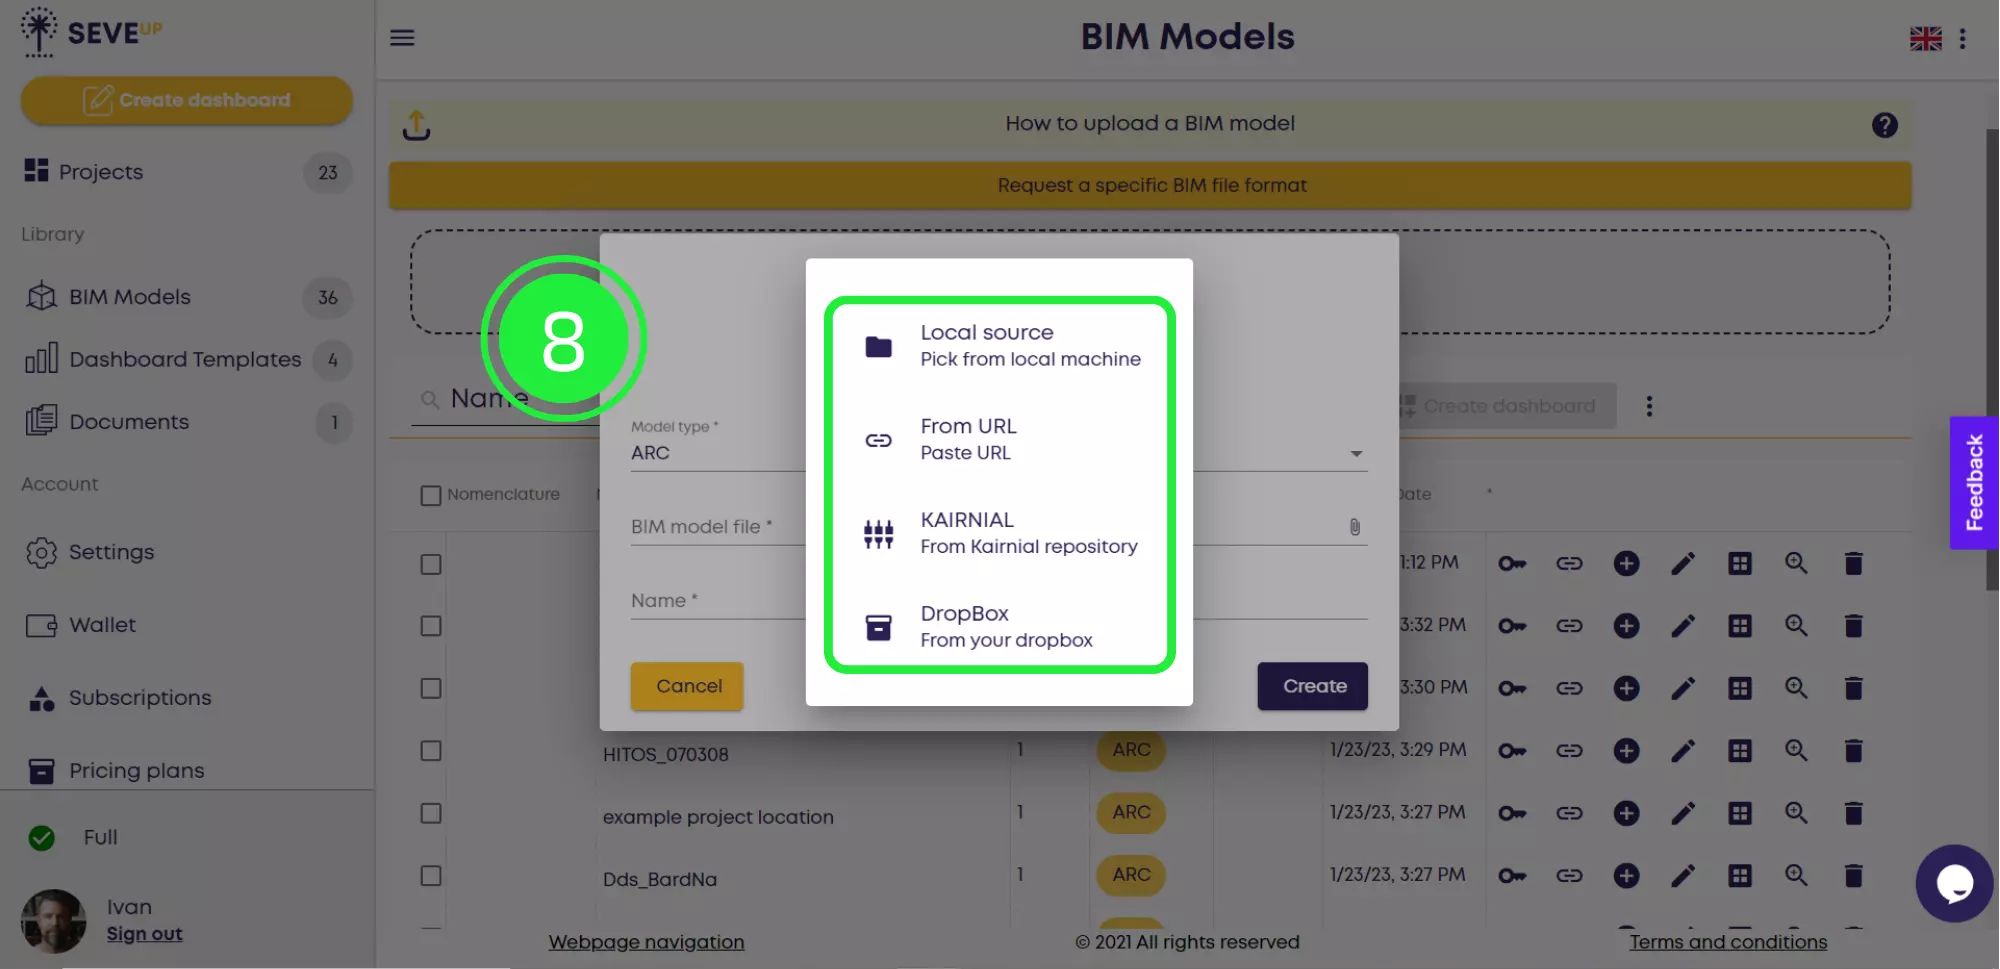
A pop-up will appear where you can select the model type, the file you want to upload, and how you want it to be named within your project. Begin by selecting the “Model Type.”

Next, actively select your BIM model file by clicking the ‘Attach File’ (paperclip) icon on the right. Initially, you can upload it from your computer (‘Local Source’) or alternatively provide a URL (‘From URL’). Moreover, if you are using a SeveUp connector, those options will also be available here.
If uploading a local file, locate the desired .ifc file, select it, and click “Open.”
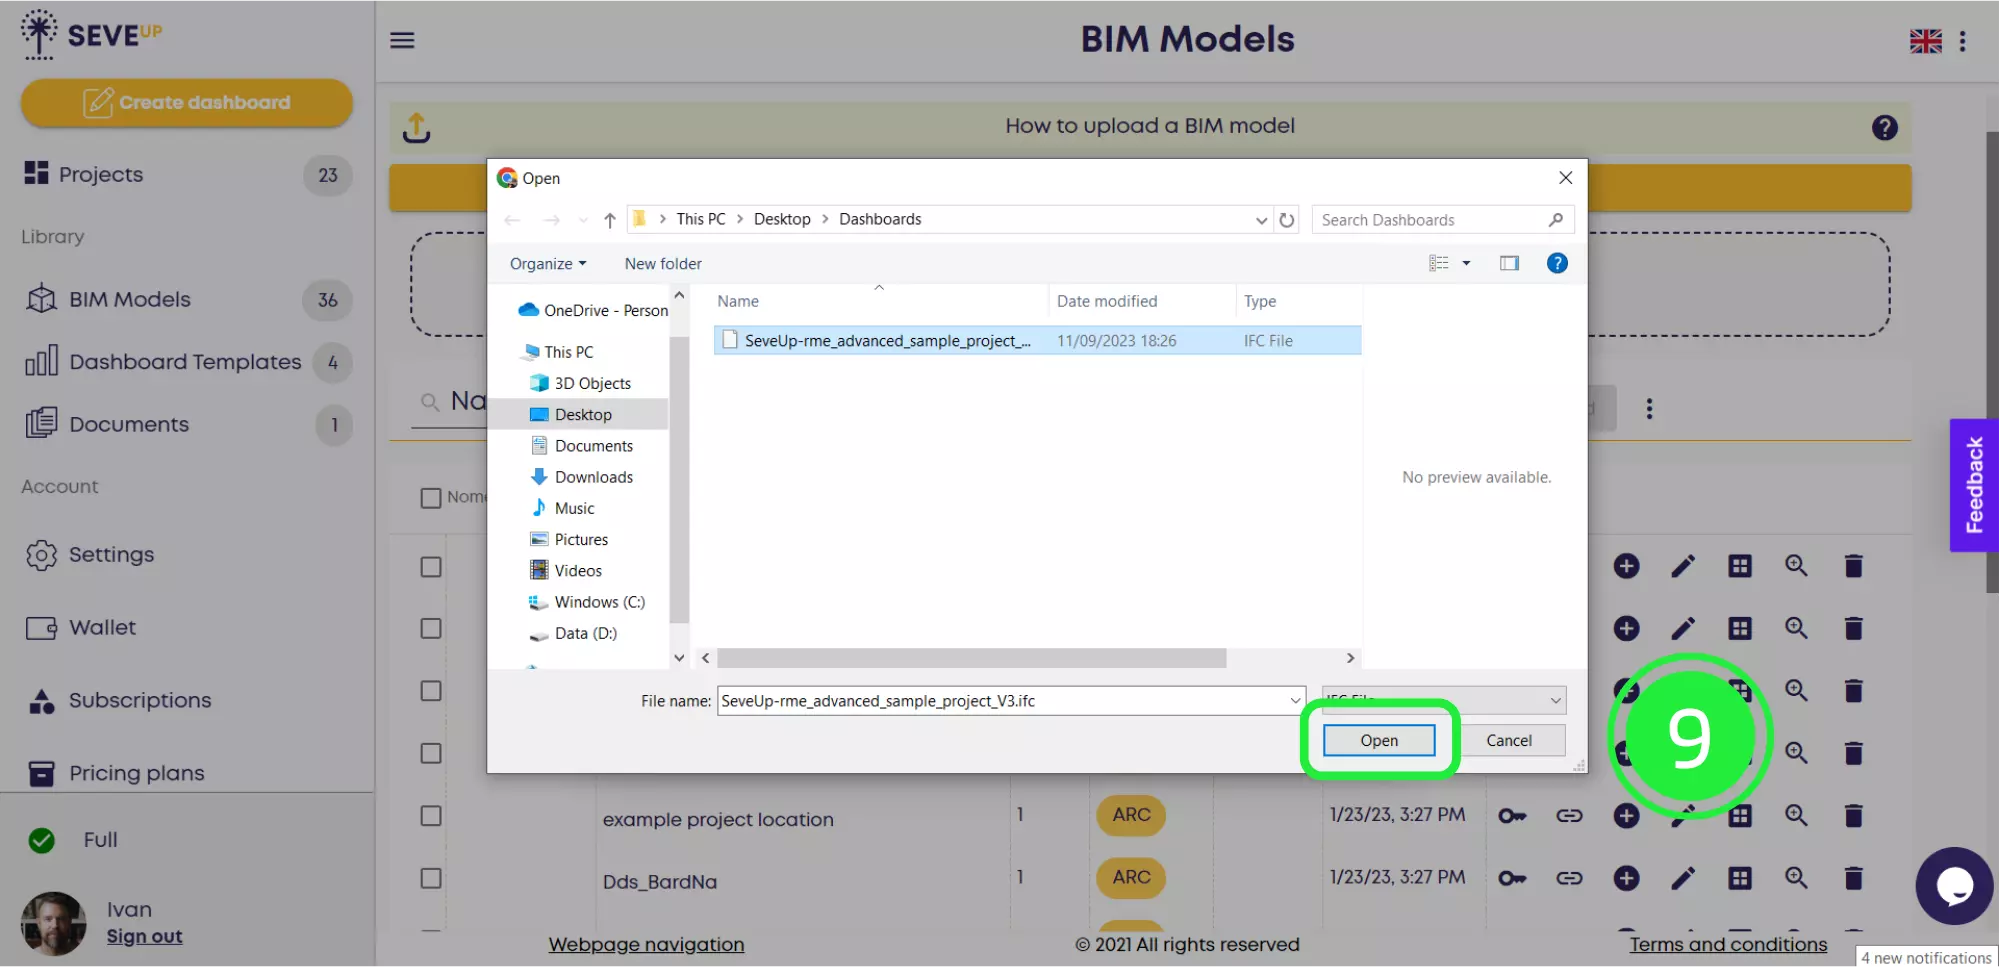
Assign your BIM model the name you desire within your project. Once all fields are filled, click “Create.”

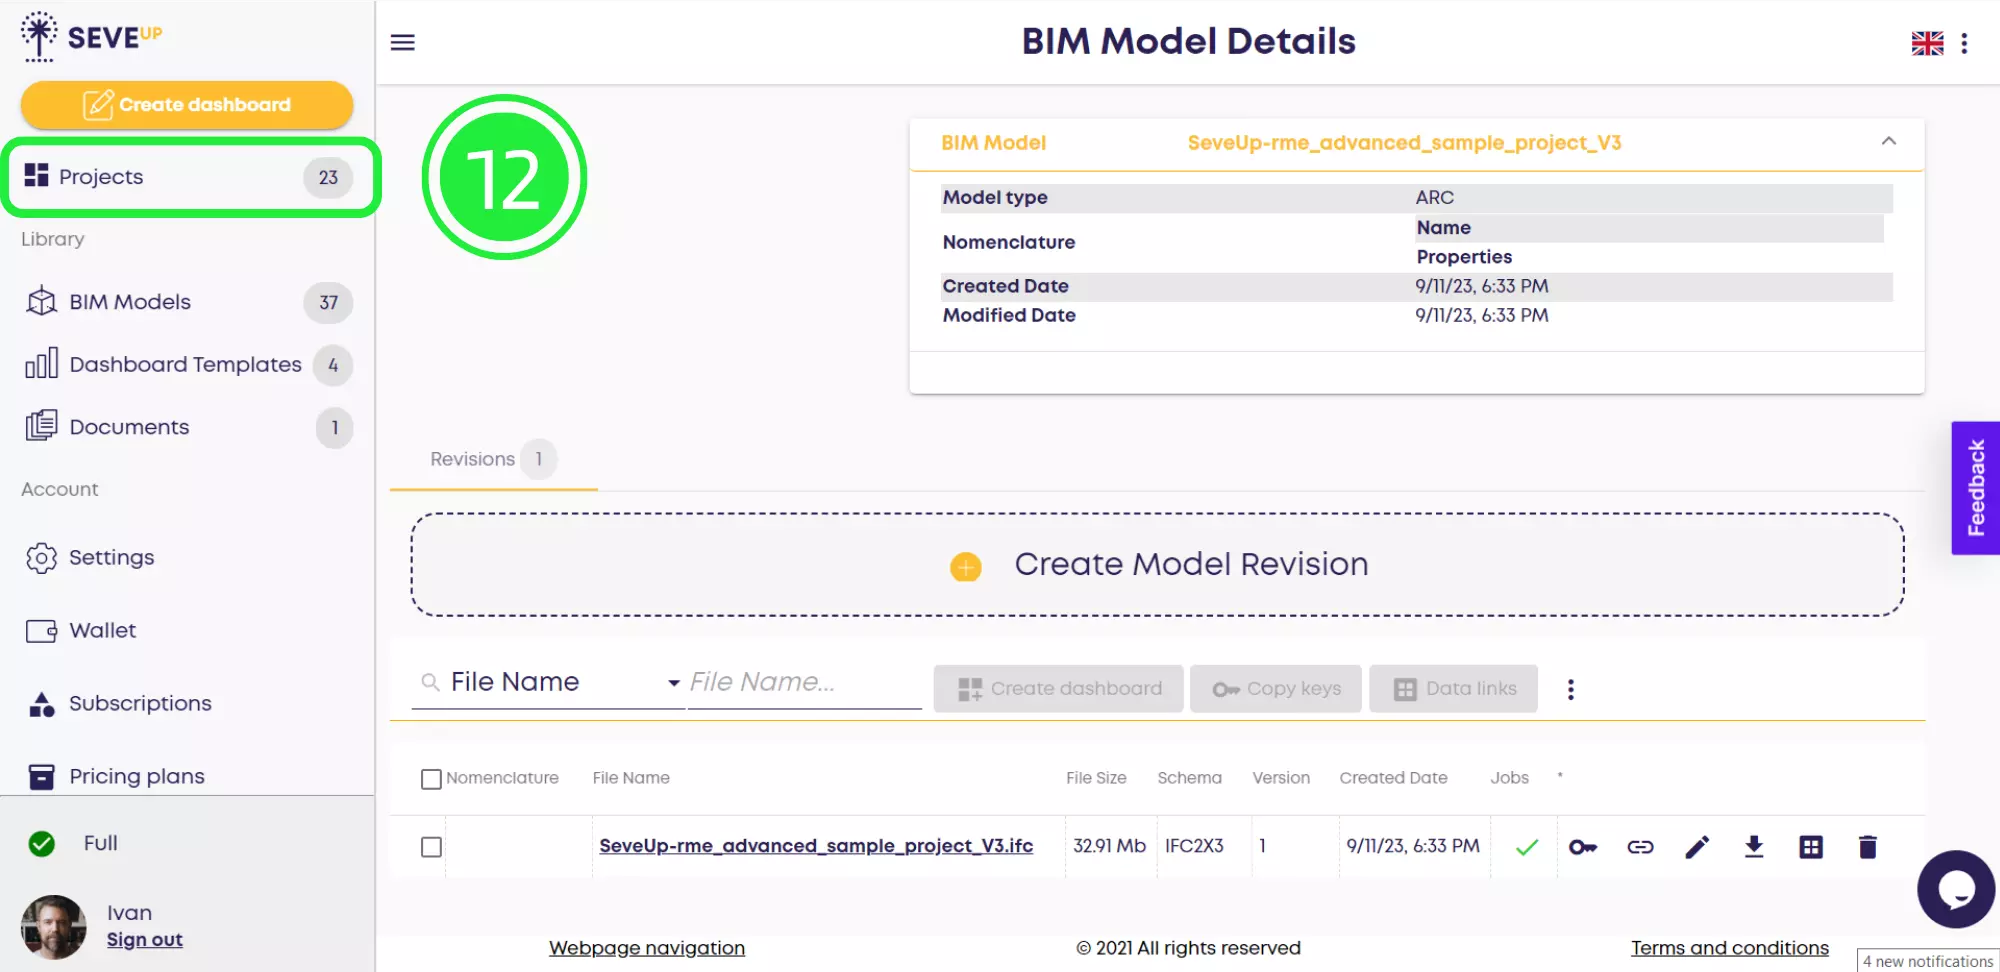
As soon as your .ifc model is successfully uploaded and ready to use, a green checkmark will appear in the “Jobs” column.

After successfully uploading your BIM model, associating it with your newly created project is just a few clicks away. Here’s how:
To link your model to your project, click on the “Projects” button to access your list of projects.
Click the thumbnail for your new project to view all the project details.
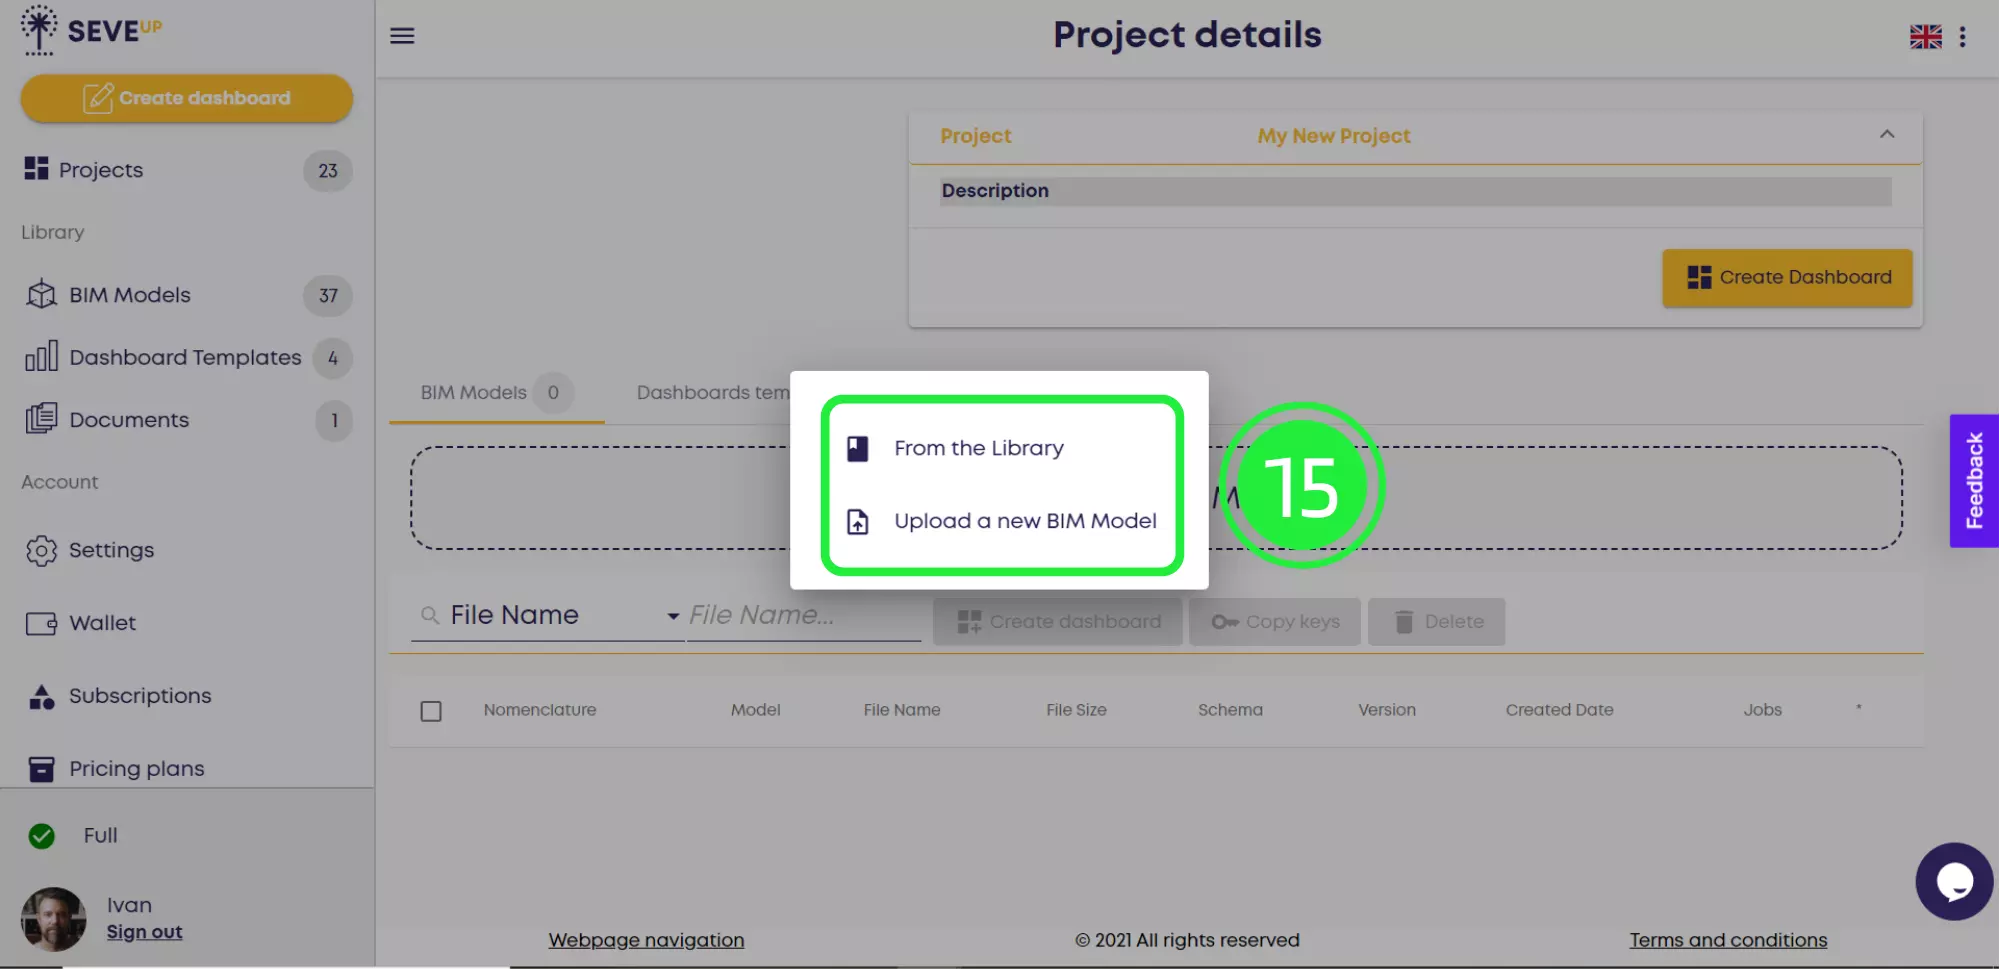
Ensure you’re in the “BIM Models” tab by selecting it, and then click the large “Add BIM Model” button in the center of the page.

To choose the BIM model you just uploaded, select the “From the Library” button. Additionally, you have the option to upload a new .ifc model from this step if you wish.
Click the menu icon in the “Model” field to view all the models in your Library.
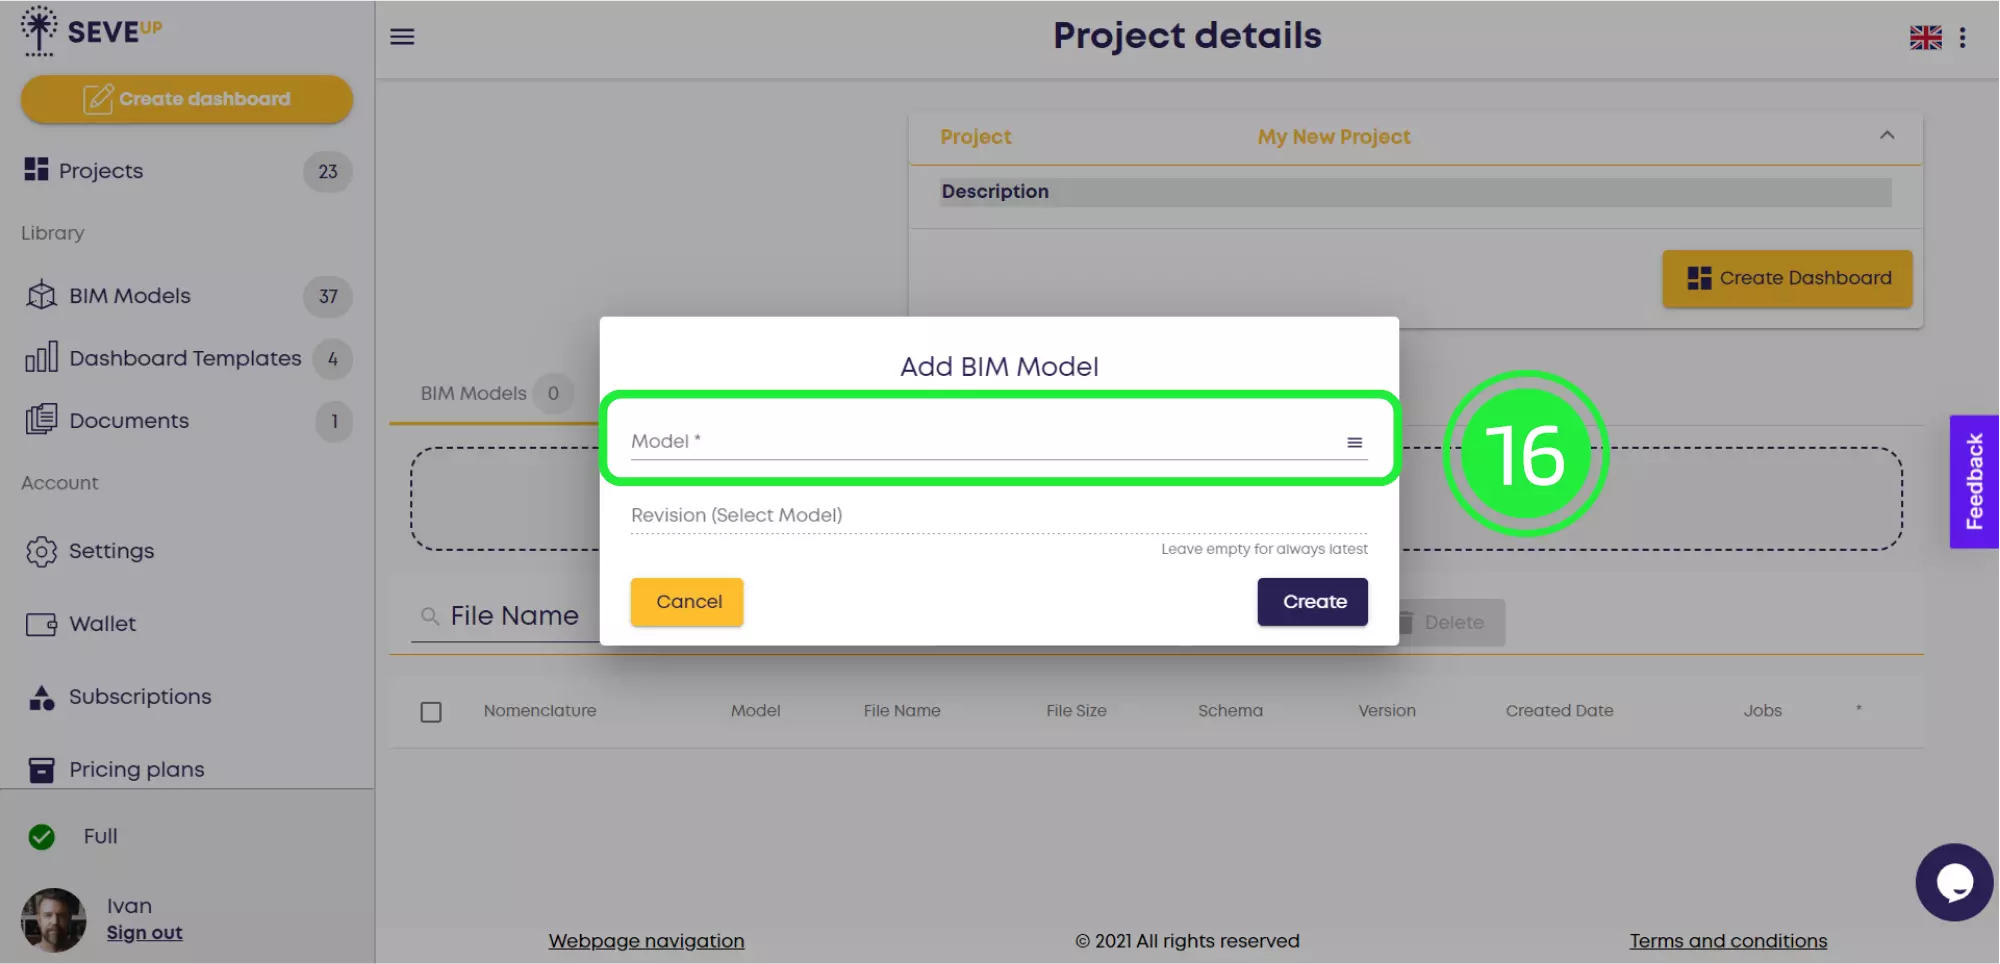
Click the menu icon in the “Model” field to view all the models in your Library. You can sort them by name, revision, model type, or milestone. If you know the file’s name, use the search bar. If necessary, select a specific revision; otherwise, as a default, the system will automatically use the latest revision.
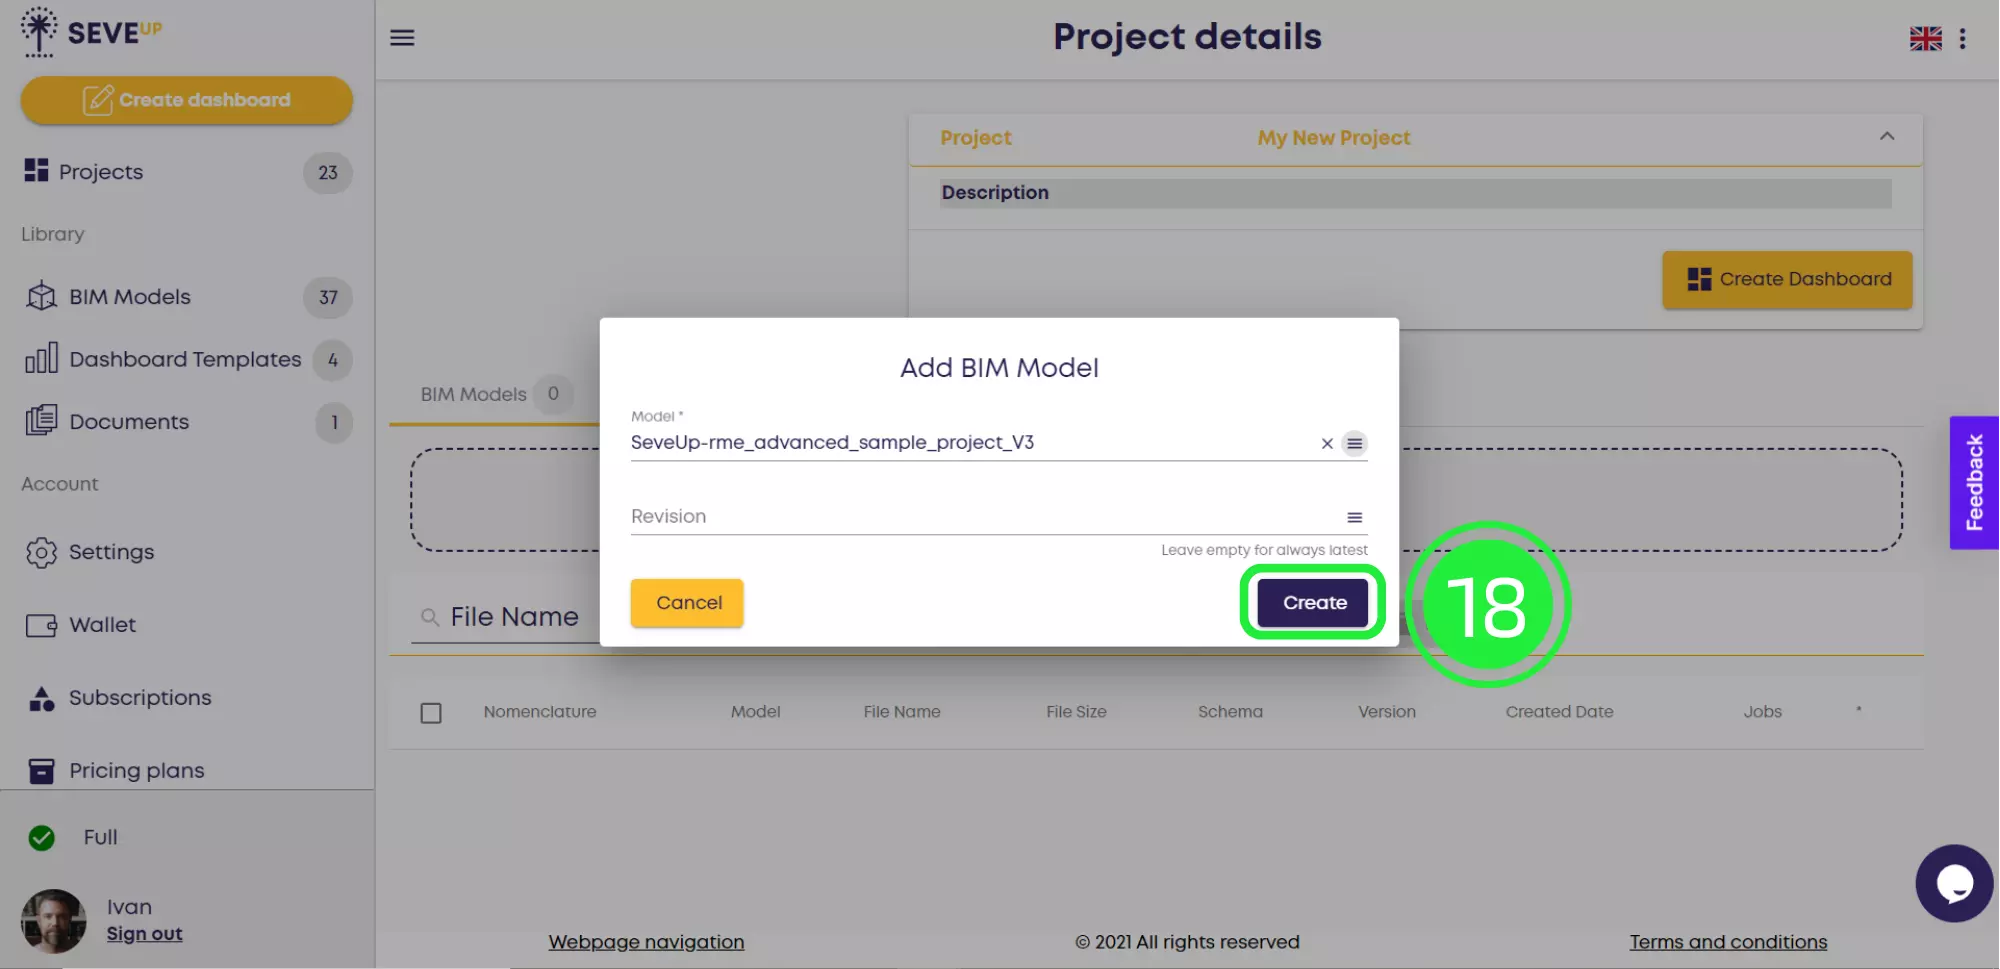
Afterward, select the .ifc model you uploaded, and then click ‘OK.’

Complete the linking process by clicking “Create.” Your .ifc model will now appear on the “Project Details” page and be seamlessly integrated with your project.

Thanks to this handy guide, you’ve successfully created, uploaded, and linked a BIM model to a new project in the SeveUp app. Now, it’s time to bring your architectural vision to life!
Maximize your BIM capabilities with the SeveUp app by following these steps. Unleash the full power of your BIM process effortlessly
Power BI Quick Tutorial: Mastering Insights in Minutes!


Want to get started with your very own BIM project? You’ll be surprised by just how easy it is. Create your own free account is SeveUp today and give it a try.

Unlock the power of your building data with SeveUp. Tailored dashboards, seamless integration
🎓 Free BIM Checker Training Learn how to automate your BIM model checks and get certified. Register for Free Click
Learn More🎓 Free BIM Checker Training Learn how to automate your BIM model checks and get certified. Register for Free Click
Learn More🎓 Free BIM Checker Training Learn how to automate your BIM model checks and get certified. Register for Free Choose
Learn More