Trusted by companies
all over the world:
Discover the simple and efficient method to merge multiple IFC files using SeveUp and Microsoft Power BI. This step-by-step guide helps you combine your BIM models into a cohesive, interactive dashboard, enhancing your project visualization and management.
Transform your IFC files effortlessly and gain valuable insights with just a few clicks!
Learn how to automate your BIM model checks and get certified.
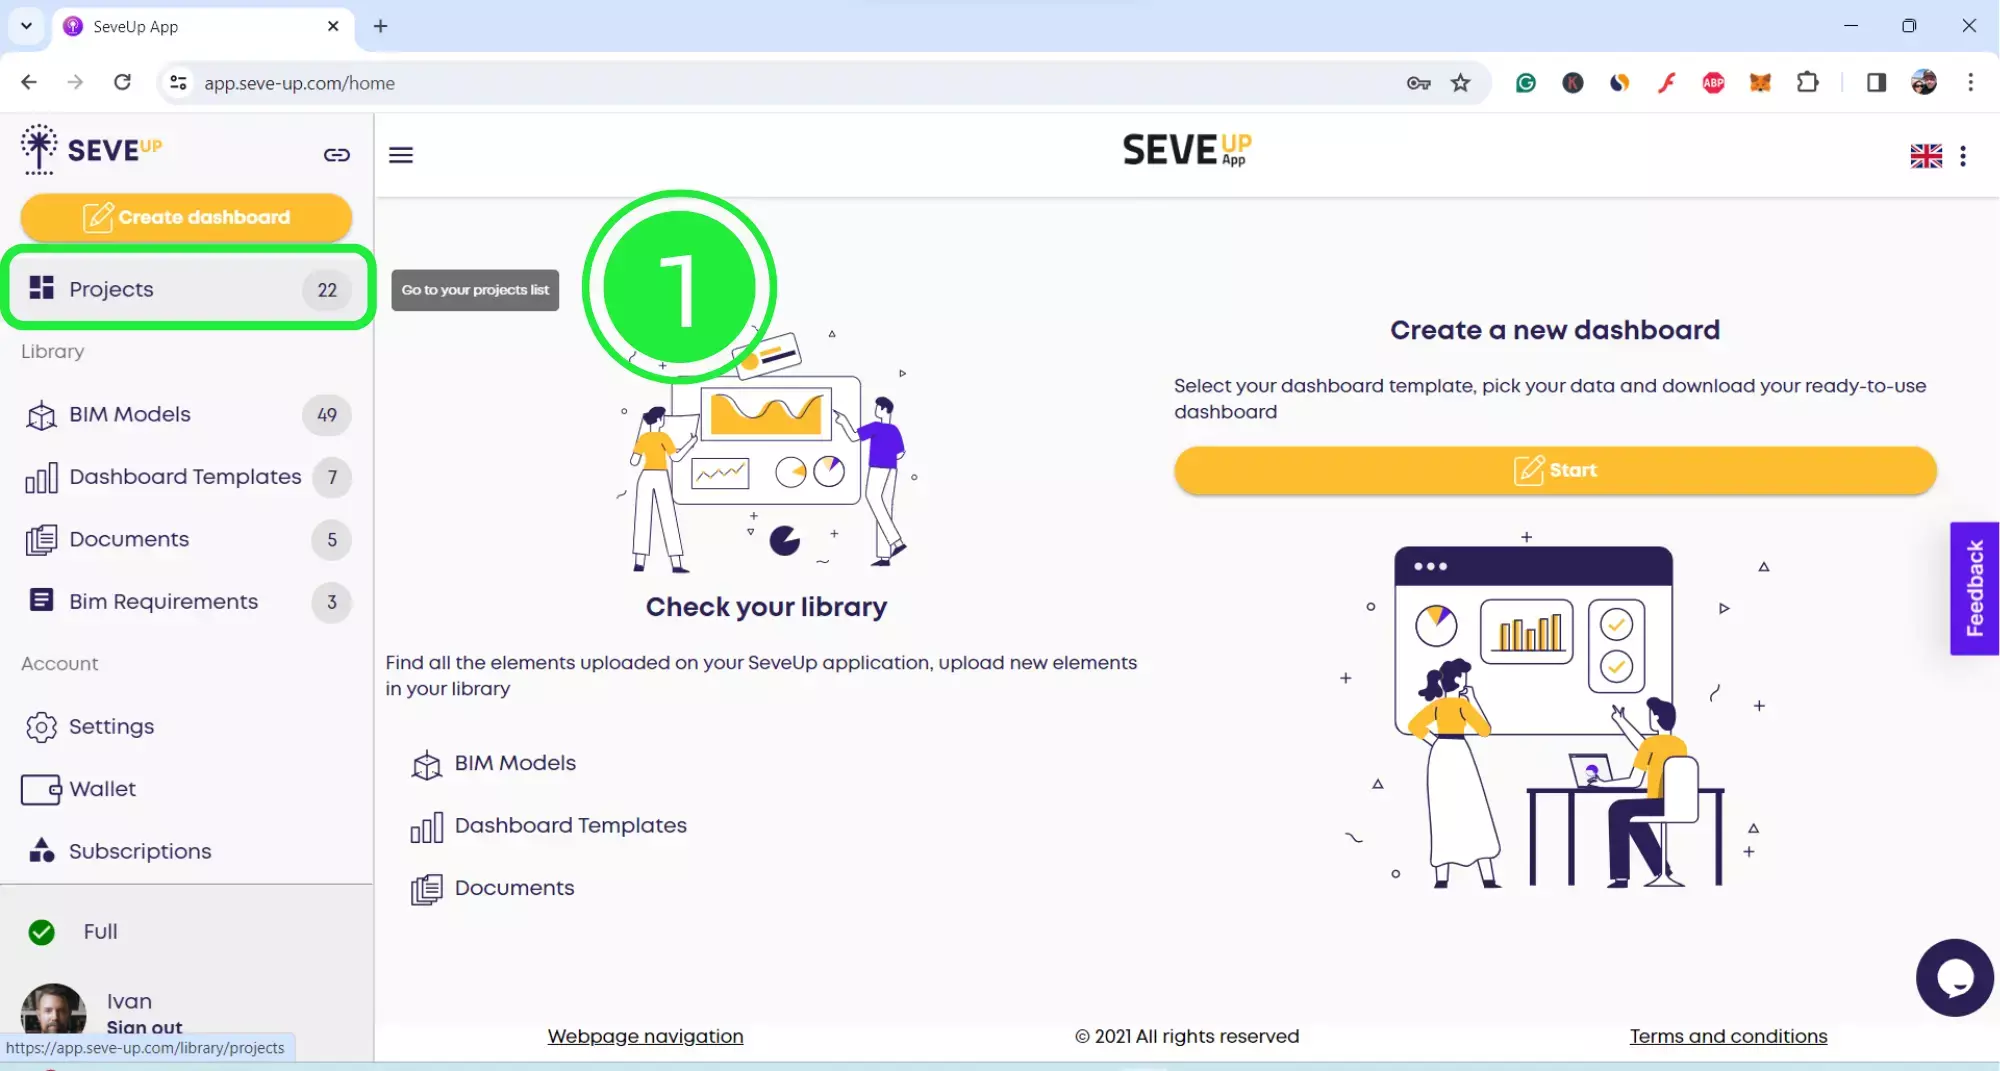
In this tuto, you will learn how to easily and quickly merge multiple IFC Files. Start off by logging in to your SeveUp App account and then click on the “Projects” button on the left-hand side.
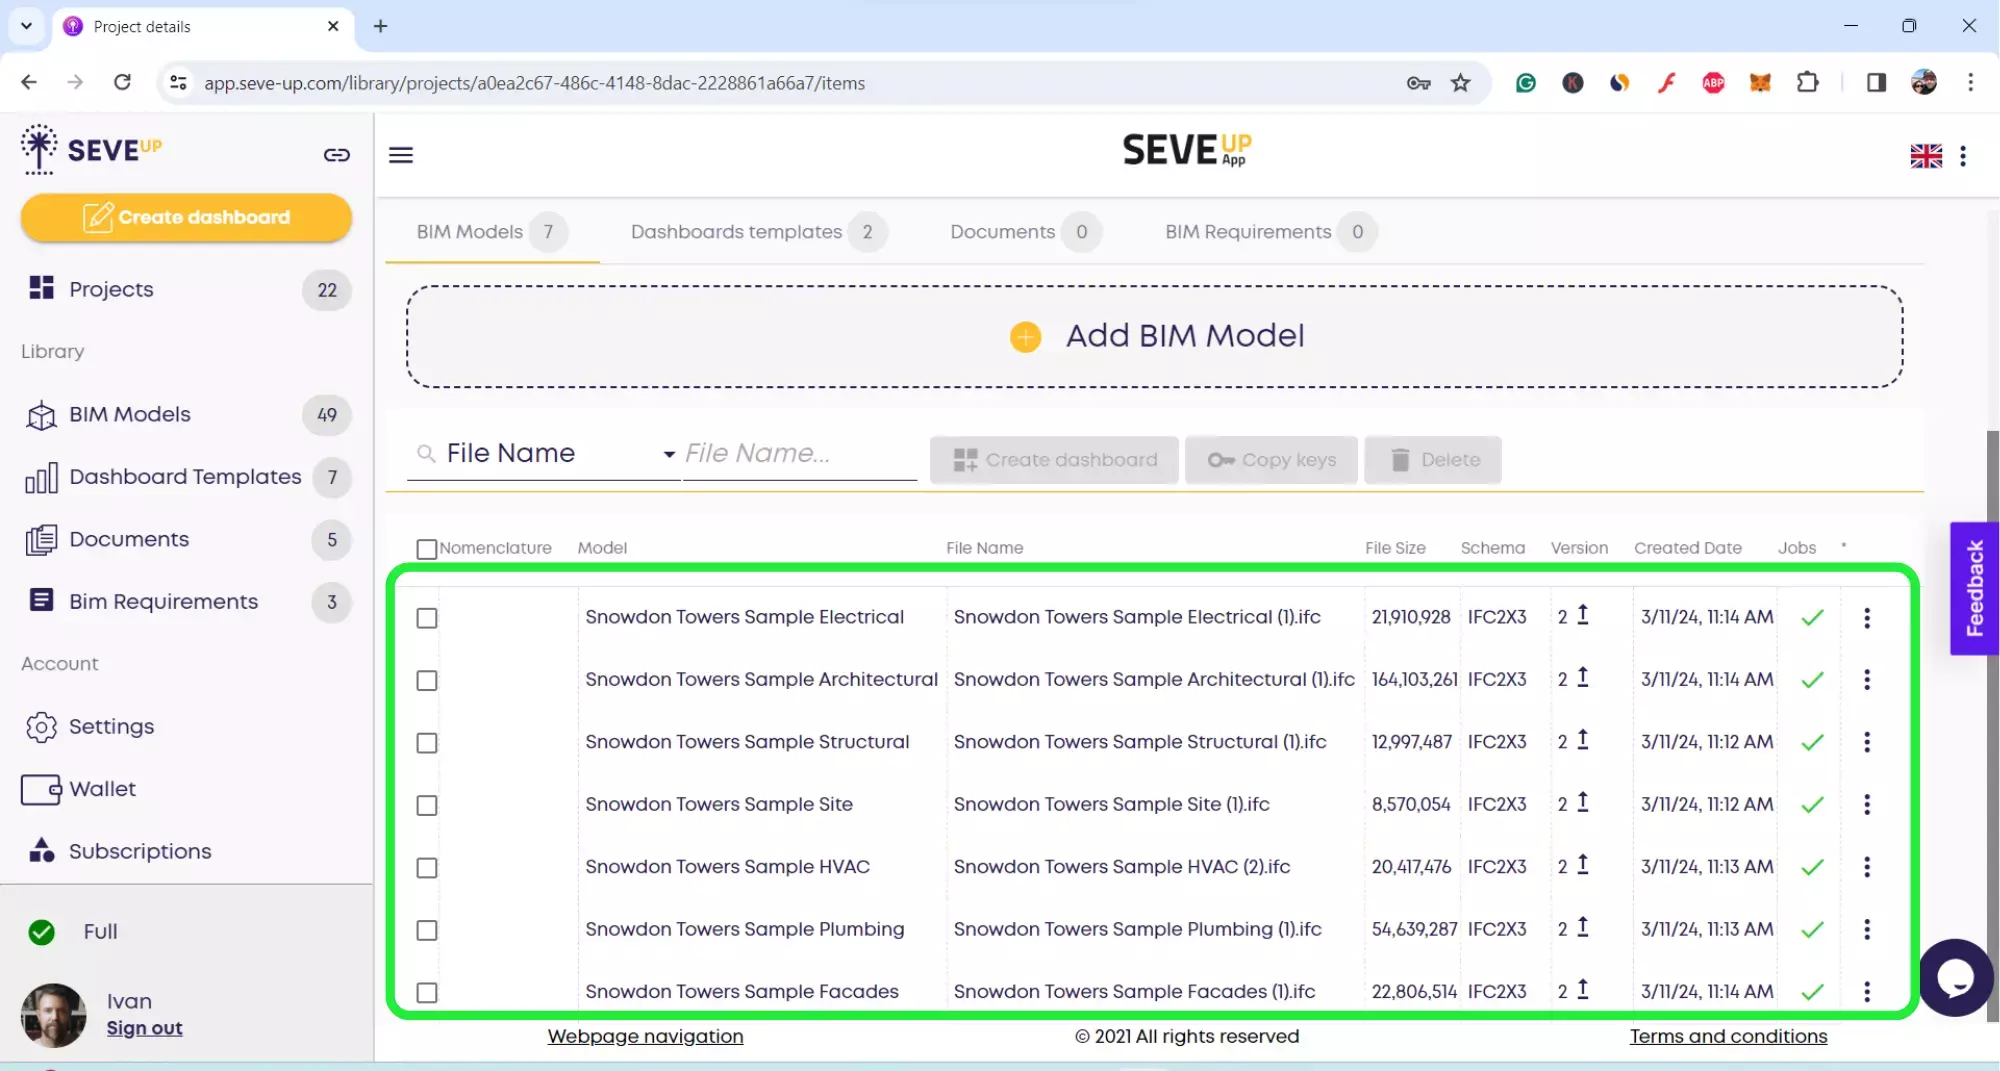
Select your project to access the folder and ensure that several BIM models in the fom of .ifc files have been added to it.
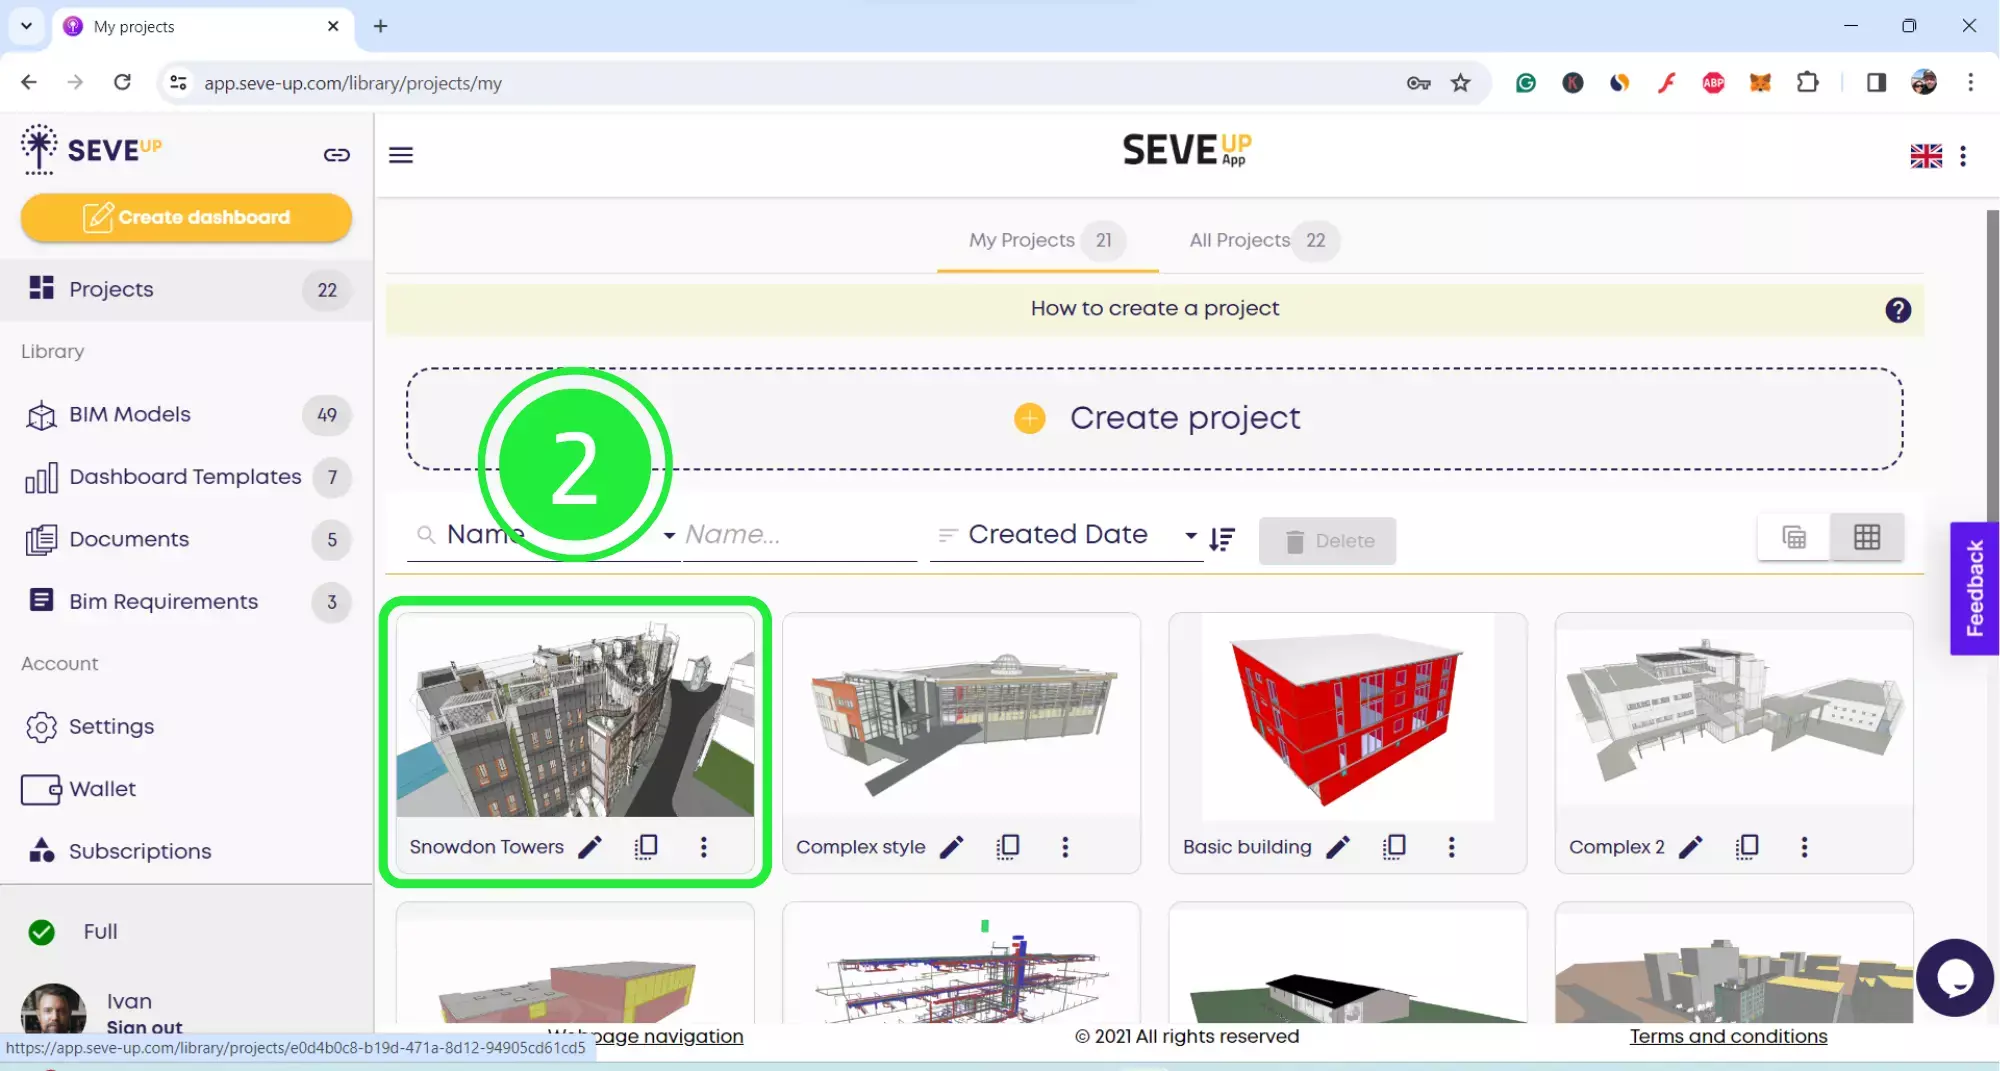
SeveUp can handle the merger of a huge amount of data as long as all the files have the same base point.
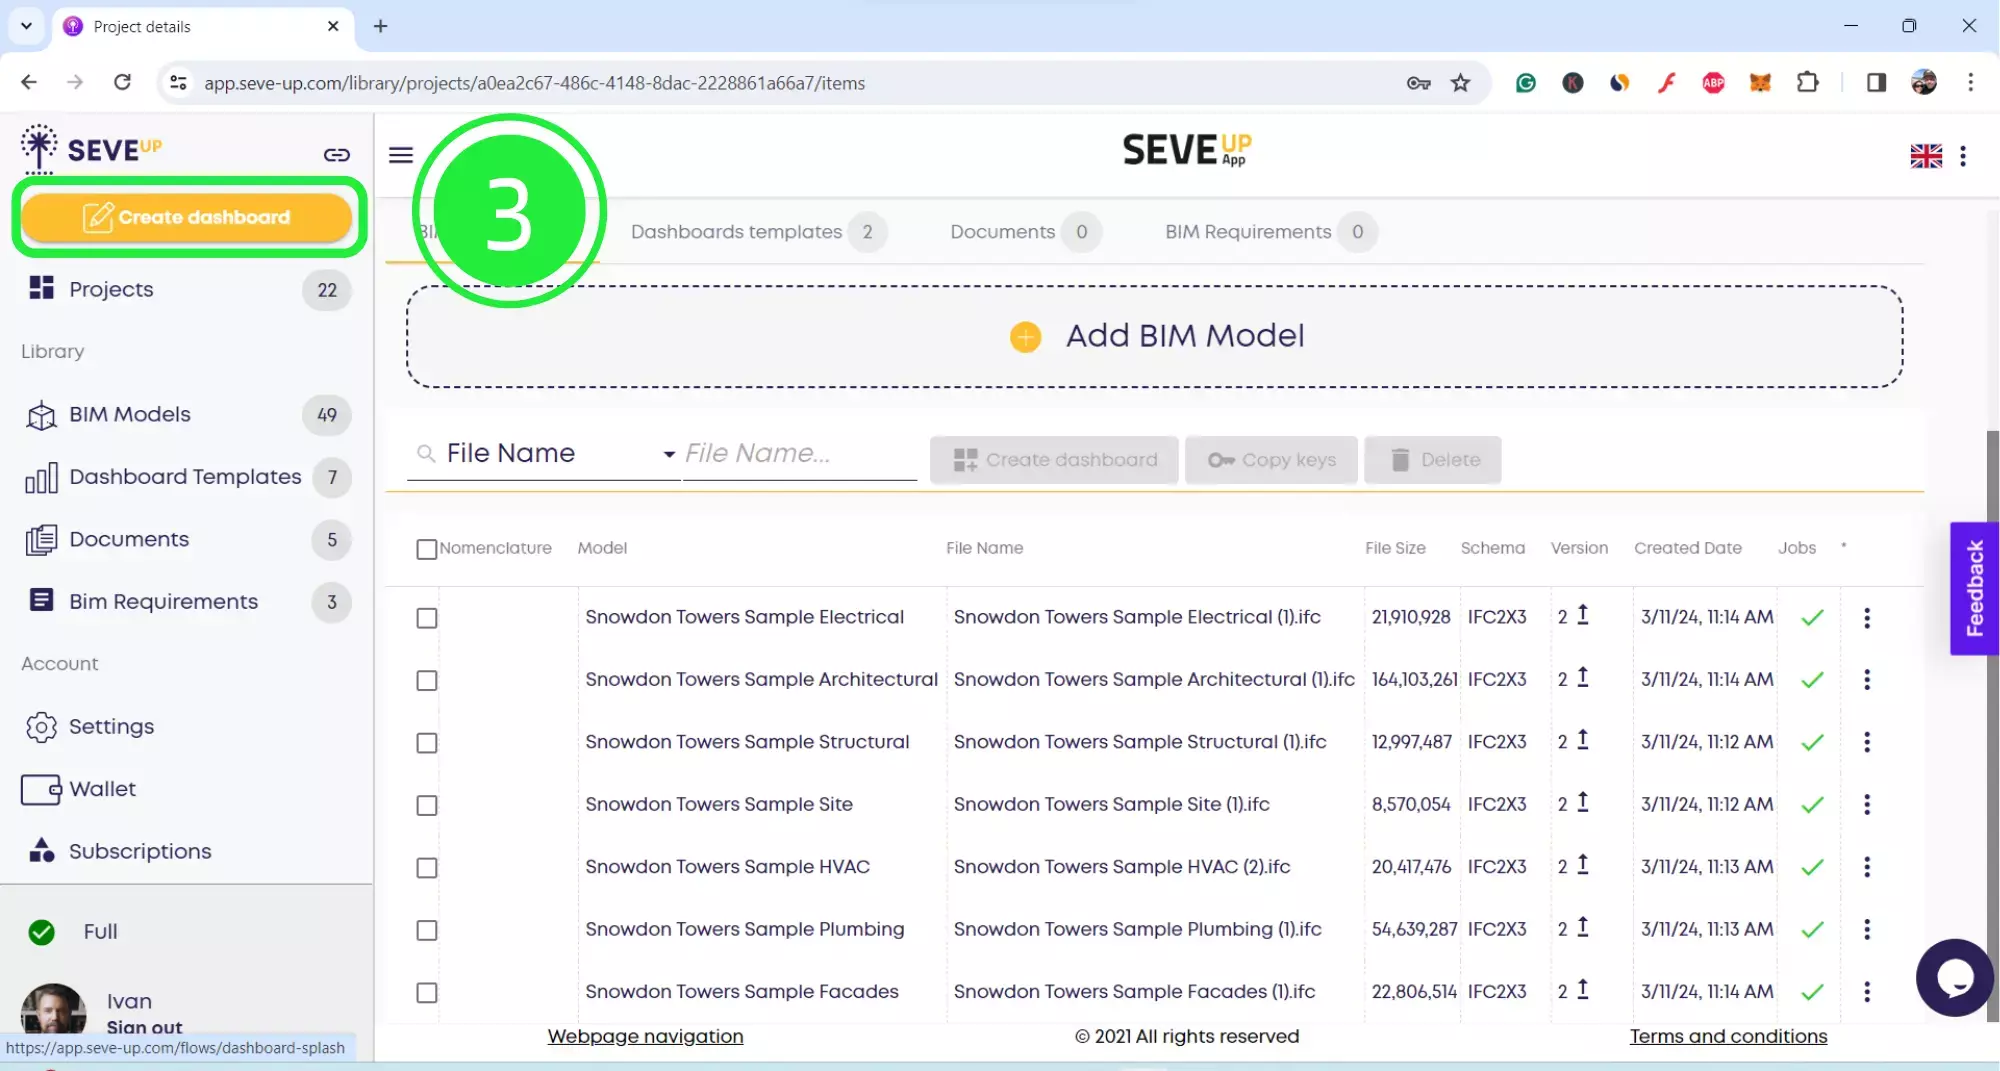
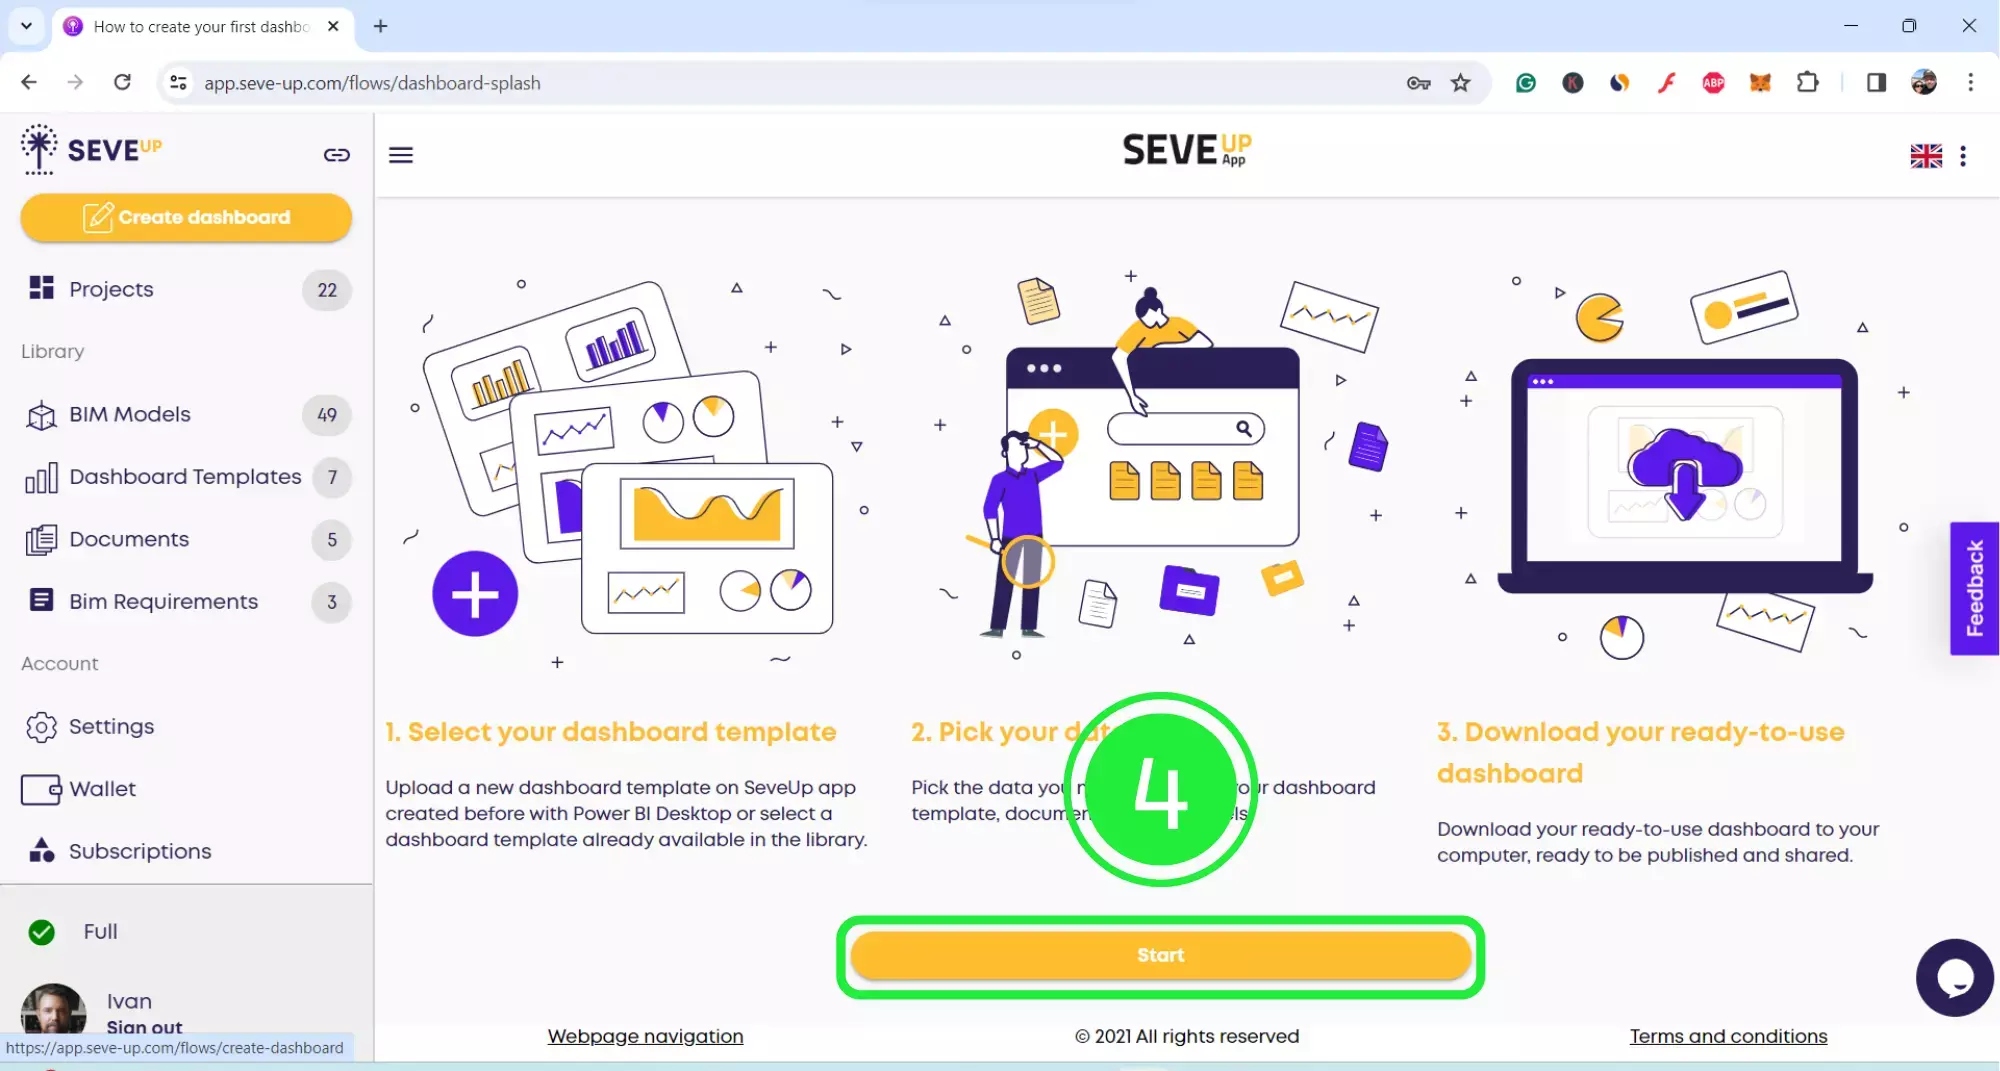
In order to merge the files we need to create a custom dashboard. Click on the “Create Dashboard” button on the left-hand side to start the SeveUp dashboard wizard.
In the centre of the tutorial page you’ll find the “Start” button. Click on that to start creating your new dashboard.
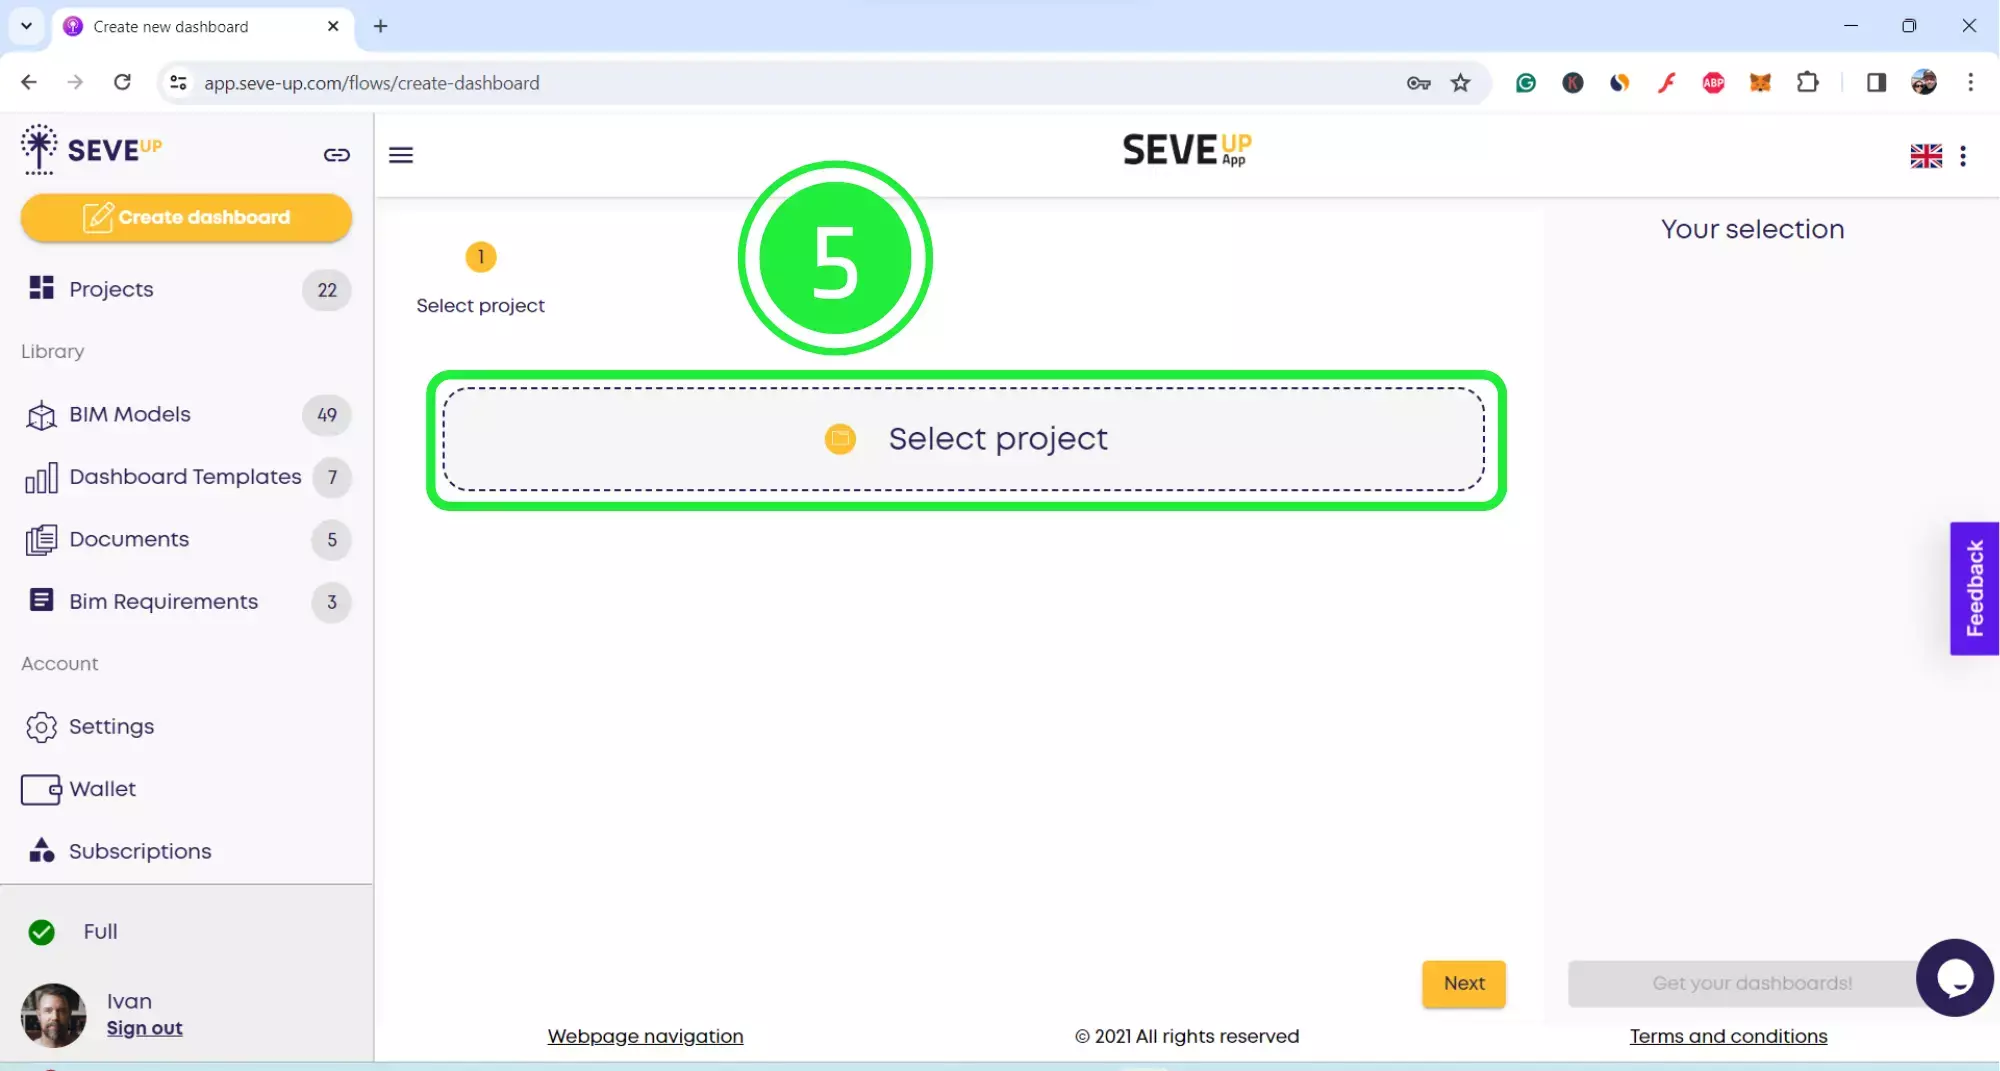
At the top of the page, you’ll see the wizard is now showing your progress. Click on the large “Select Project” button in the centre.
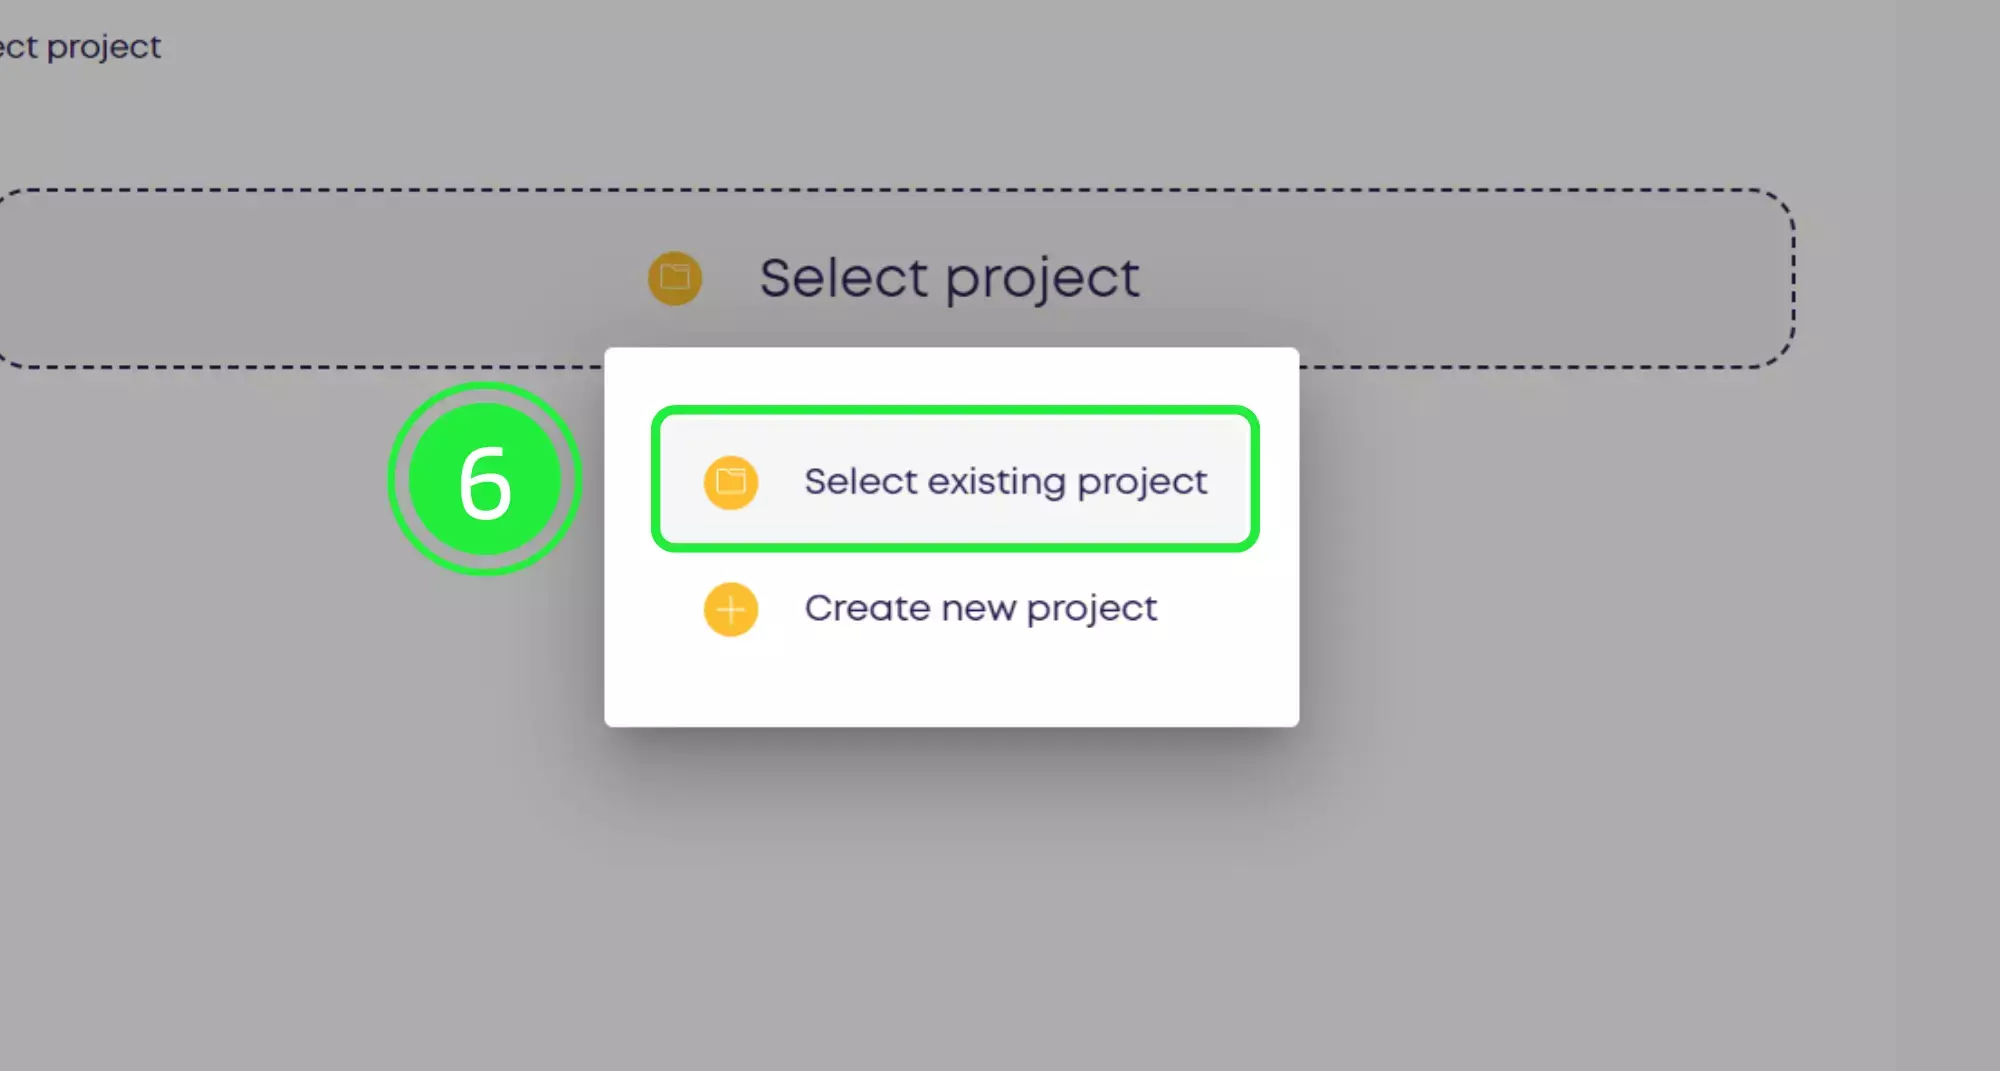
A popup will appear, allowing you to choose whether to select an existing project or create a new project. Click on “Select Existing Project”.
A selection of your projects will appear in a popup box. Choose the project you want to use by clicking on the small box to highlight it with a tick.
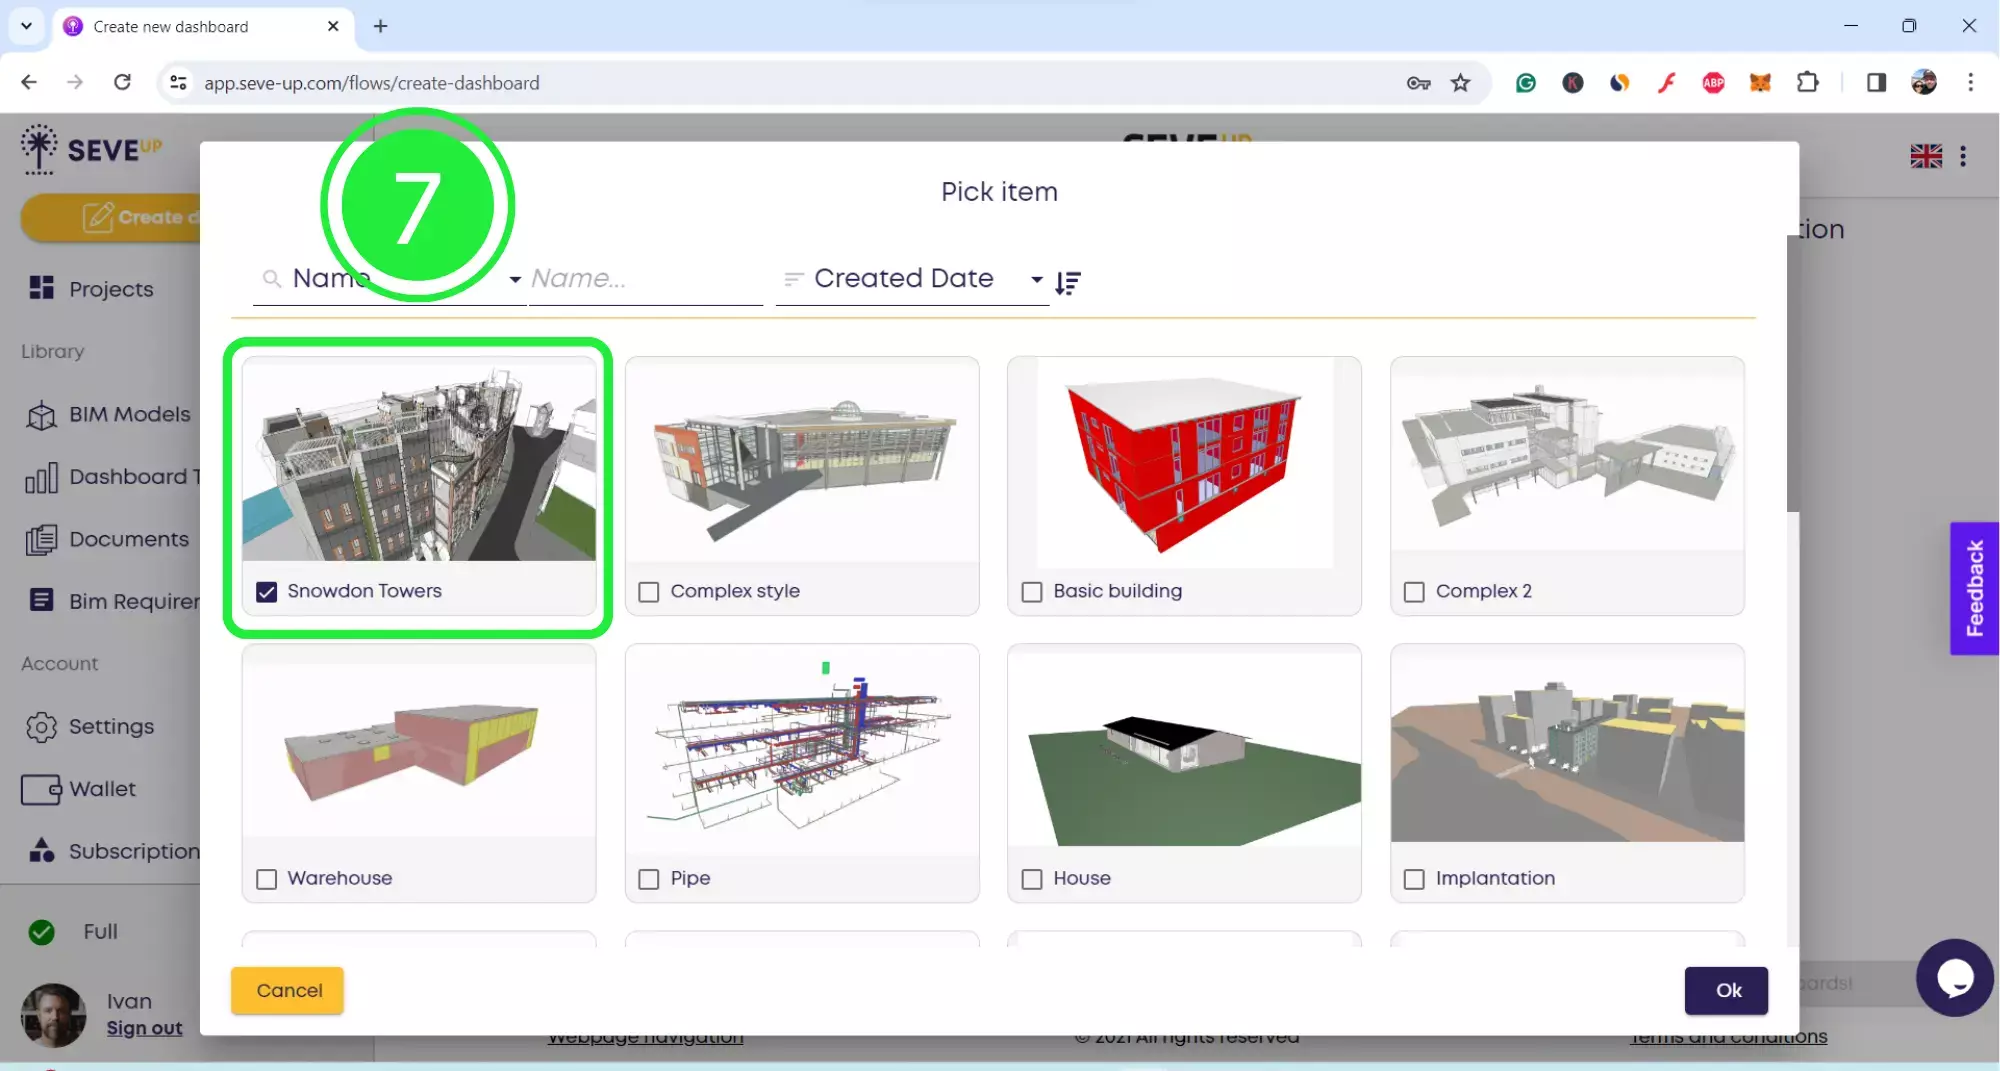
Now click on the “OK” button located in the bottom right corner.

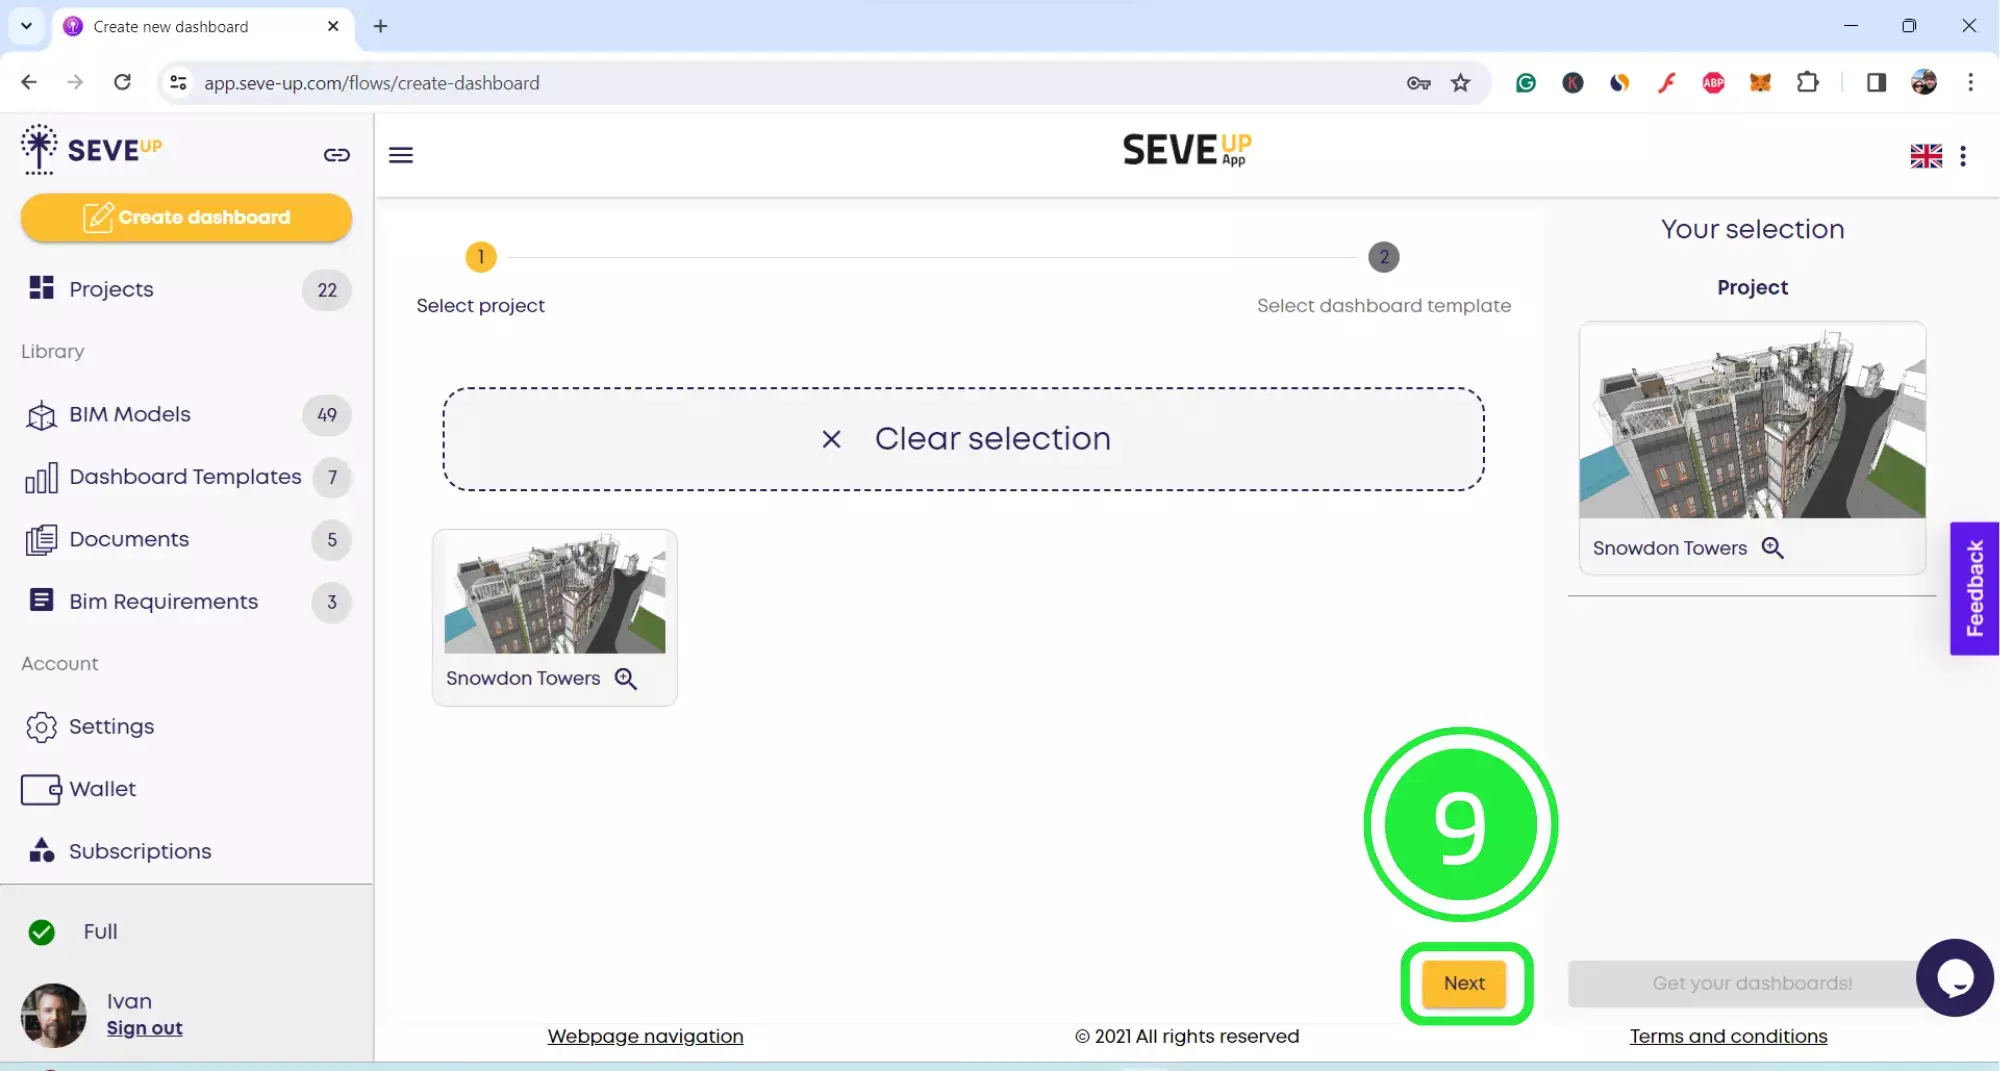
The chosen project will appear in the wizard. Click on “Next” at the bottom to move to the following stage
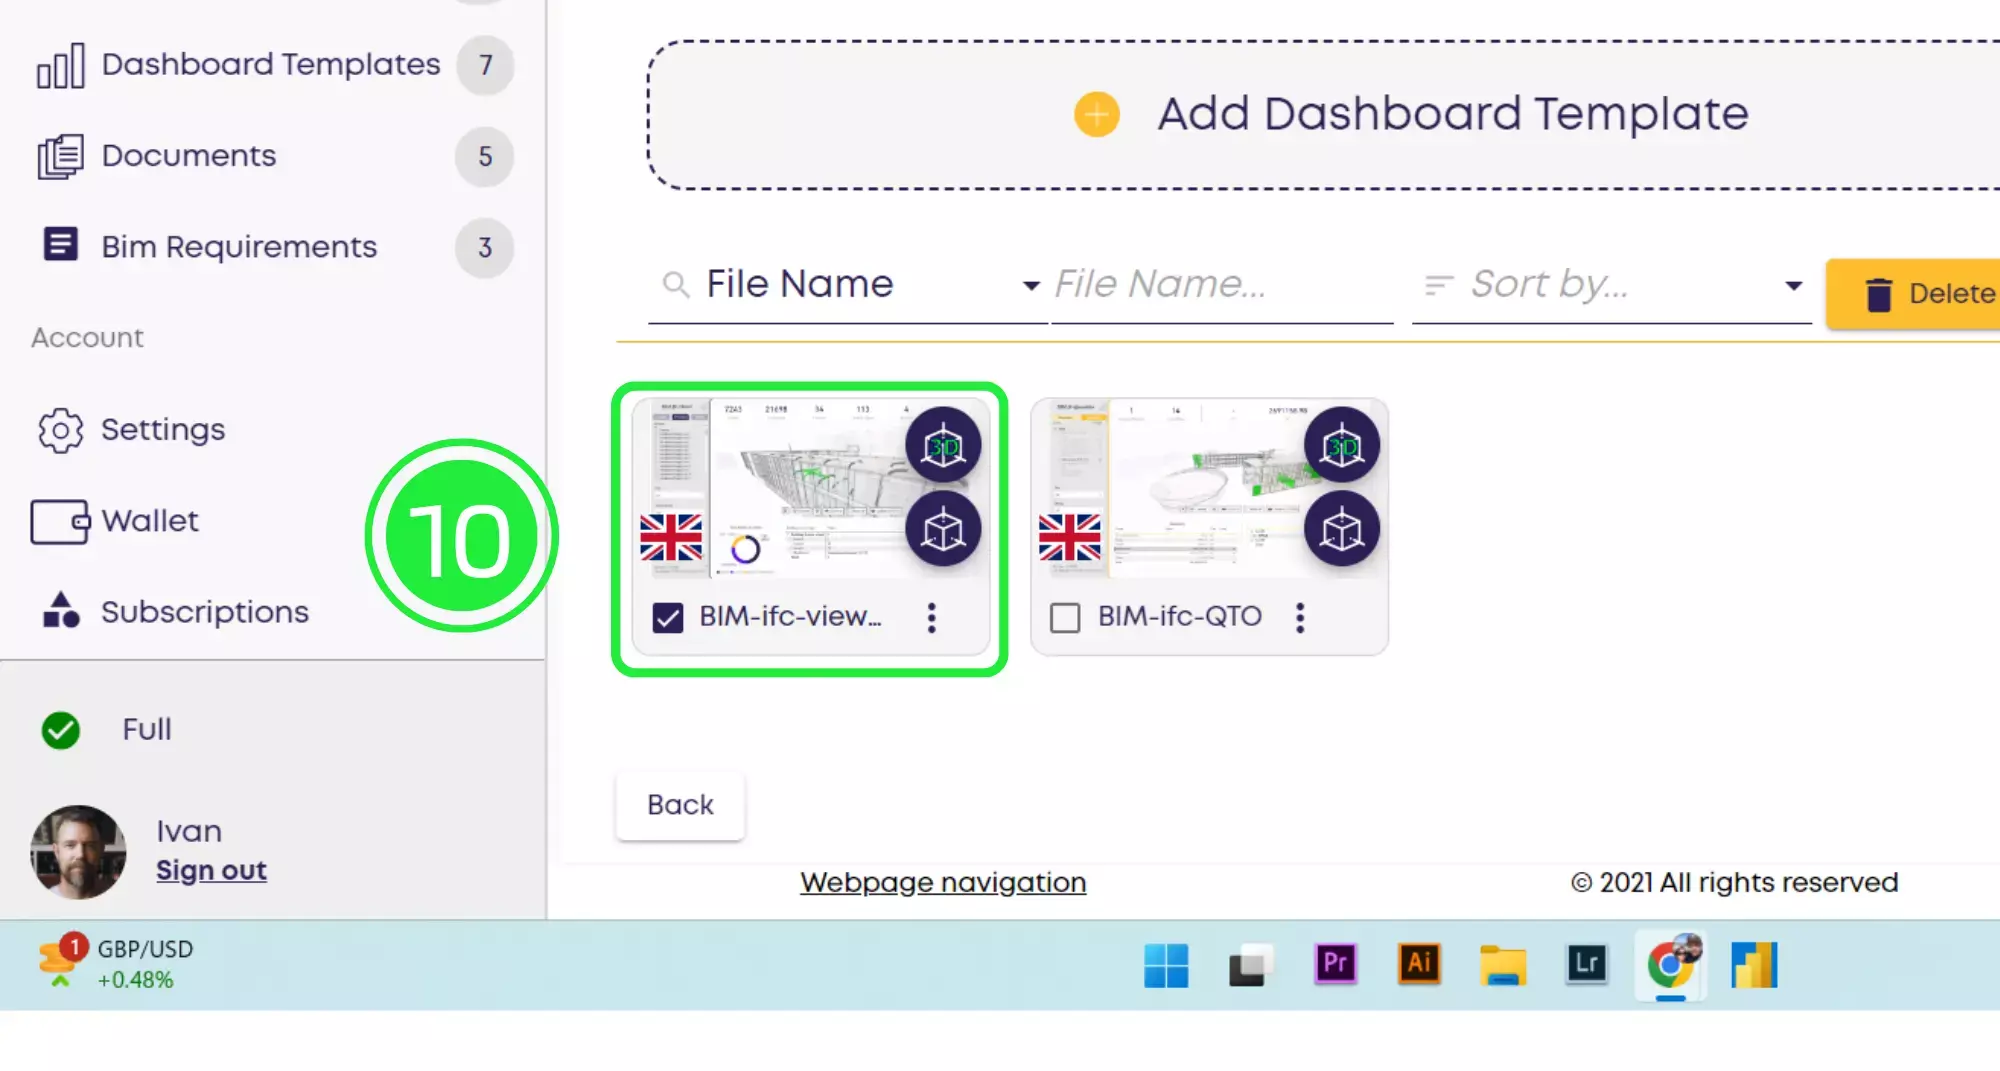
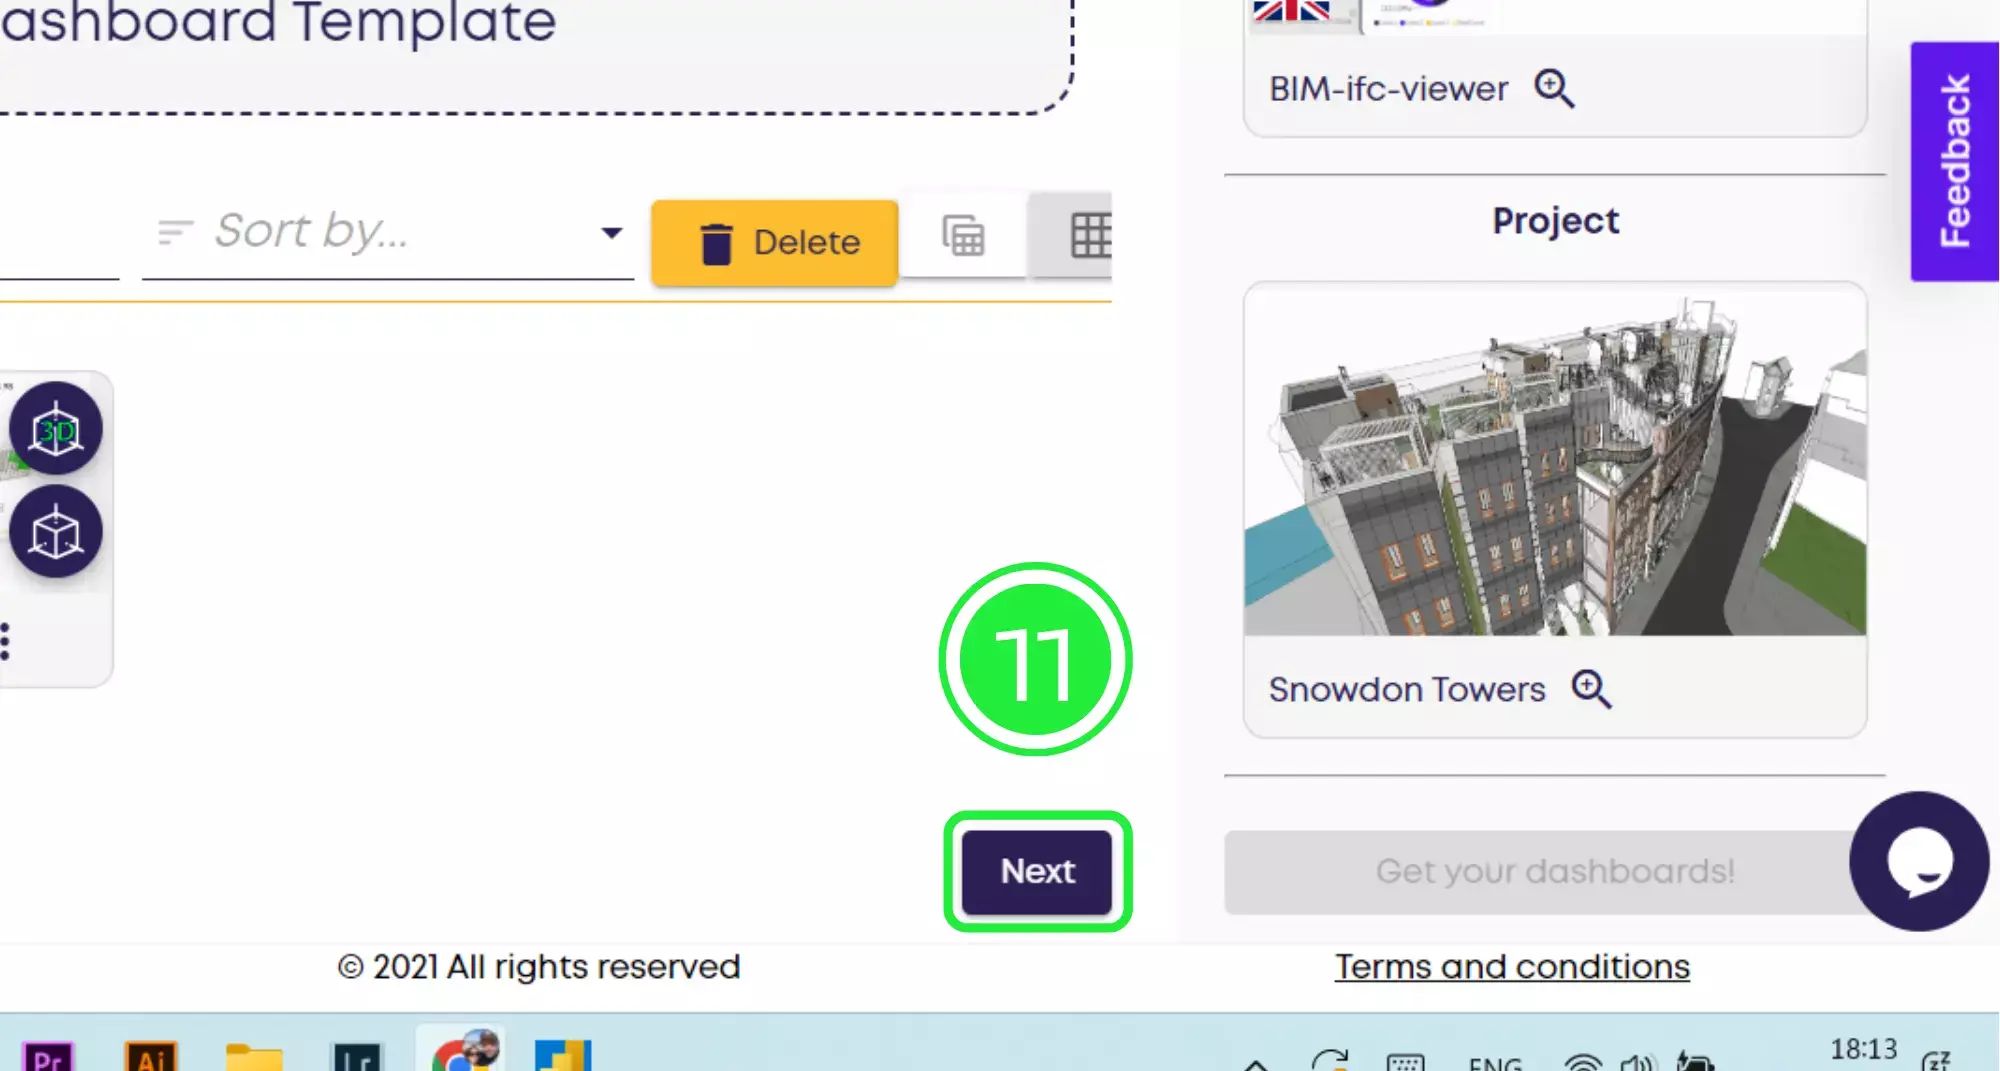
The dashboard wizard has moved onto the “Select Dashboard Template” tab. Choose the “BIM-ifc-viewer” template from the ones shown by clicking on the small box to highlight it with a tick. SeveUp provides several dashboard templates with Power BI visuals already added so you can easily filter your data.
Now click on “Next” on the bottom right of the page to move onto the next part in the wizard.
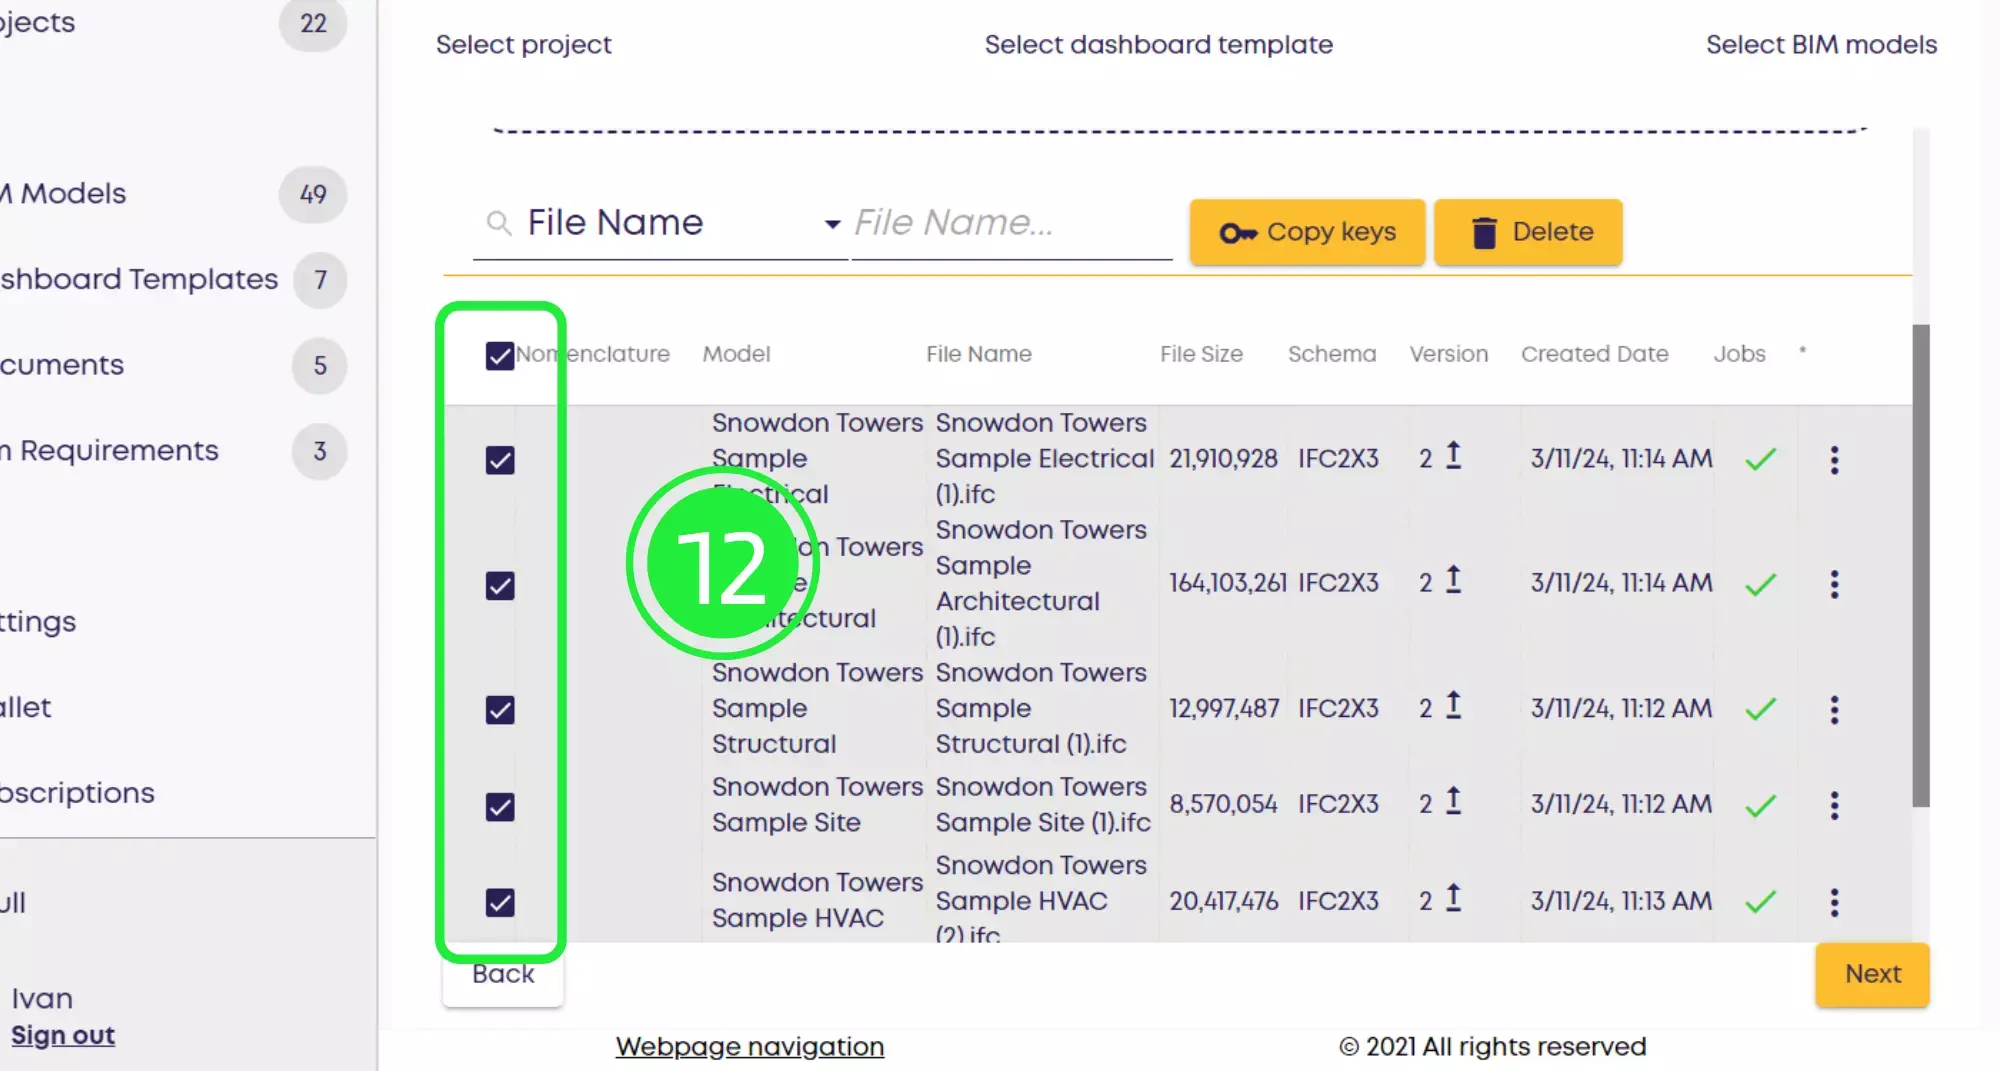
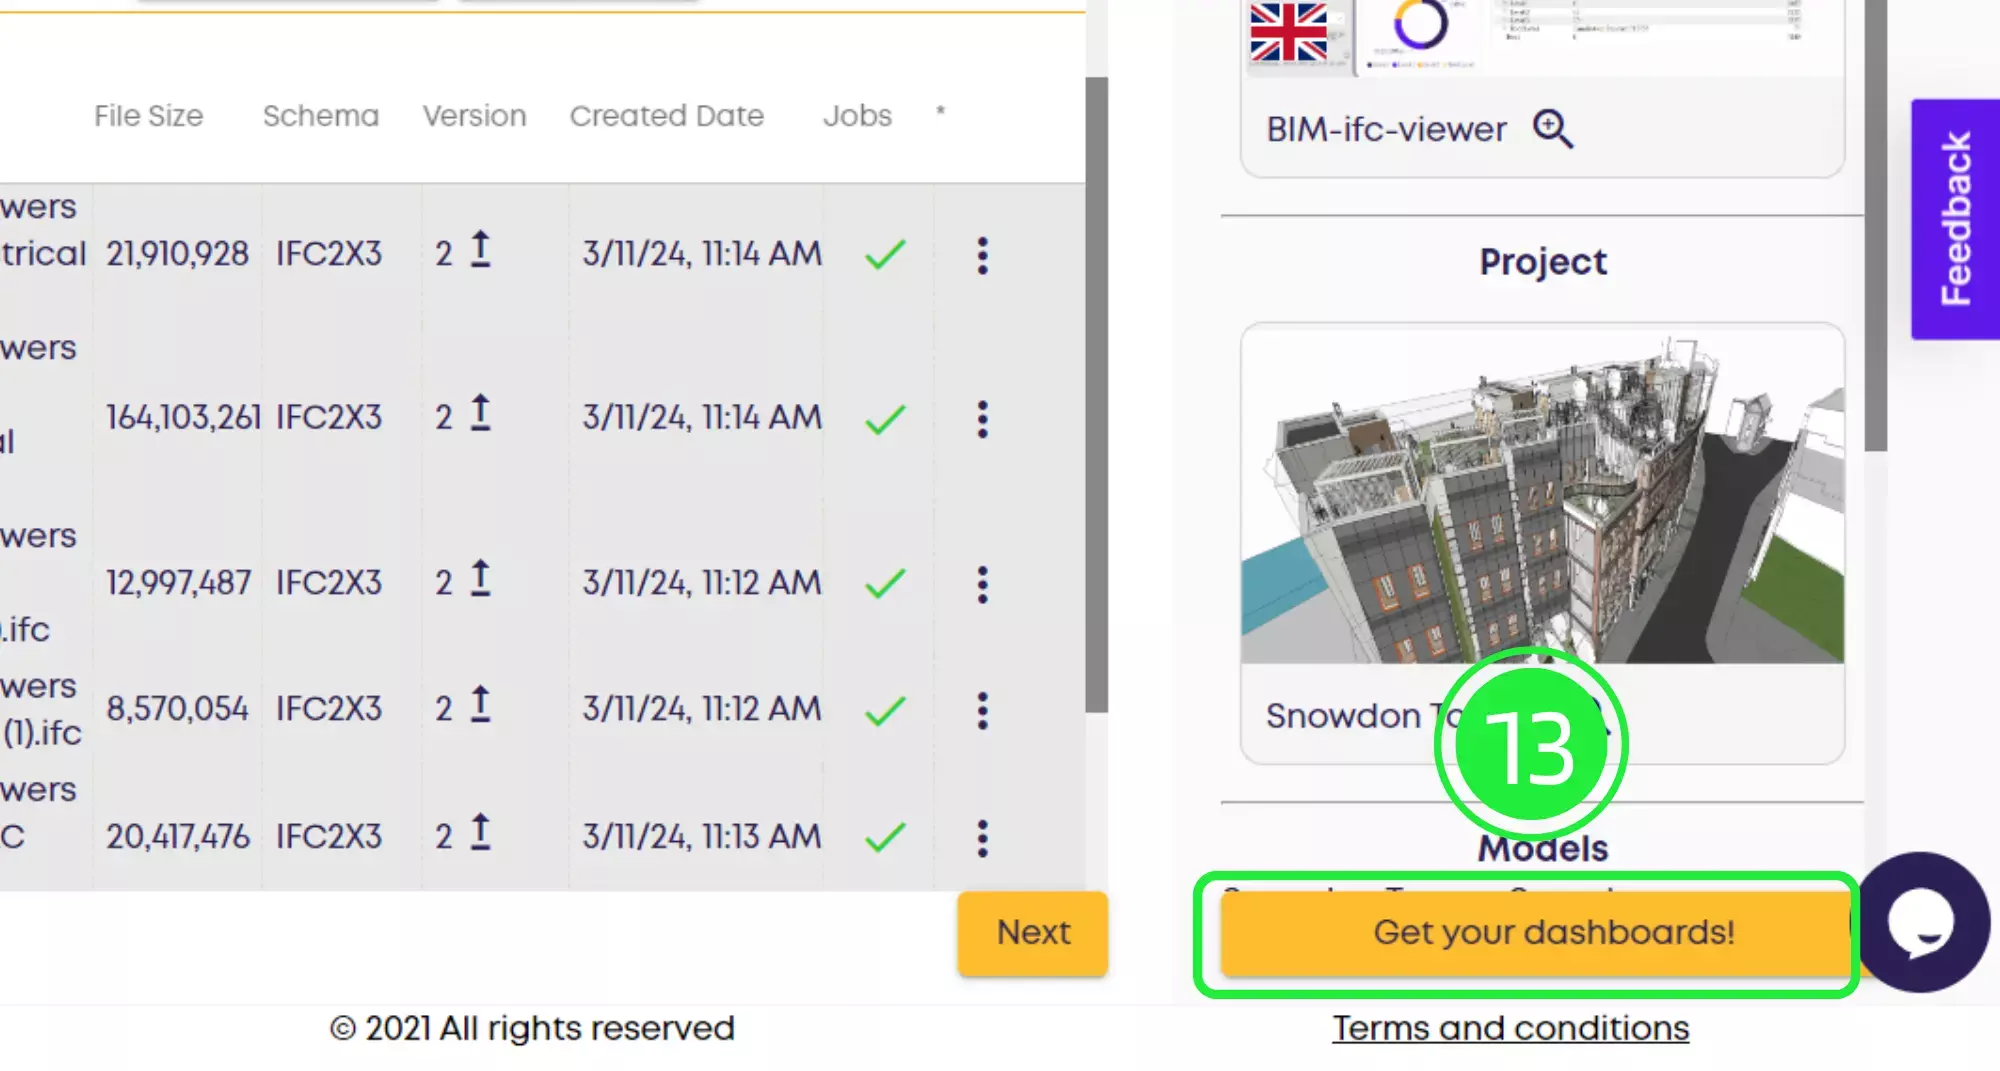
Now the wizard has moved to the “Select BIM Models” tab. Click on the BIM models you would like to use by highlighting the small boxes with a tick. You can choose as many BIM models as you’d like to add into your dashboard. Make sure that the ones you choose all have the same base point so that the 3D BIM viewer in Power BI is able to display the information correctly.
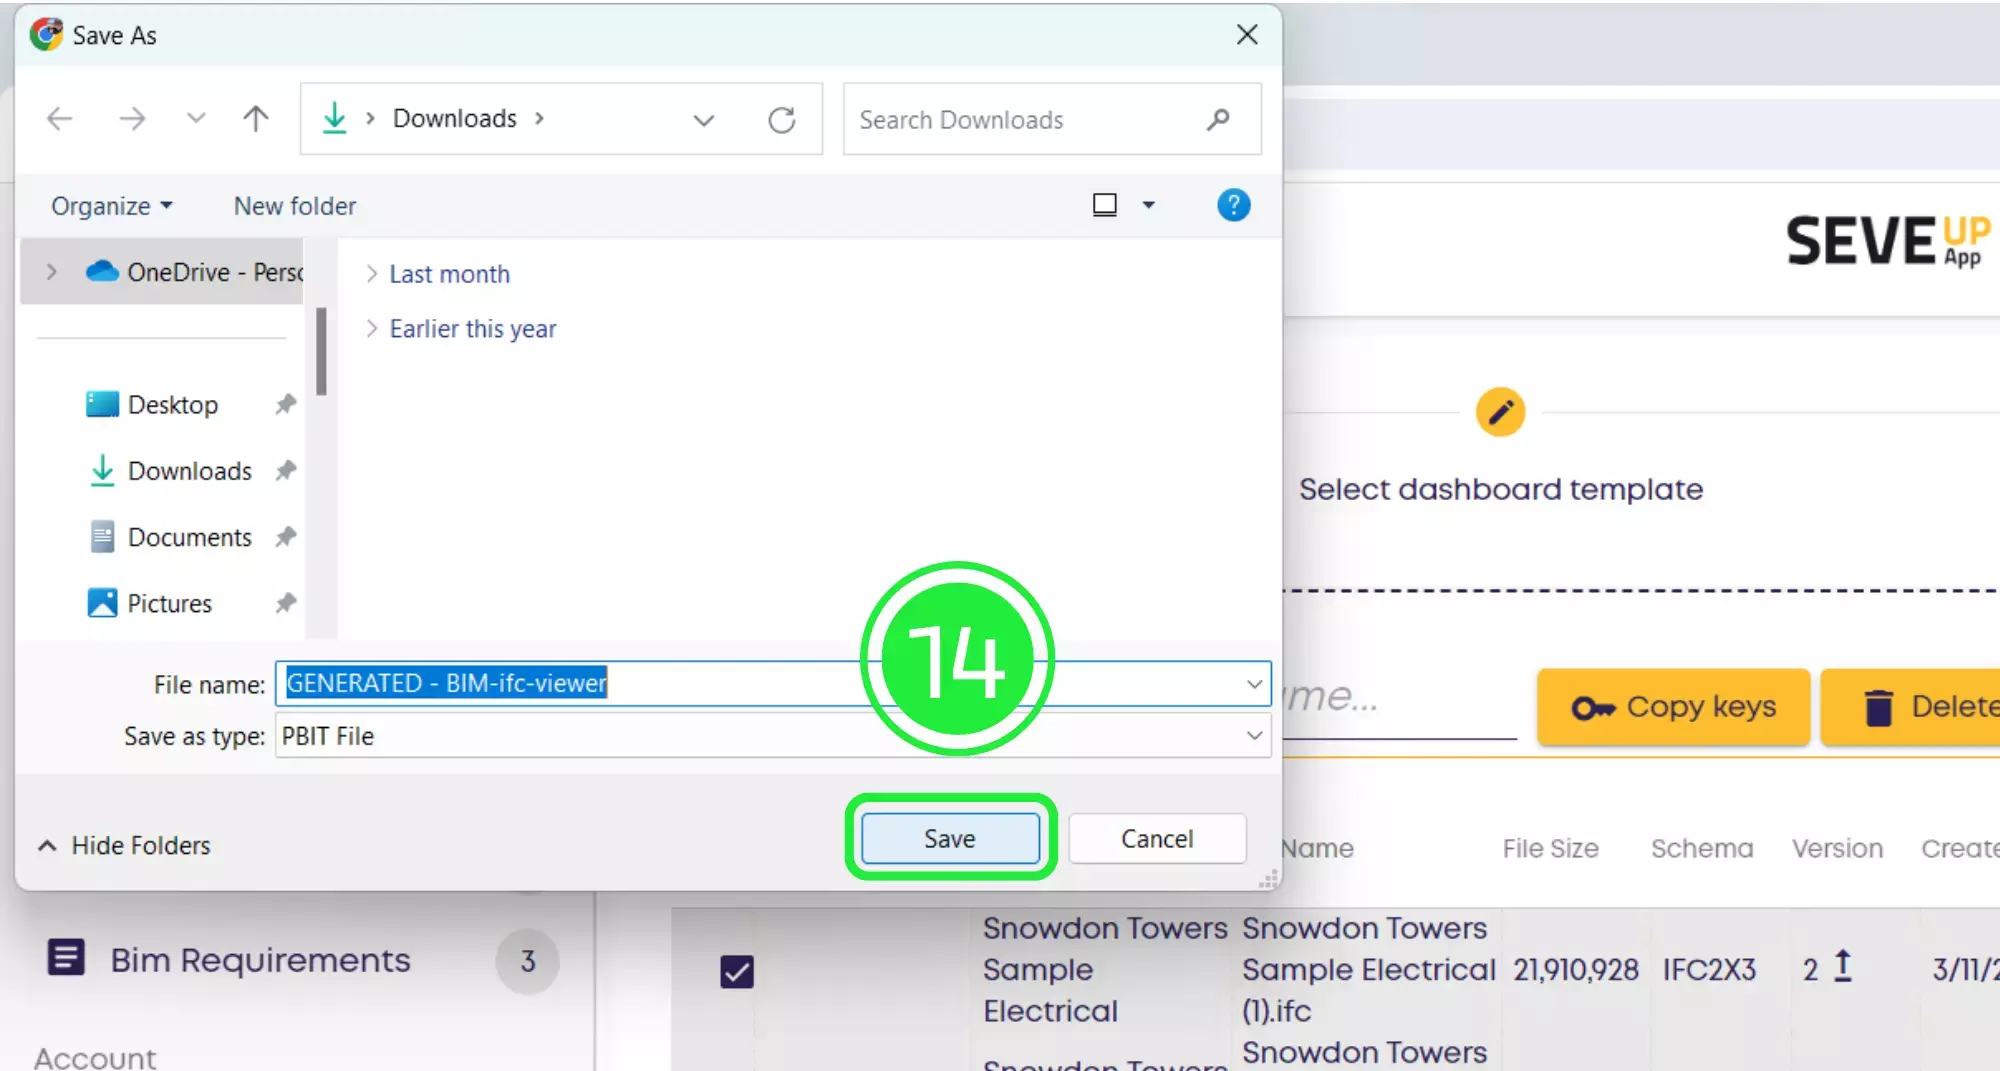
Now click on “Get Your Dashboards!” and your dashboard will download onto your computer.
Click on the “Save” button to save your project to your computer.
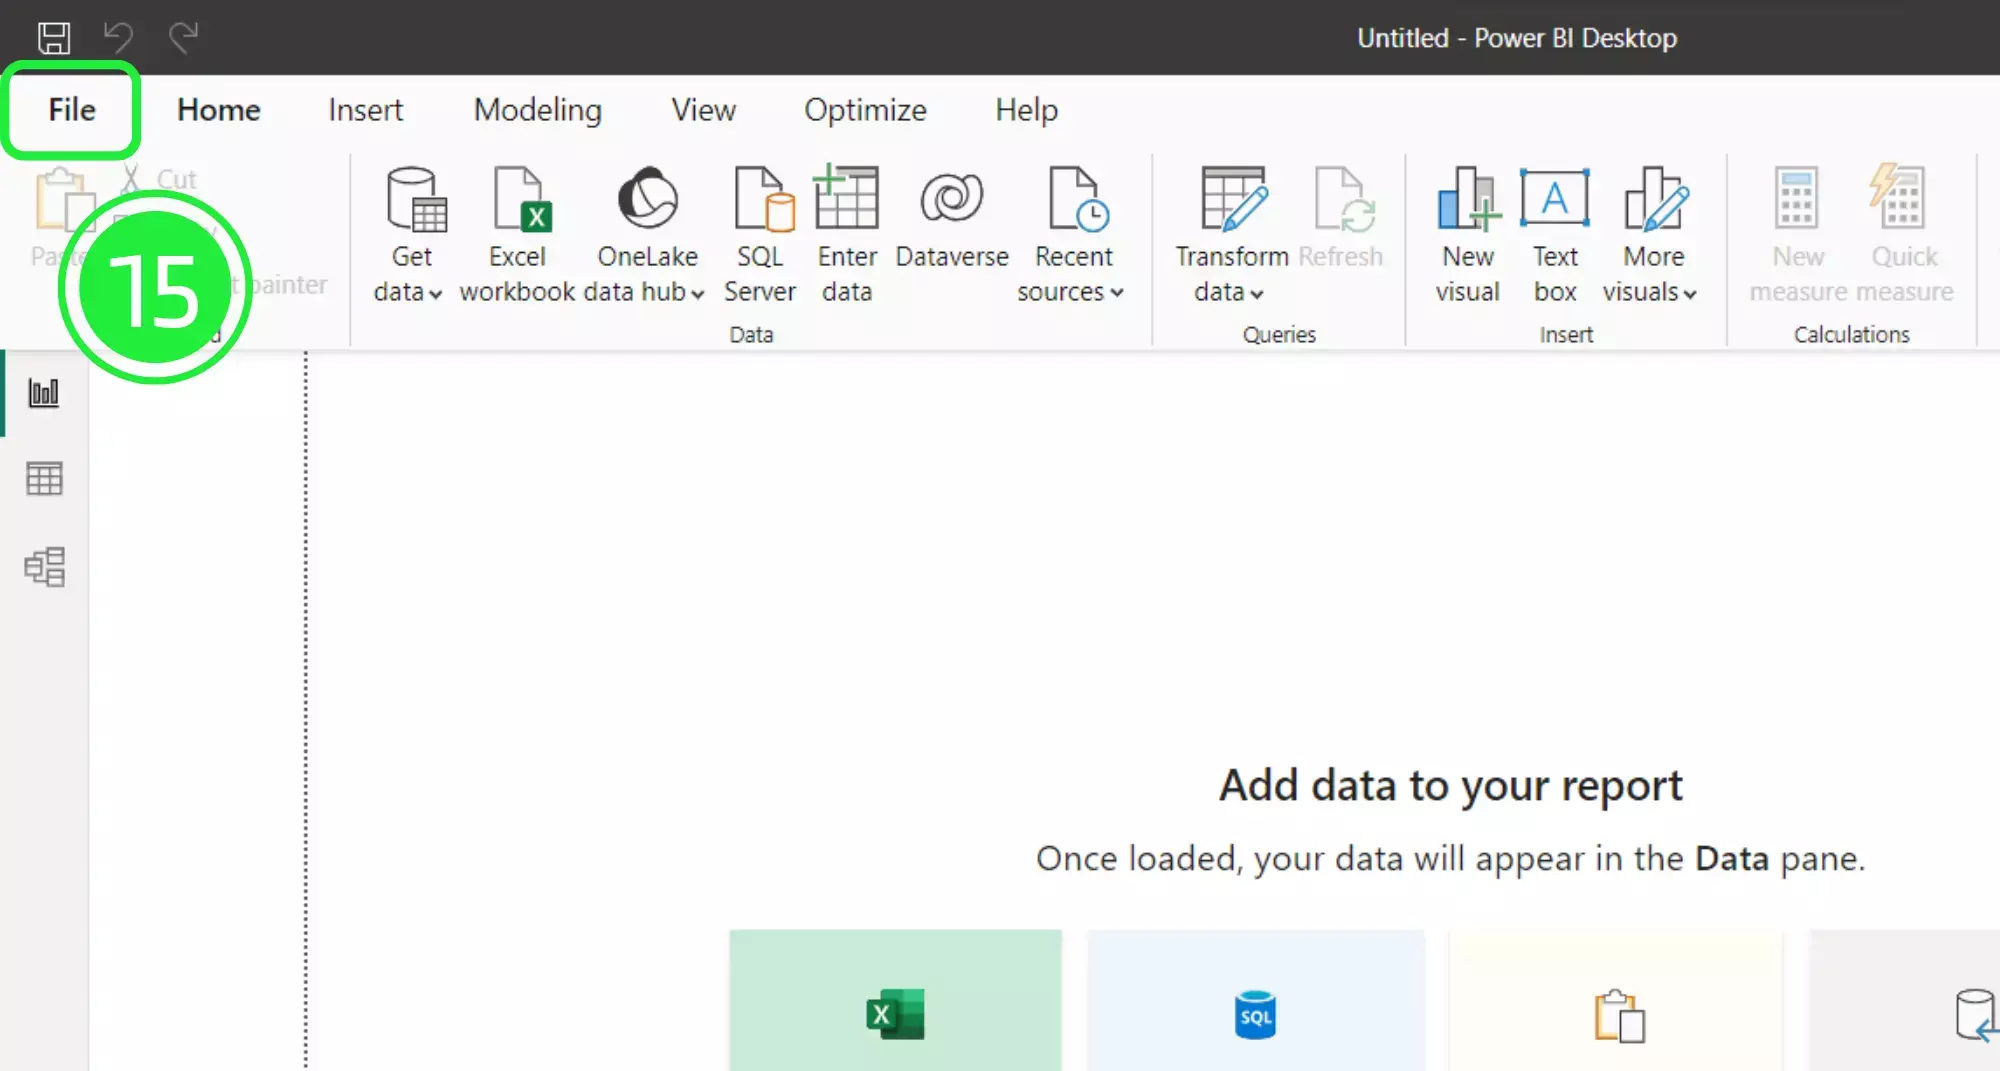
Open up Microsoft Power BI and click on “File” on the top left of the page. If you want to know how to mastering Power BI, you can watch the tutorial here.
SeveUp provides several tutorials so that you improve your skills and become comfortable with the tools.
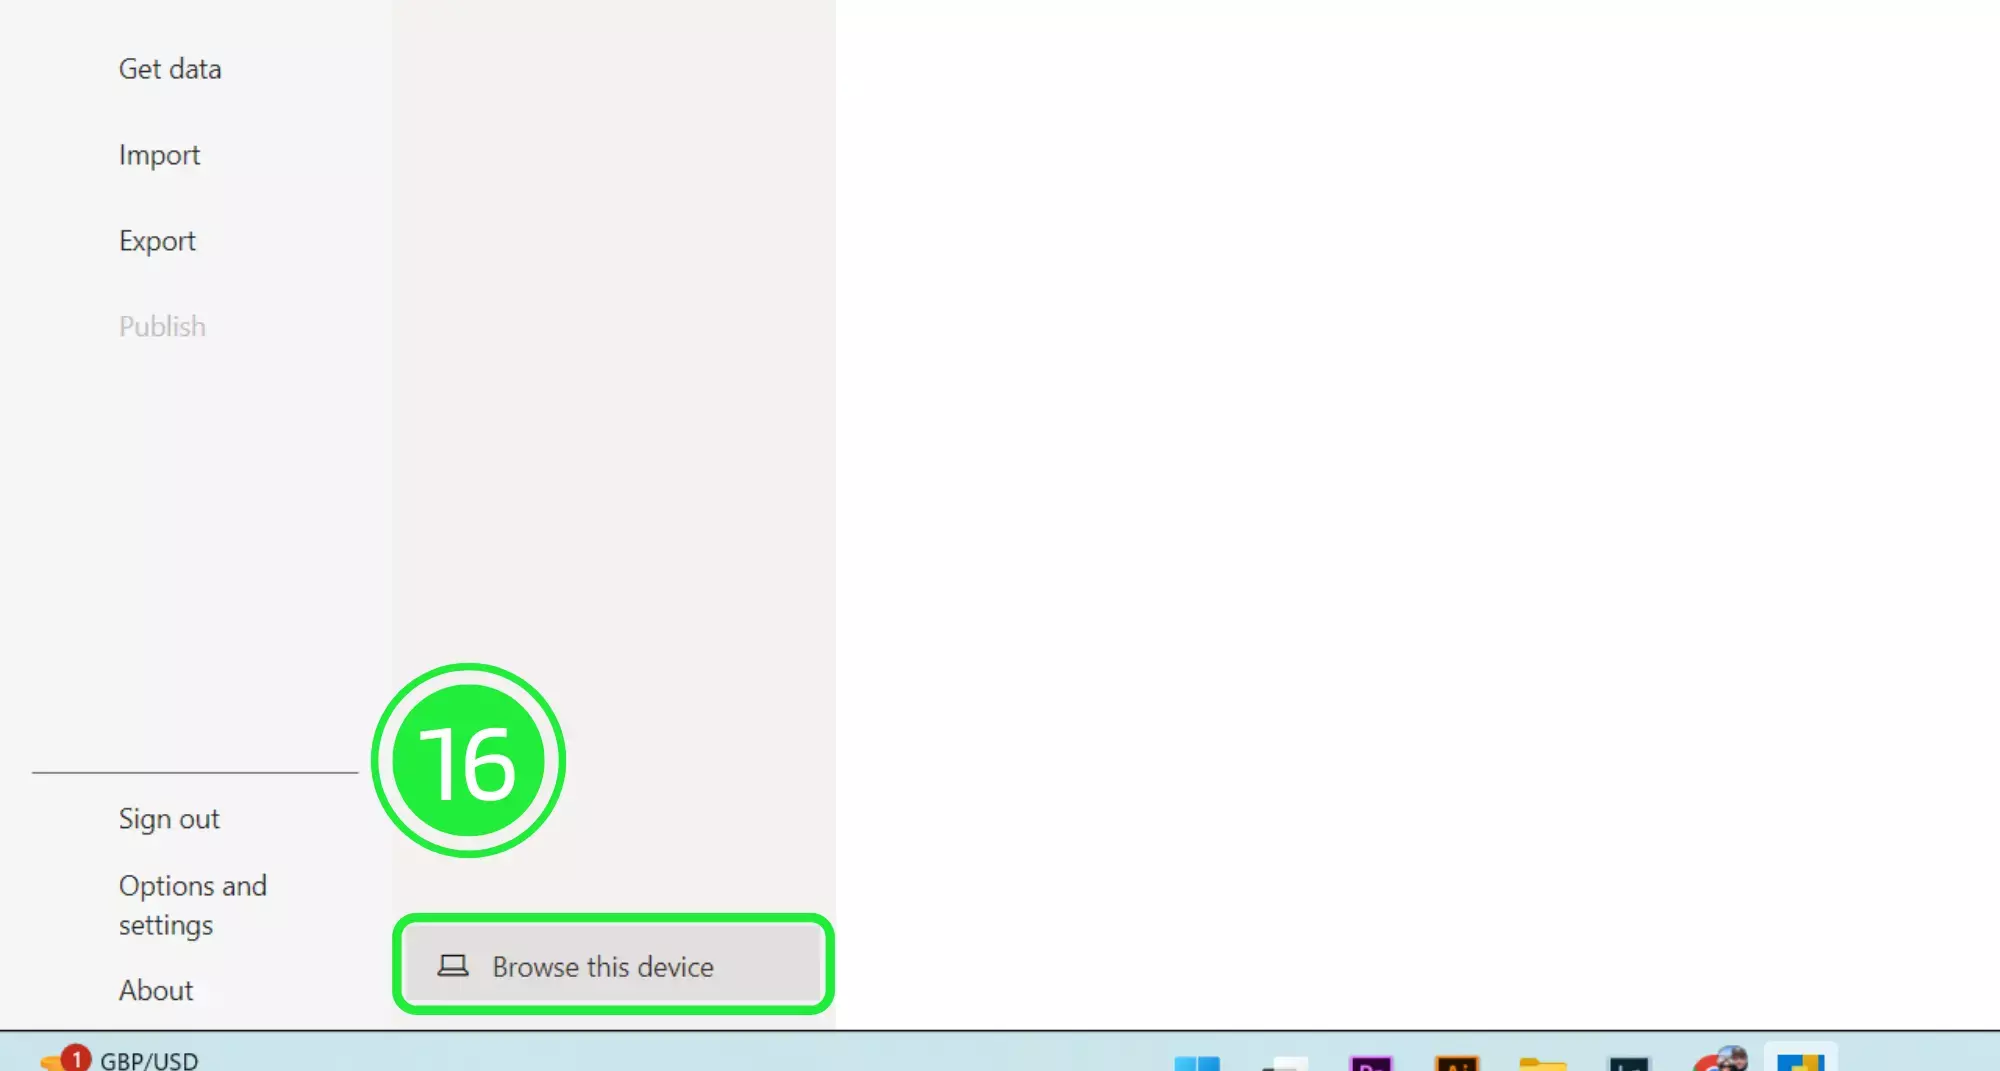
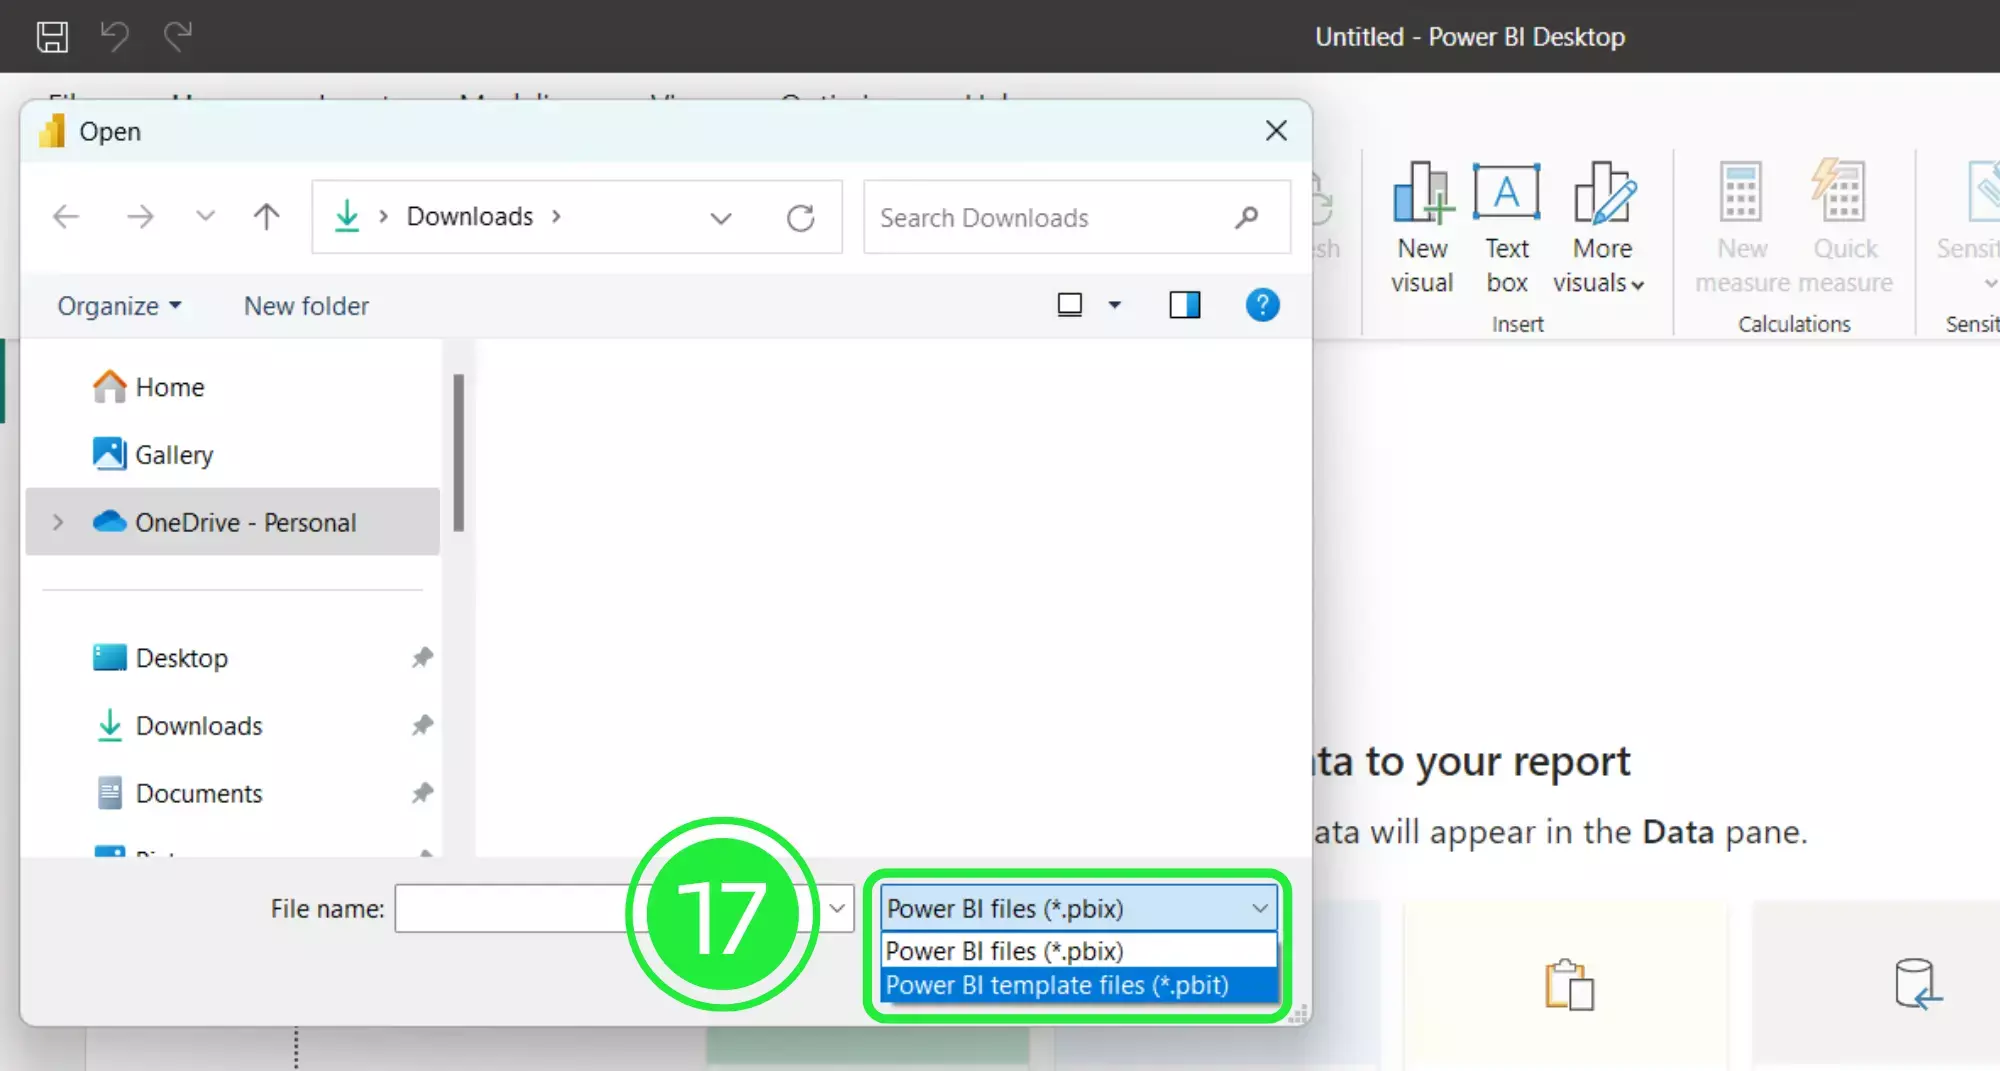
A menu will open up. Click on the “Browse this device” button at the bottom of the screen to search for your newly downloaded dashboard.
On the “Open” window, go to the bottom right and choose the correct file extension. Choose “Power BI Template Files (*pbit). All files of this type will now show in the window.
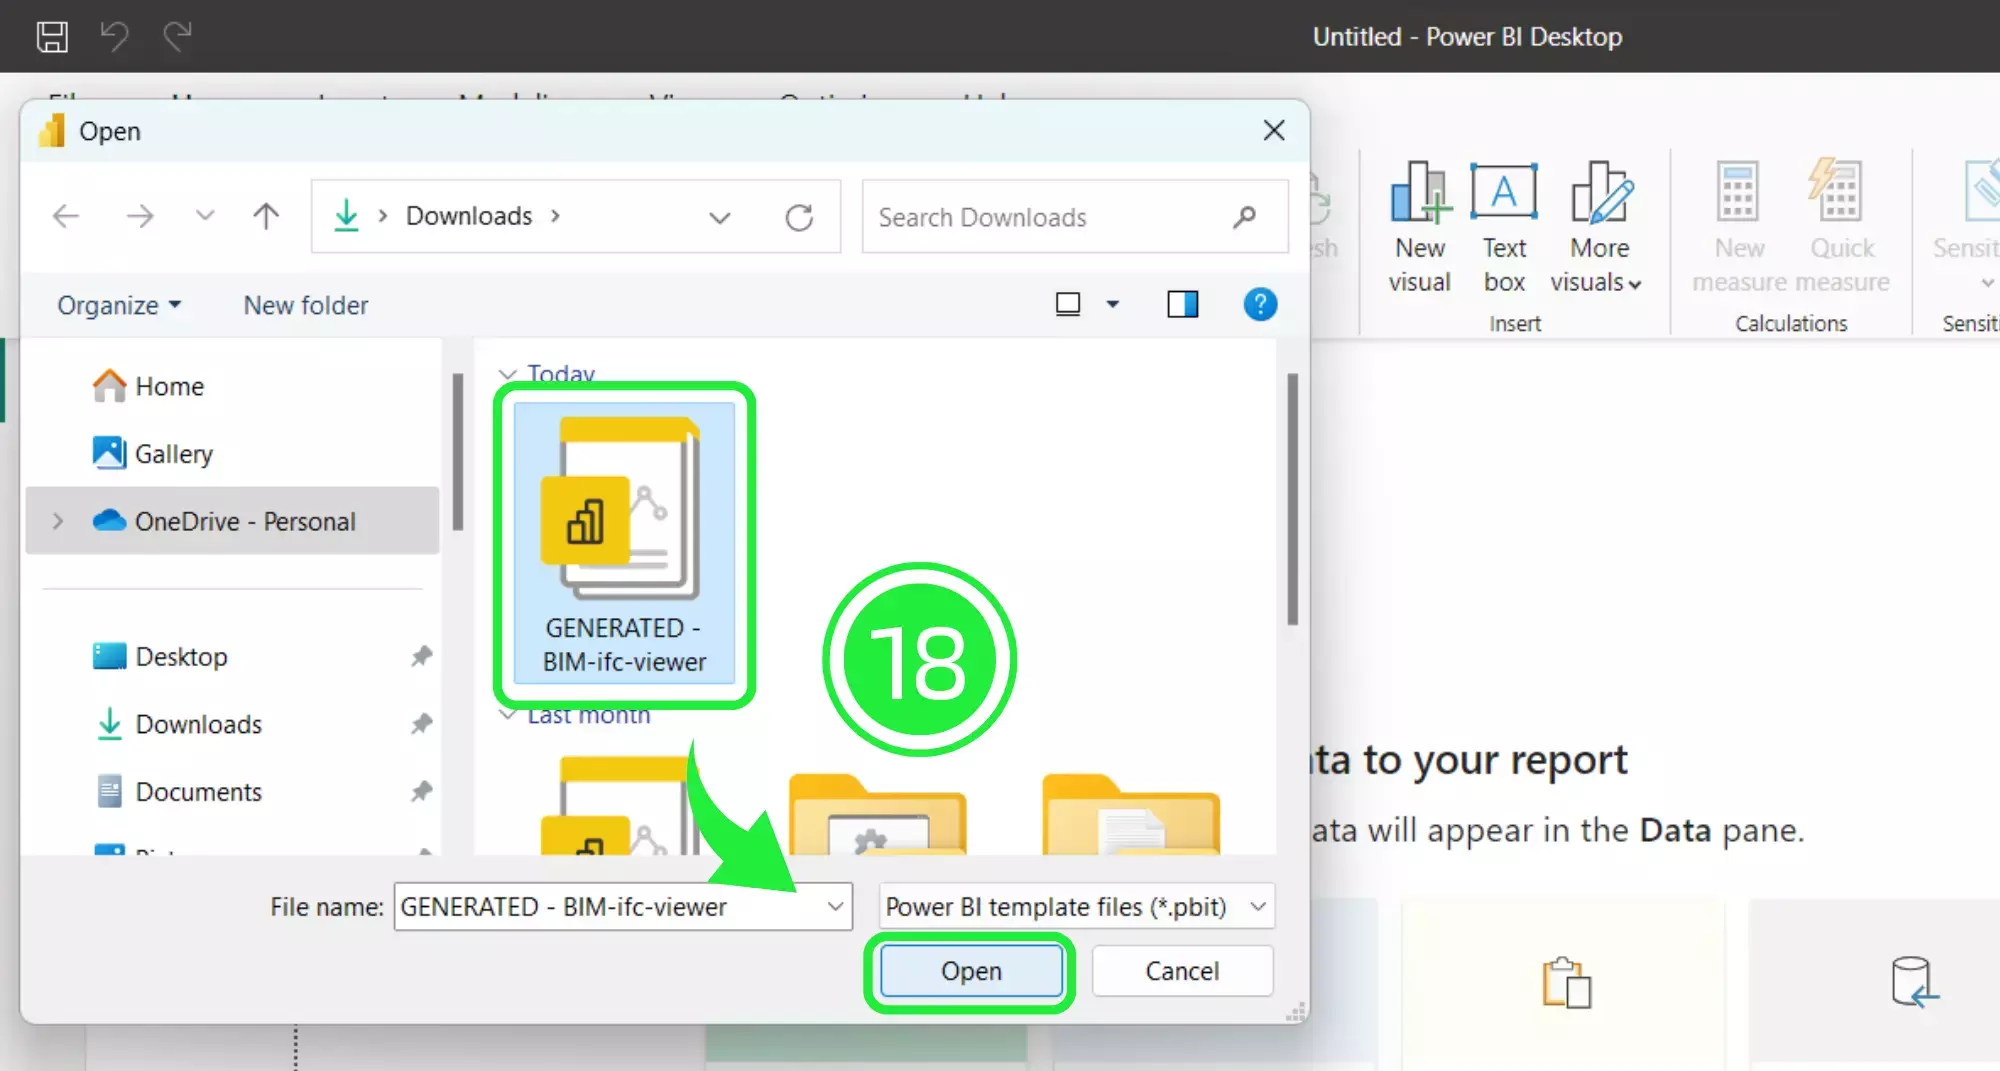
Select your newly downloaded template file and then click on “Open”.
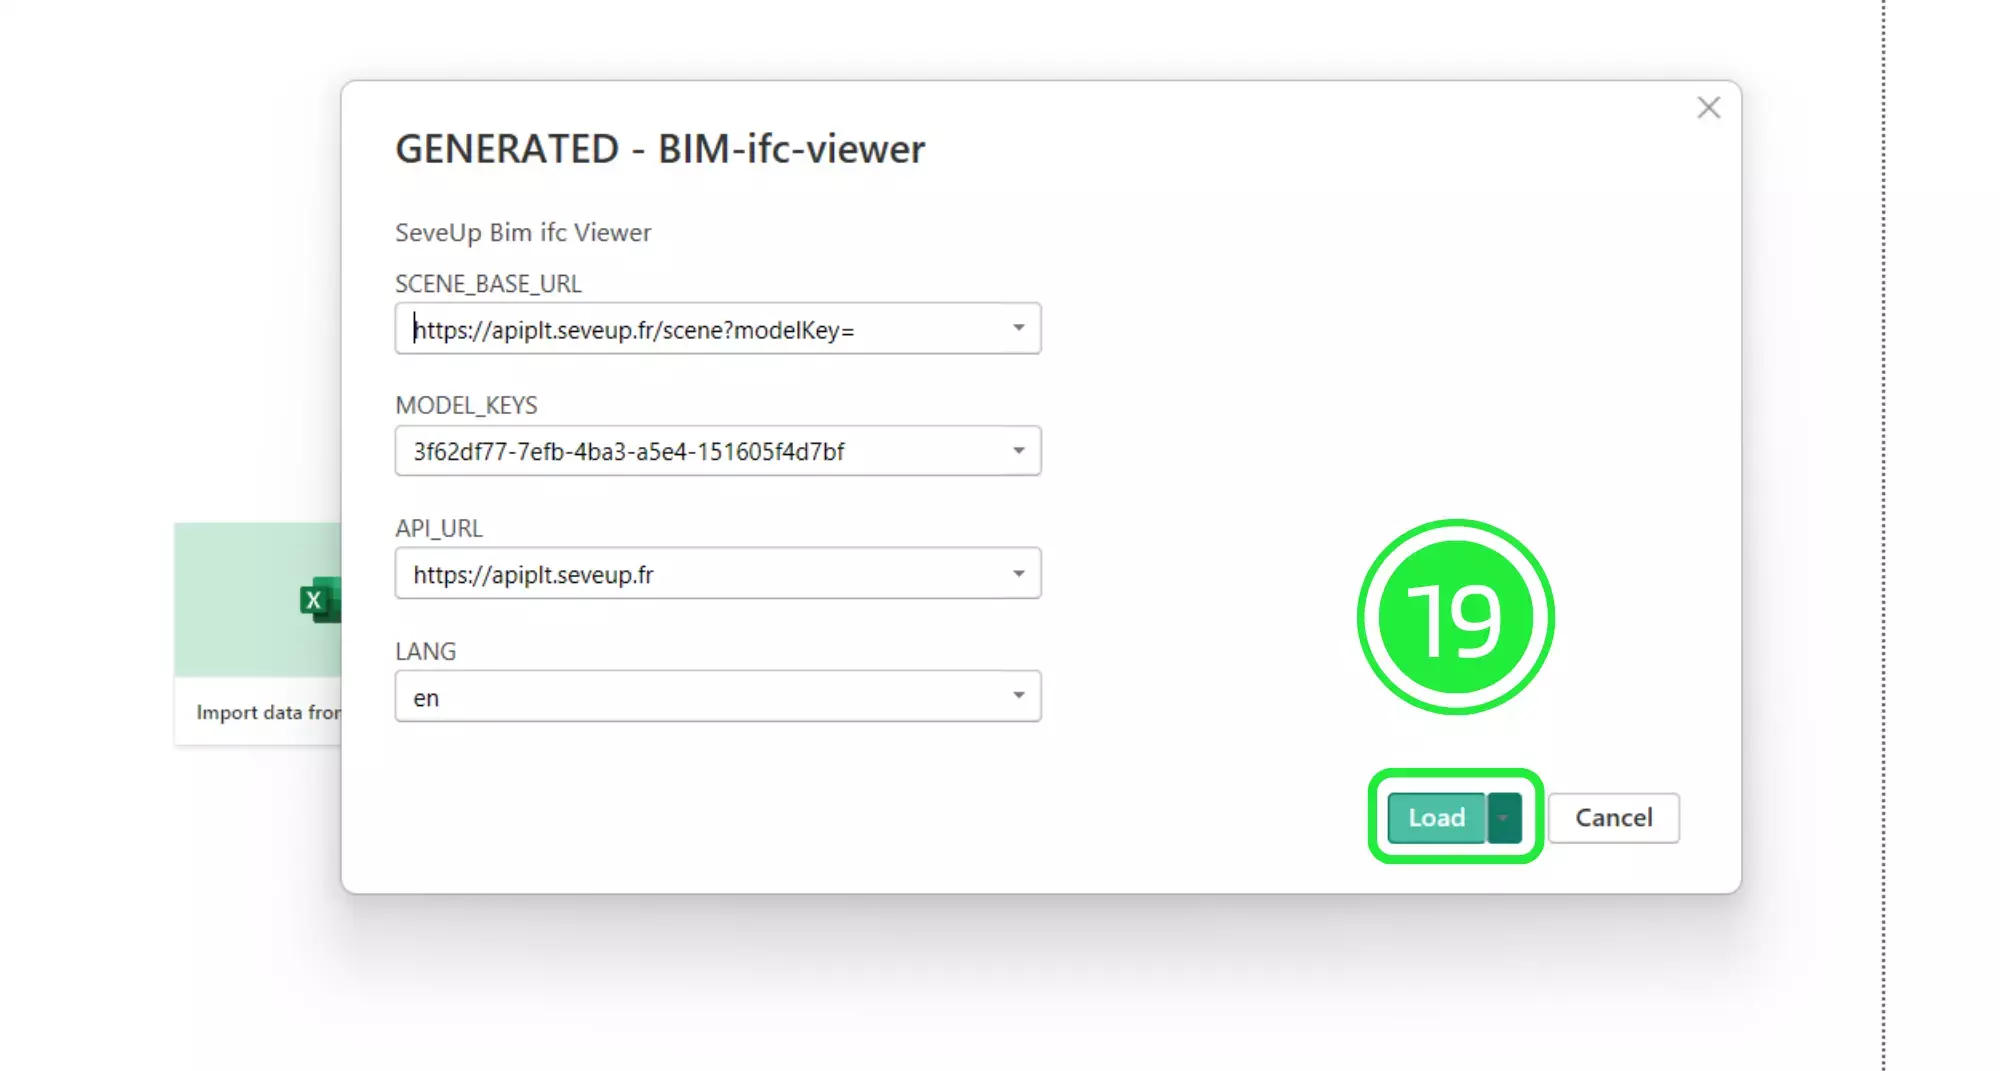
A pop-up will appear showing the file details. Click on “Load” and your Dashboard Template file will start to load in Microsoft Power BI.
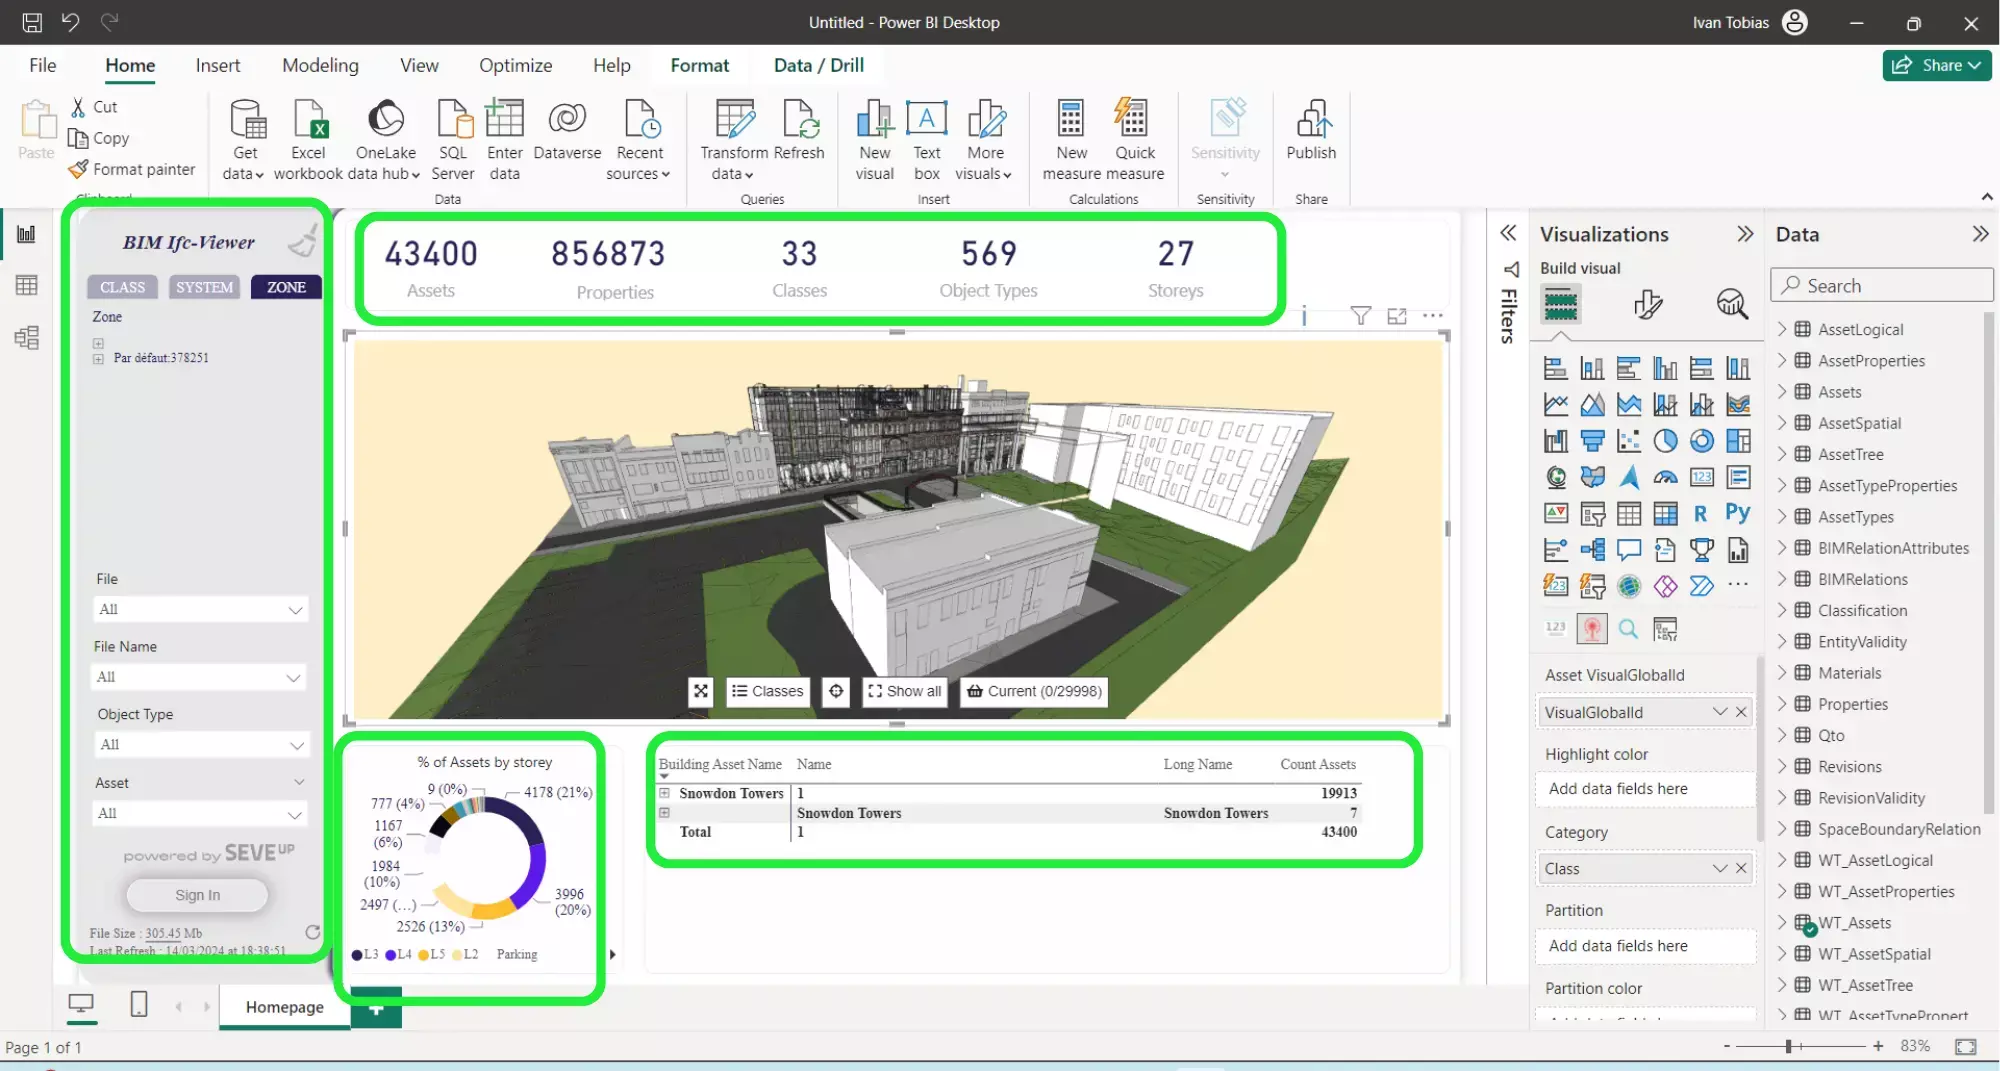
Once your new dashboard template has loaded, it will populate the Power BI interface with all of the BIM data that was in the added ifc files.
In the centre of the interface you’ll find the SeveUp Custom 3D BIM Viewer. All of the BIM models are loaded into the viewer and are shown as one cohesive model.
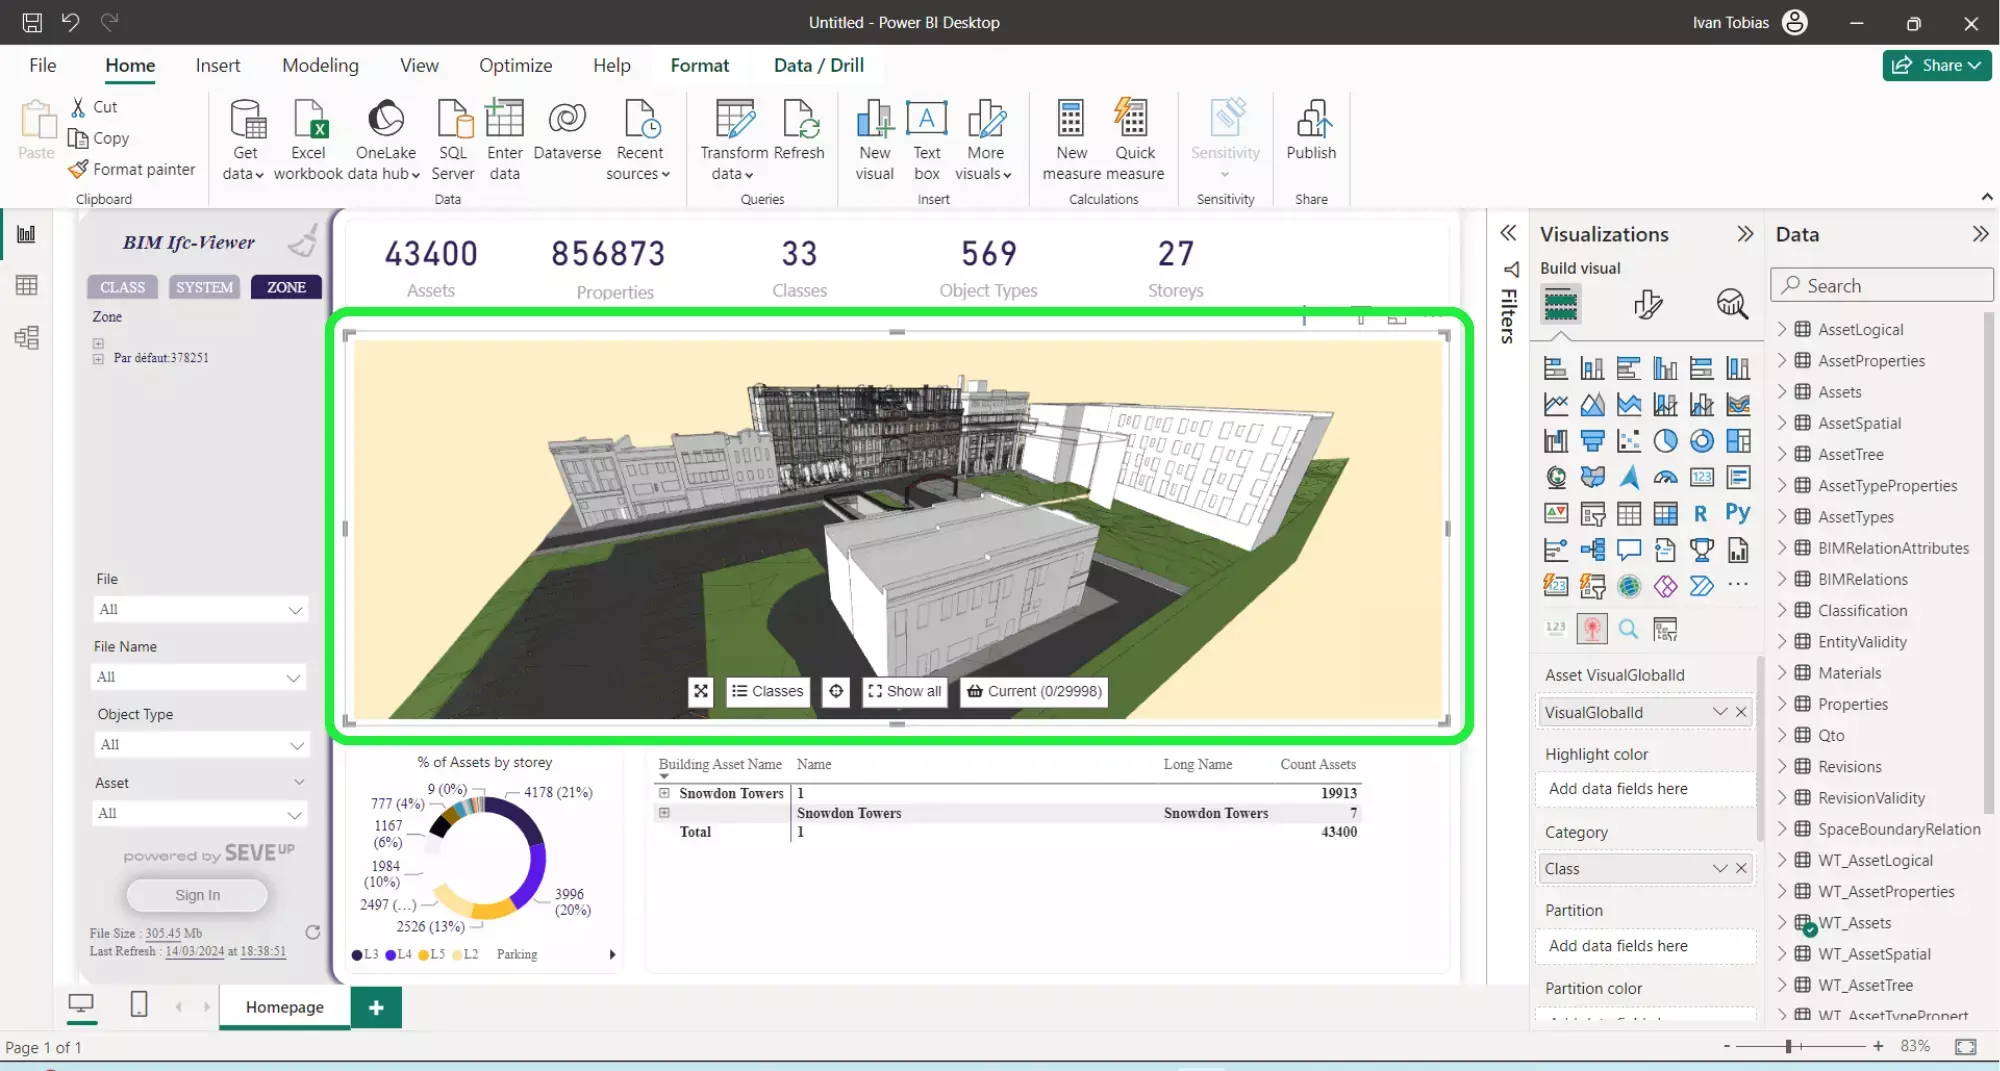
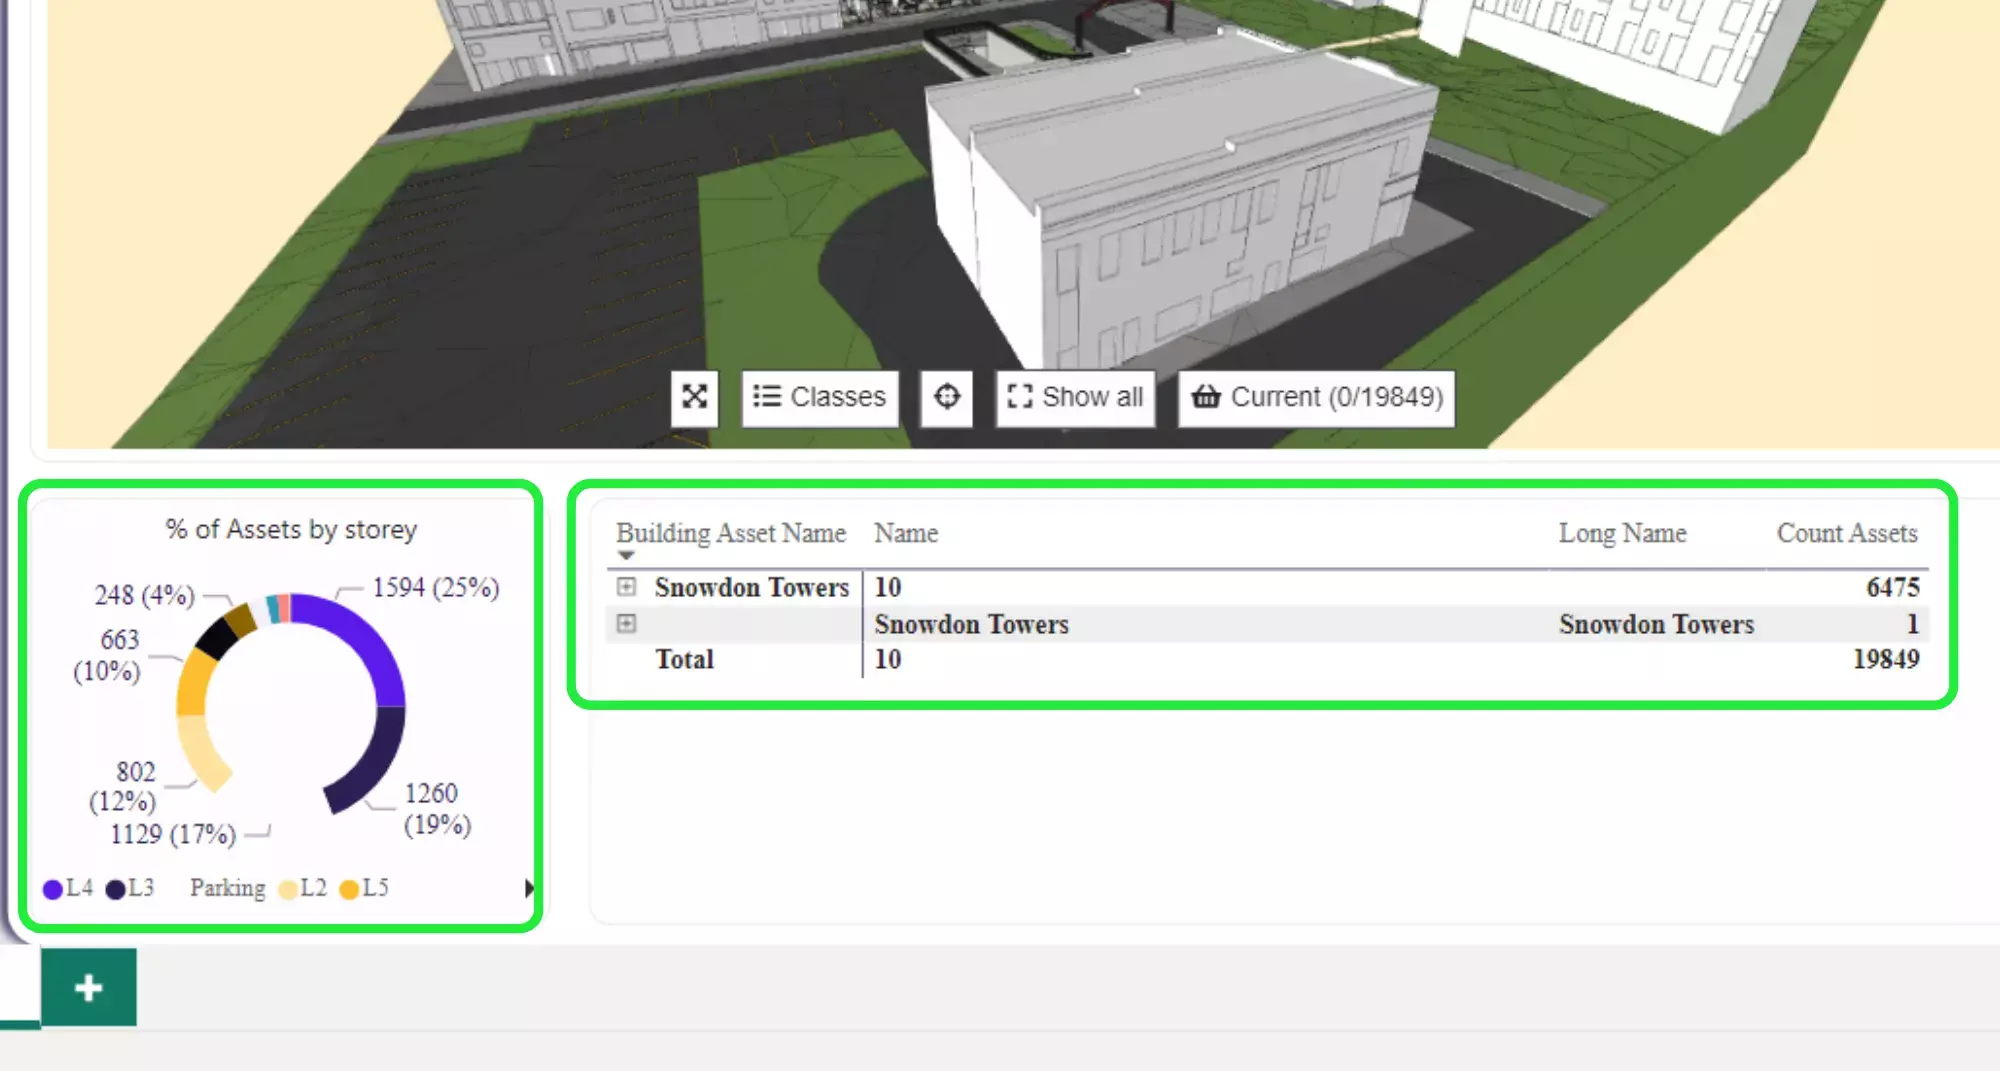
There are also several visual filters already set up within the dashboard. These visuals are interactive and can be used to easily filter the data contained within all of the BIM models.
To choose just one of the ifc files, click on the “File” button in the left-hand visual to open up the list of BIM models.
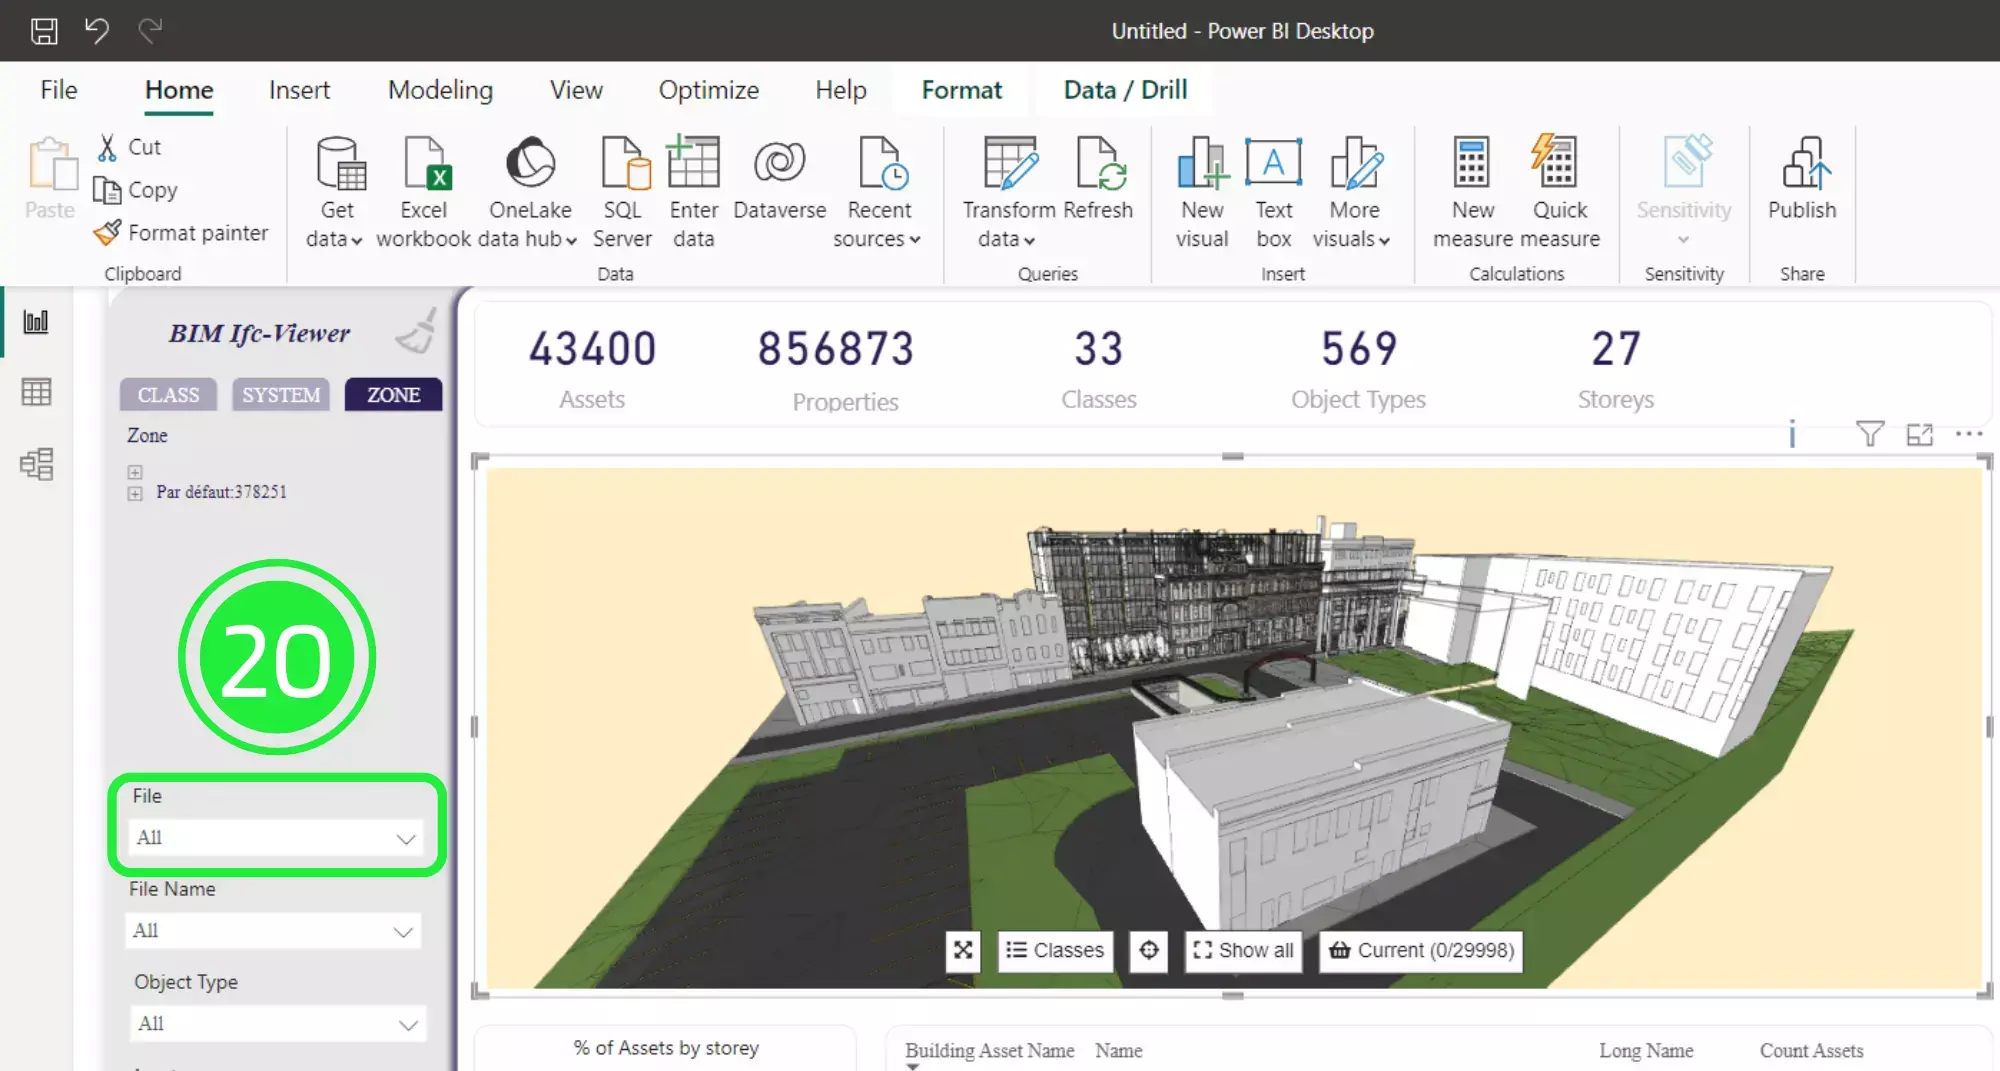
If there are many ifc files uploaded into the dashboard you will be able to use the “Search” function to find the BIM model you need.
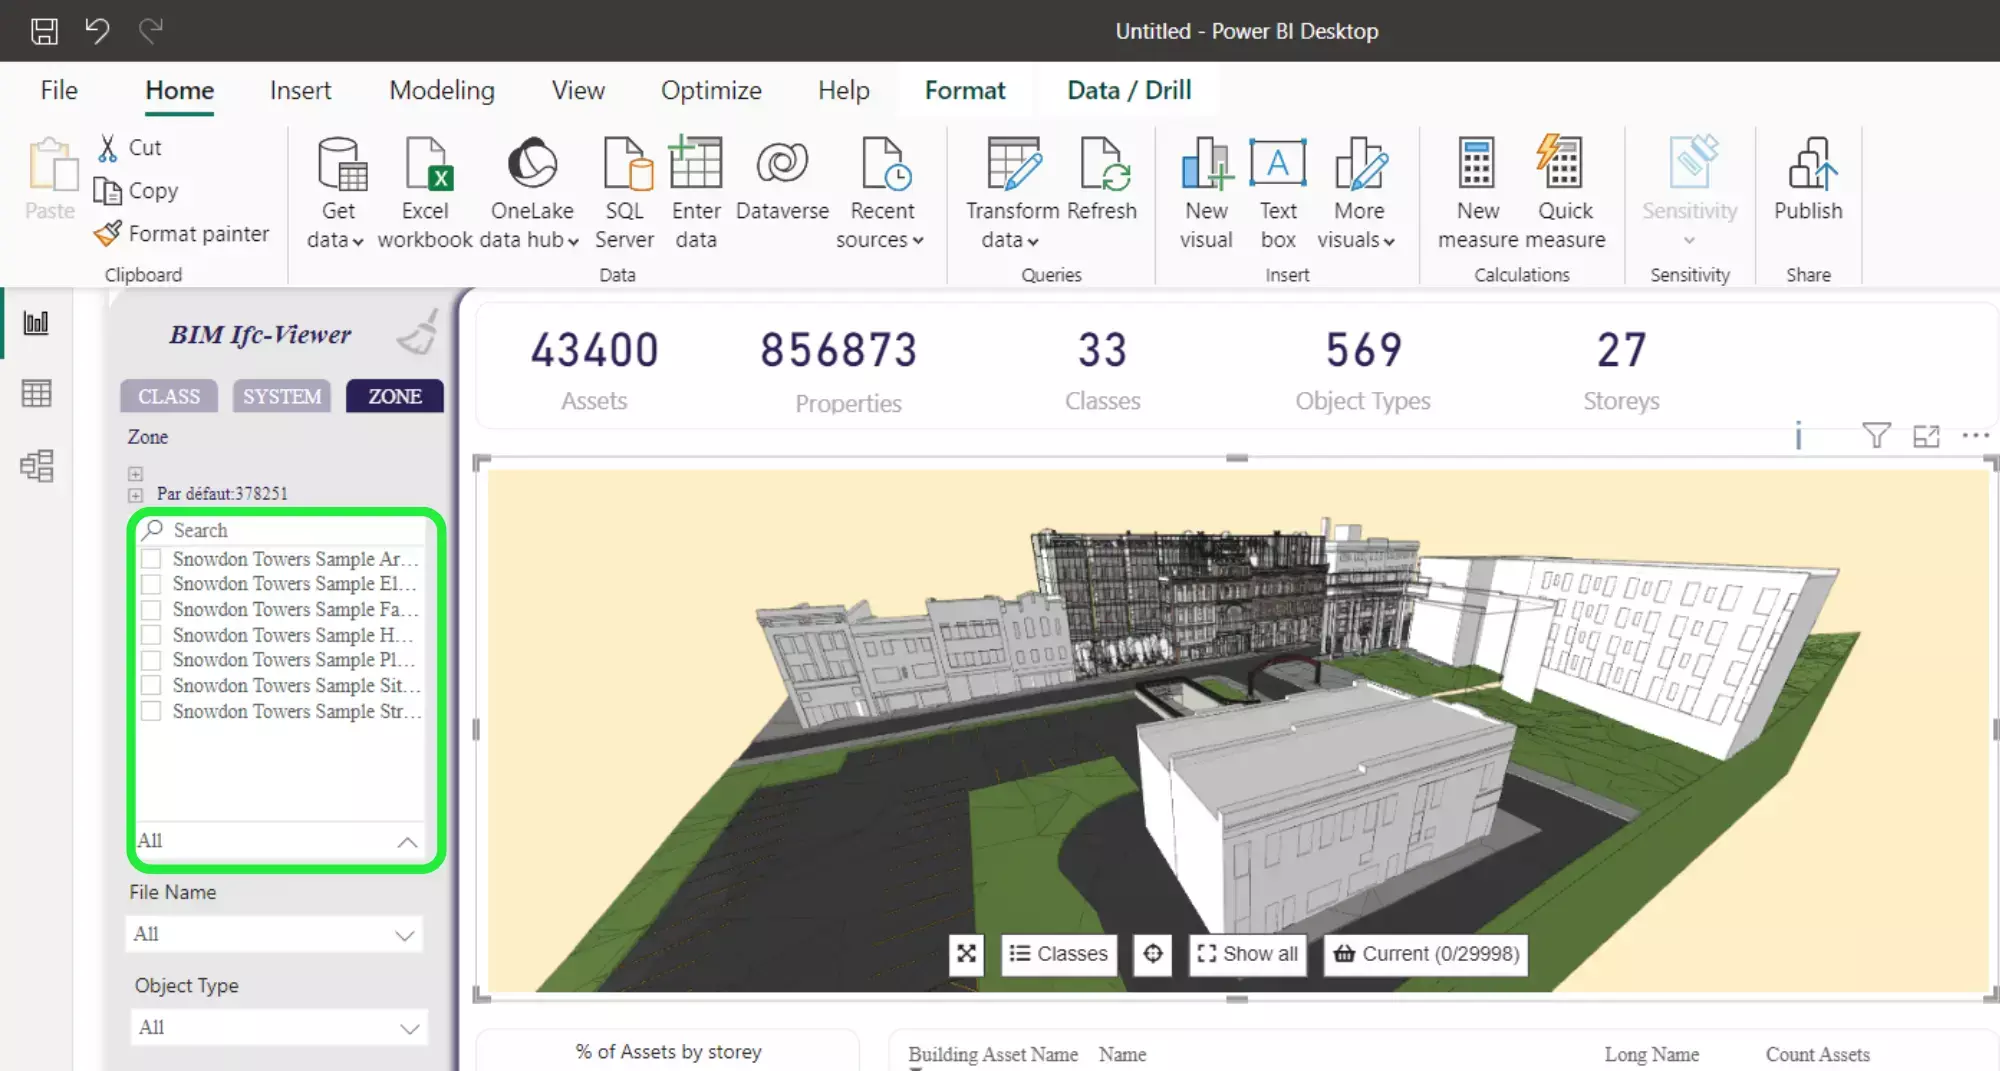
Choose the BIM model that you want to use and you will see that the data within the visuals will change to reflect the selection.
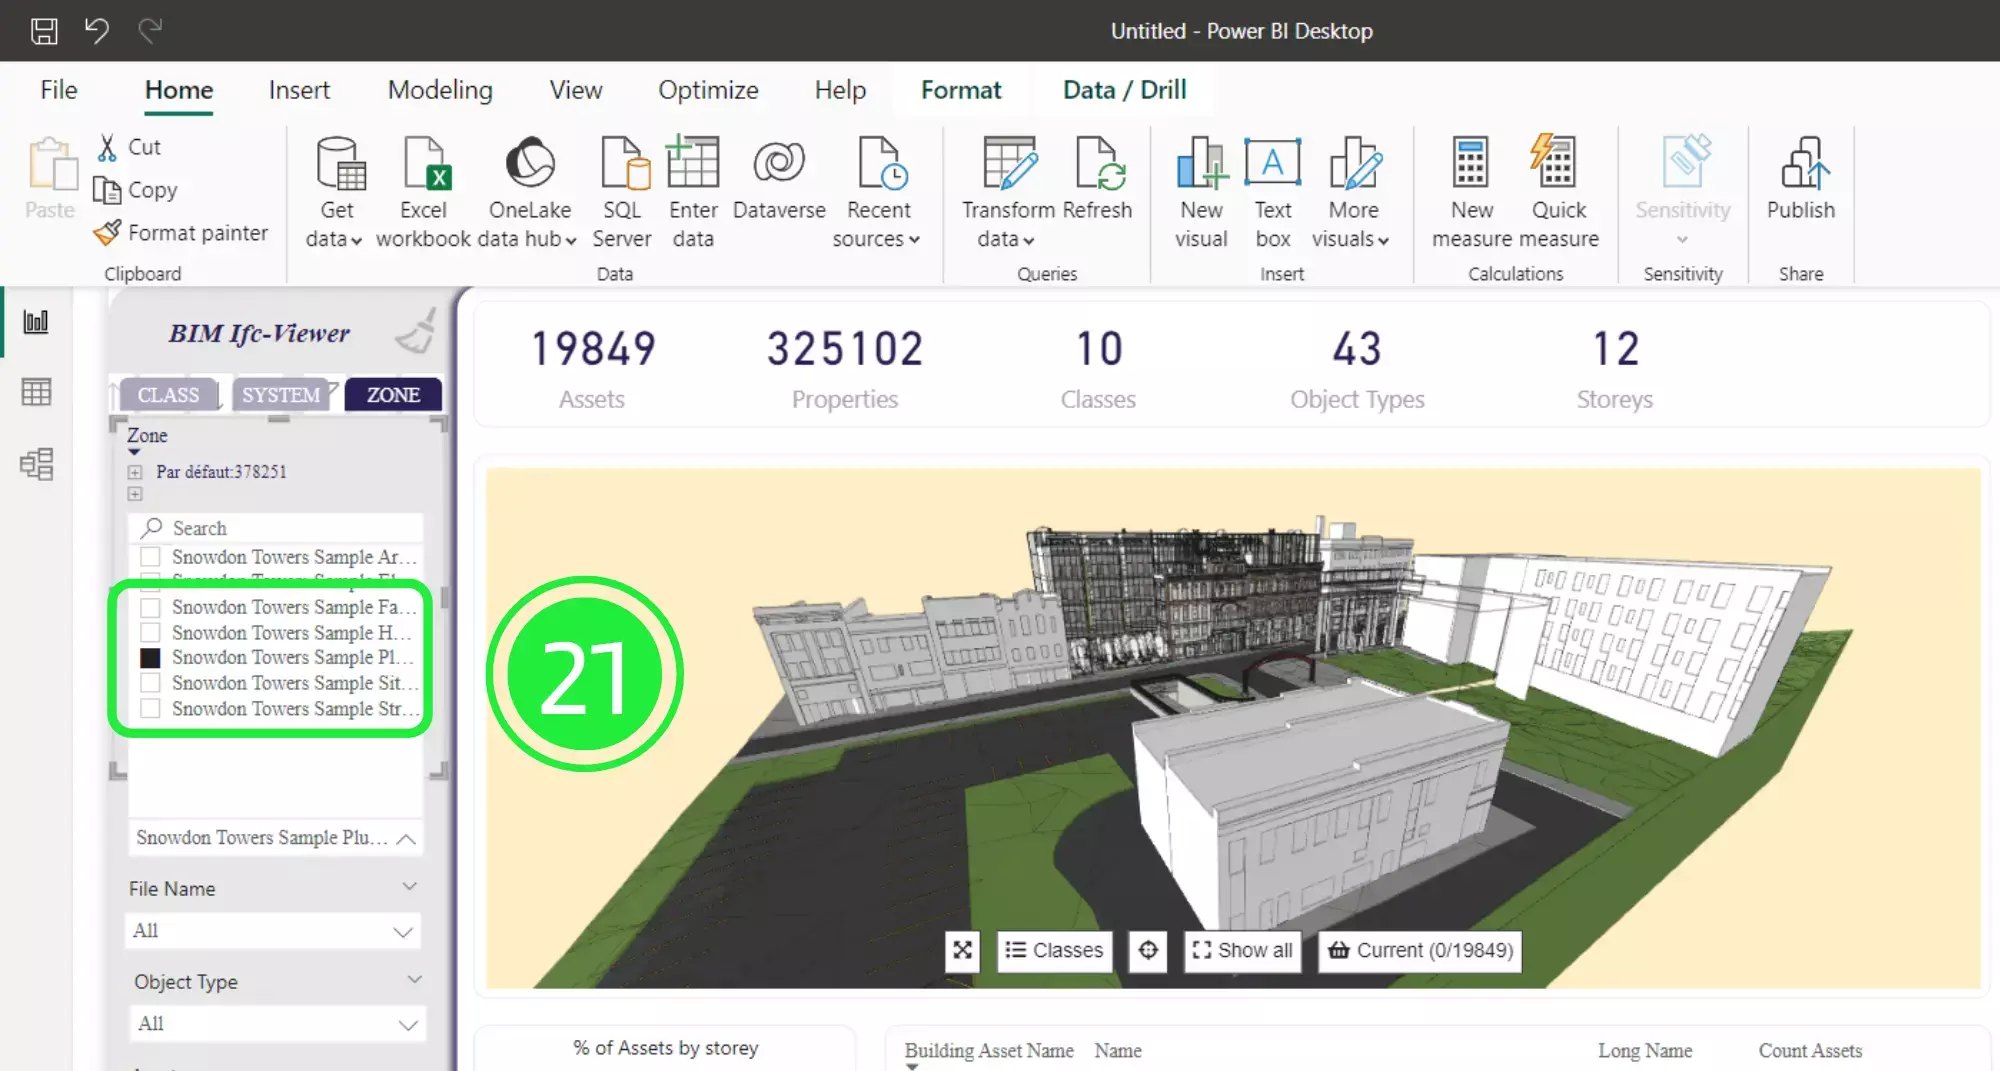
The number of Assets, Properties, Classes, Object Types and Storeys will change to show only those within the selected ifc file.
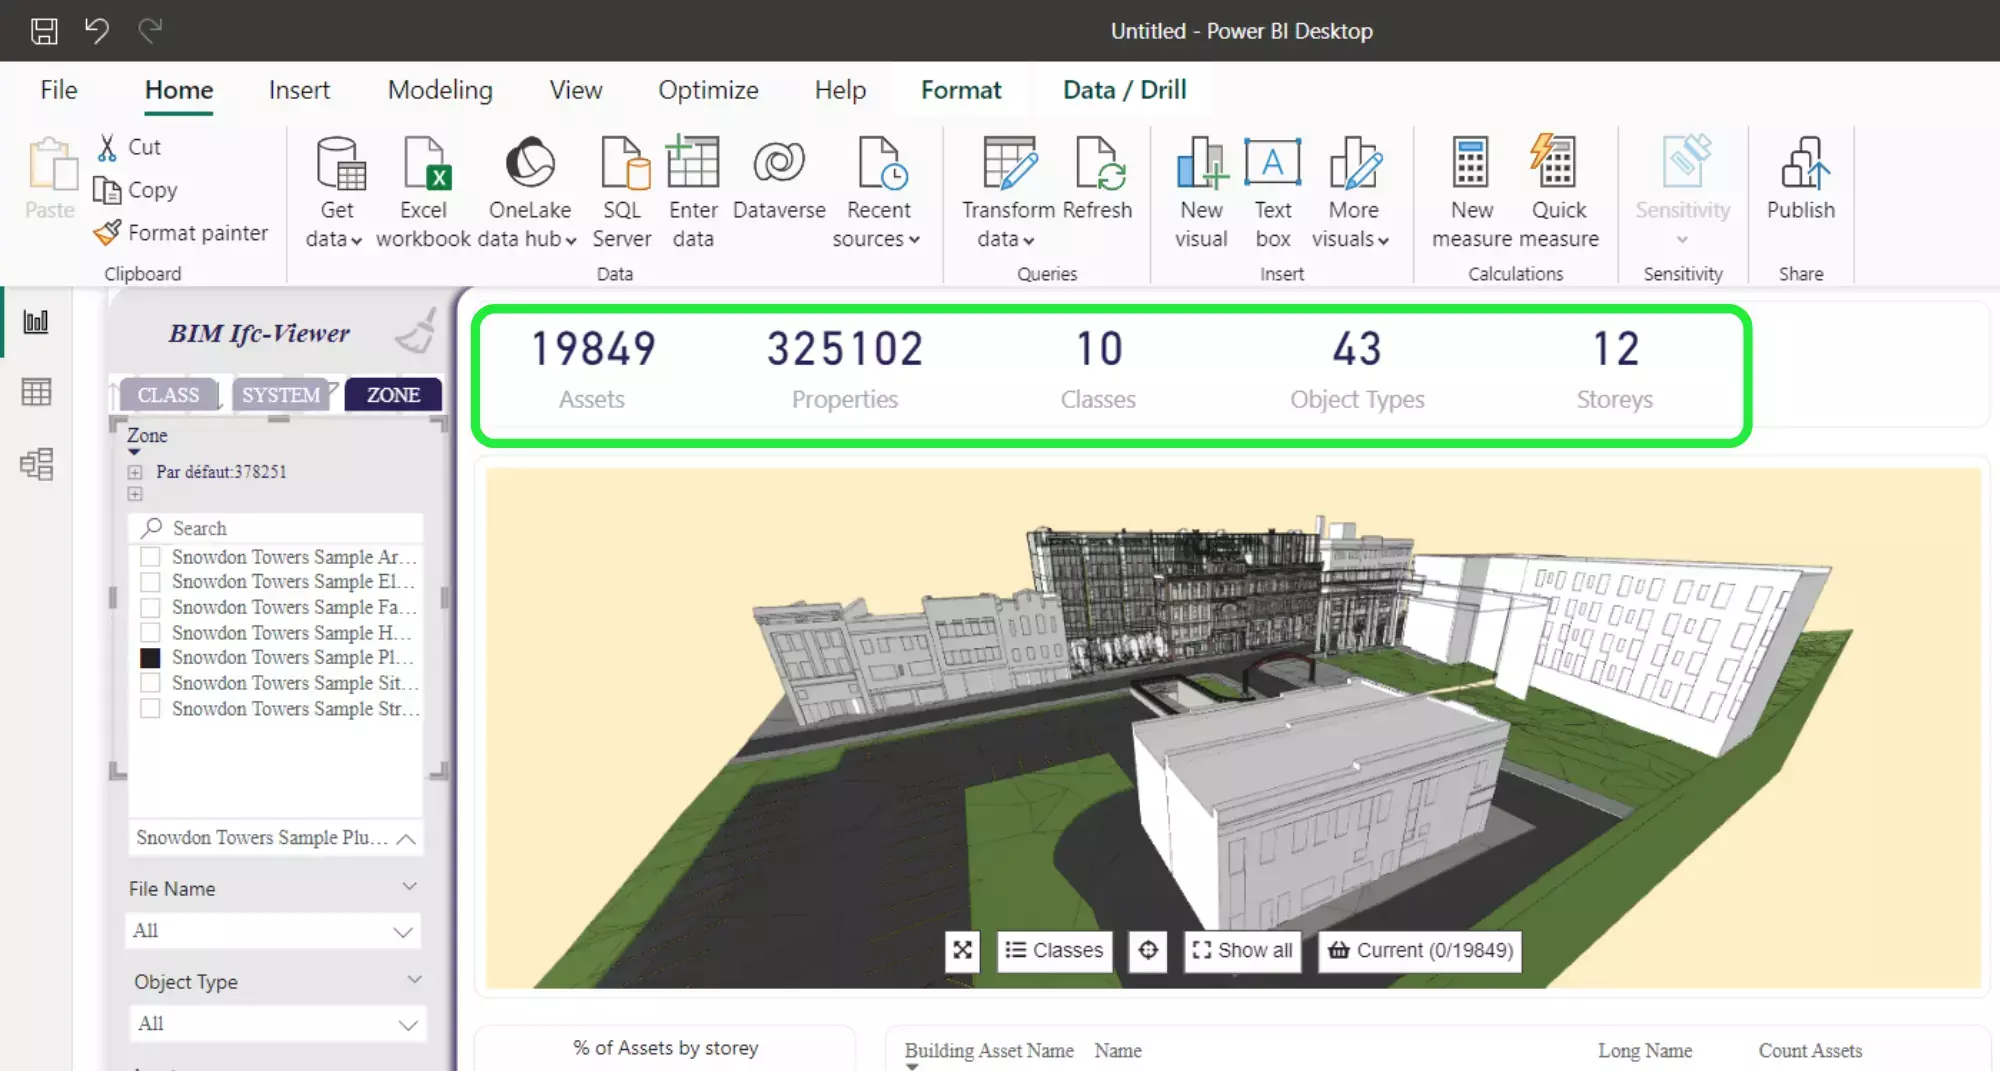
Other visuals in the dashboard will also change to show different information, making it easy to extrapolate the data in a few clicks.
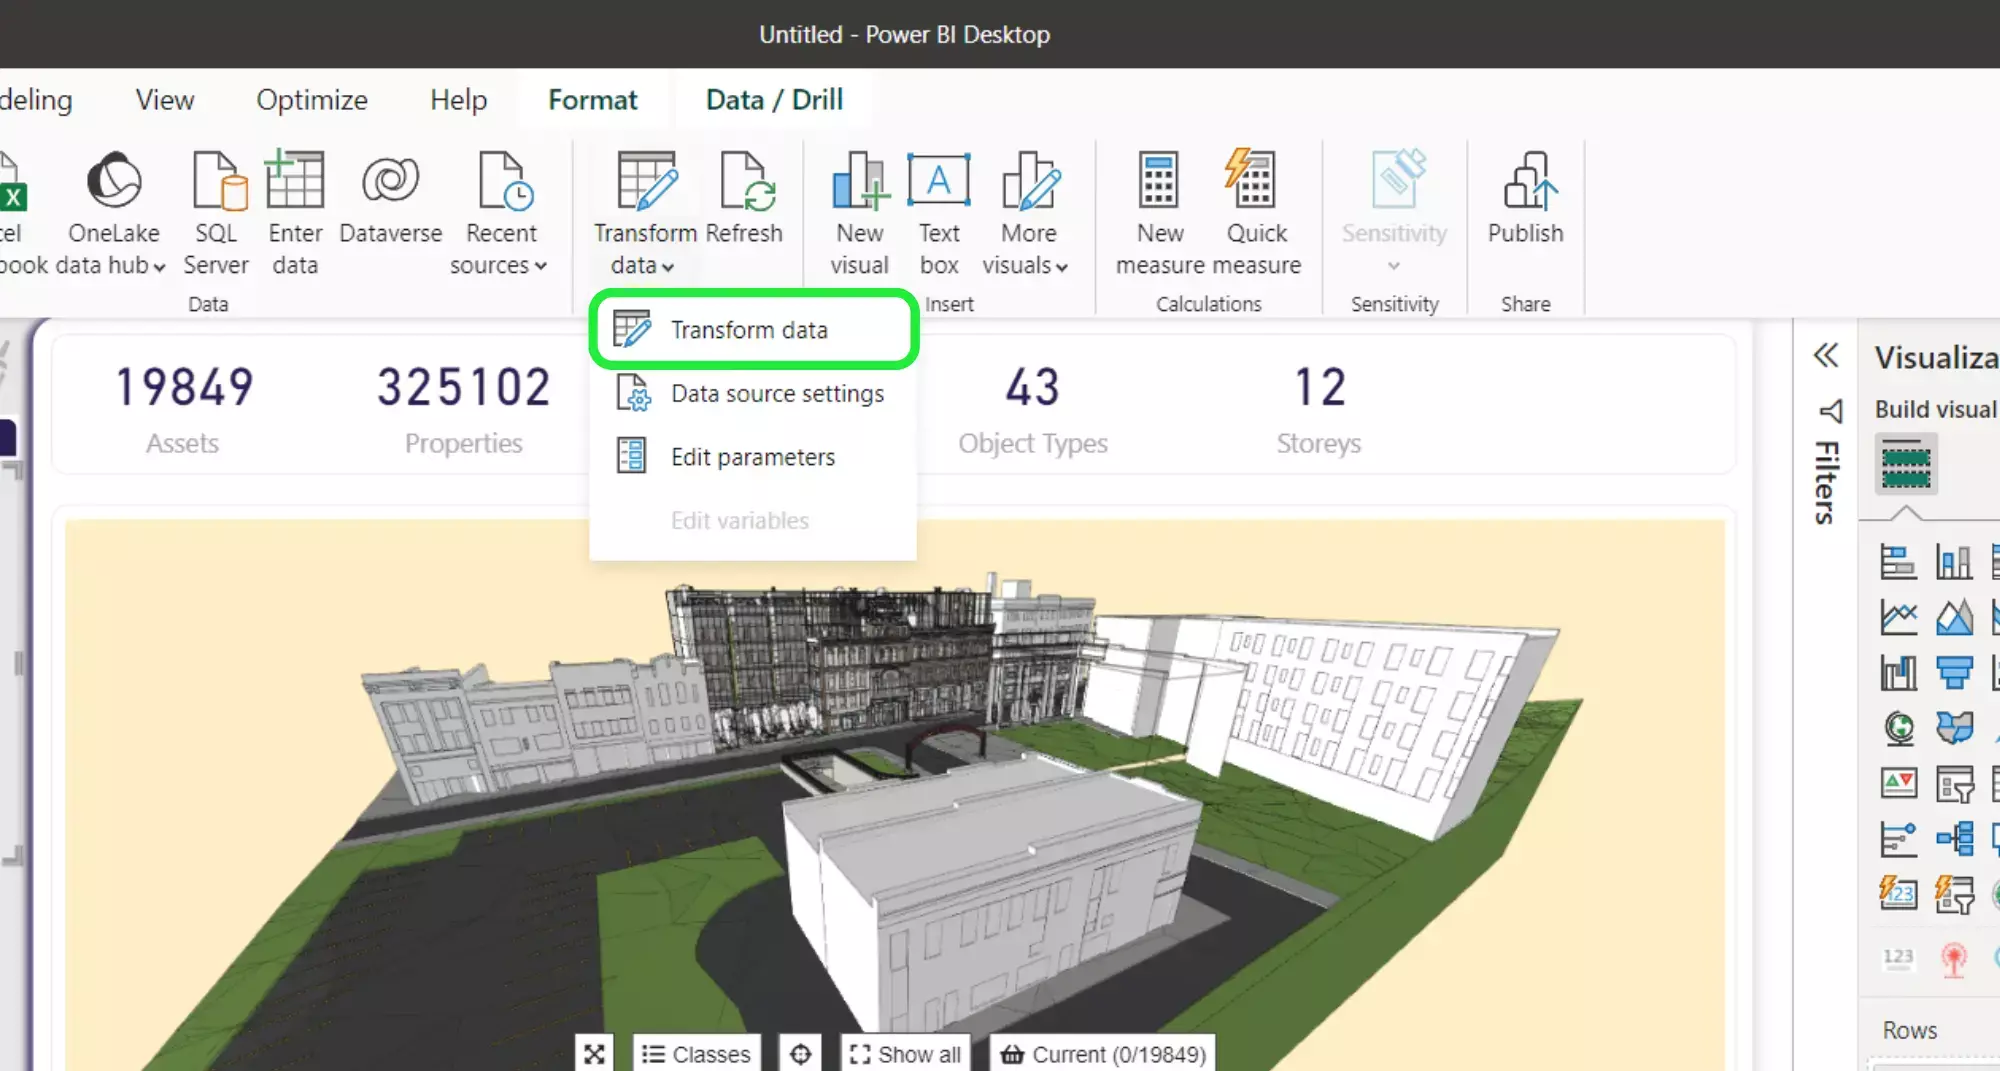
In order to look at the data contained within the model click on “Transform Data” at the top of the Power BI interface to drop down the menu.
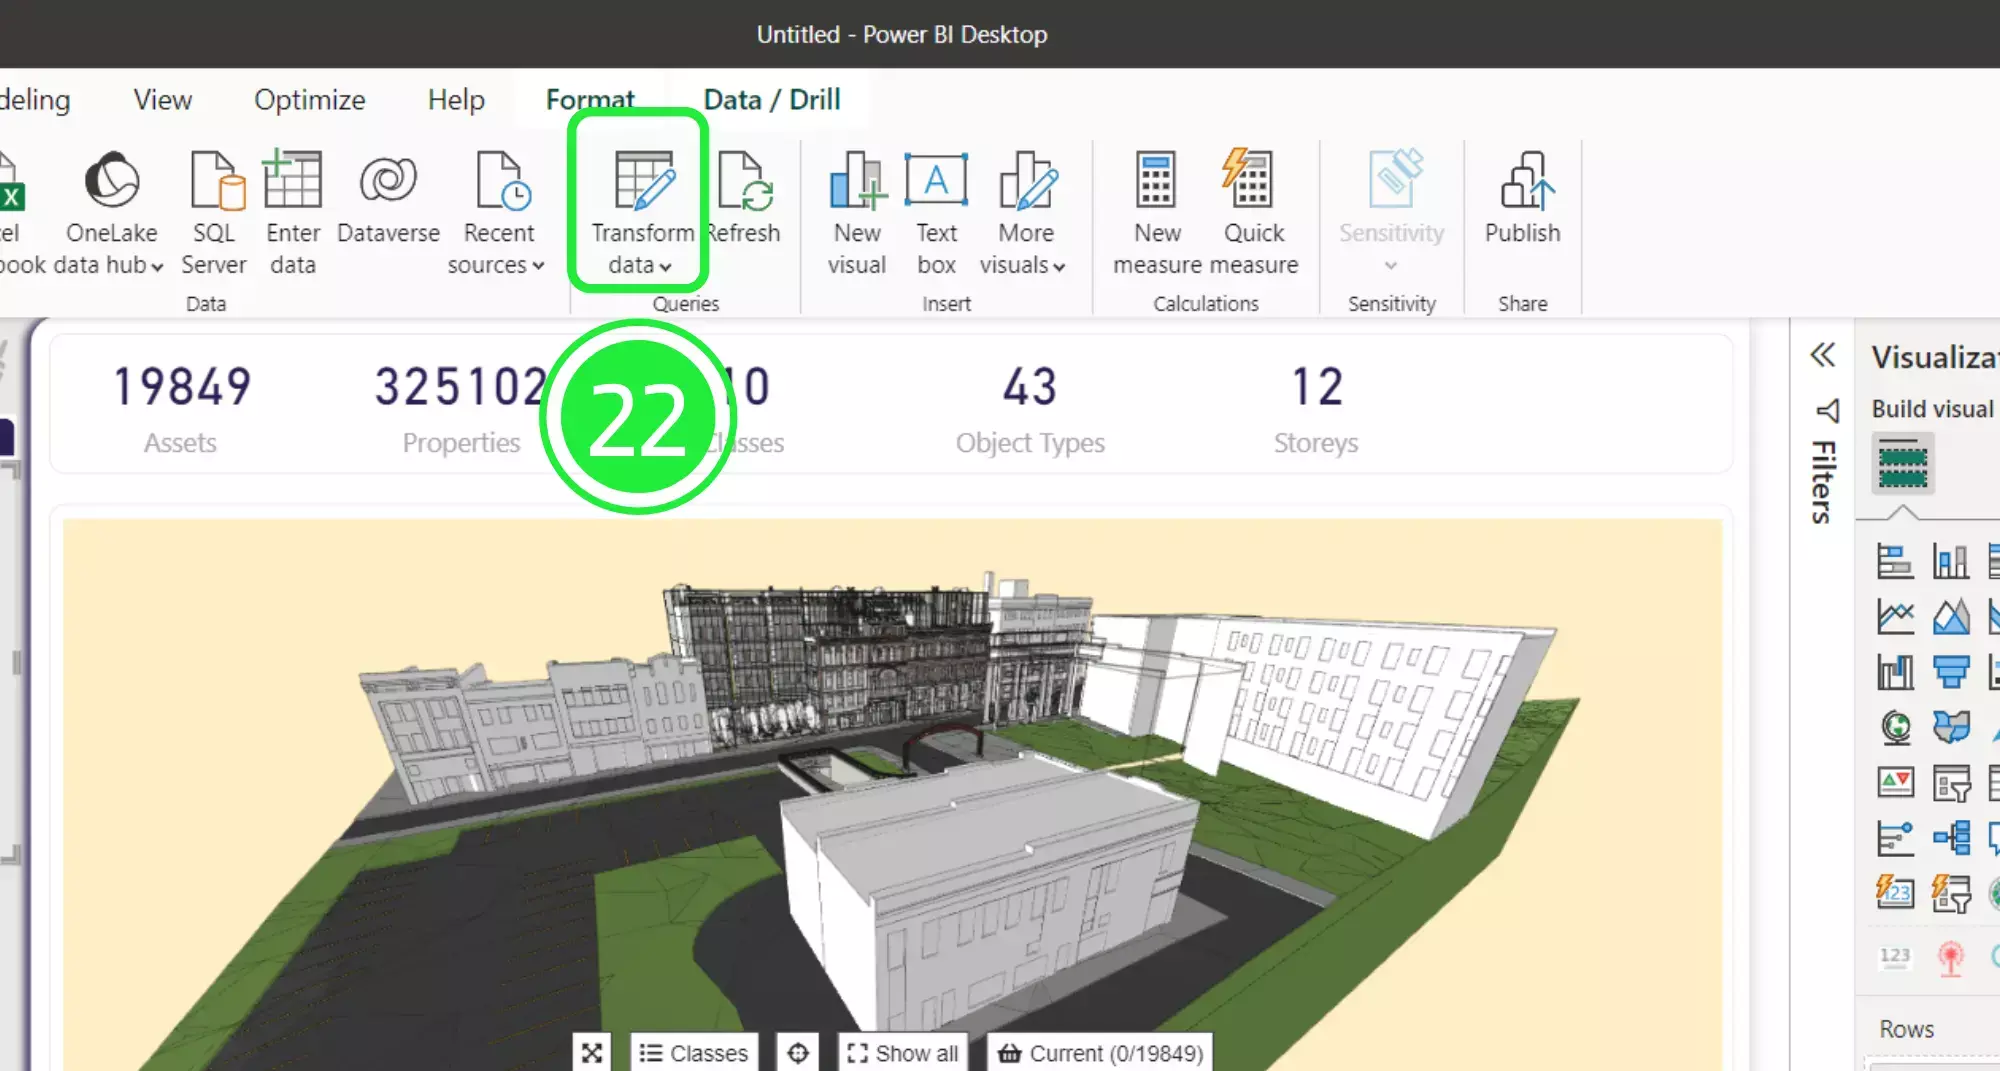
Then click on “Transform Data” to access the Power Query Editor.
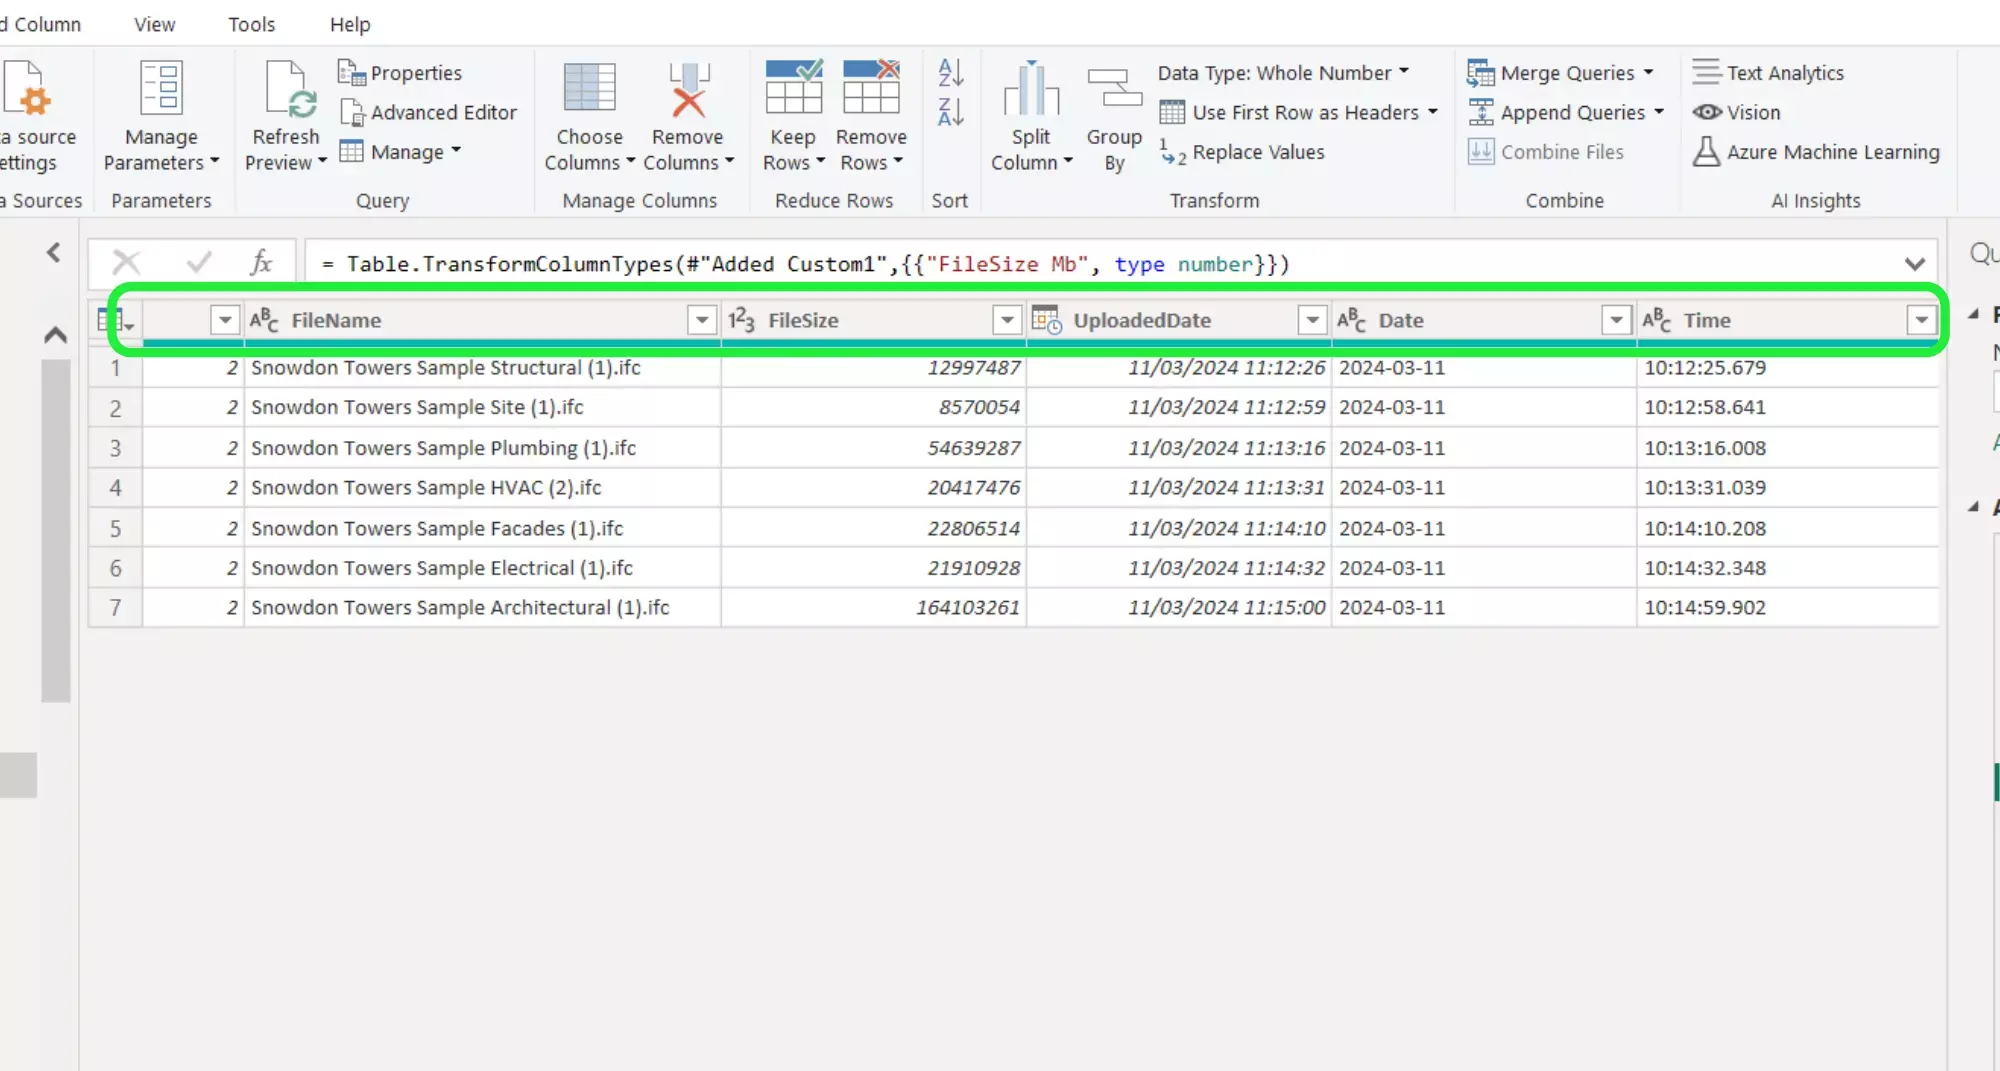
All of the working tables are on the left hand side of the “Power Query Editor”. Click on “WT_Revisions” in order to display the data as a table.

Each BIM model has a specific Revision ID assigned to it and all of the data such as the filename and the version number are also included.
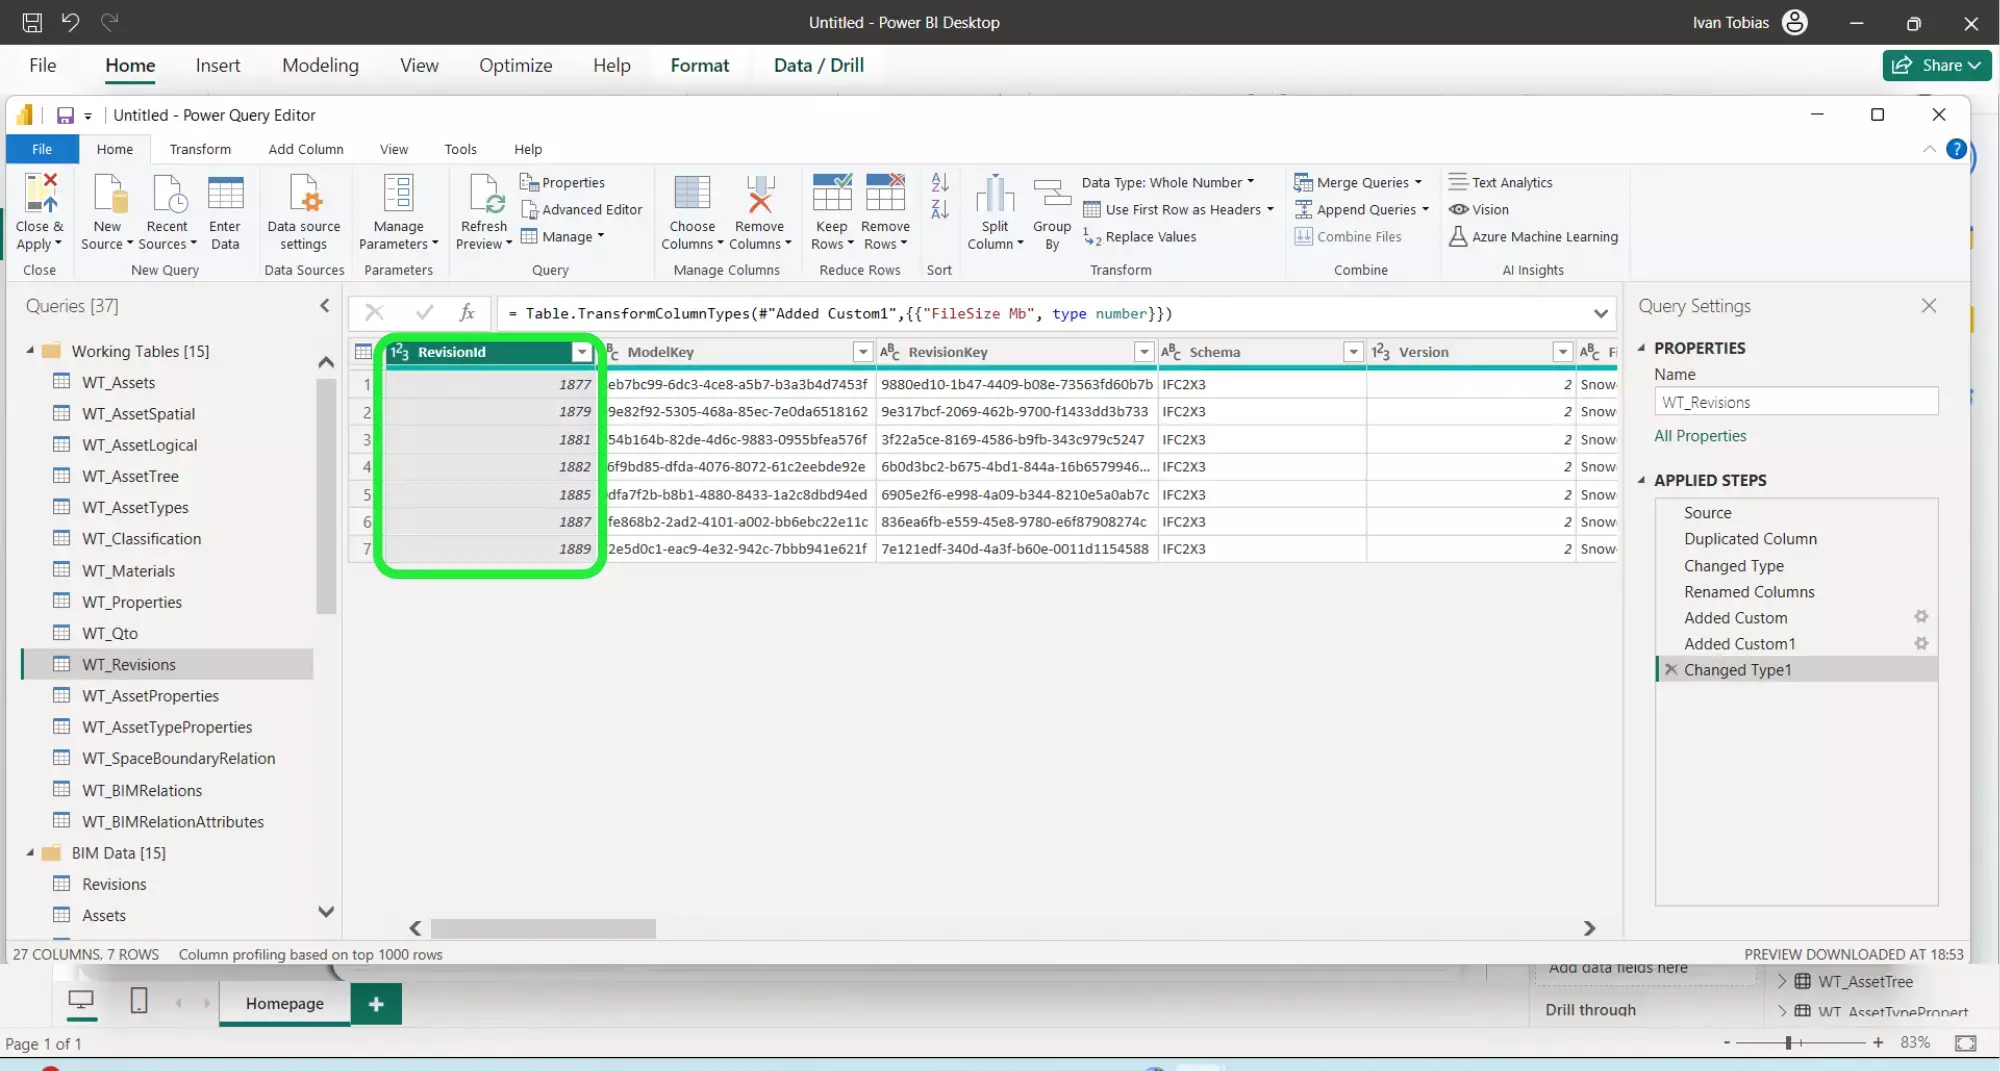
This is the same for all of the tables. A Revision ID is assigned to each of the asset data so that they are linked to each BIM model. Although the data has been extracted and merged into one dashboard, the BIM models are still technically distinct from one another. You are finalizing how to easily and quickly merge multiple IFC Files.
SeveUp’s ability to transform and merge IFC files into a dynamic and interactive Power BI dashboard is a game-changer, and it will help you to transform the way you visualise, interact with, and understand your construction projects.
Next step : Want to get started with your very own BIM project? You’ll be surprised by just how easy it is. Create your own free account is SeveUp today and give it a try.
Learn how to automate your BIM model checks and get certified.


🎓 Free BIM Checker Training Learn how to automate your BIM model checks and get certified. Register for Free Click
Learn More🎓 Free BIM Checker Training Learn how to automate your BIM model checks and get certified. Register for Free Click
Learn More🎓 Free BIM Checker Training Learn how to automate your BIM model checks and get certified. Register for Free Choose
Learn More