Trusted by companies
all over the world:
In the architecture, engineering, and construction (AEC) industry, being able to effectively BIM dashboards and view your building information modeling data more easily is a major competitive advantage. SeveUp’s Microsoft Power BI integration makes it easy to seamlessly visualize complex construction data in real time, allowing stakeholders to glean insights and make informed decisions swiftly and effectively.
When you can turn multi-dimensional BIM data into interactive Power BI dashboards, you create major benefits for project monitoring and resource allocation. Dashboards make data easier to understand for everyone, fostering a collaborative environment and allowing stakeholders to synchronize their efforts, boosting efficiency and mitigating risk. Combining SeveUp’s detailed spatiotemporal BIM data with Power BI’s analytical power not only augments users’ ability to complete in-depth analysis, it also supercharges strategic planning.
The integration of SeveUp’s BIM dashboards and Microsoft Power BI is a gamechanger to help steer the AEC industry towards optimized project outcomes, higher productivity, and advanced innovation.
Now that you’re familiar with adding an existing BIM dashboard to a project, let’s show you how to download a SeveUp BIM dashboard and import it into Microsoft Power BI. Just follow the steps below:
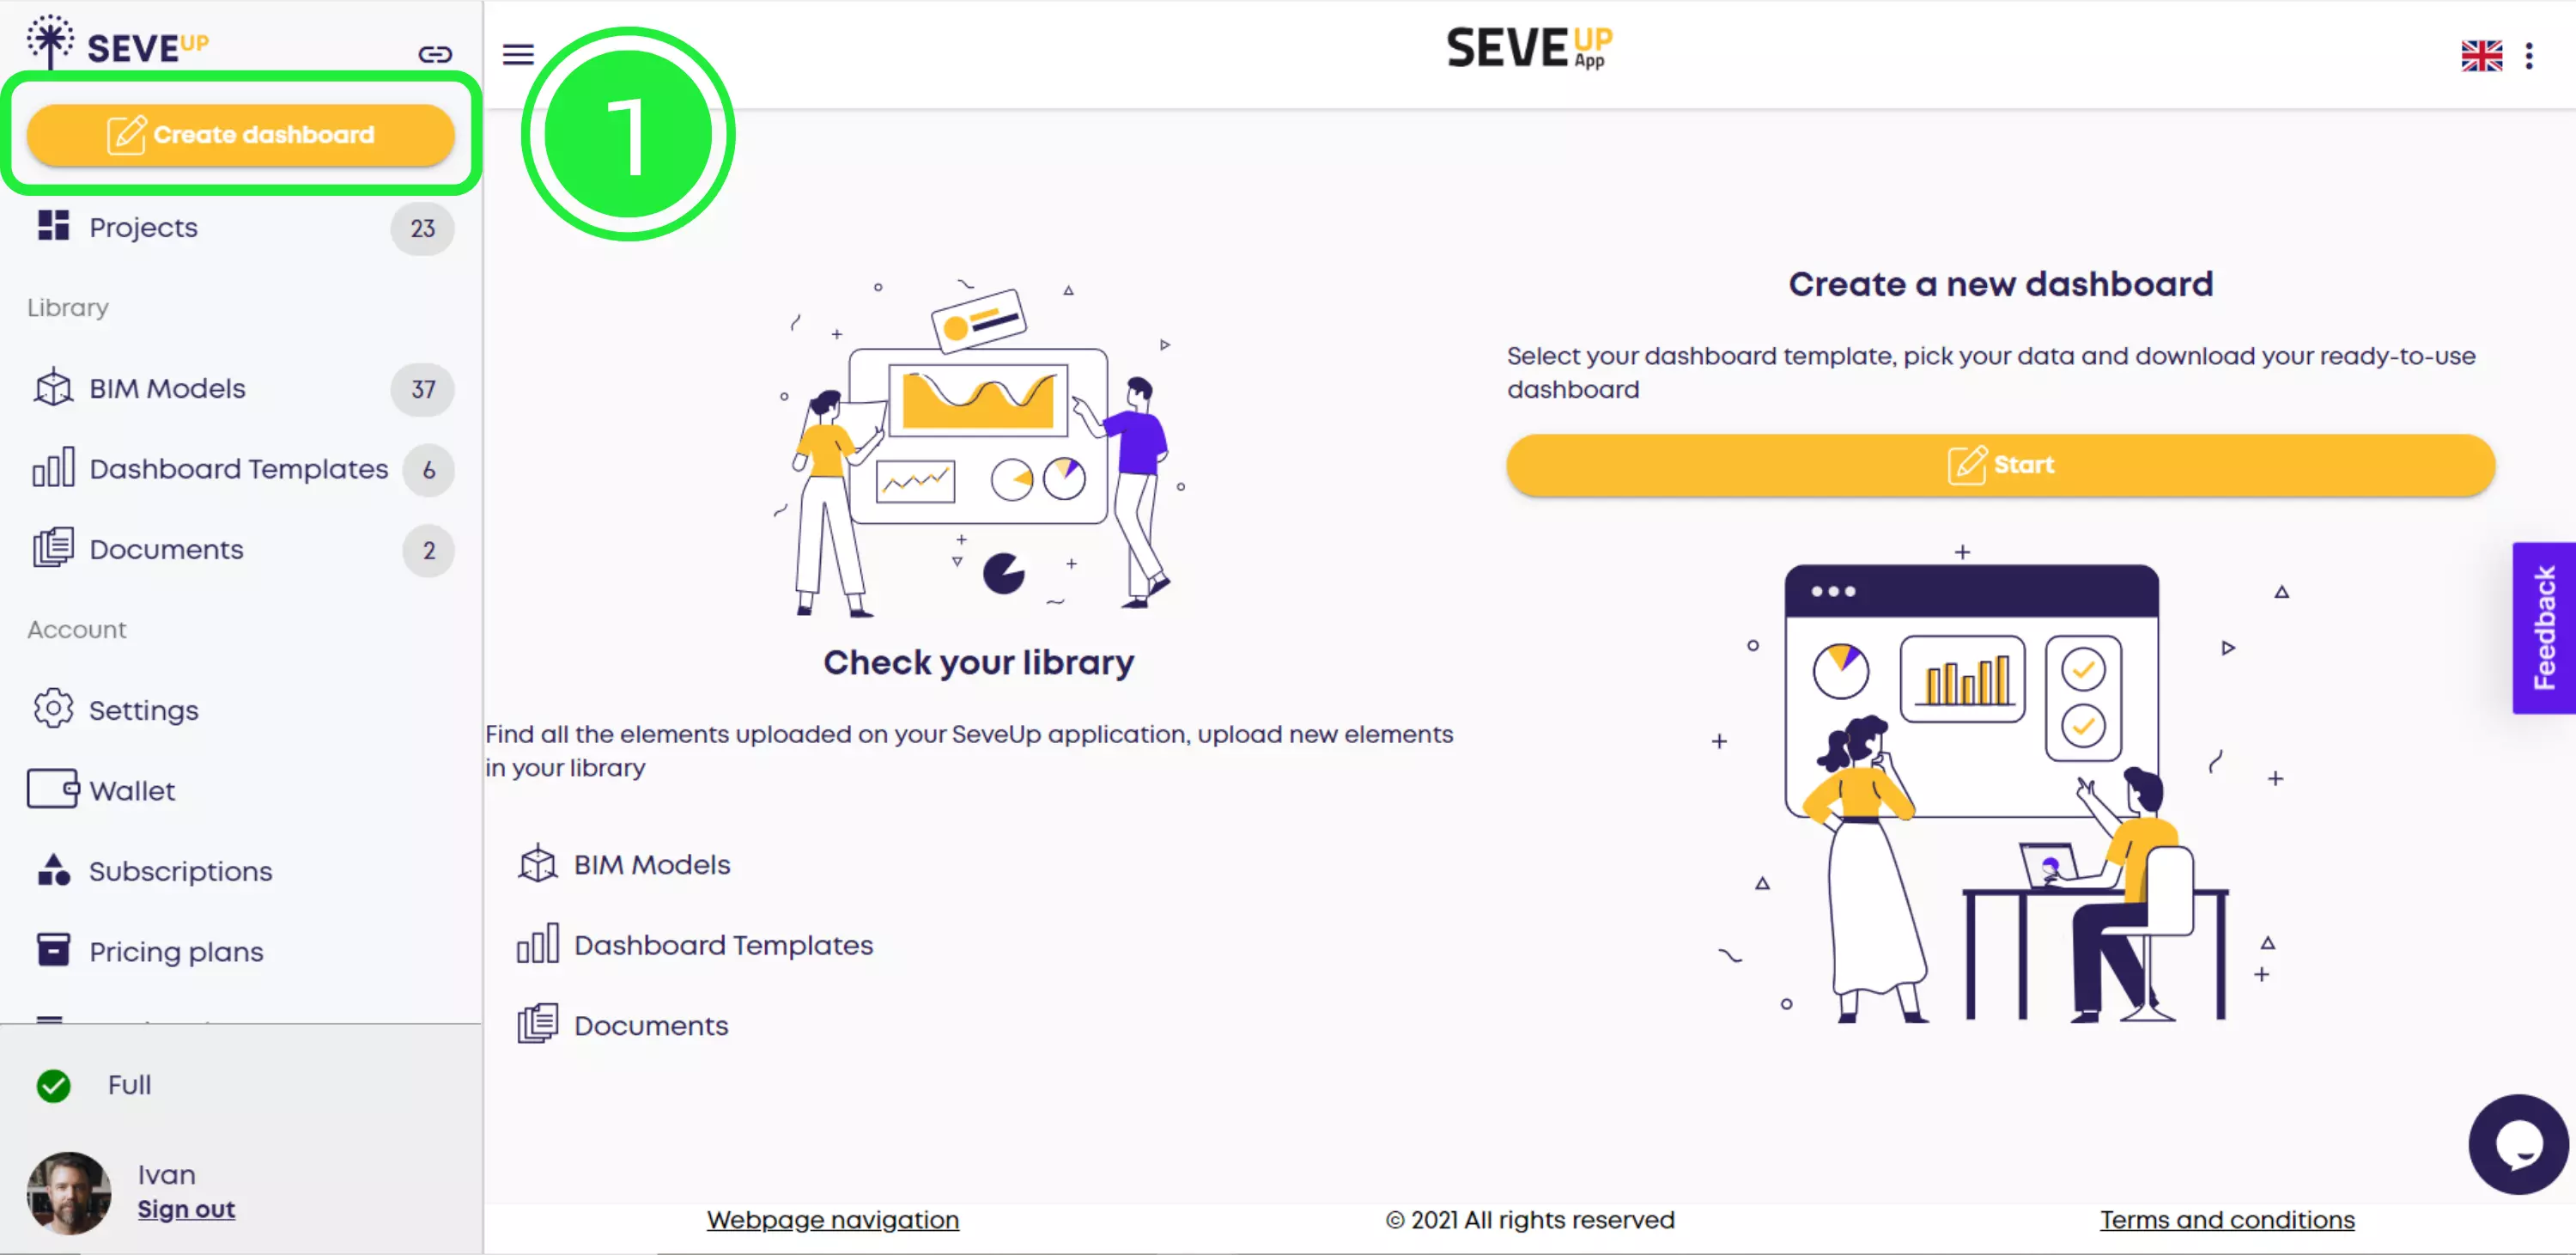
To get started, log in to the SeveUp app and click the yellow “Create dashboard” button at the top of the left navigation bar.
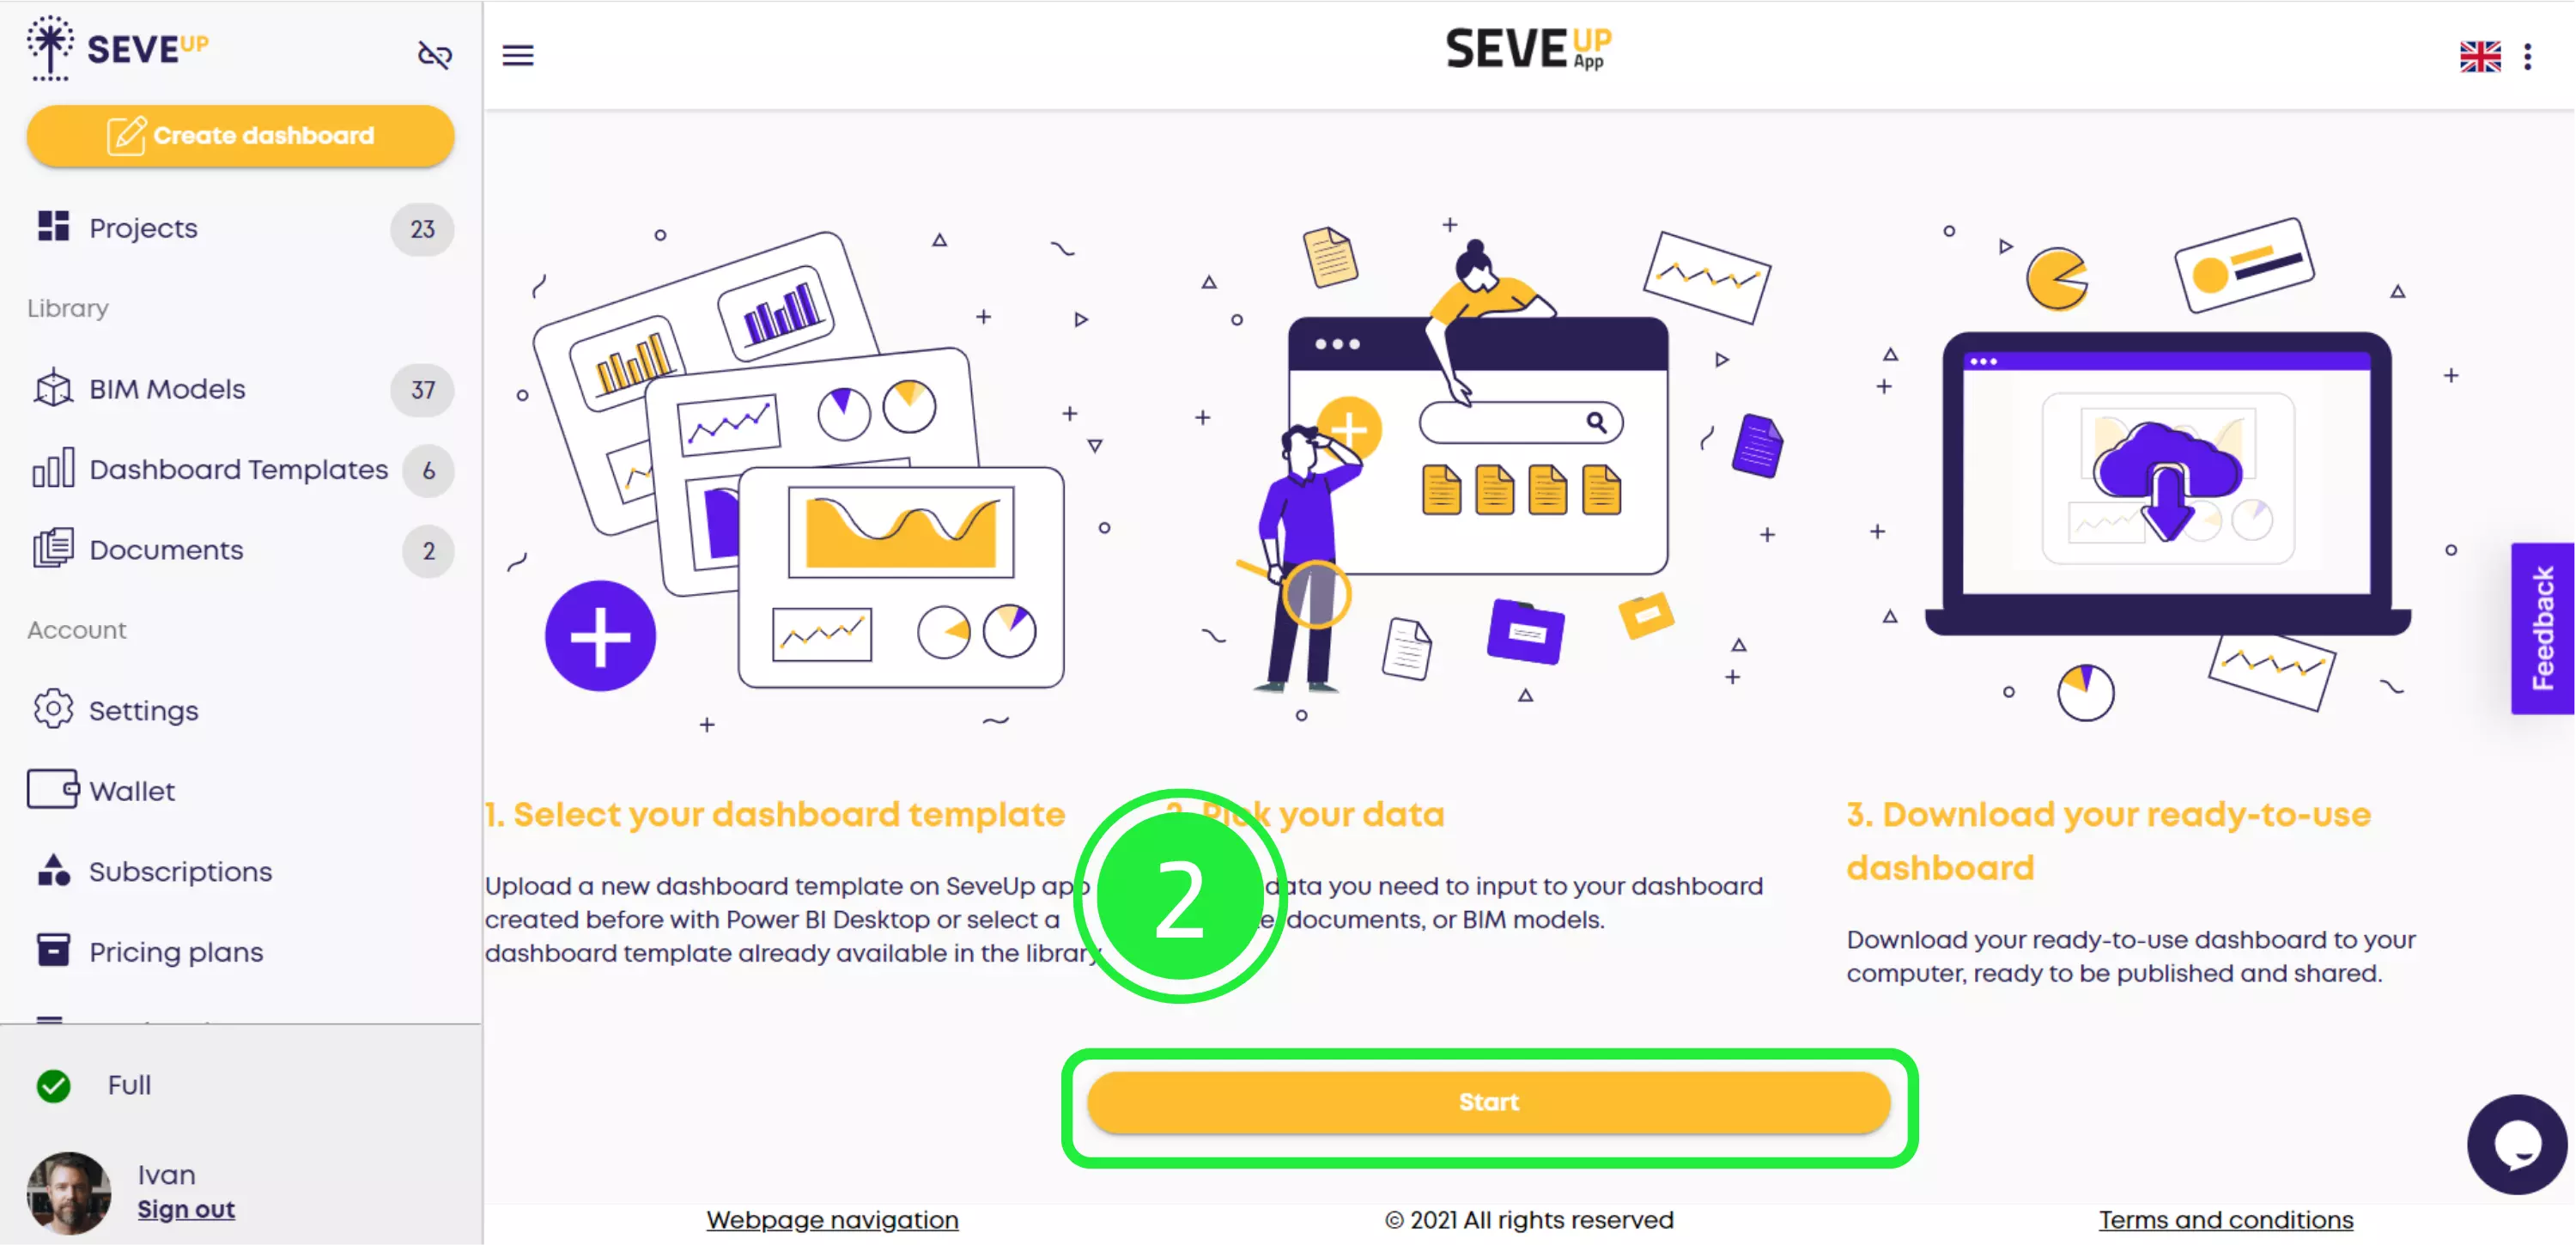
First, read about the process on the dashboard creation page. Don’t worry, we’ll walk you through every step. When you’re ready to start, click the yellow “Start” button in the center of the page.
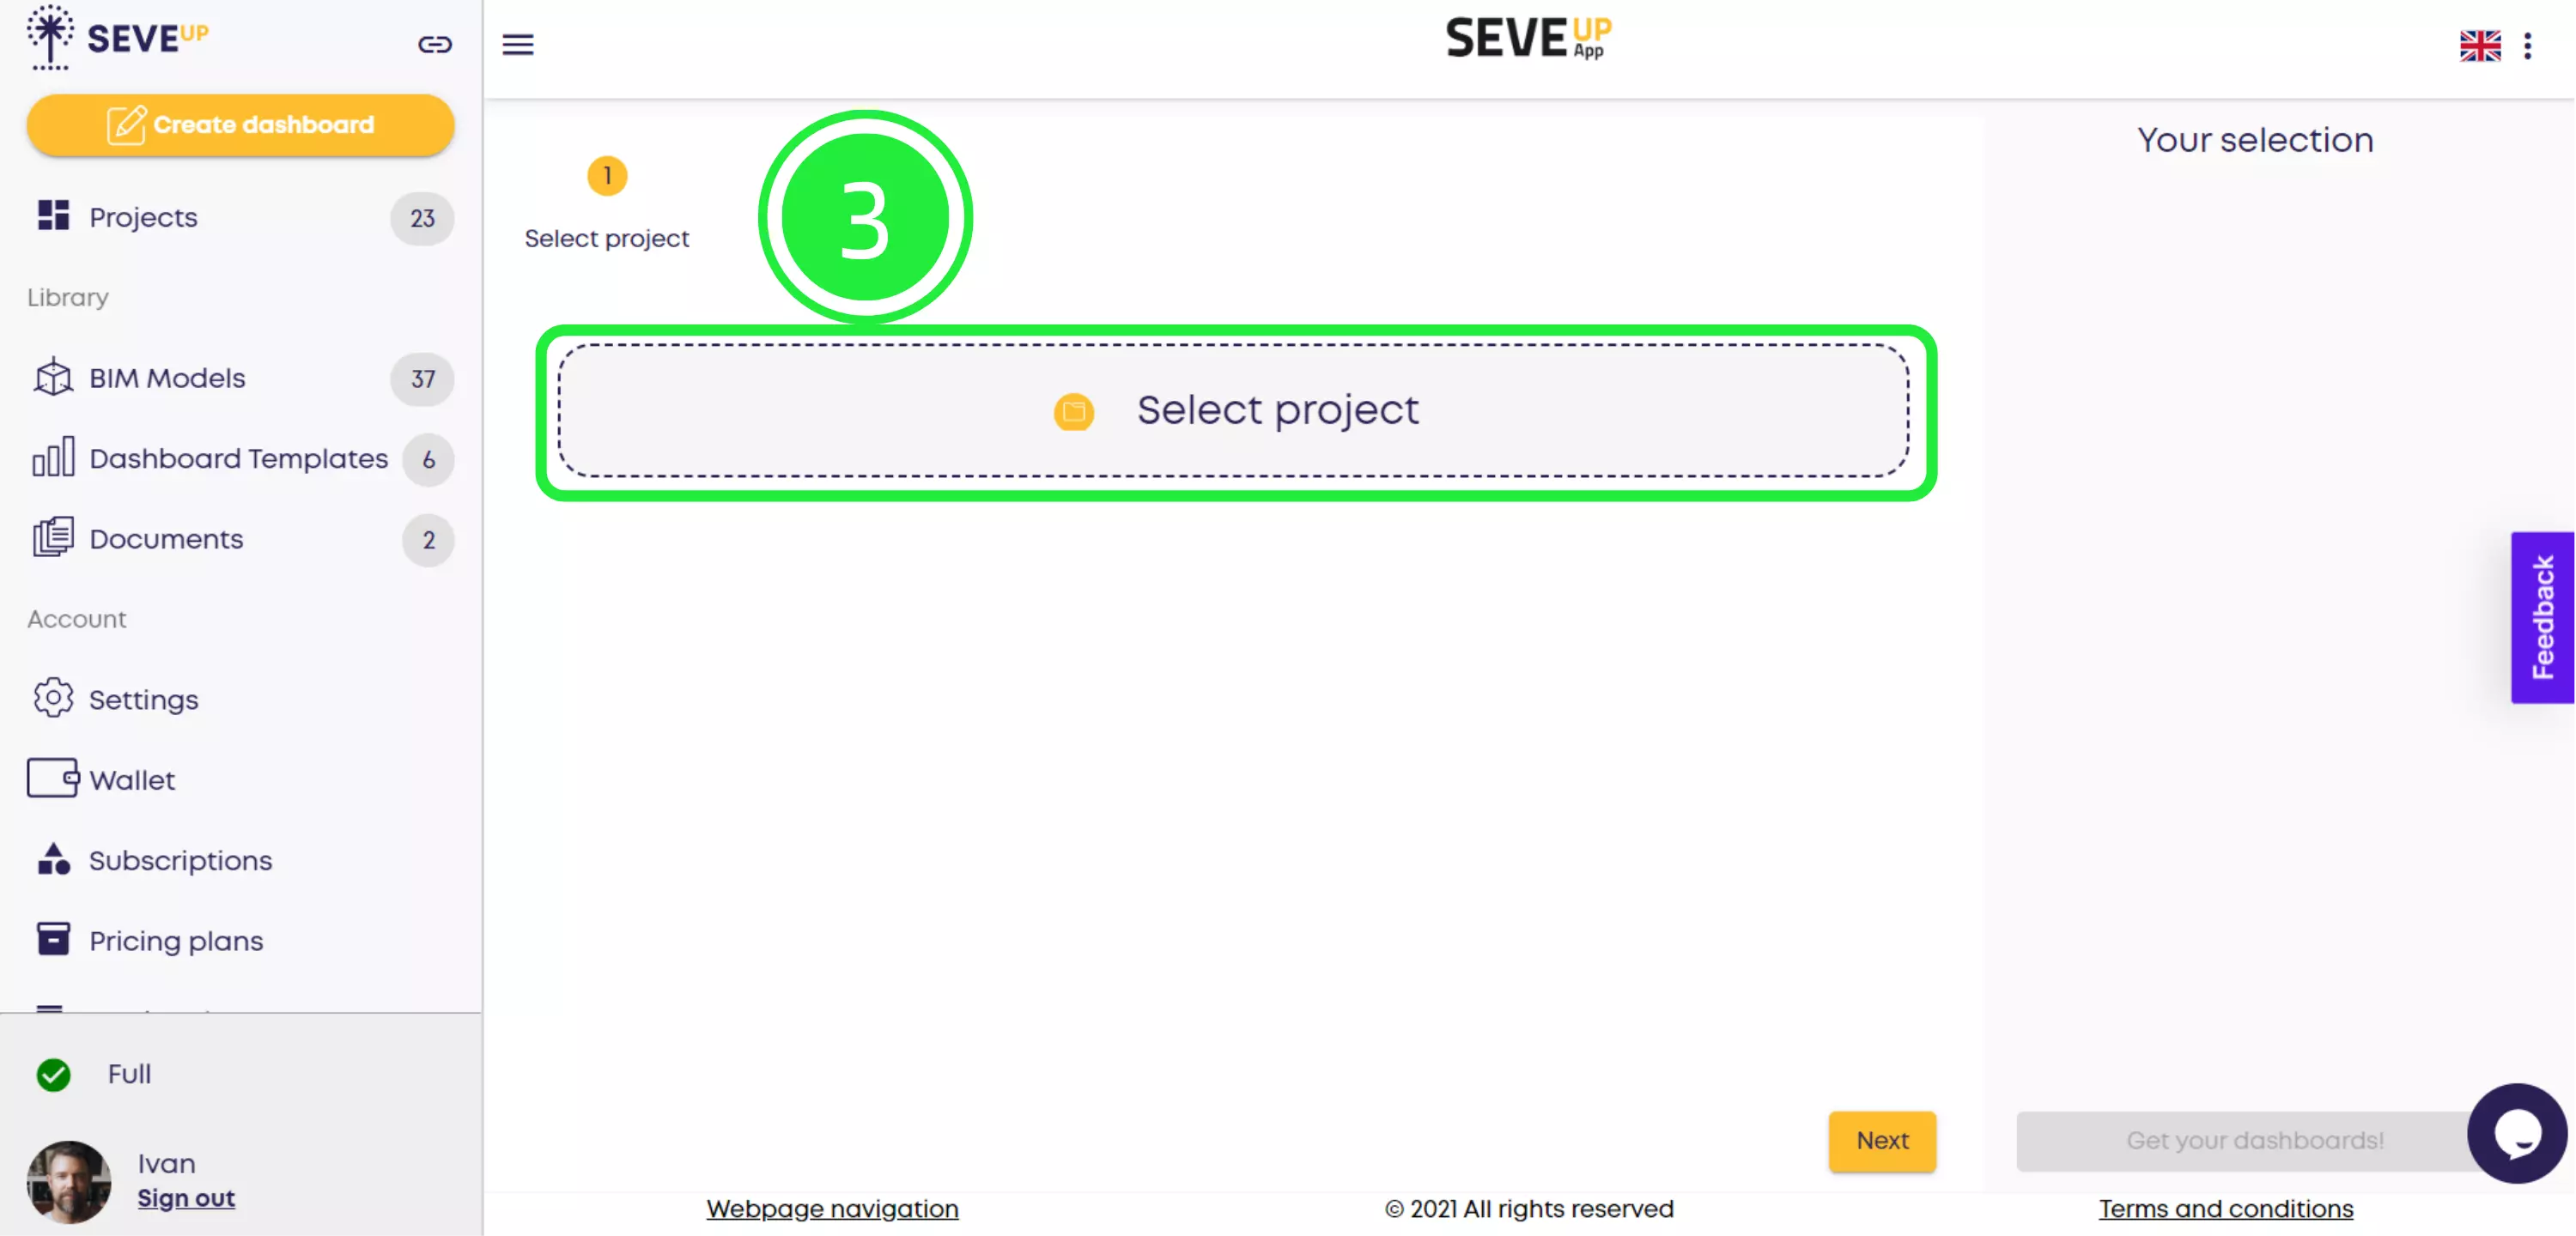
At the top of the page, you’ll notice a progress bar letting you know how far along you are in the process. Continue with the first step: finding your project. Click the “Select project” button.
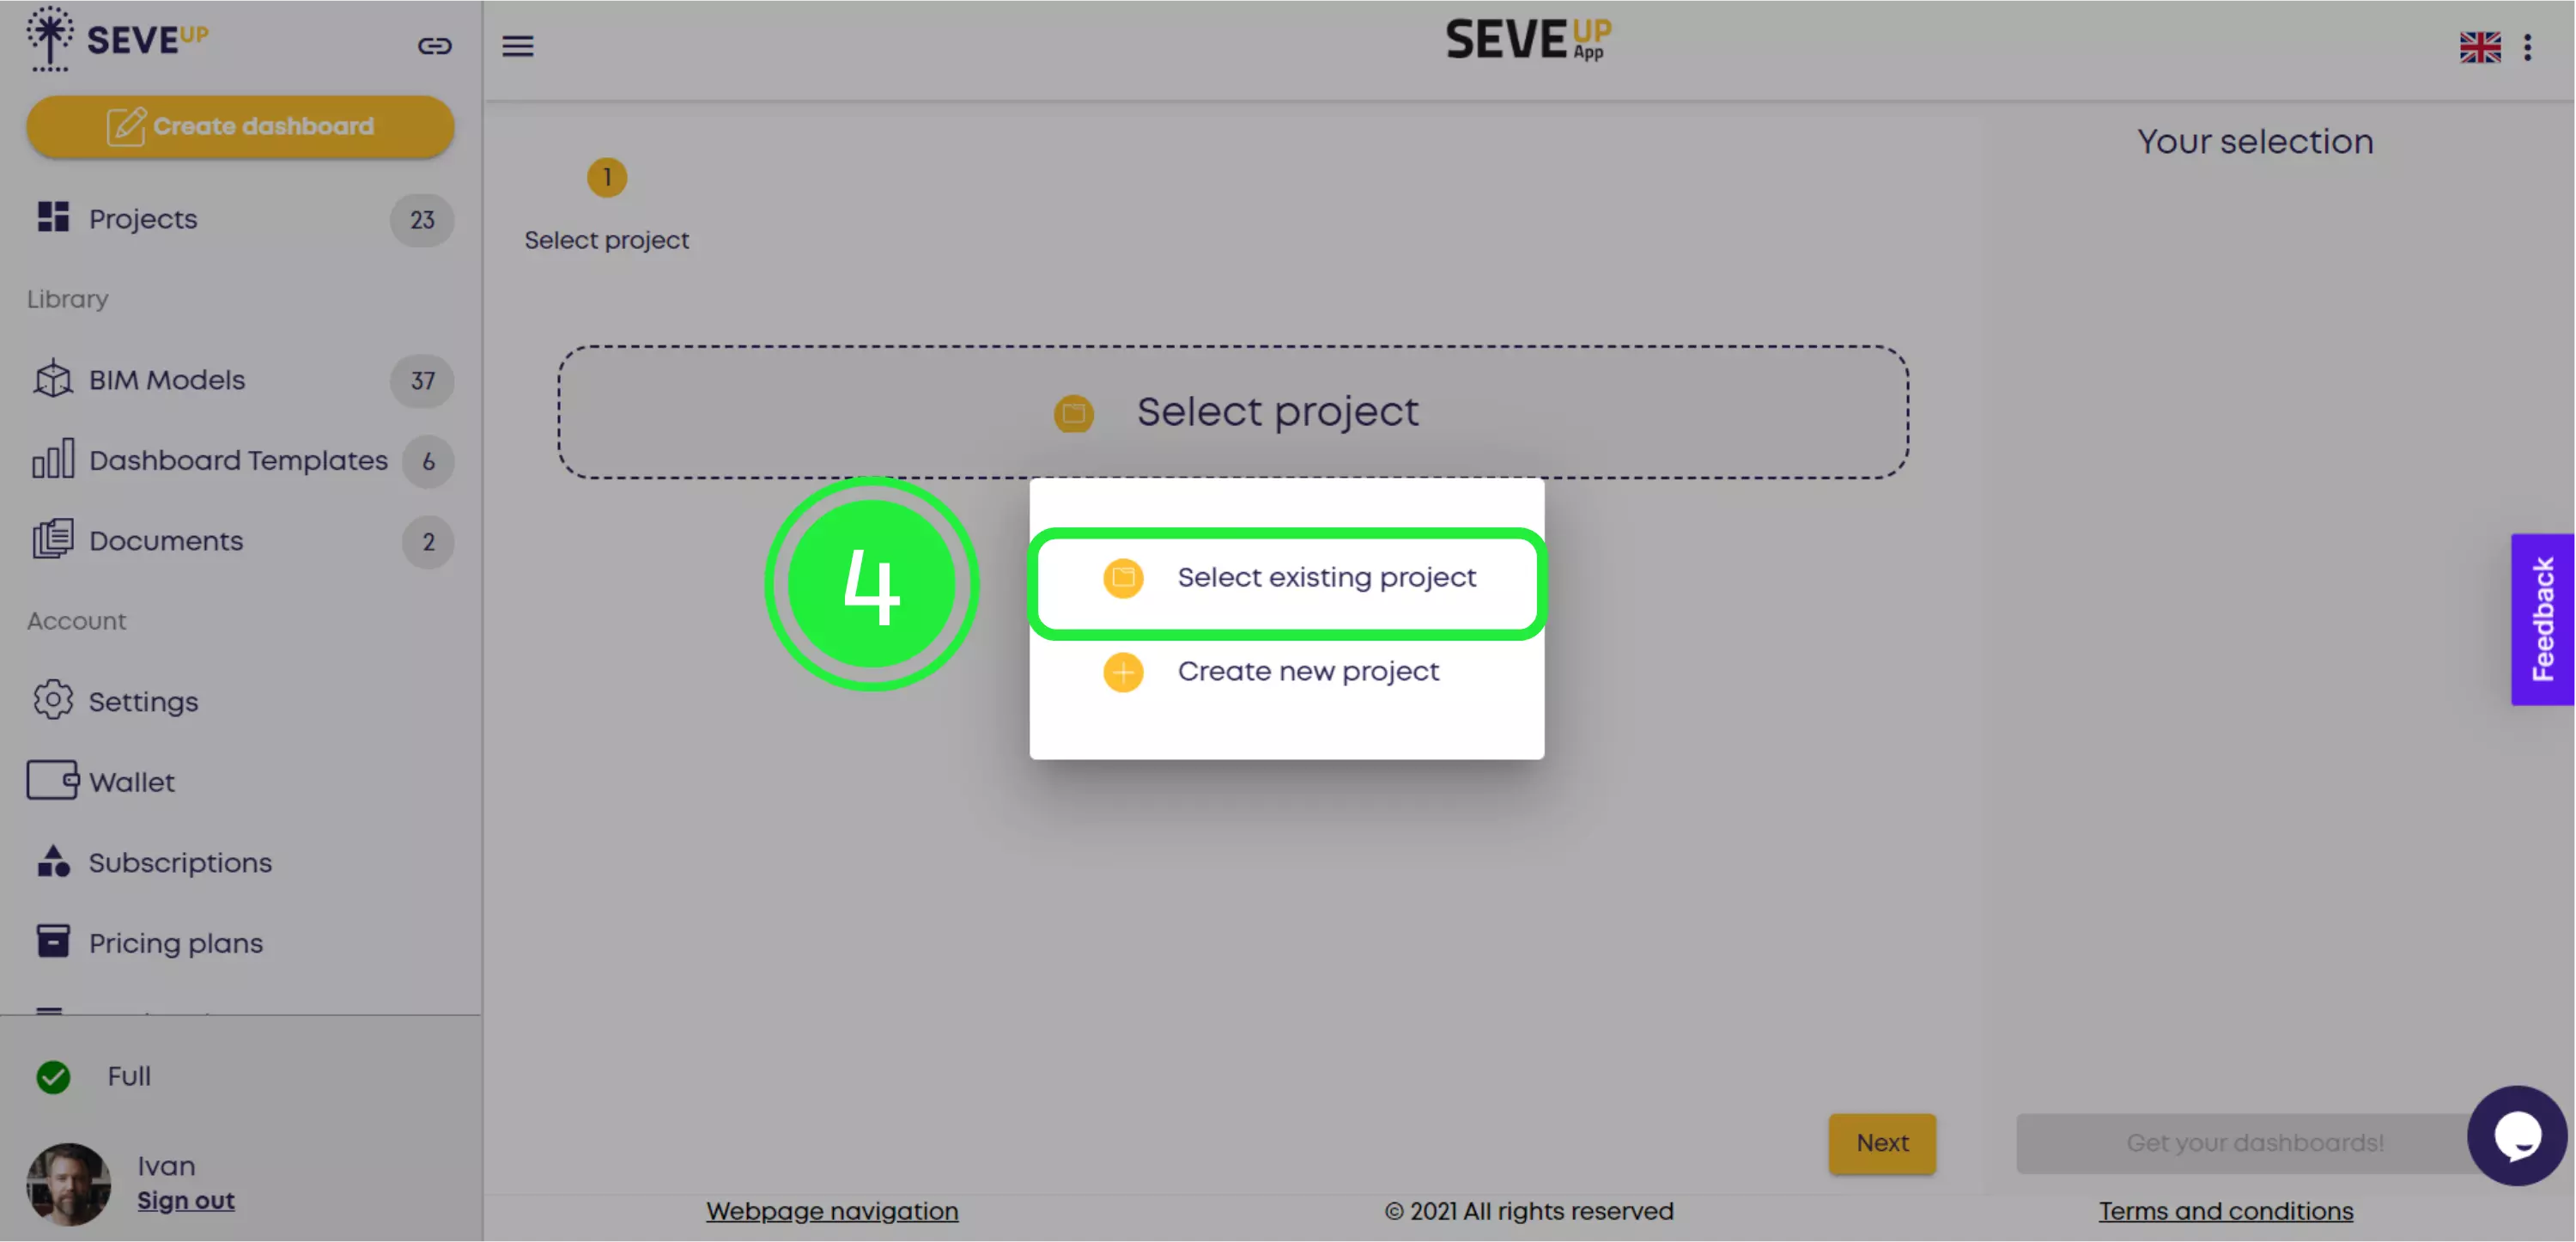
A popup will appear that allows you to choose whether to select an existing project or create a new project. For the purposes of this example, click “Select existing project”. If needed, you can refer to our previous tutorial [link to previous tutorial] for detailed instructions on how to create a new project, then come back to this tutorial.
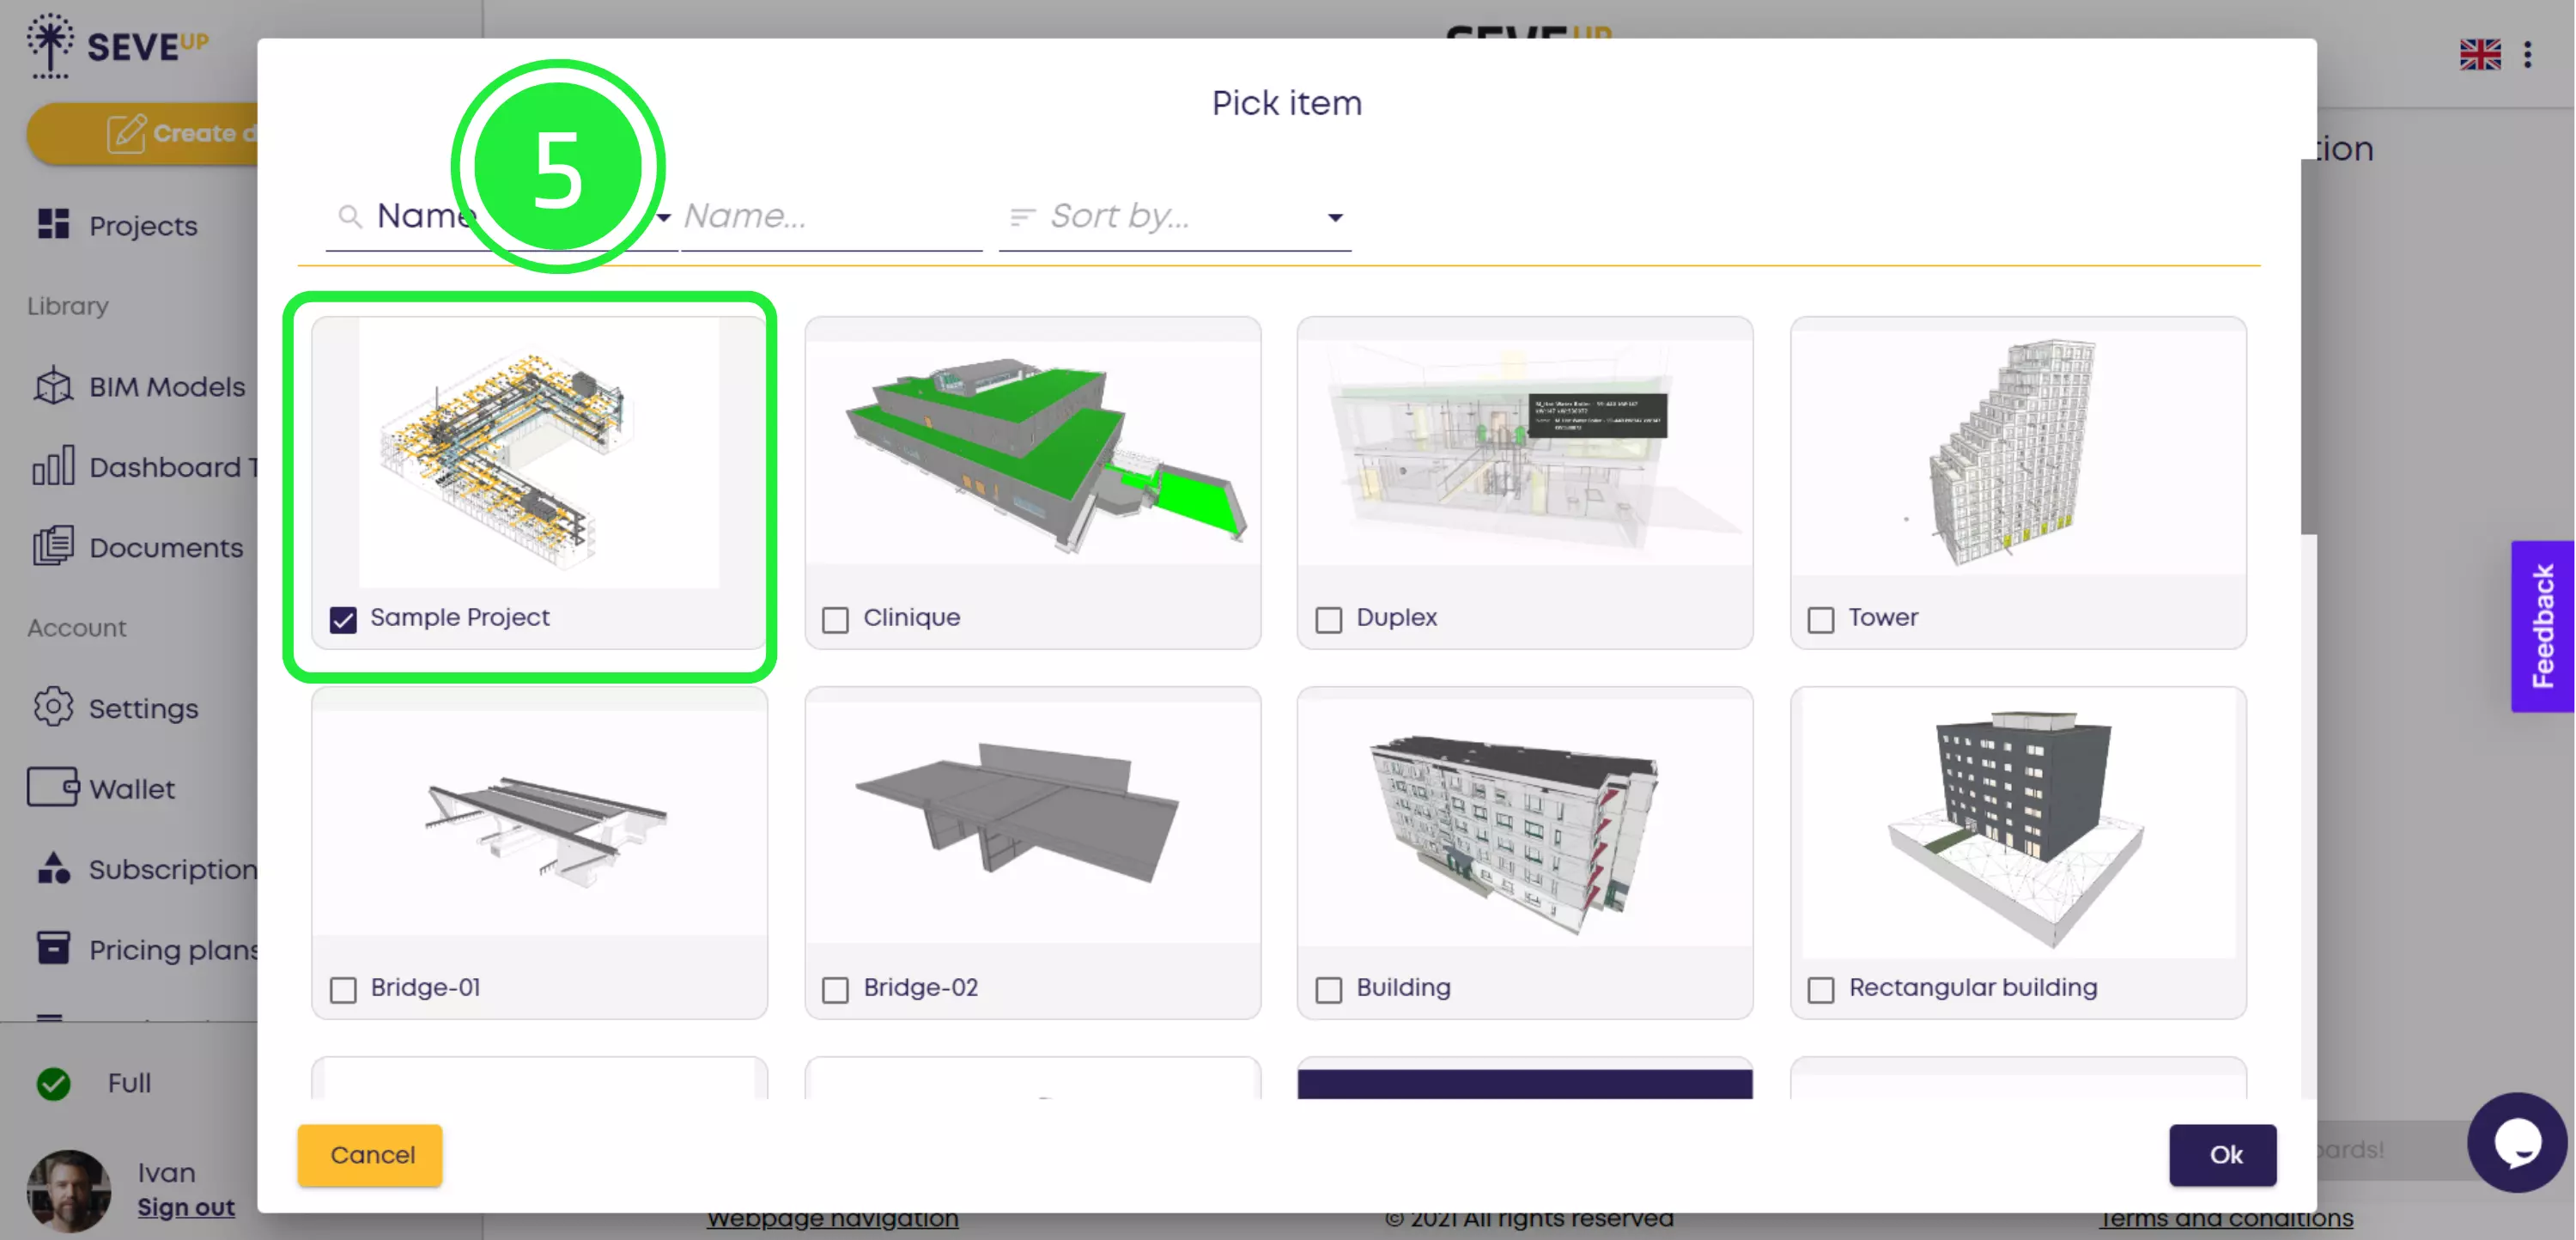
A popup will appear displaying all your existing projects. Choose the project you want to use for your dashboard by selecting the corresponding check box in the bottom left corner of the tile.
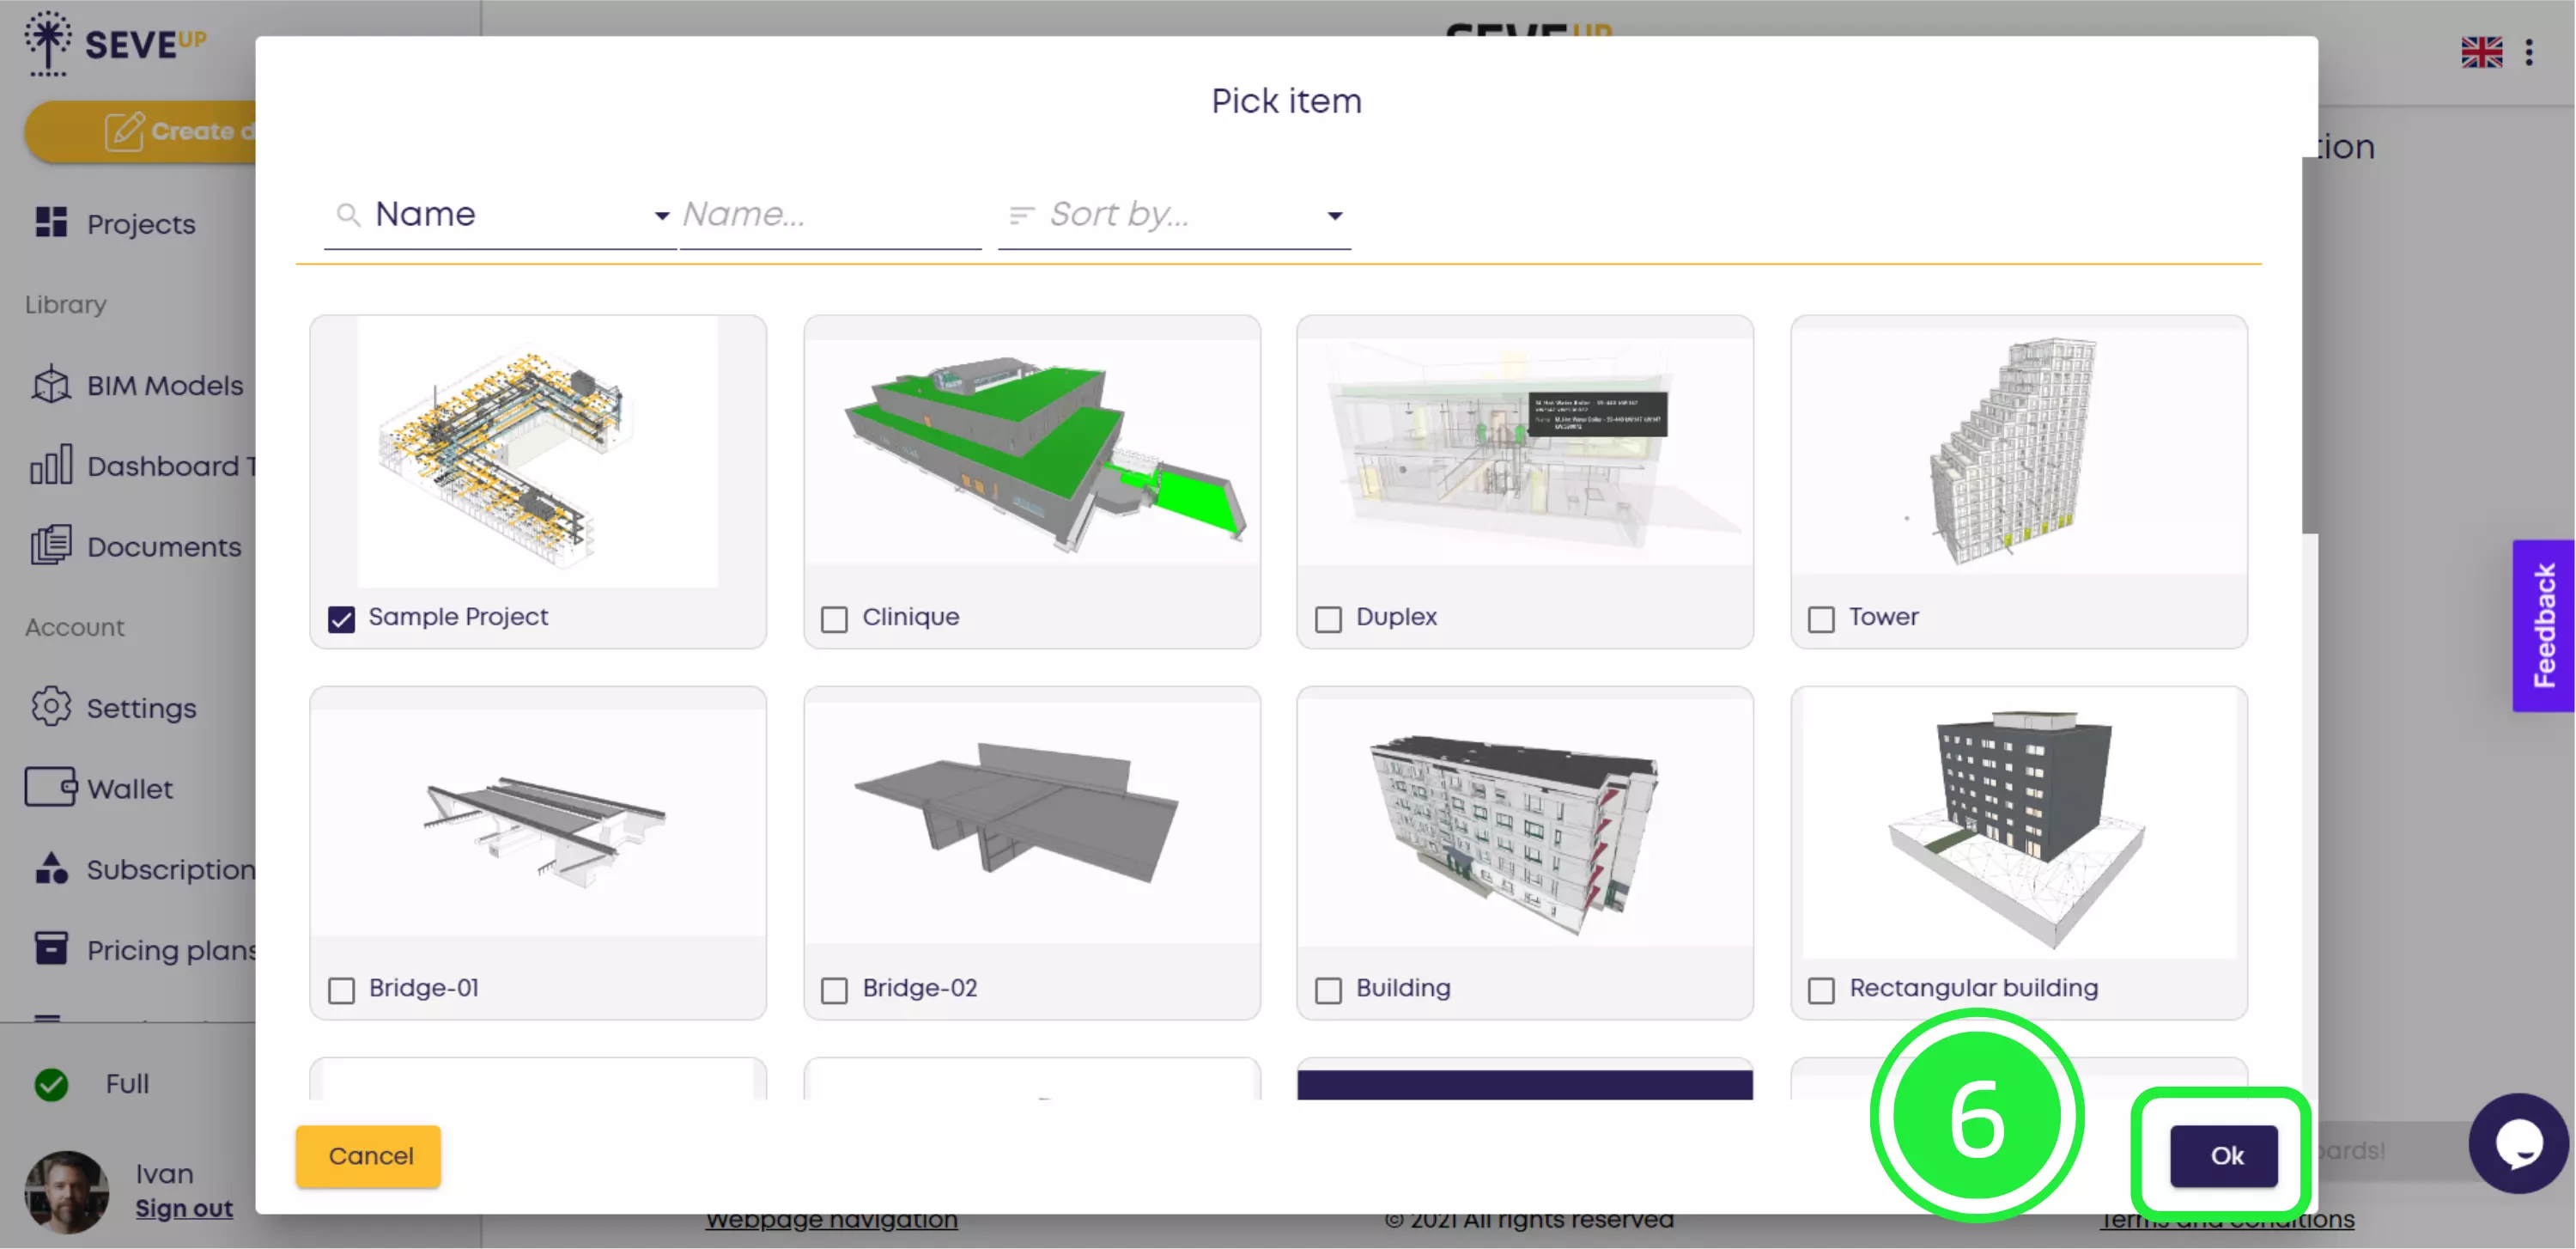
Confirm the selected project by clicking “OK” in the bottom right corner.
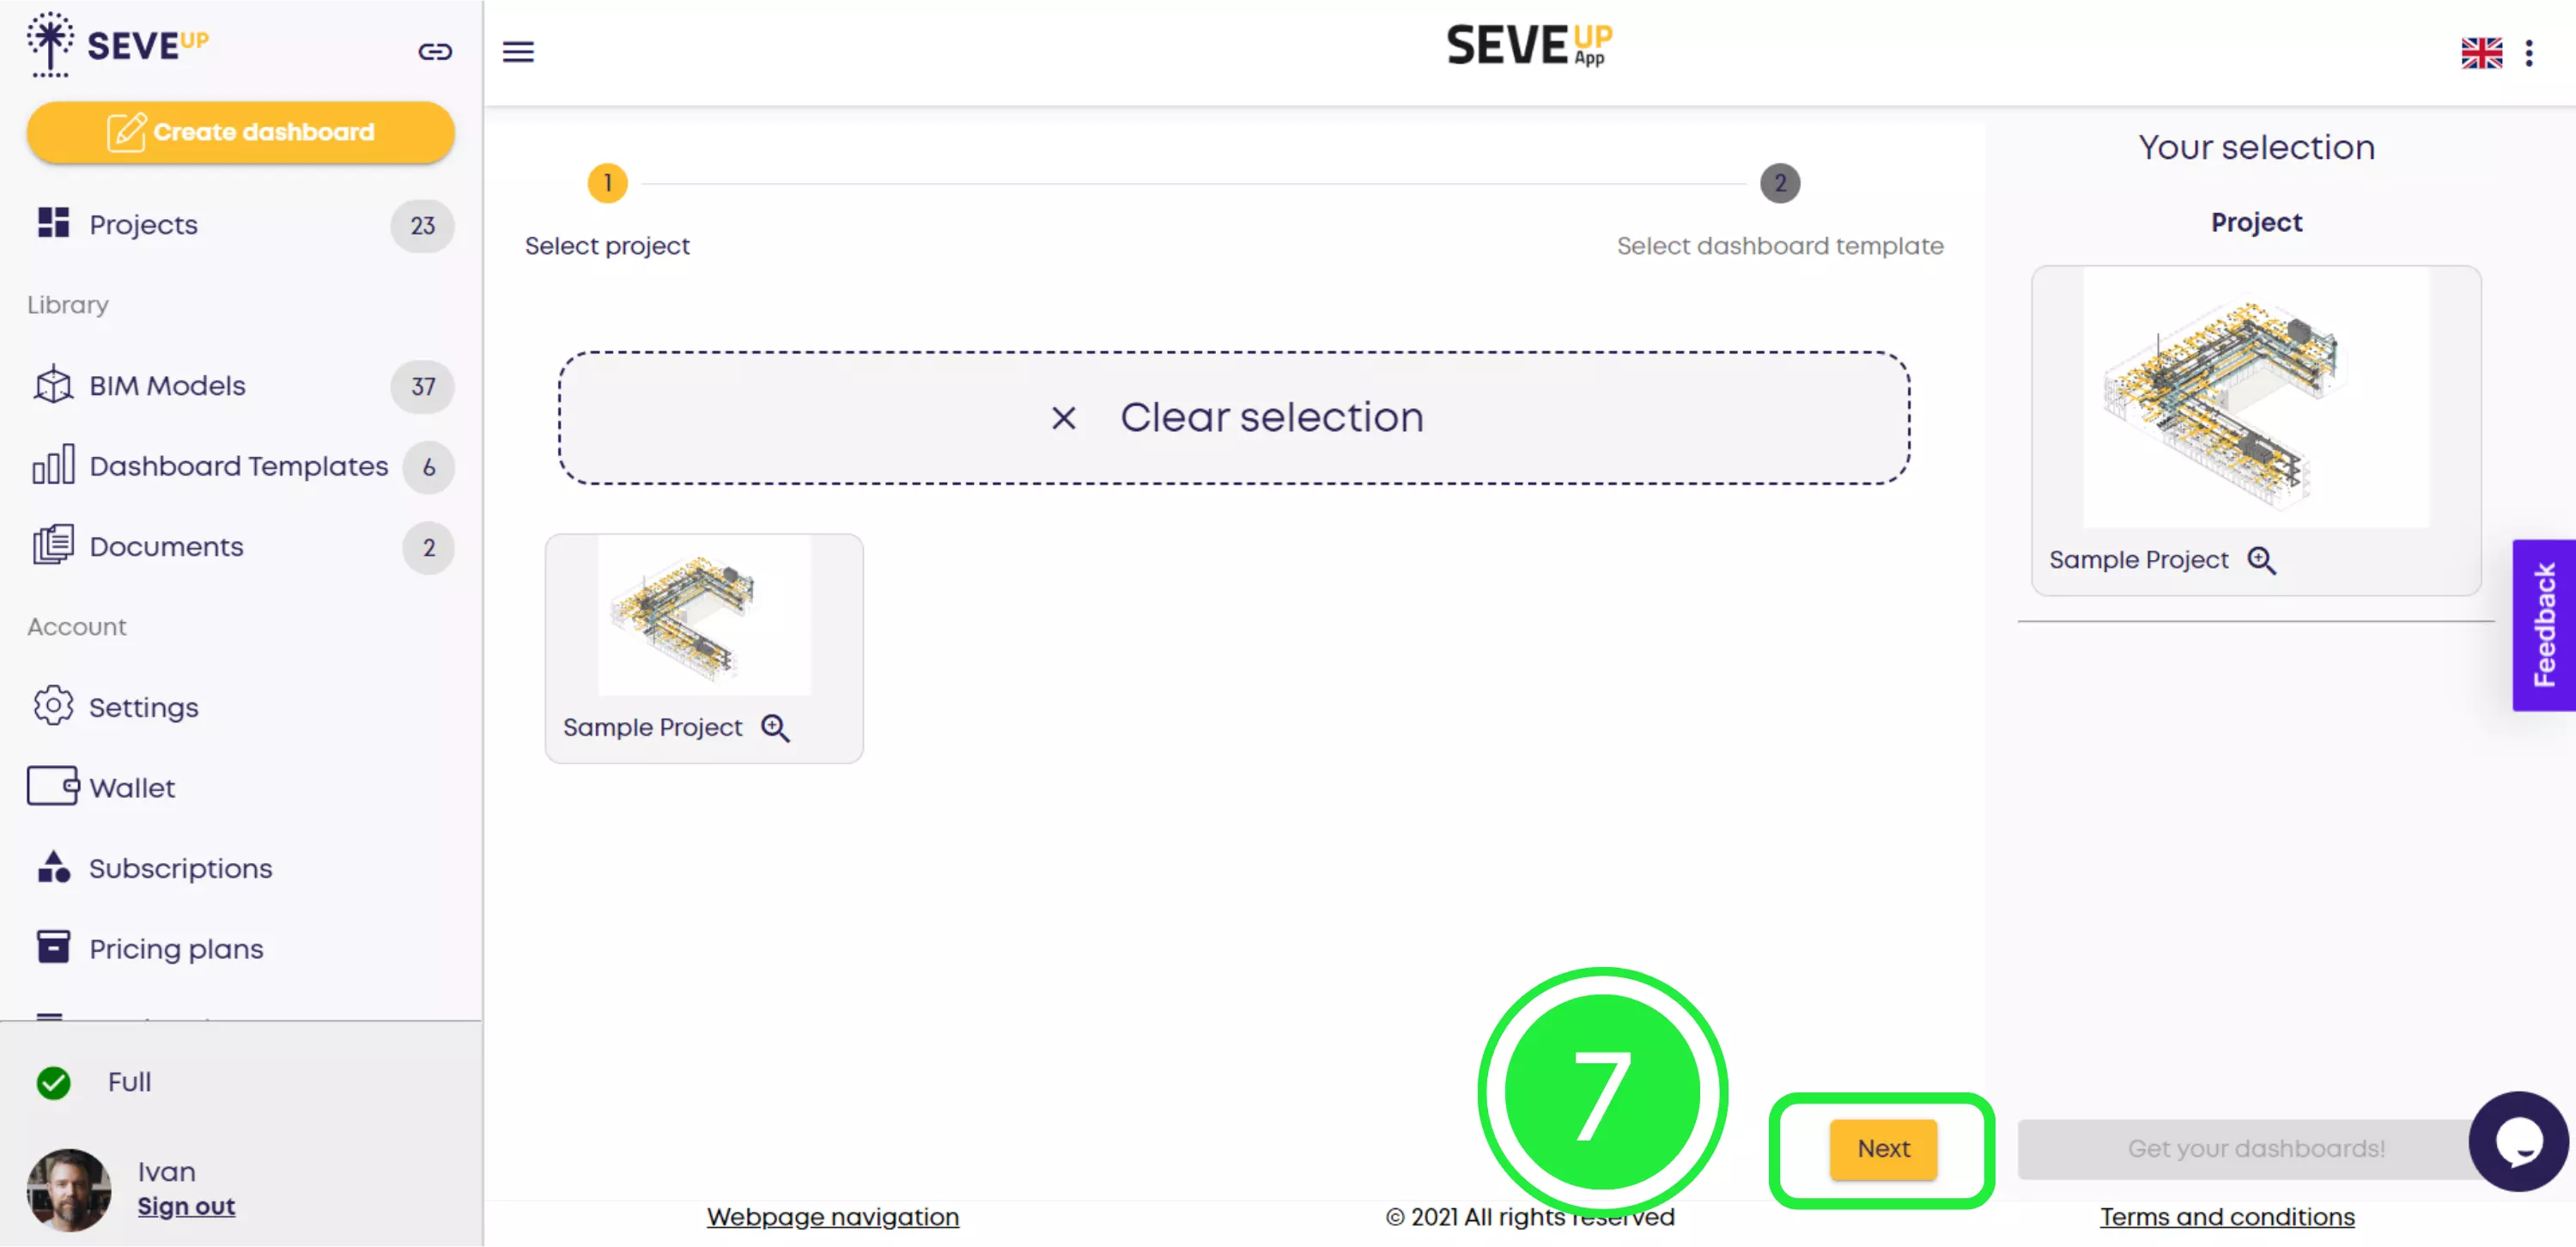
Now you’ll see the project you’ve selected on your screen. To progress to the next step of the wizard, click “Next”.
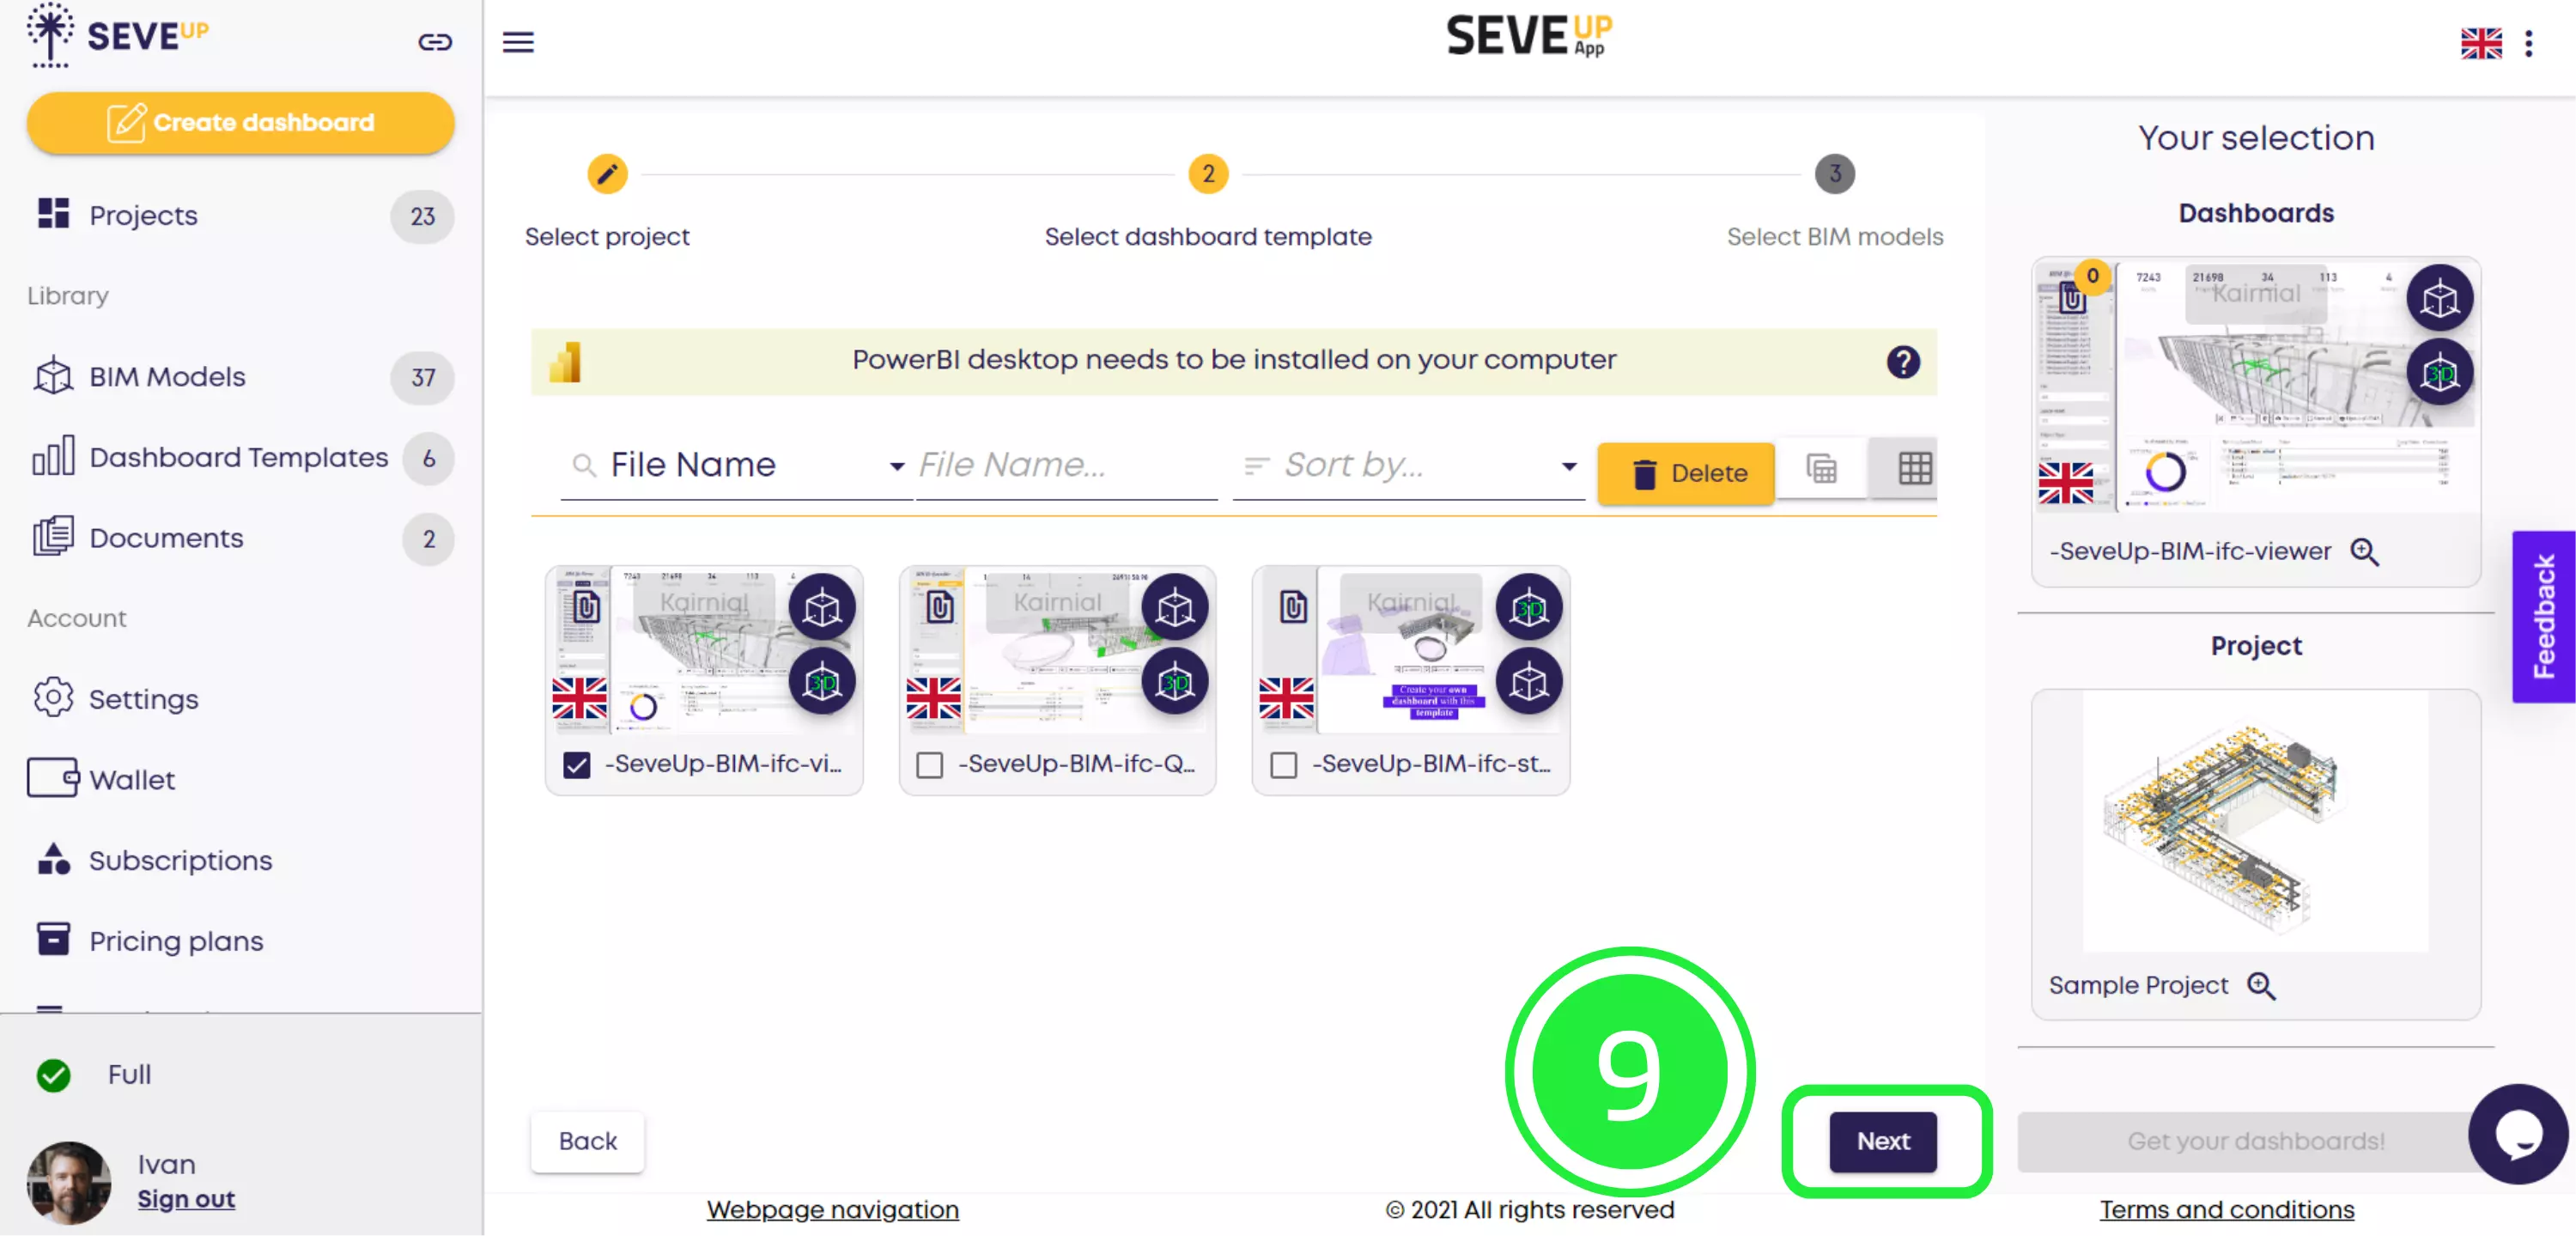
In this step of the wizard, it’s time to select your dashboard template. Choose your desired template from the ones shown by checking the box in the bottom left corner of the tile. Once you’ve selected it, it will appear in the right-hand pane above the project you selected.
To progress to the next step of the wizard, click “Next” in the bottom right corner of the wizard pane.
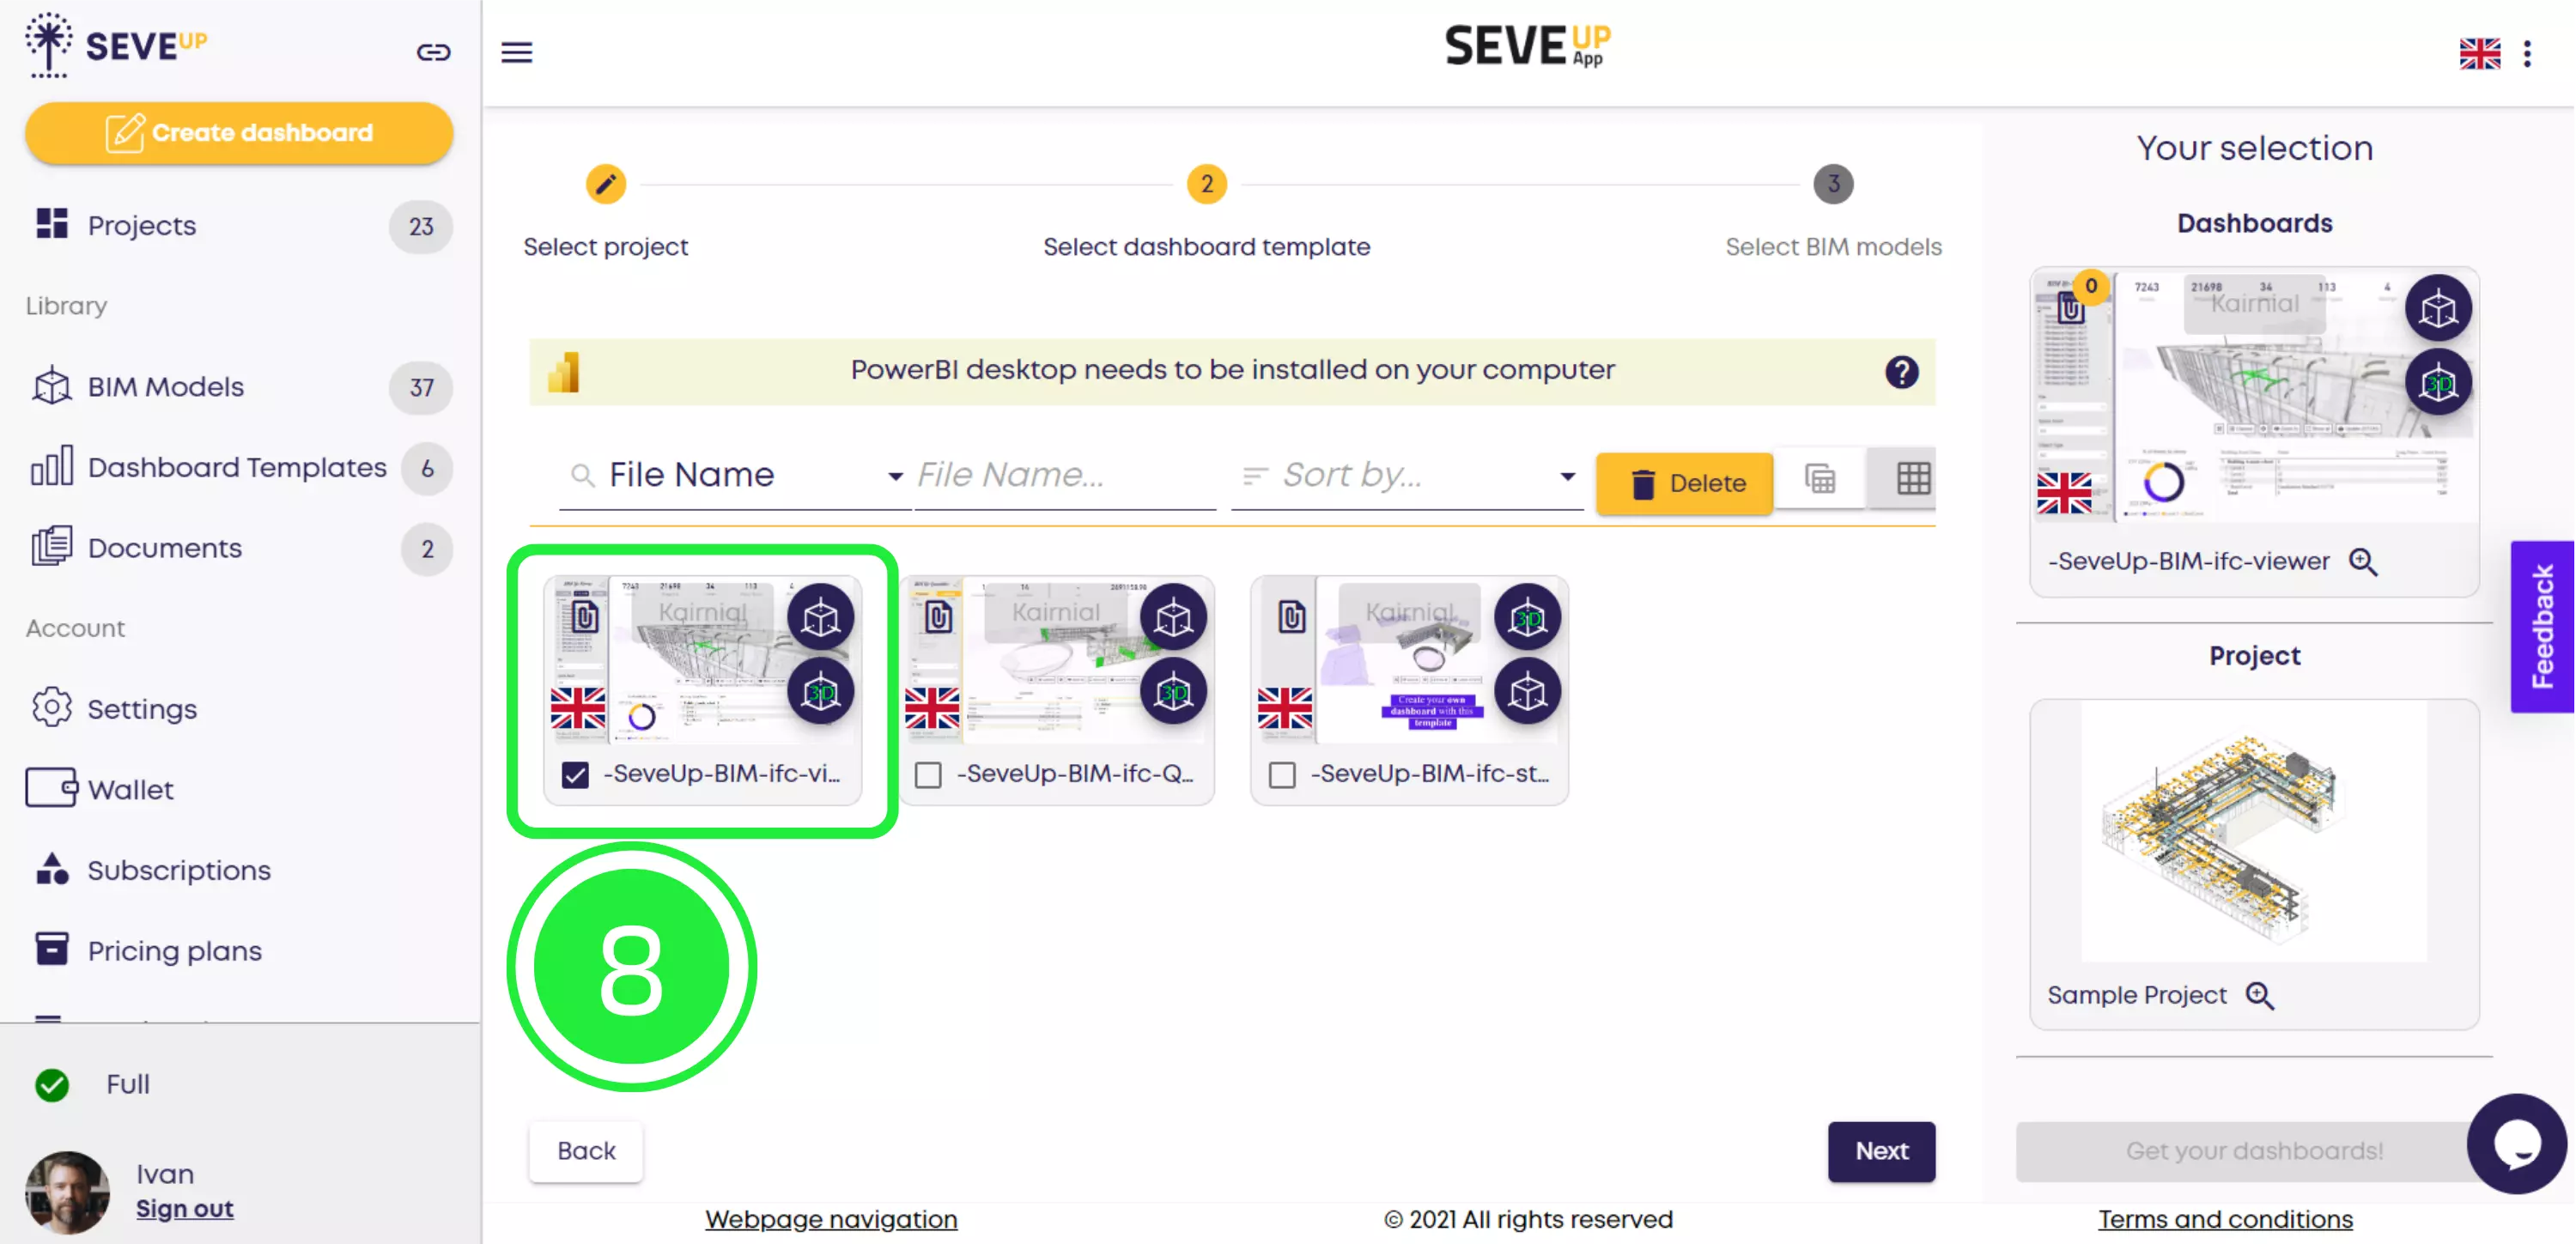
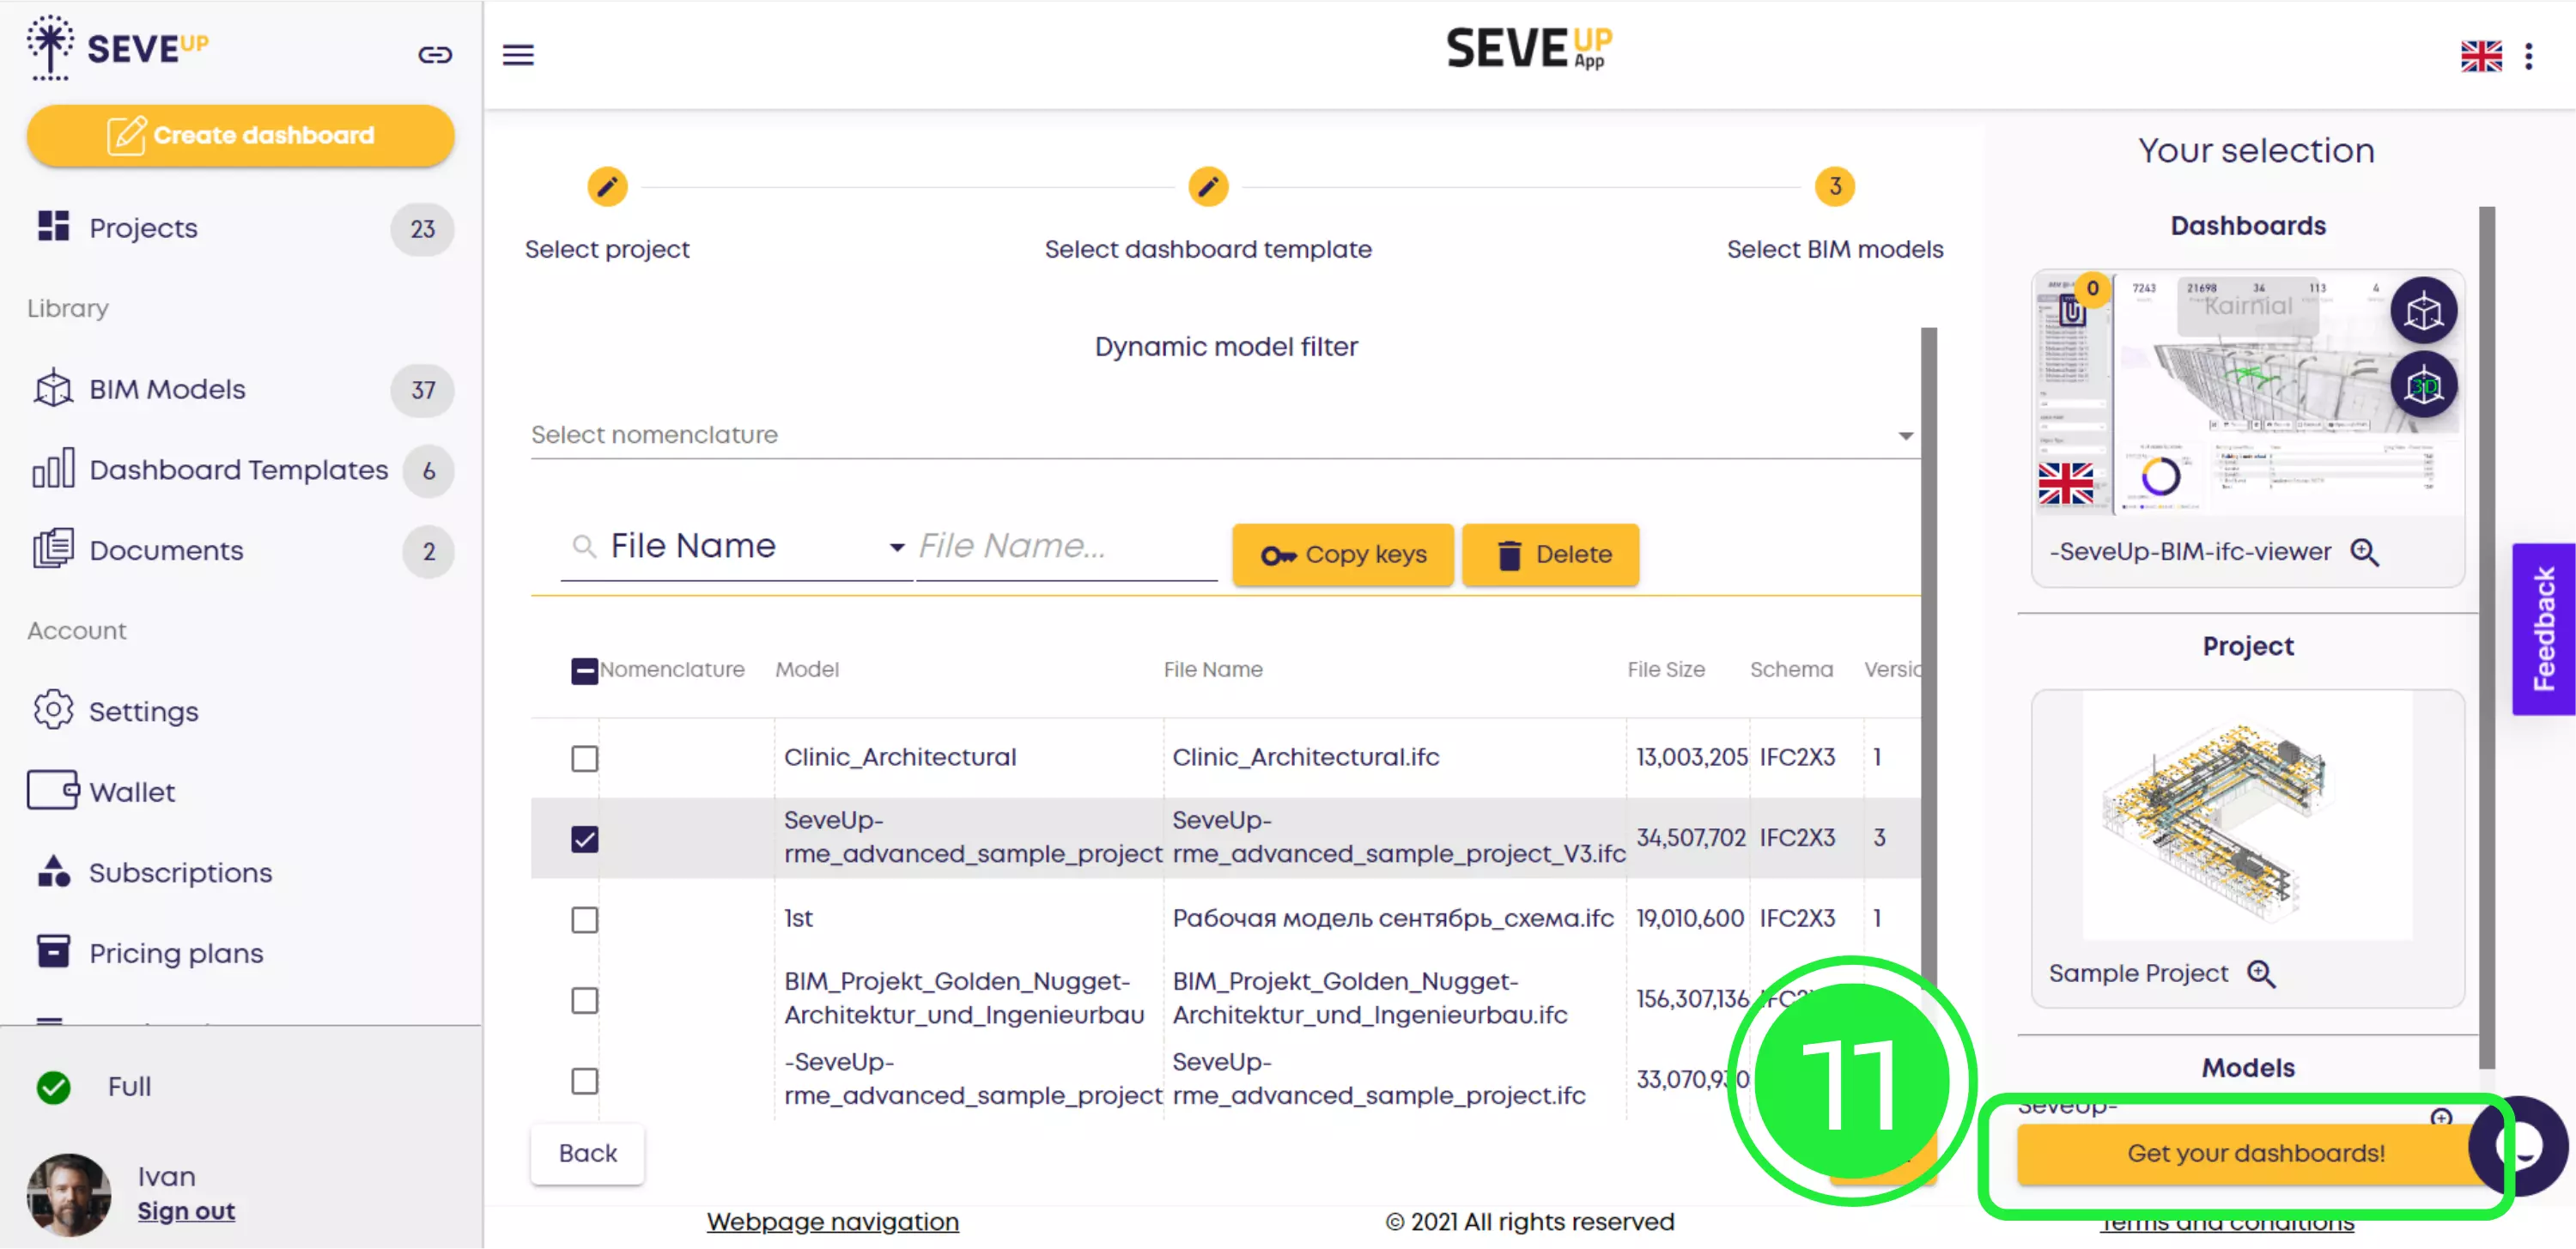
In this step of the wizard, it’s time to select a BIM model. Select the BIM model(s) you would like to associate with your dashboard by checking the box in the left column next to the model’s name.

To finish the wizard and automatically download your new dashboard to your computer, click the “Get your dashboards!” button in the bottom-right corner of the page.
To be able to import your new dashboard to Microsoft Power BI, you’ll first have to open Microsoft Power BI. Then click “File” in the navigation menu in the top-left corner of the page.

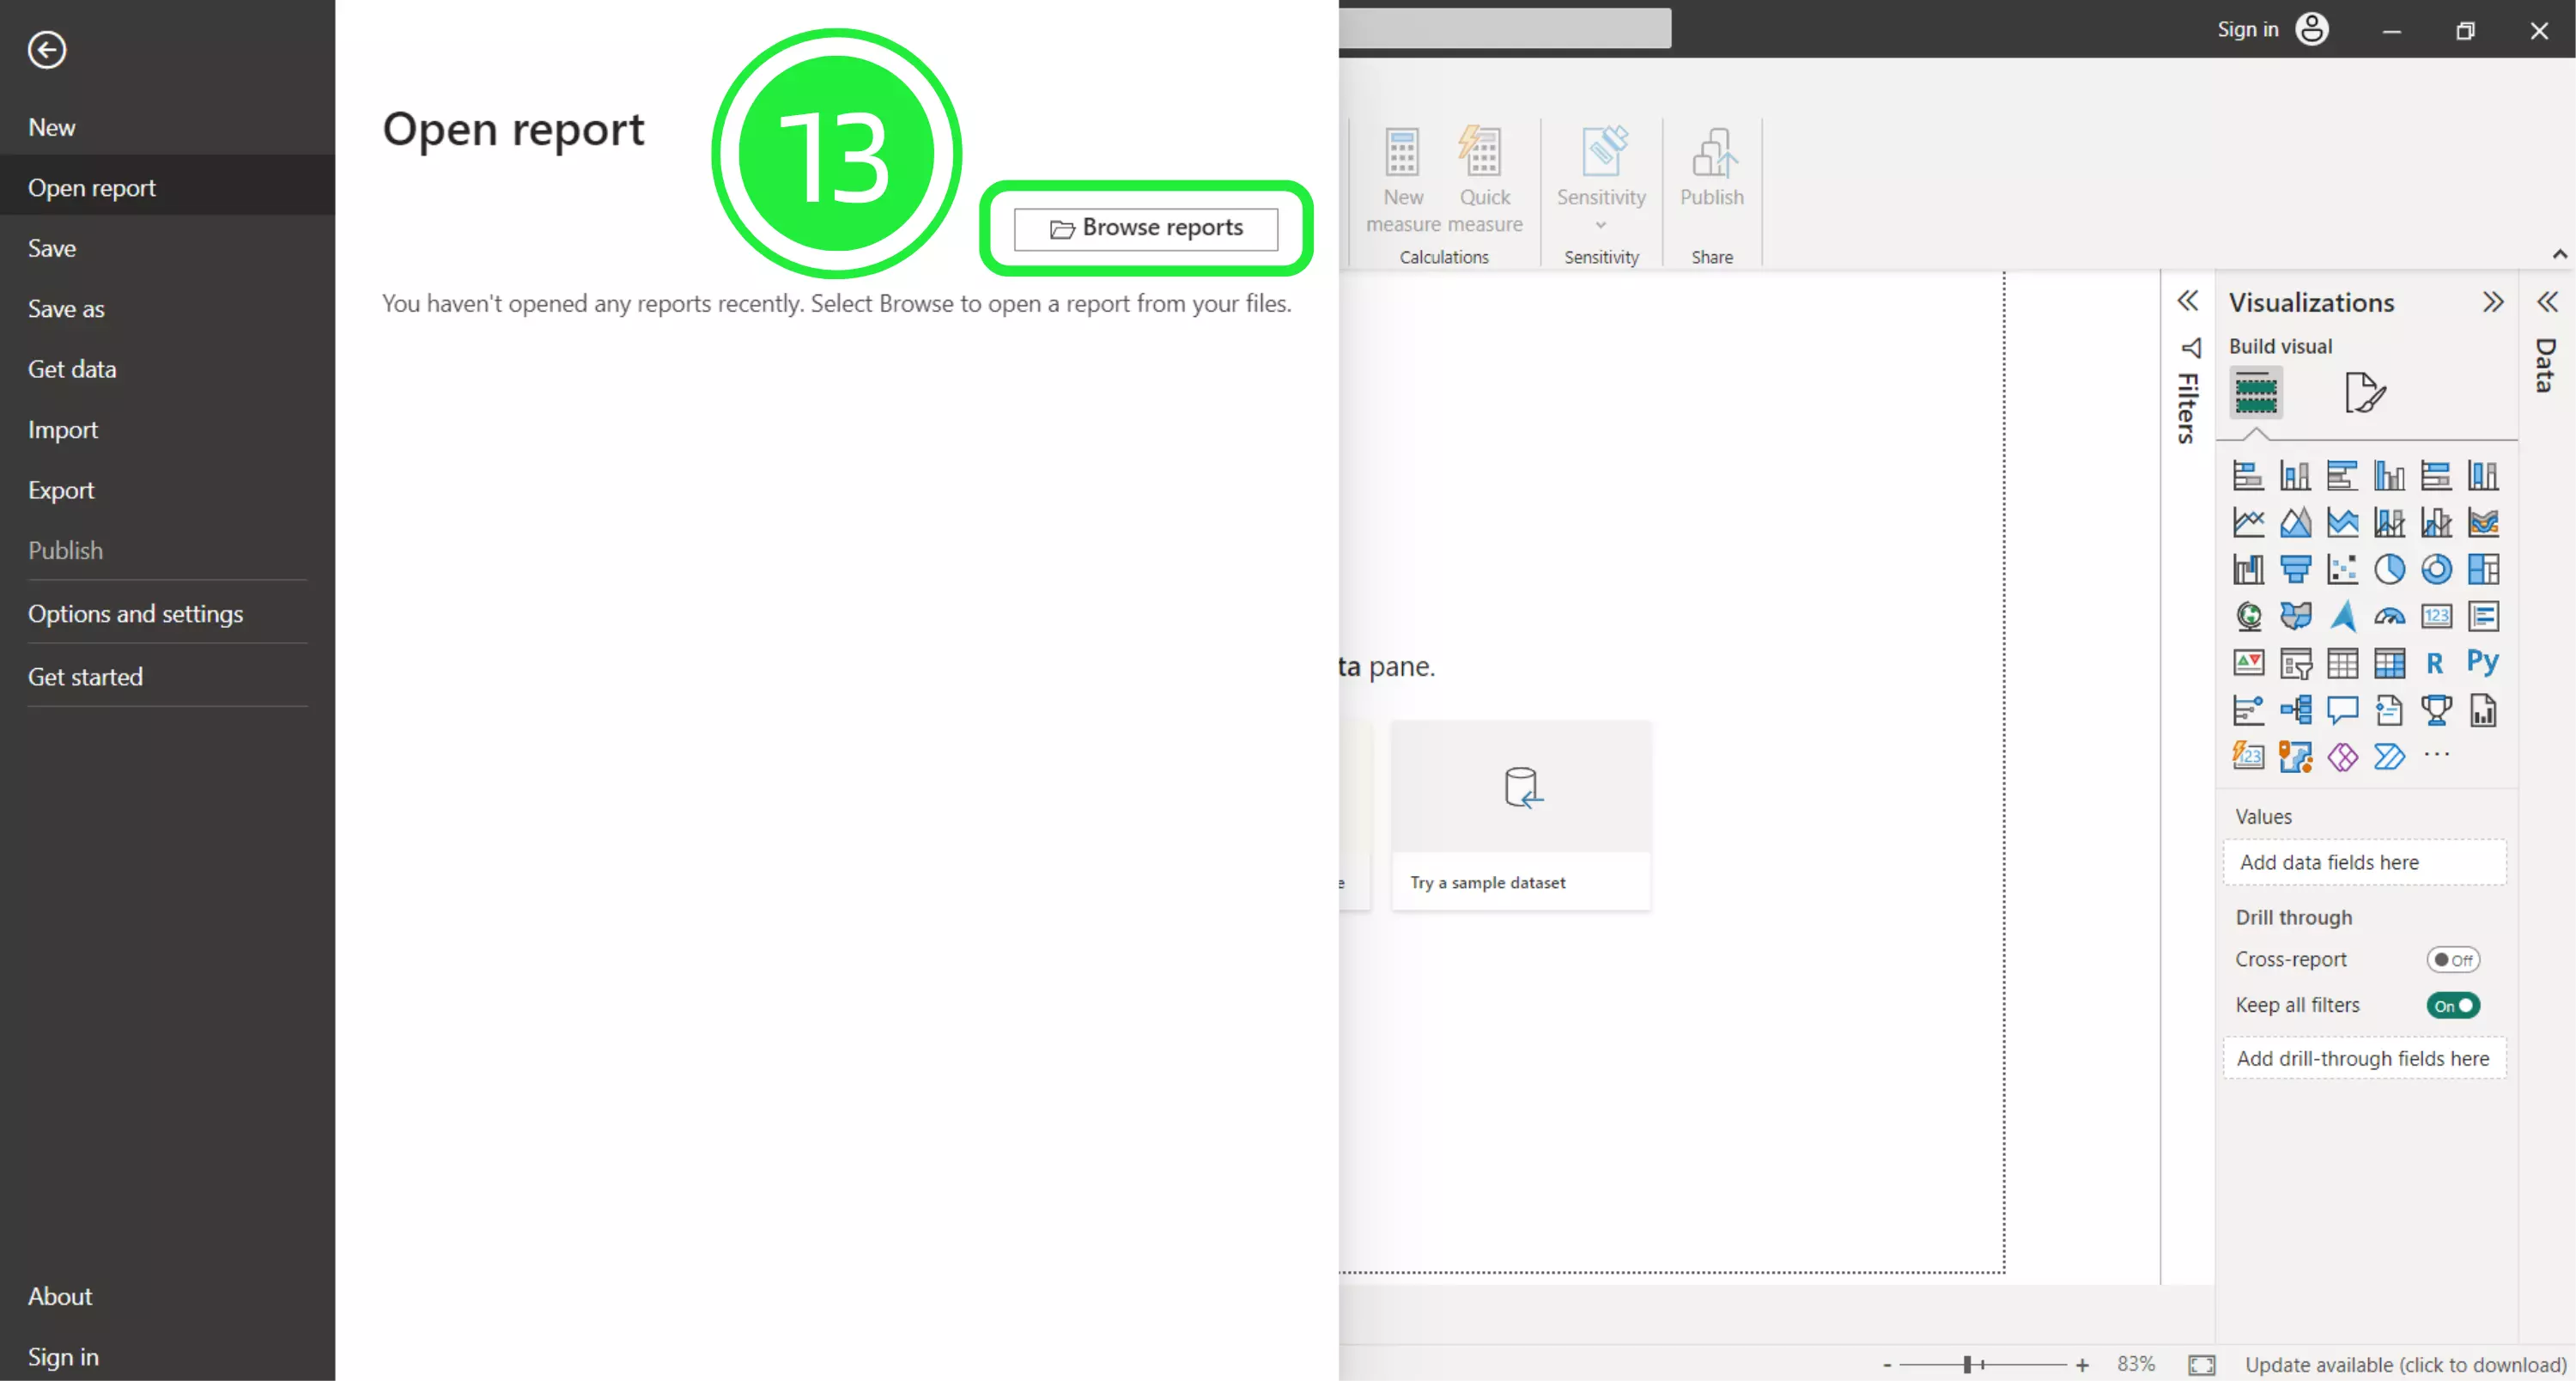
To find your dashboard file, go to Open report and click the “Browse reports” button to search for your newly downloaded dashboard file.
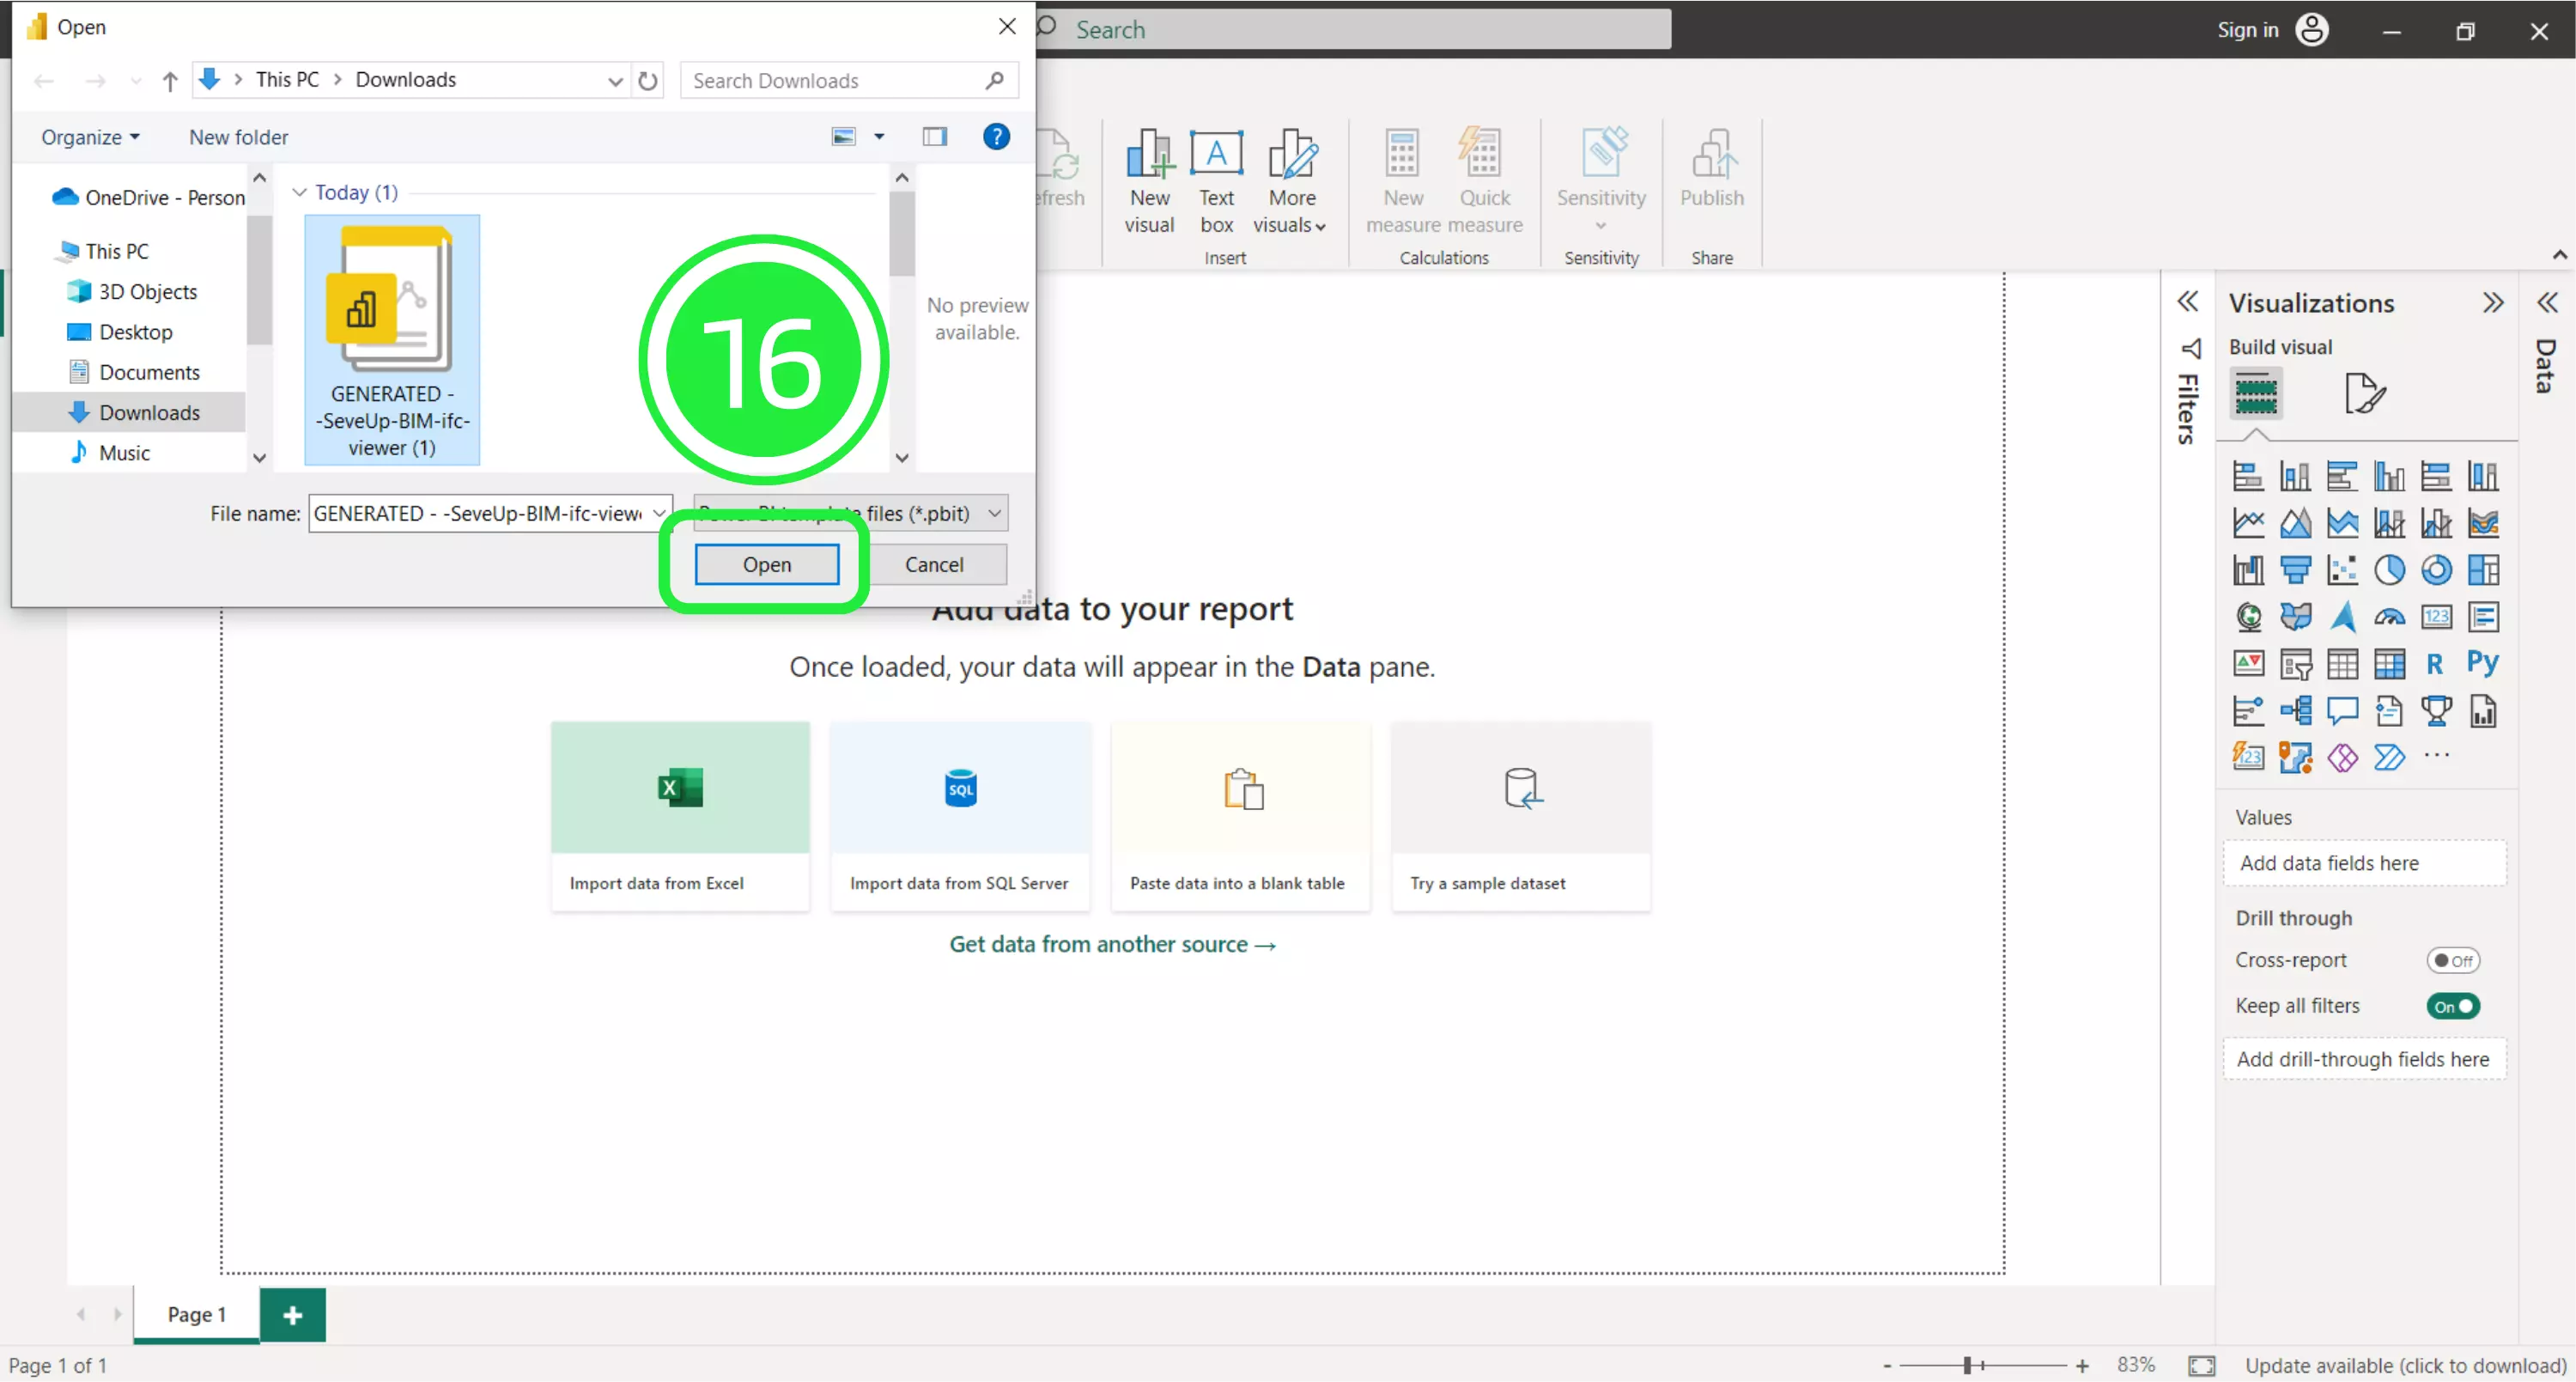
A file browser window will open. In the bottom right corner next to the file name field, click on the File type dropdown and choose the correct file extension: Power BI Template Files (*pbit). Once selected, all the files of this type will now show in the browser window. Your template from SeveUp automatically downloaded to your system’s Downloads folder. To find it, click “Downloads” in the left navigation menu and look for your file.

Select your newly downloaded template file by clicking it with your cursor.
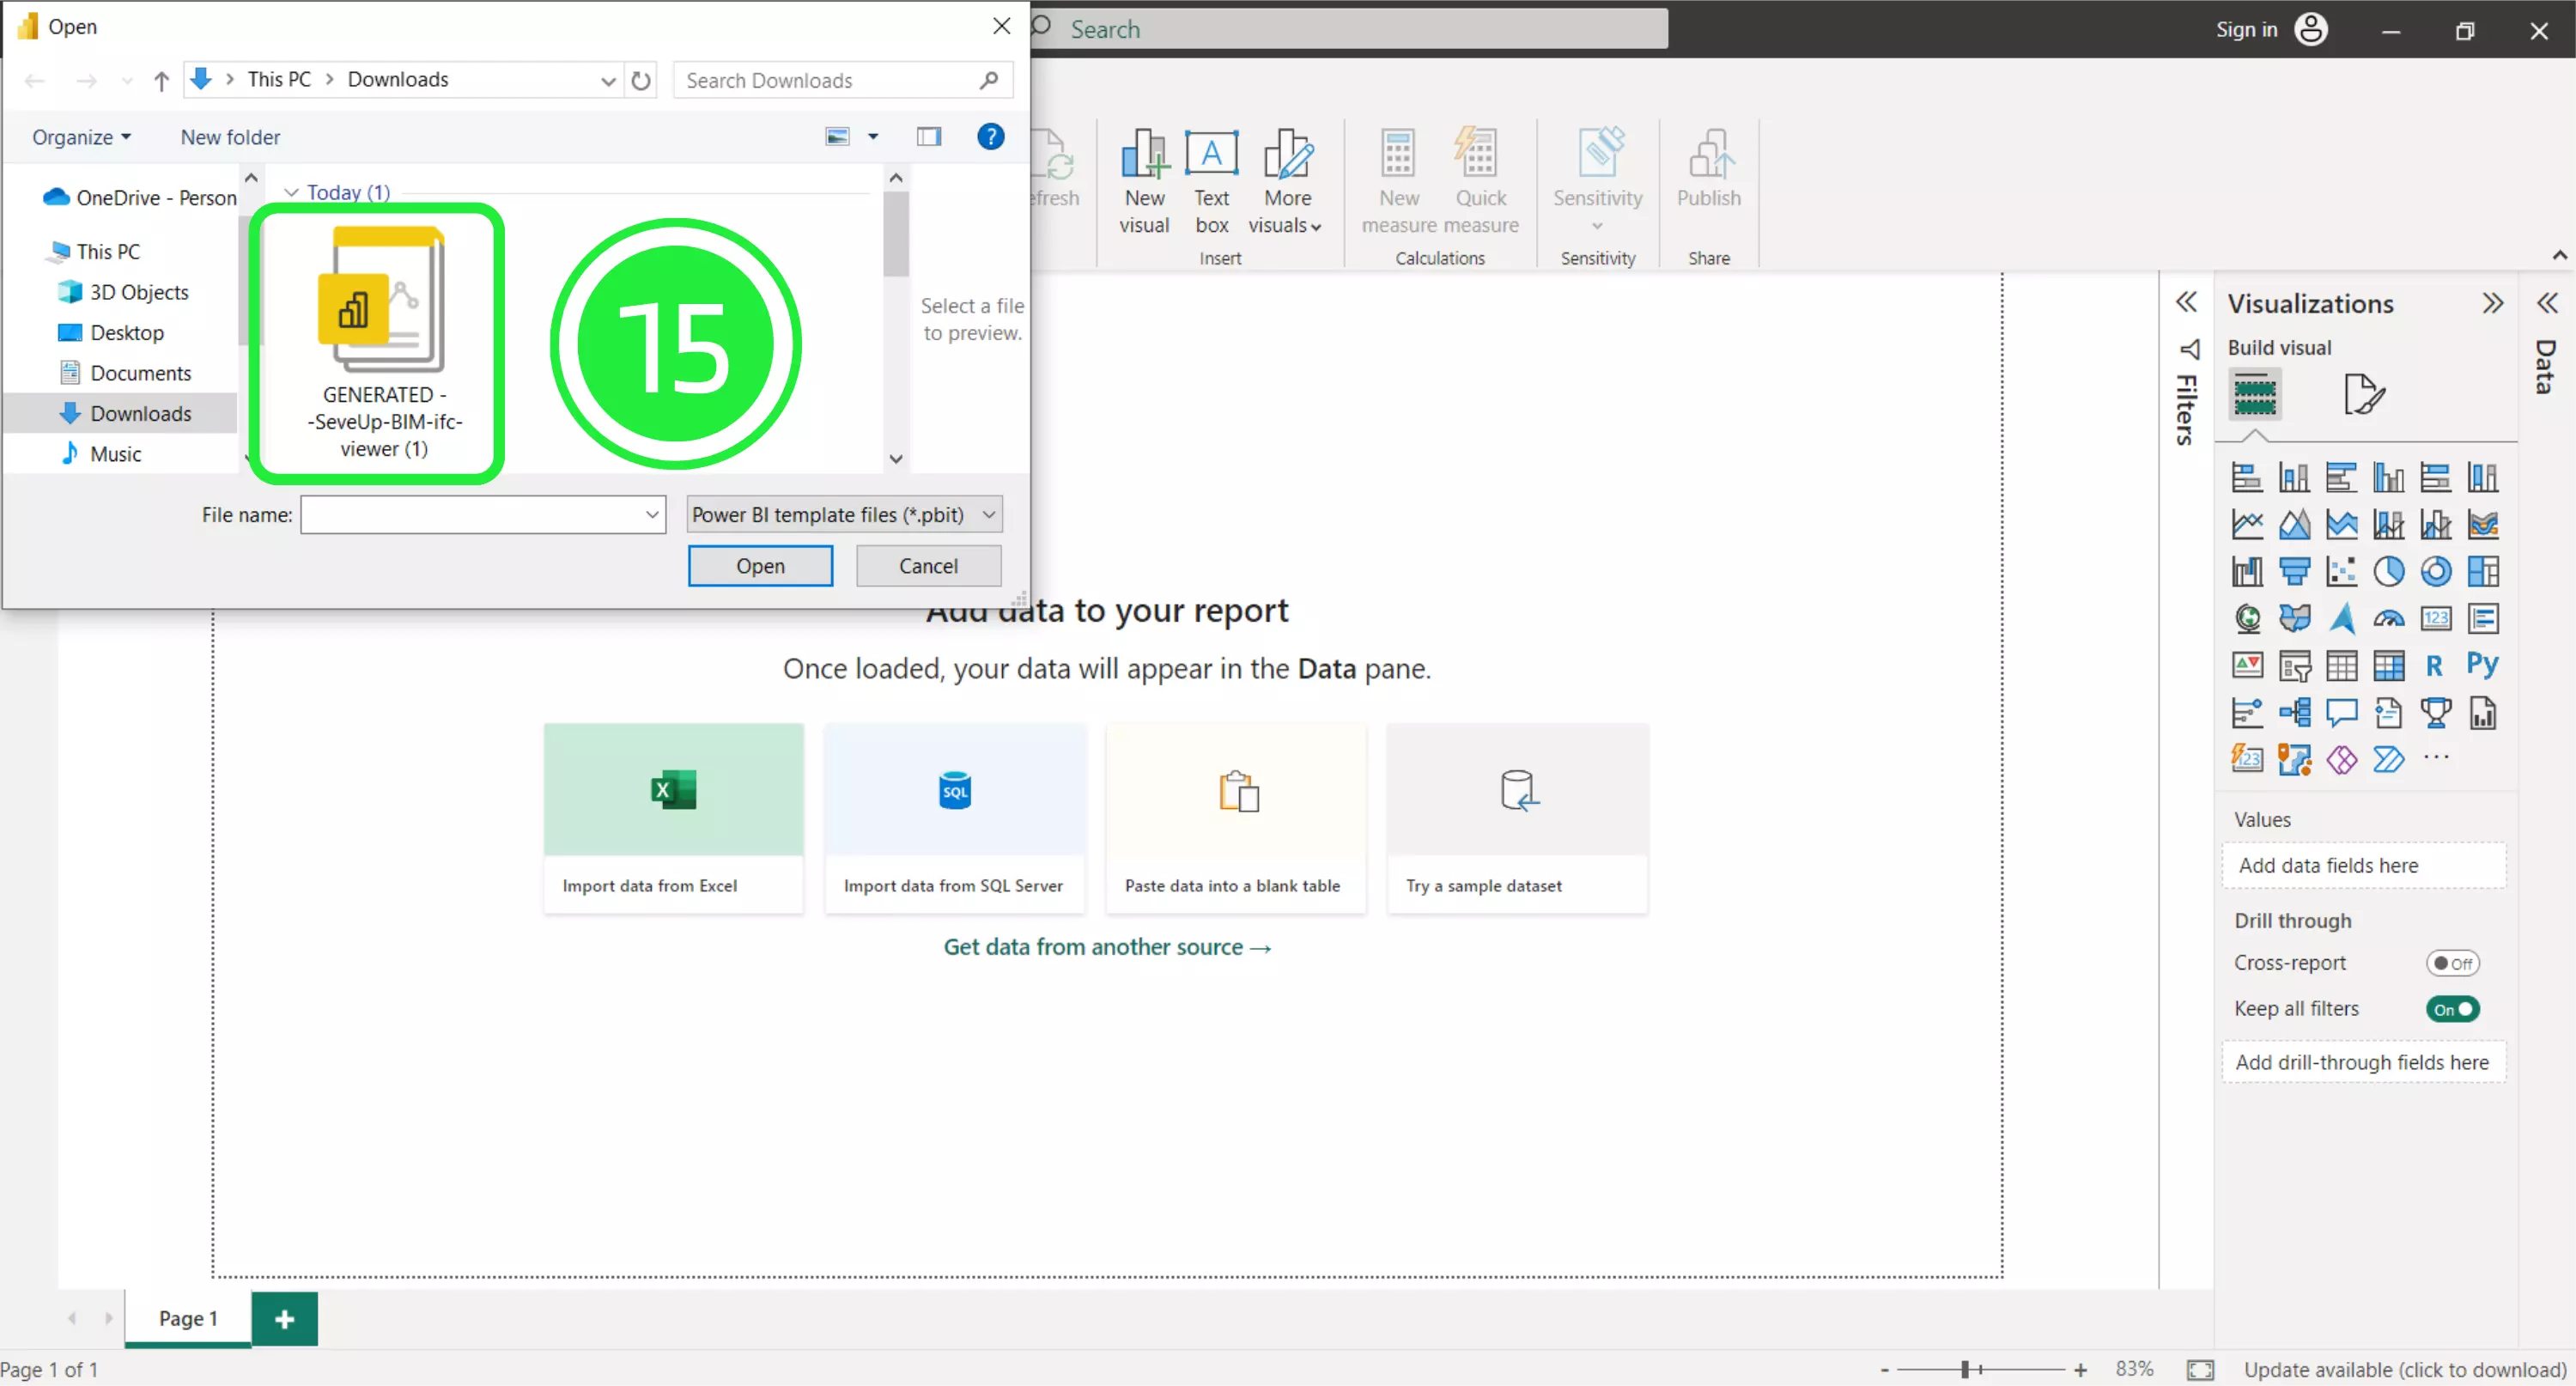
Use Power BI to open the file by clicking the “Open” button.
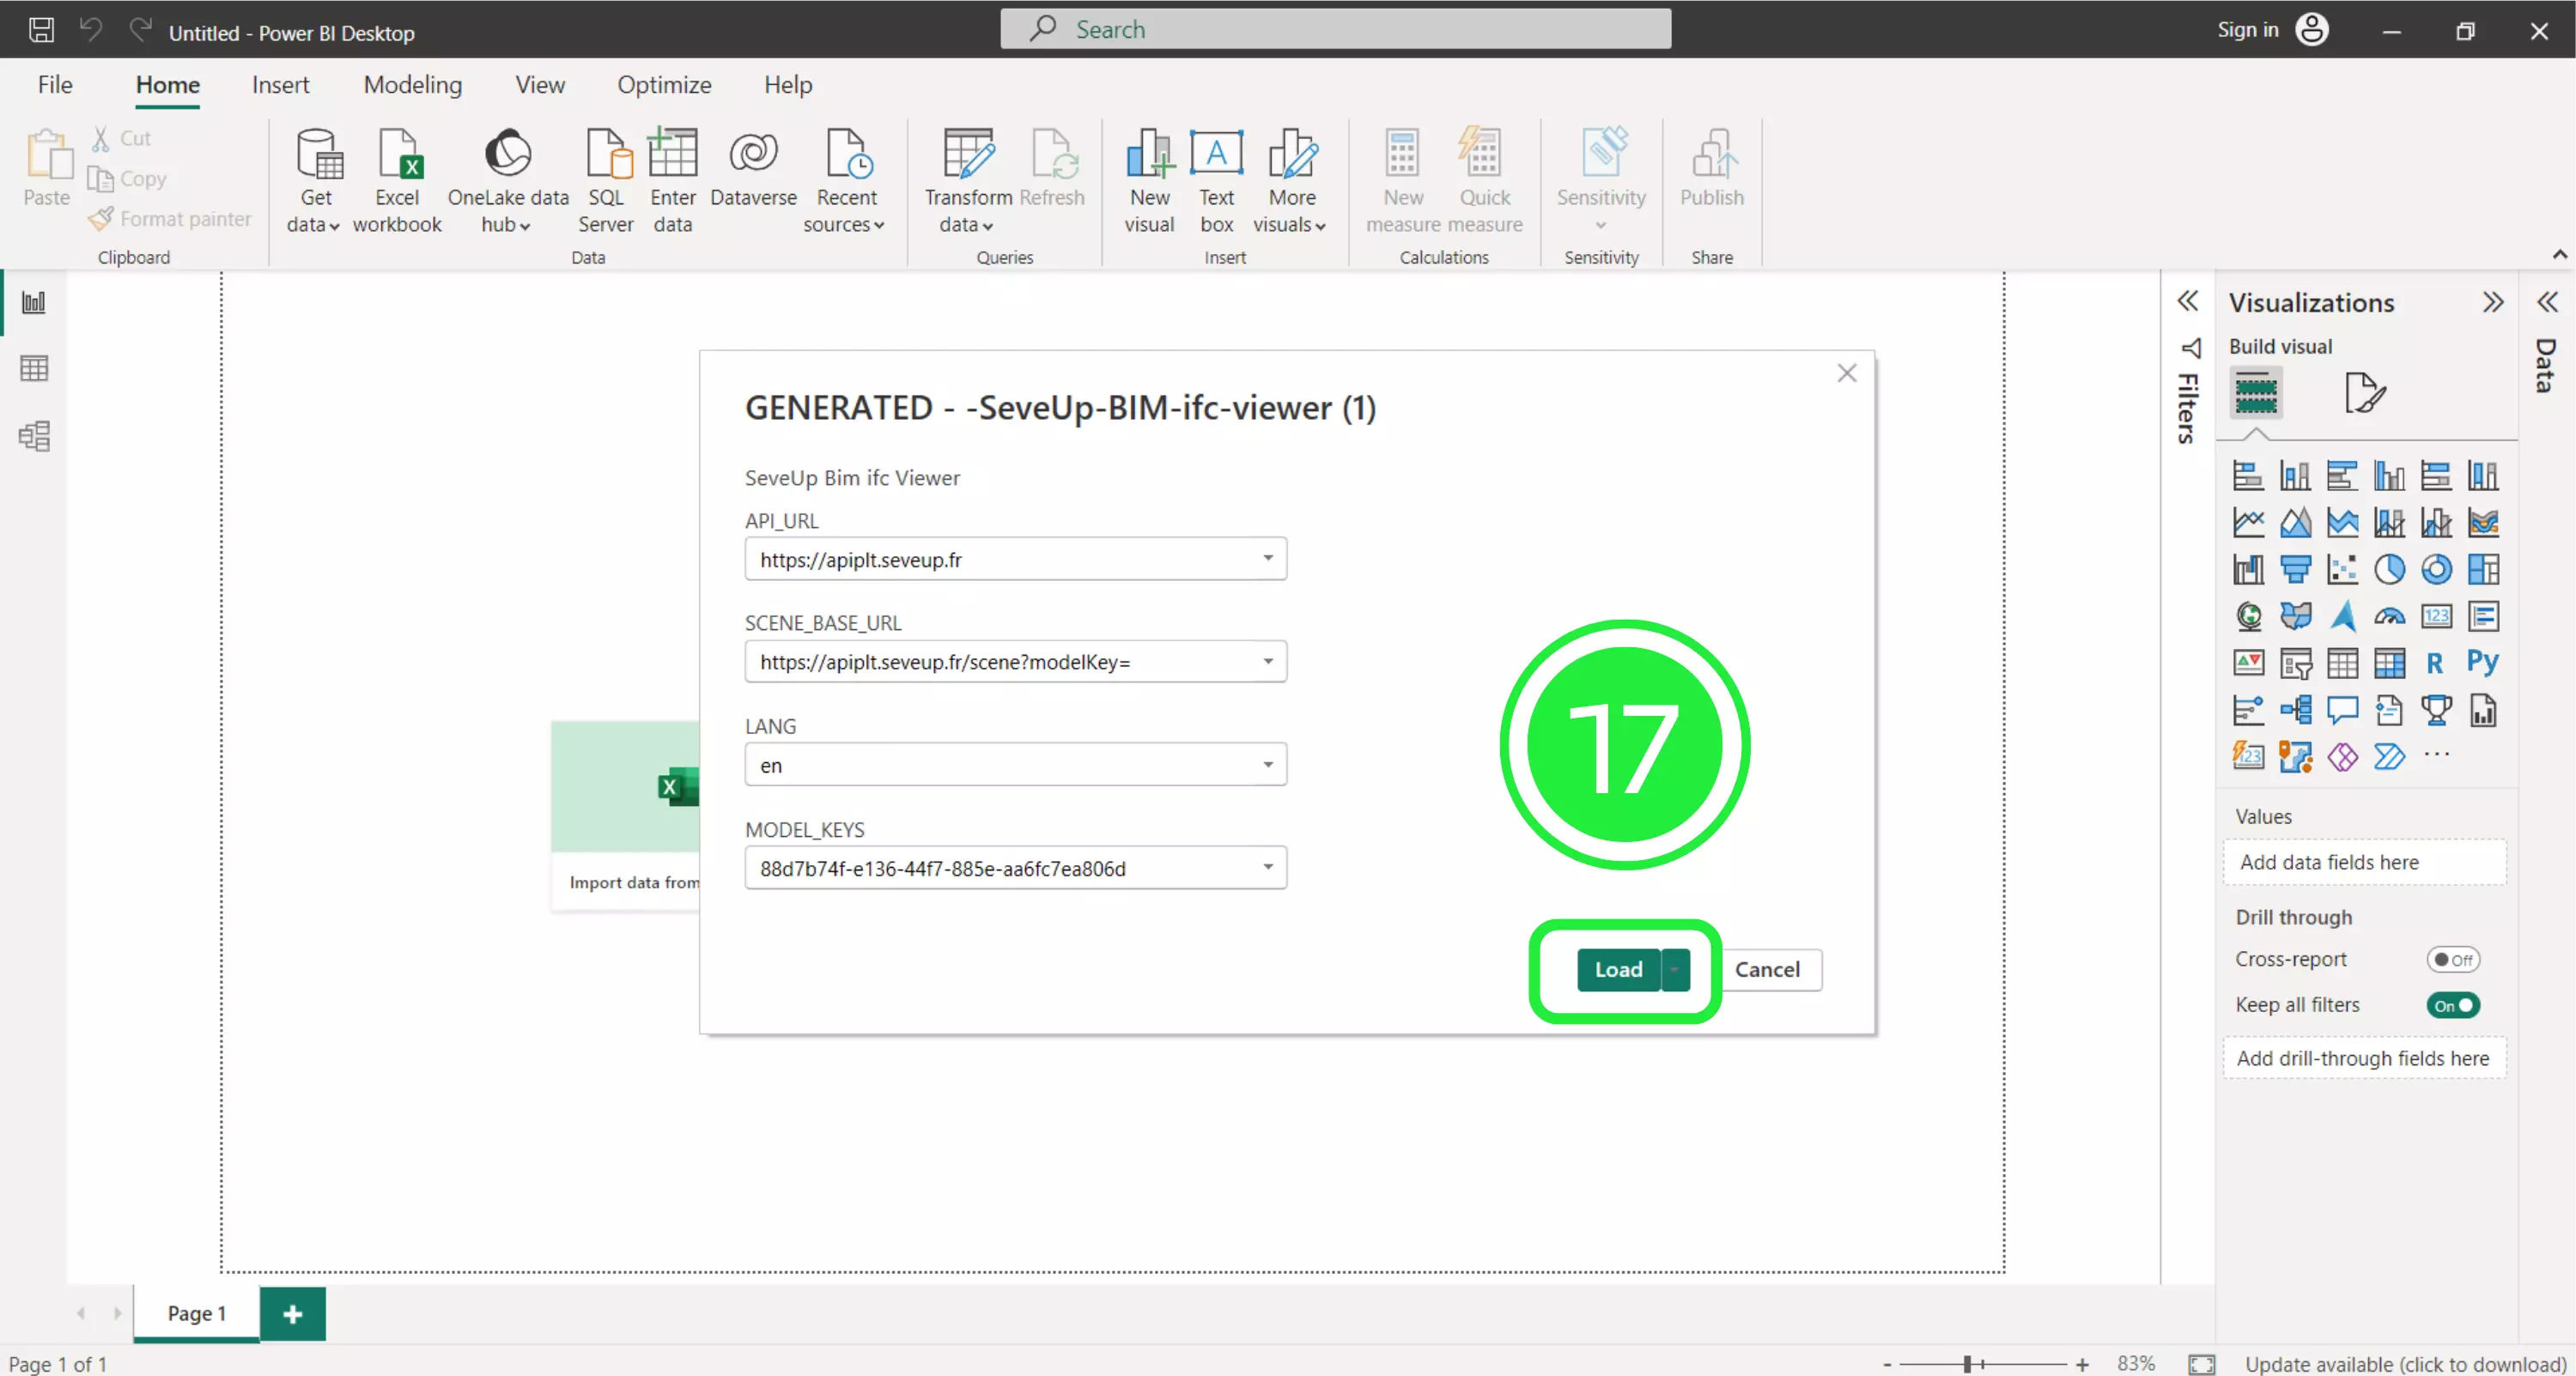
A popup will appear showing the file details. To start loading the file in Power BI, click “Load”.
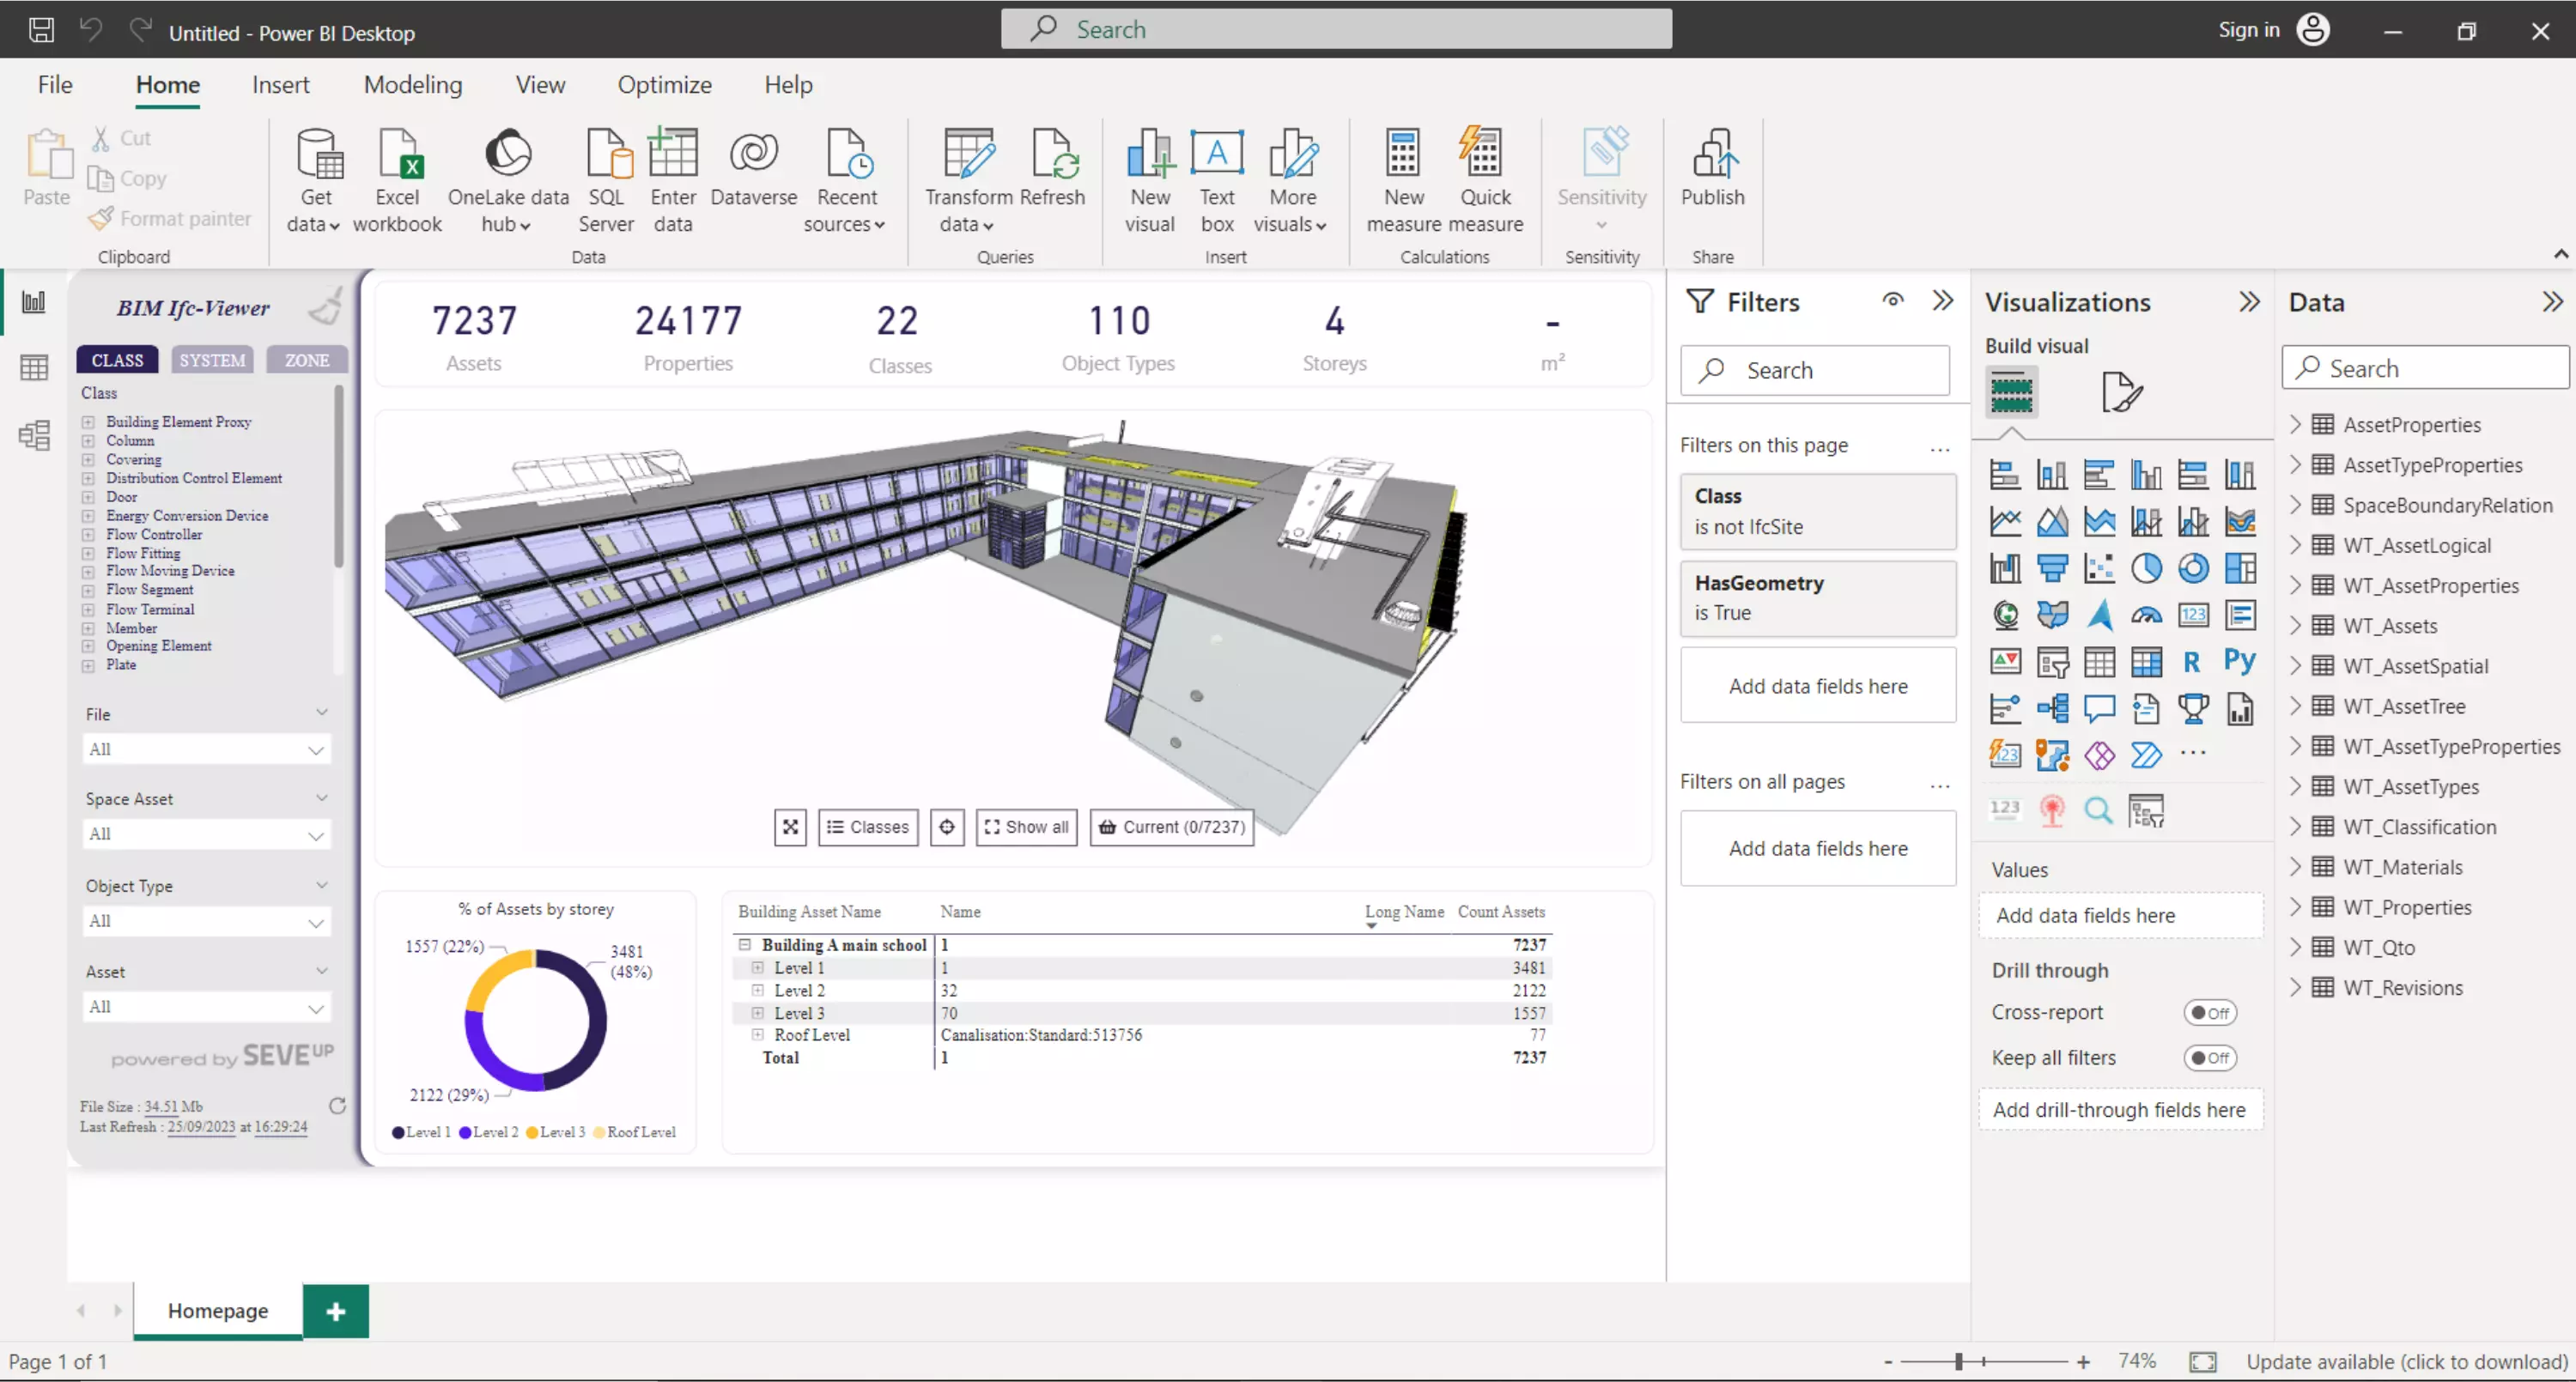
That’s it! Once your new dashboard template has loaded, it will populate the Power BI interface with all the BIM data included in the files you added in the wizard. Then you can start exploring all the possibilities of SeveUp BIM dashboards in Power BI.
Importing SeveUp dashboards into Power BI is a transformative approach to managing construction projects. The combination of SeveUp’s comprehensive BIM data and Power BI’s visualization capabilities results in dynamic dashboards that facilitate real-time monitoring, insightful analysis, and effective collaboration.
Maximize your BIM capabilities with the SeveUp app by following these steps. Unleash the full power of your BIM process effortlessly
Power BI Quick Tutorial: Mastering Insights in Minutes!


Want to get started with your very own BIM project? You’ll be surprised by just how easy it is. Create your own free account is SeveUp today and give it a try.

Unlock the power of your building data with SeveUp. Tailored dashboards, seamless integration
🎓 Free BIM Checker Training Learn how to automate your BIM model checks and get certified. Register for Free Click
Learn More🎓 Free BIM Checker Training Learn how to automate your BIM model checks and get certified. Register for Free Click
Learn More🎓 Free BIM Checker Training Learn how to automate your BIM model checks and get certified. Register for Free Choose
Learn More