Trusted by companies
all over the world:
BIM dashboards are an integral part of modern, green construction, offering real-time data visualization, promoting informed decision-making, and fostering collaboration.
SeveUp provides BIM dashboard templates featuring customizable interfaces and data analysis tools that let project stakeholders get more from their data. Our dashboards make for more efficient project management because they provide insights for data-driven decision-making, improve resource management, streamline communication, and help mitigate risk.
Adding BIM dashboards to their workflows will help construction companies stay competitive in our new digital era and reduce their carbon footprints. SeveUp is at the forefront of this technology, delivering high-performance dashboards that can drive efficiency and sustainability in the AEC industry.
Now that you’ve mastered creating new BIM projects and integrating BIM models, let’s guide you through seamlessly adding a BIM dashboard to a project using the SeveUp App. To achieve this, follow these straightforward steps to enhance your project visualization.
First, log in to the SeveUp app. Then click the “Dashboard Templates” button in the left navigation bar to make sure you have the BIM dashboard you need in the folder.
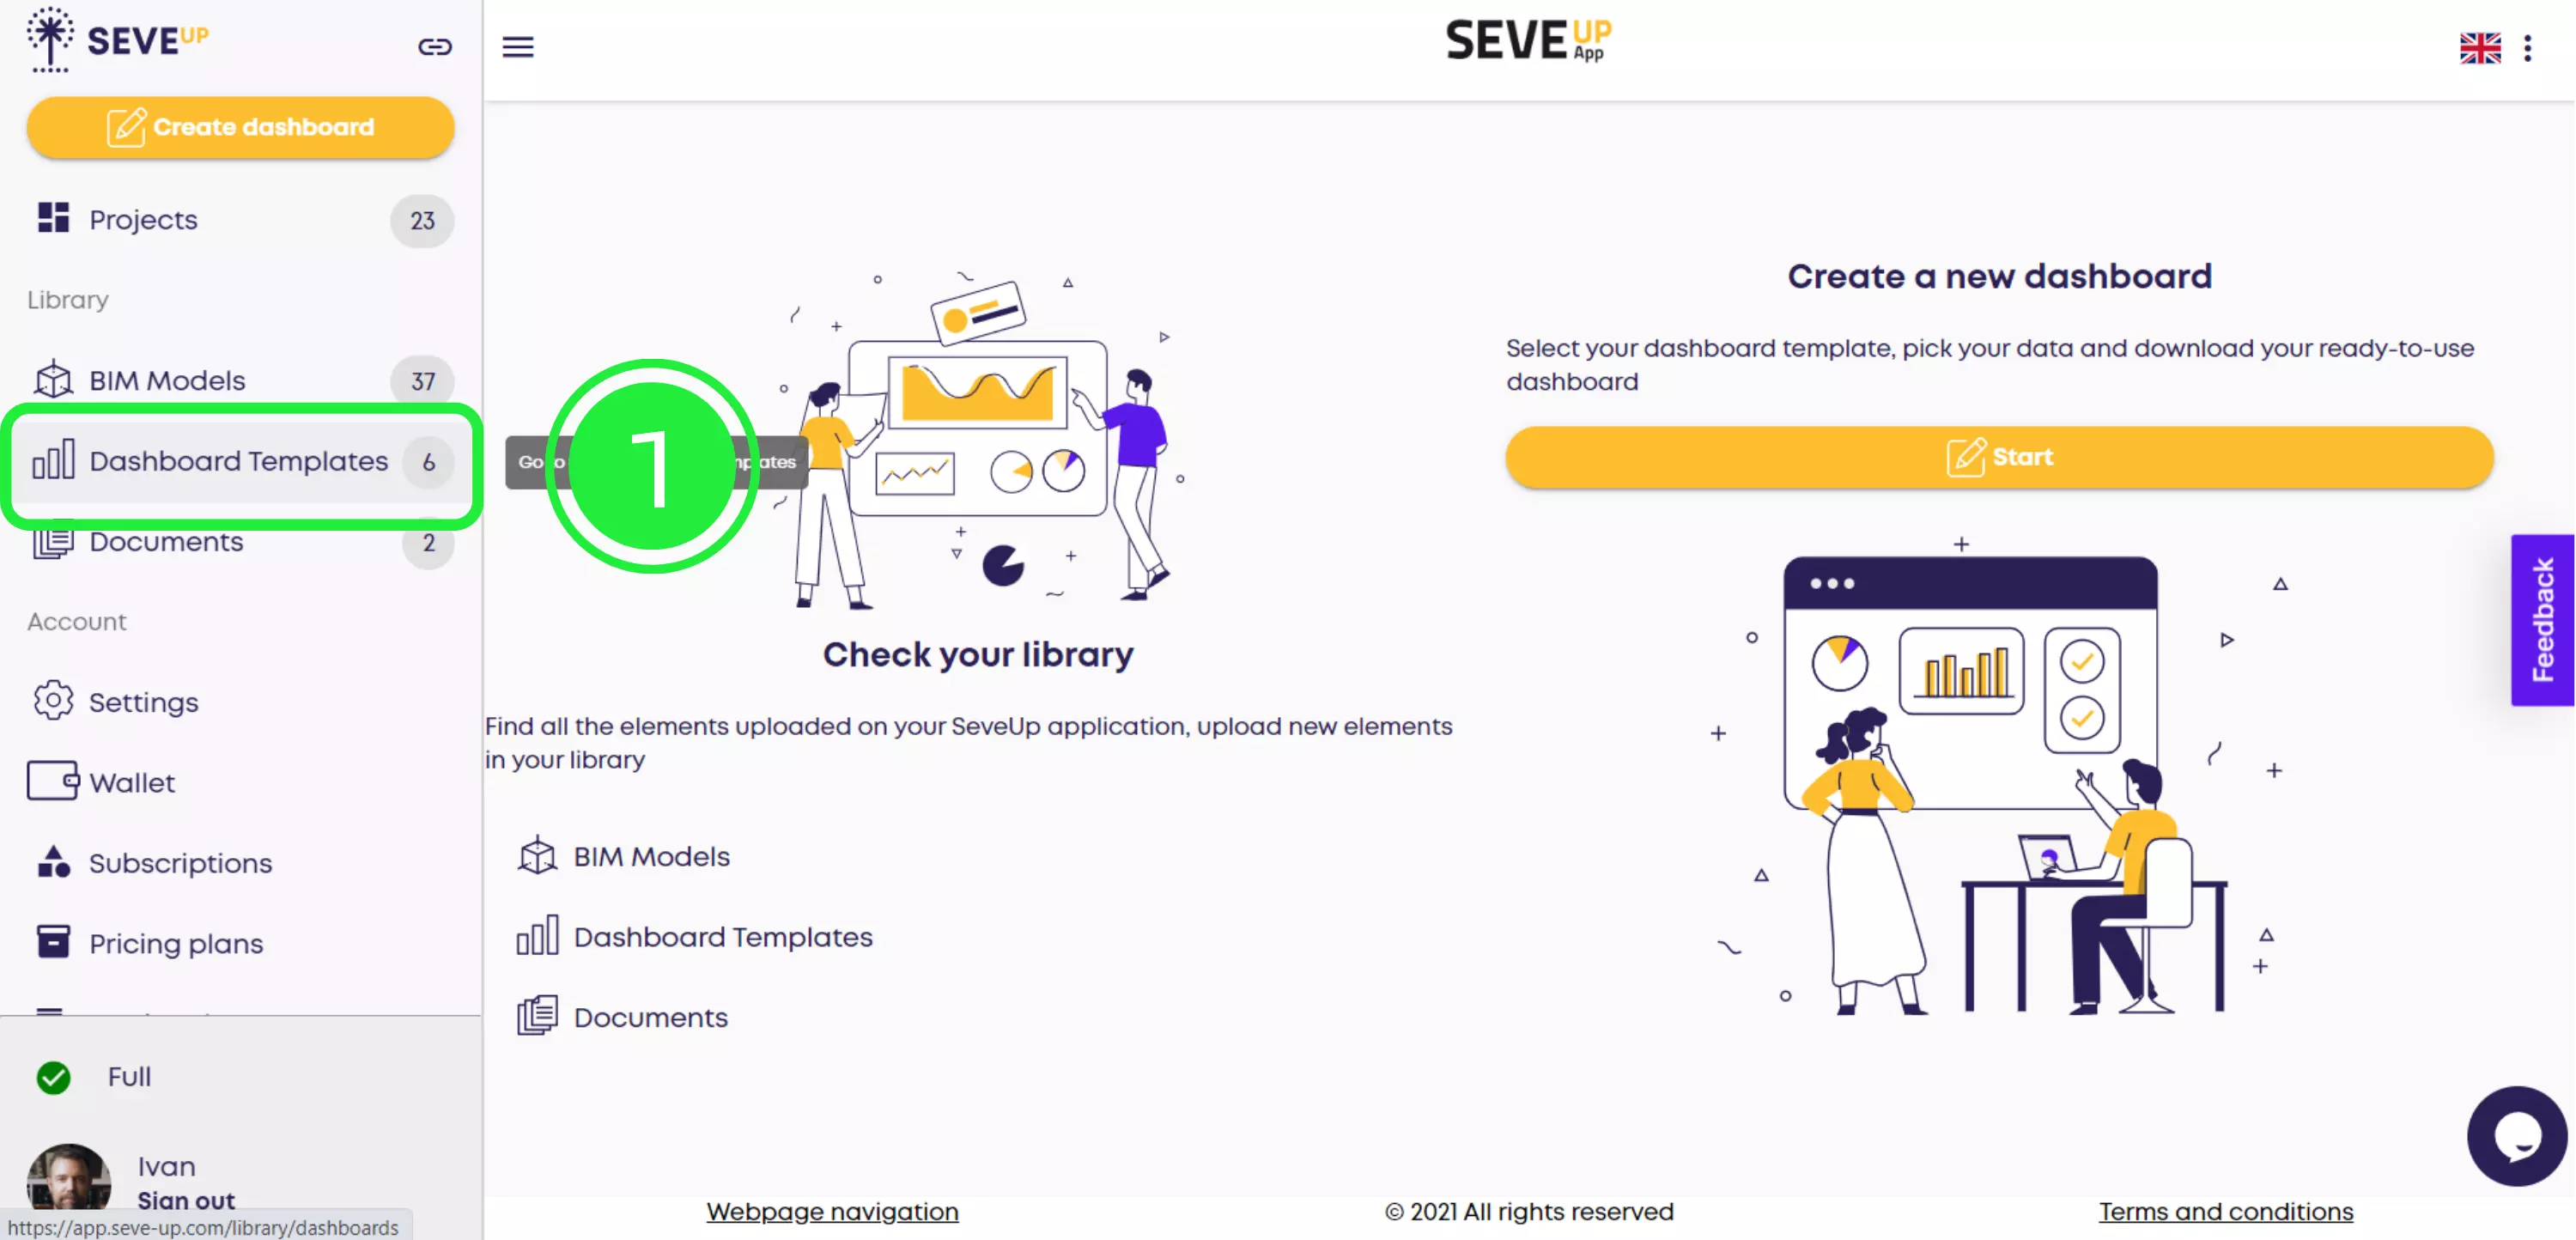
As you can see, there are six dashboard templates on this page, and the one for this example is among them. Now it’s time to add it to a project.
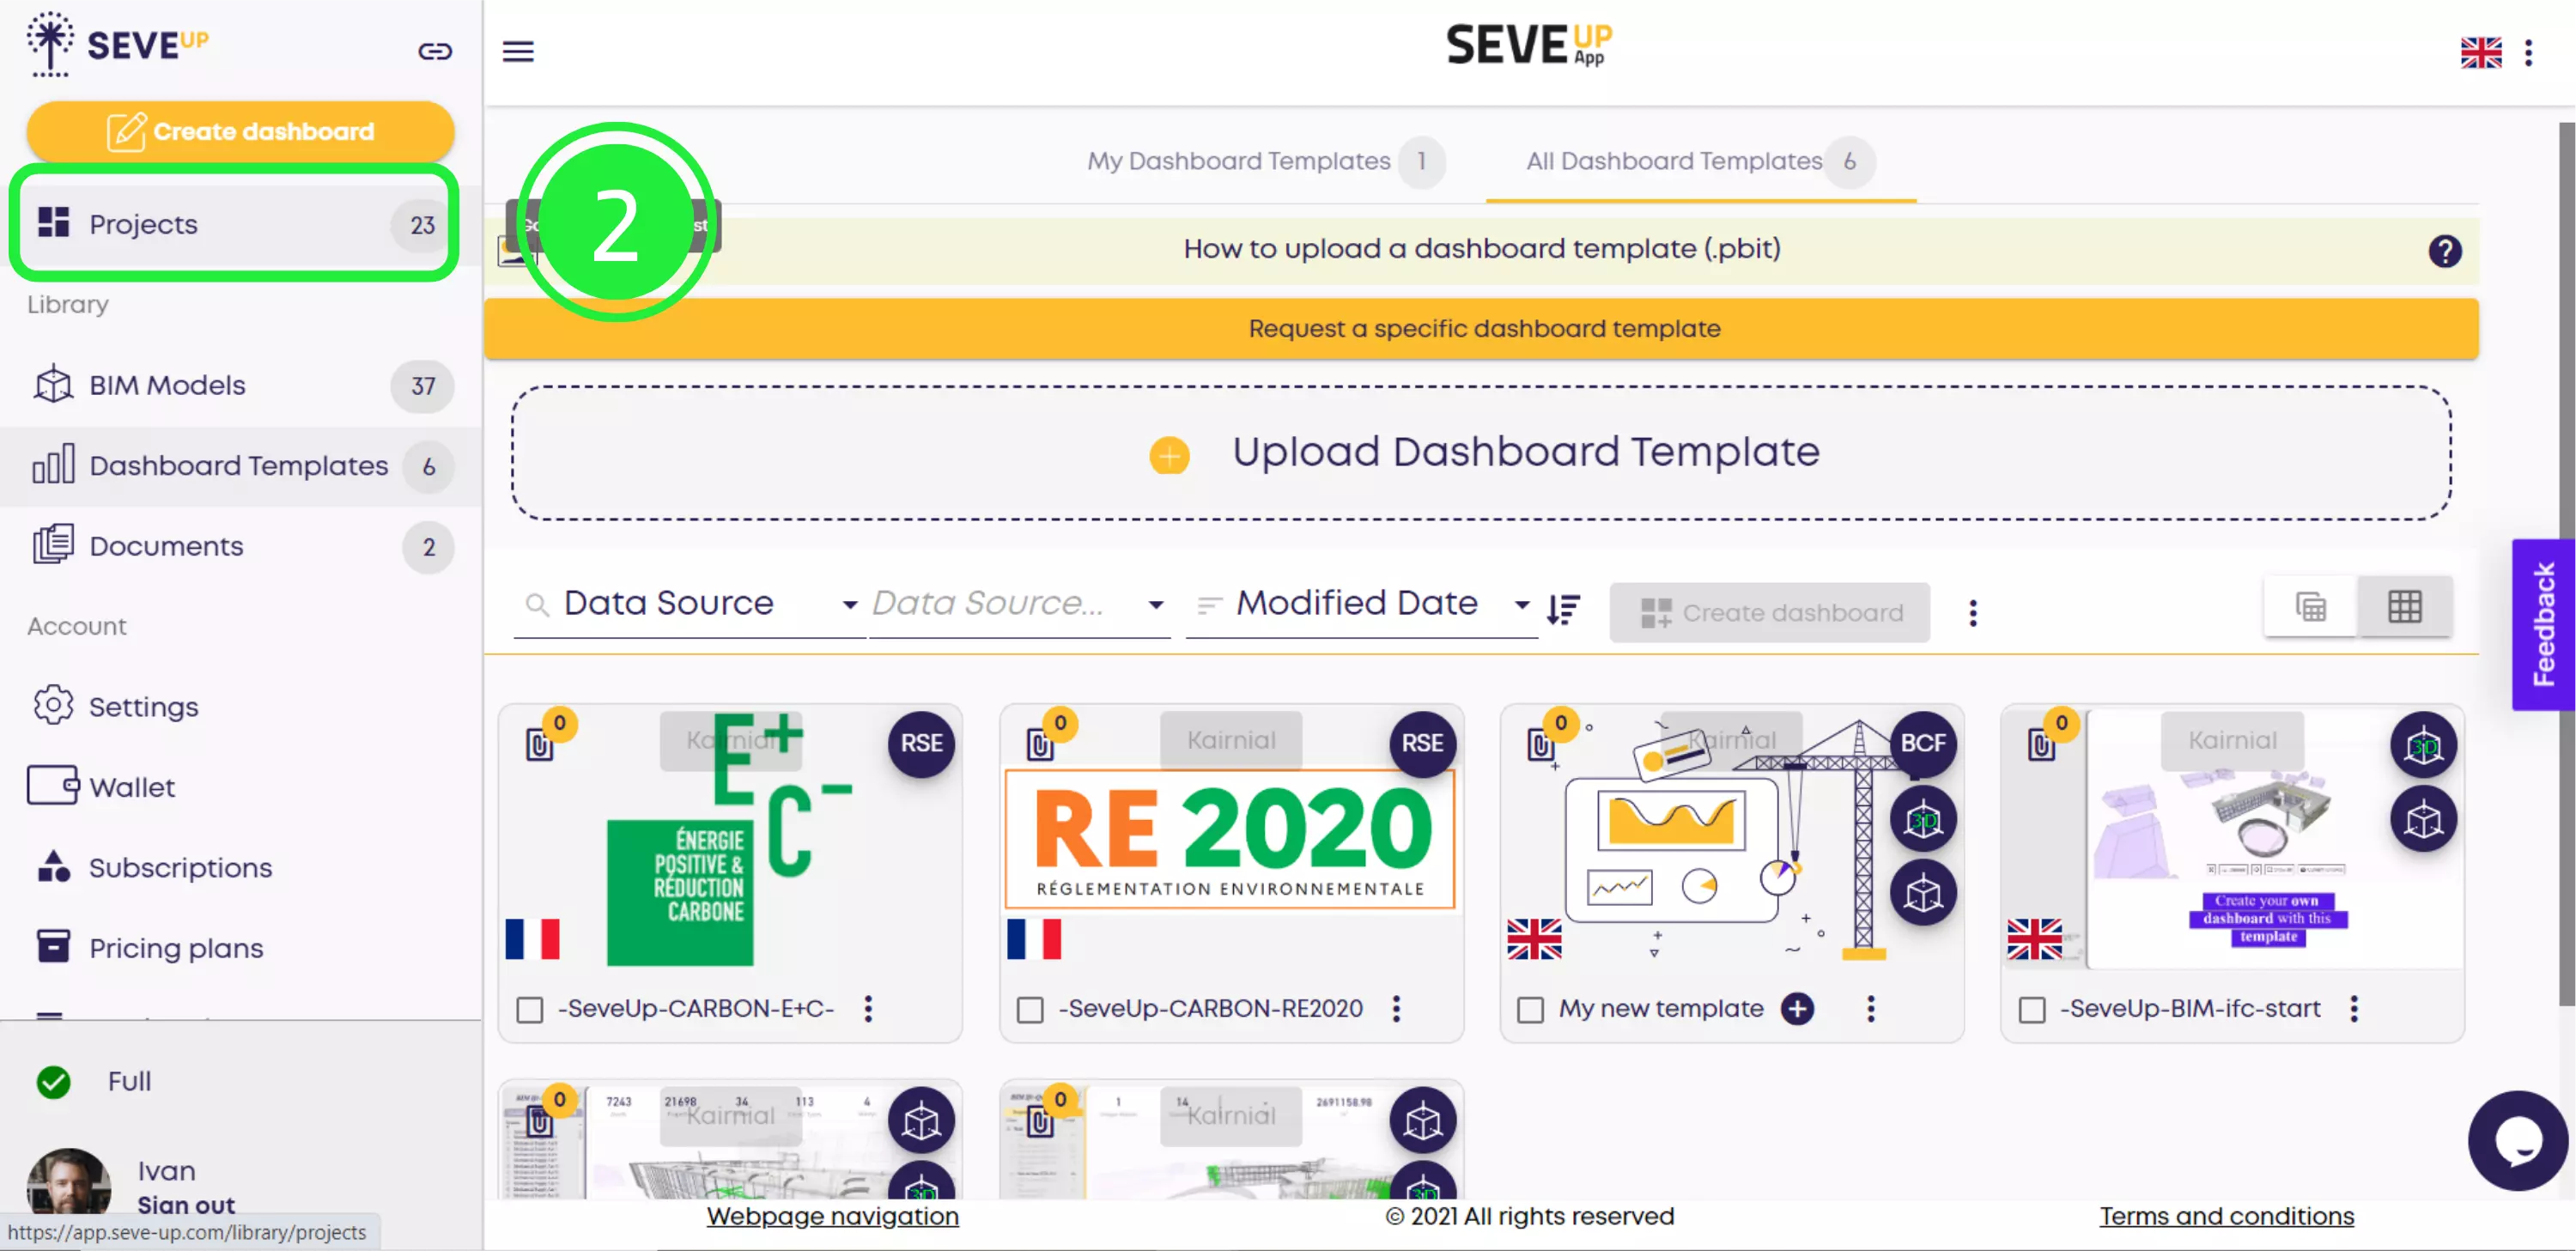
Get started by clicking the “Projects” button to open your Projects folder. Here, you’ll see all your projects as you create them.
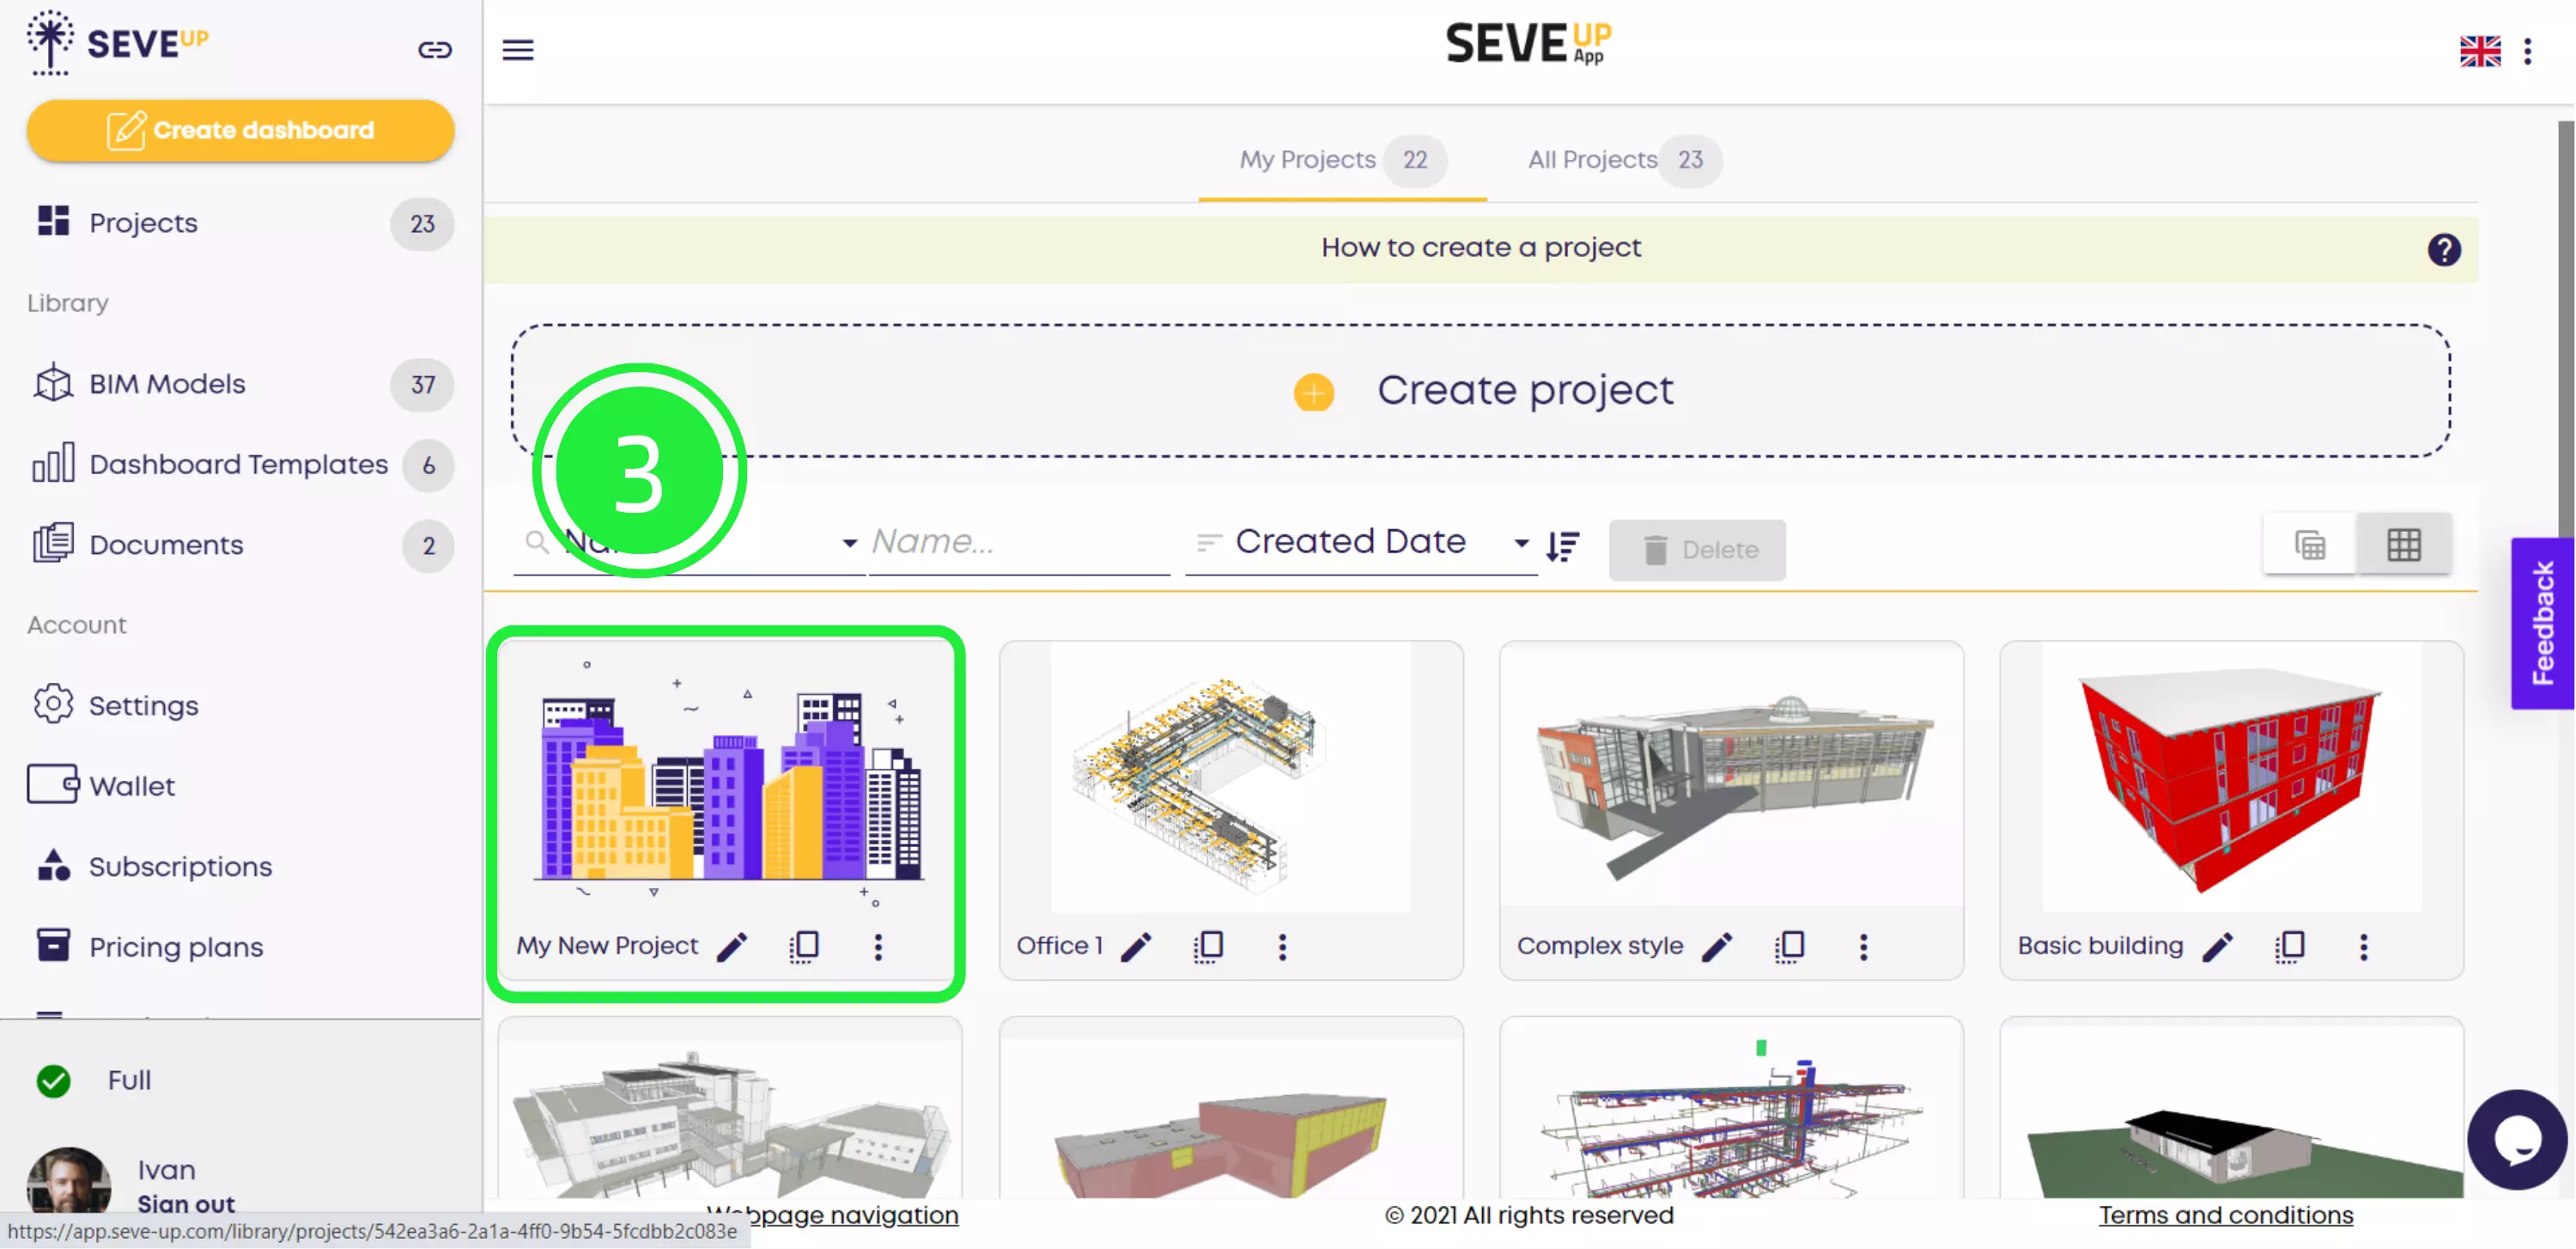
Select the name of the project you want to work on. For the purposes of this example, the project is called My New Project. When you click on it, you’ll open the project and be able to view all the project details.
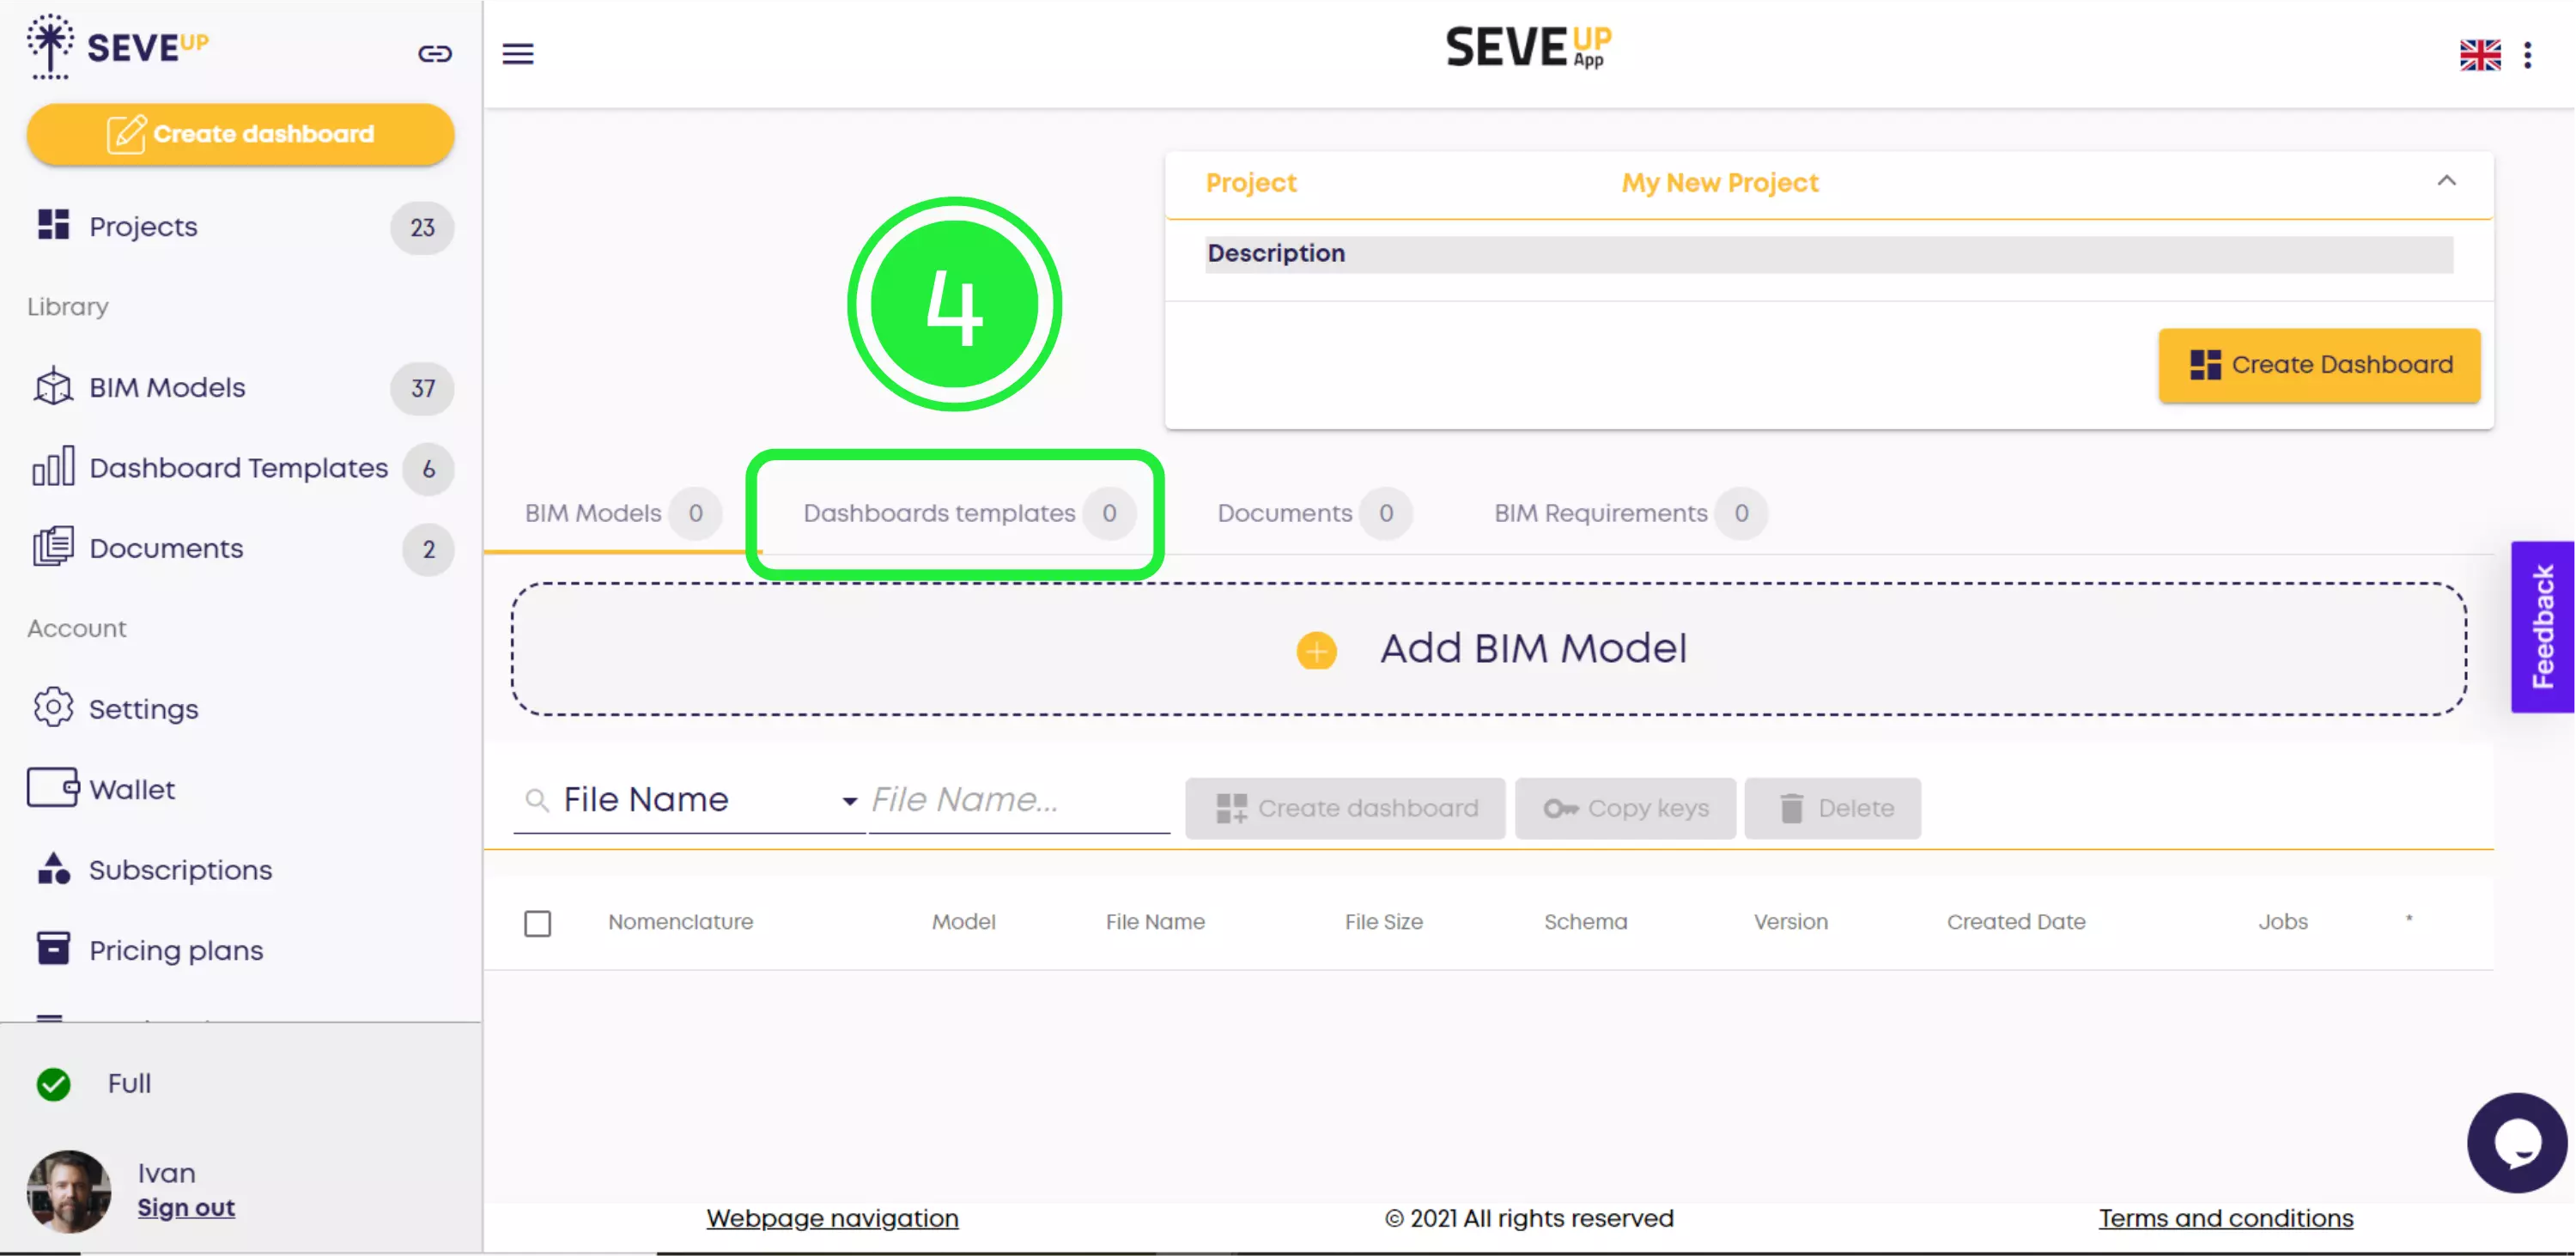
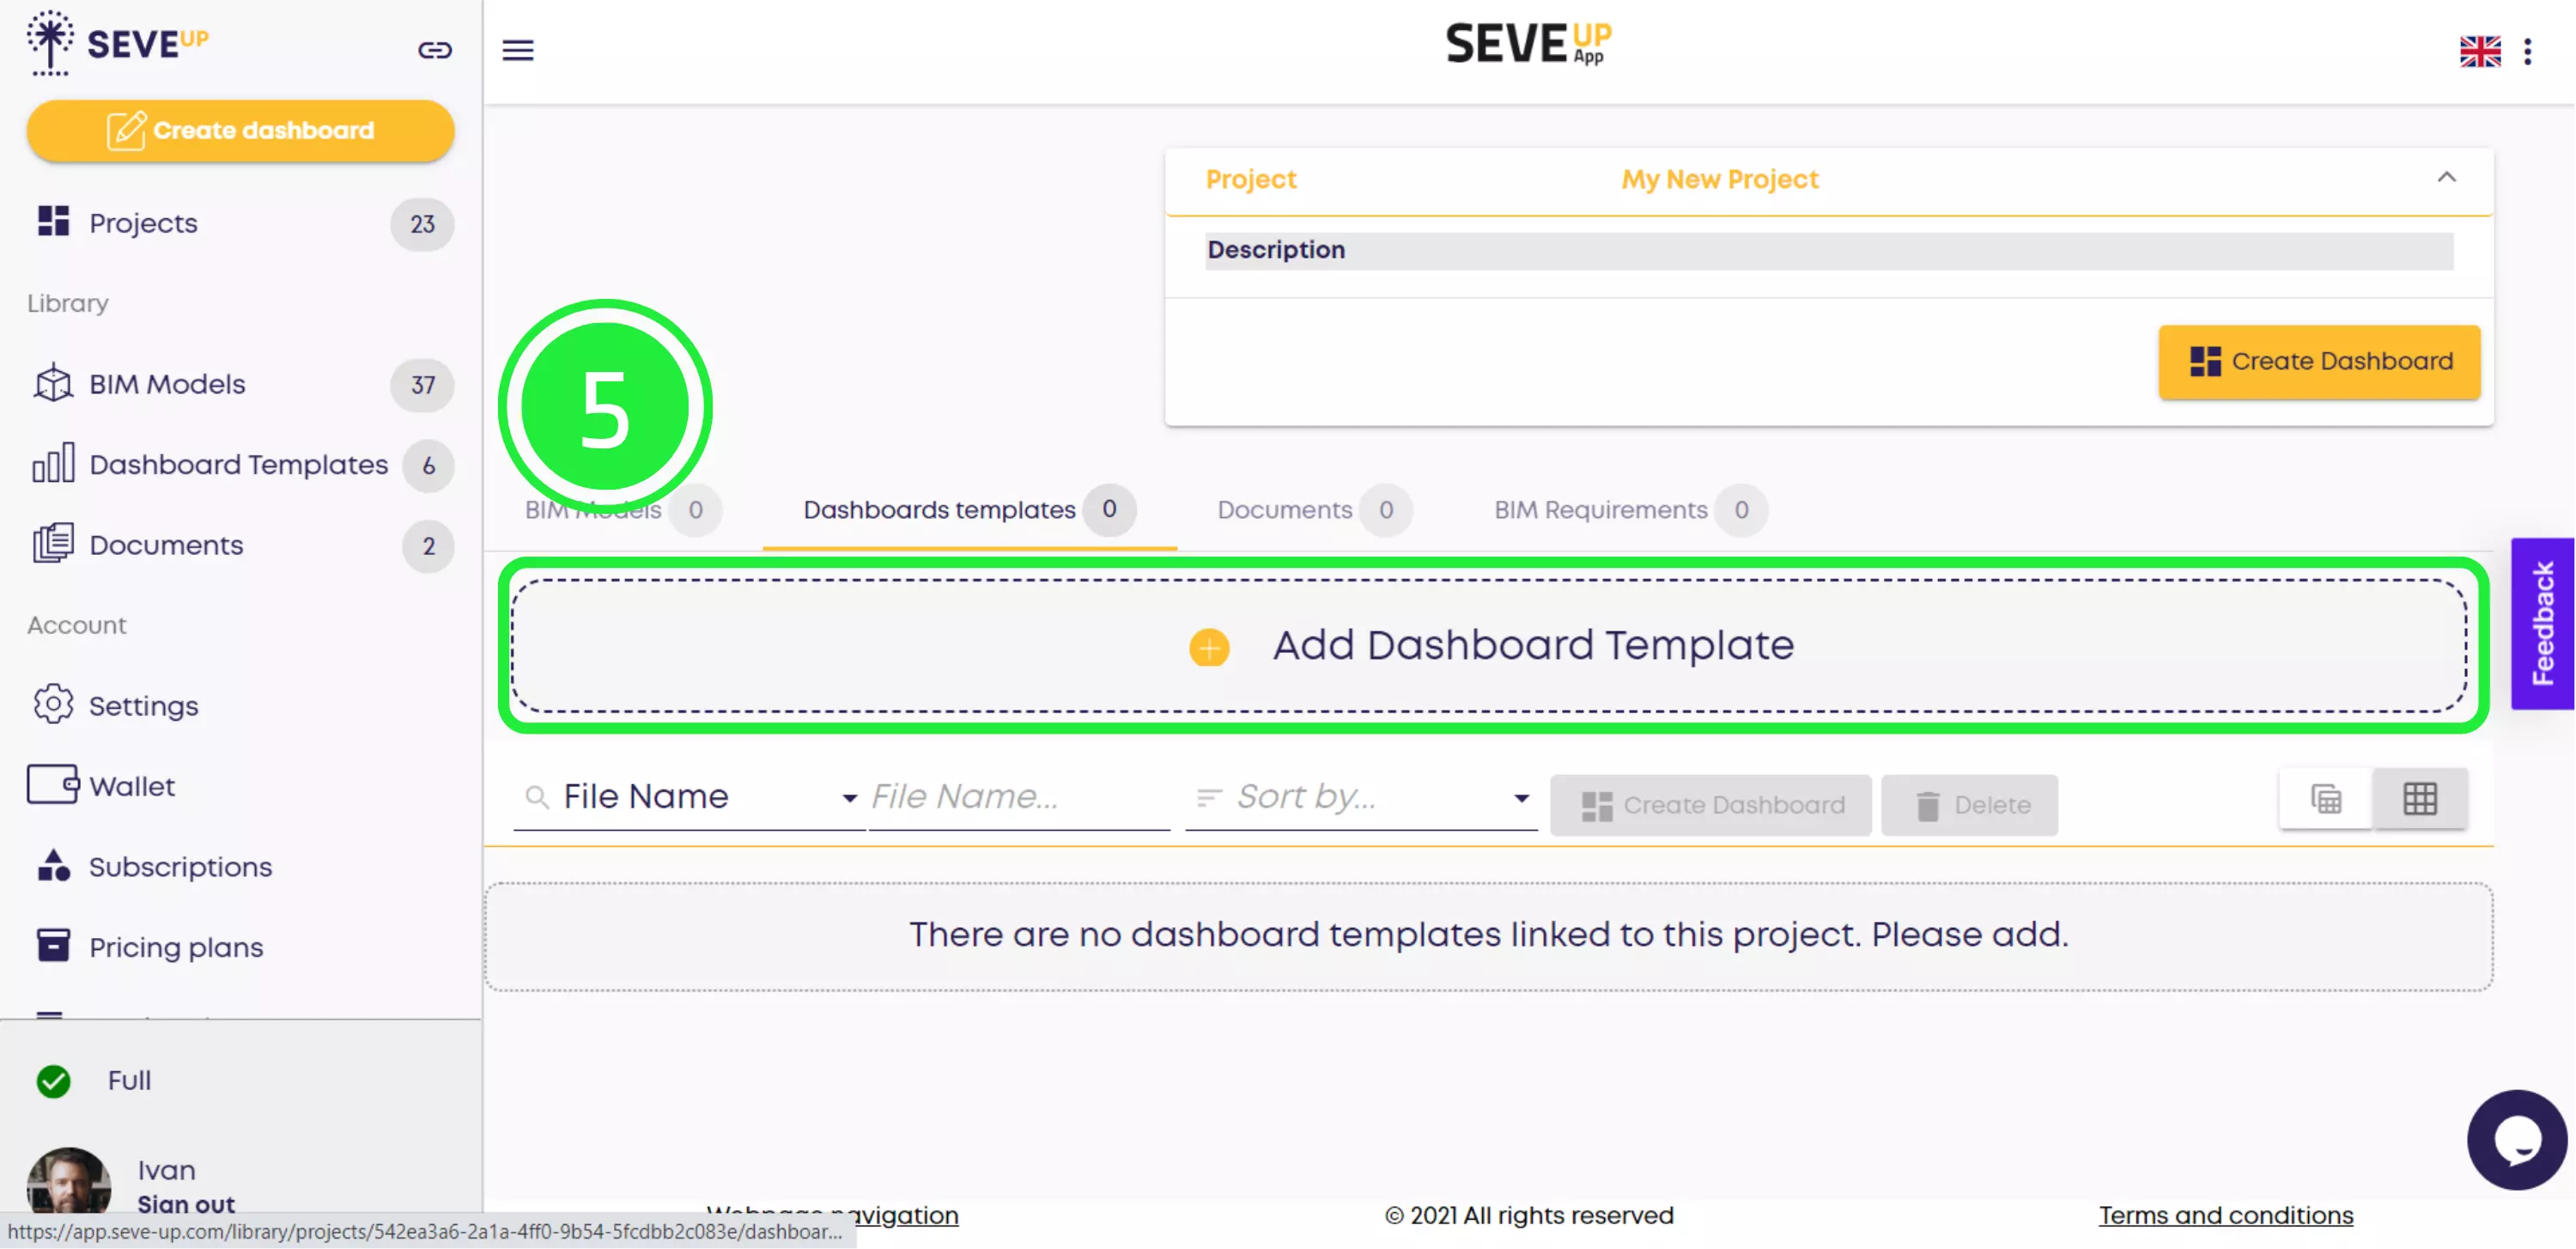
At the top of the Project view, you’ll see four tabs. Click the “Dashboards templates” tab to see the BIM dashboards that are associated with that project. In the example below, the “0” indicates no templates have been added to this project yet.
To start adding a new template, click the “Add Dashboard Template” button in the center of the page.
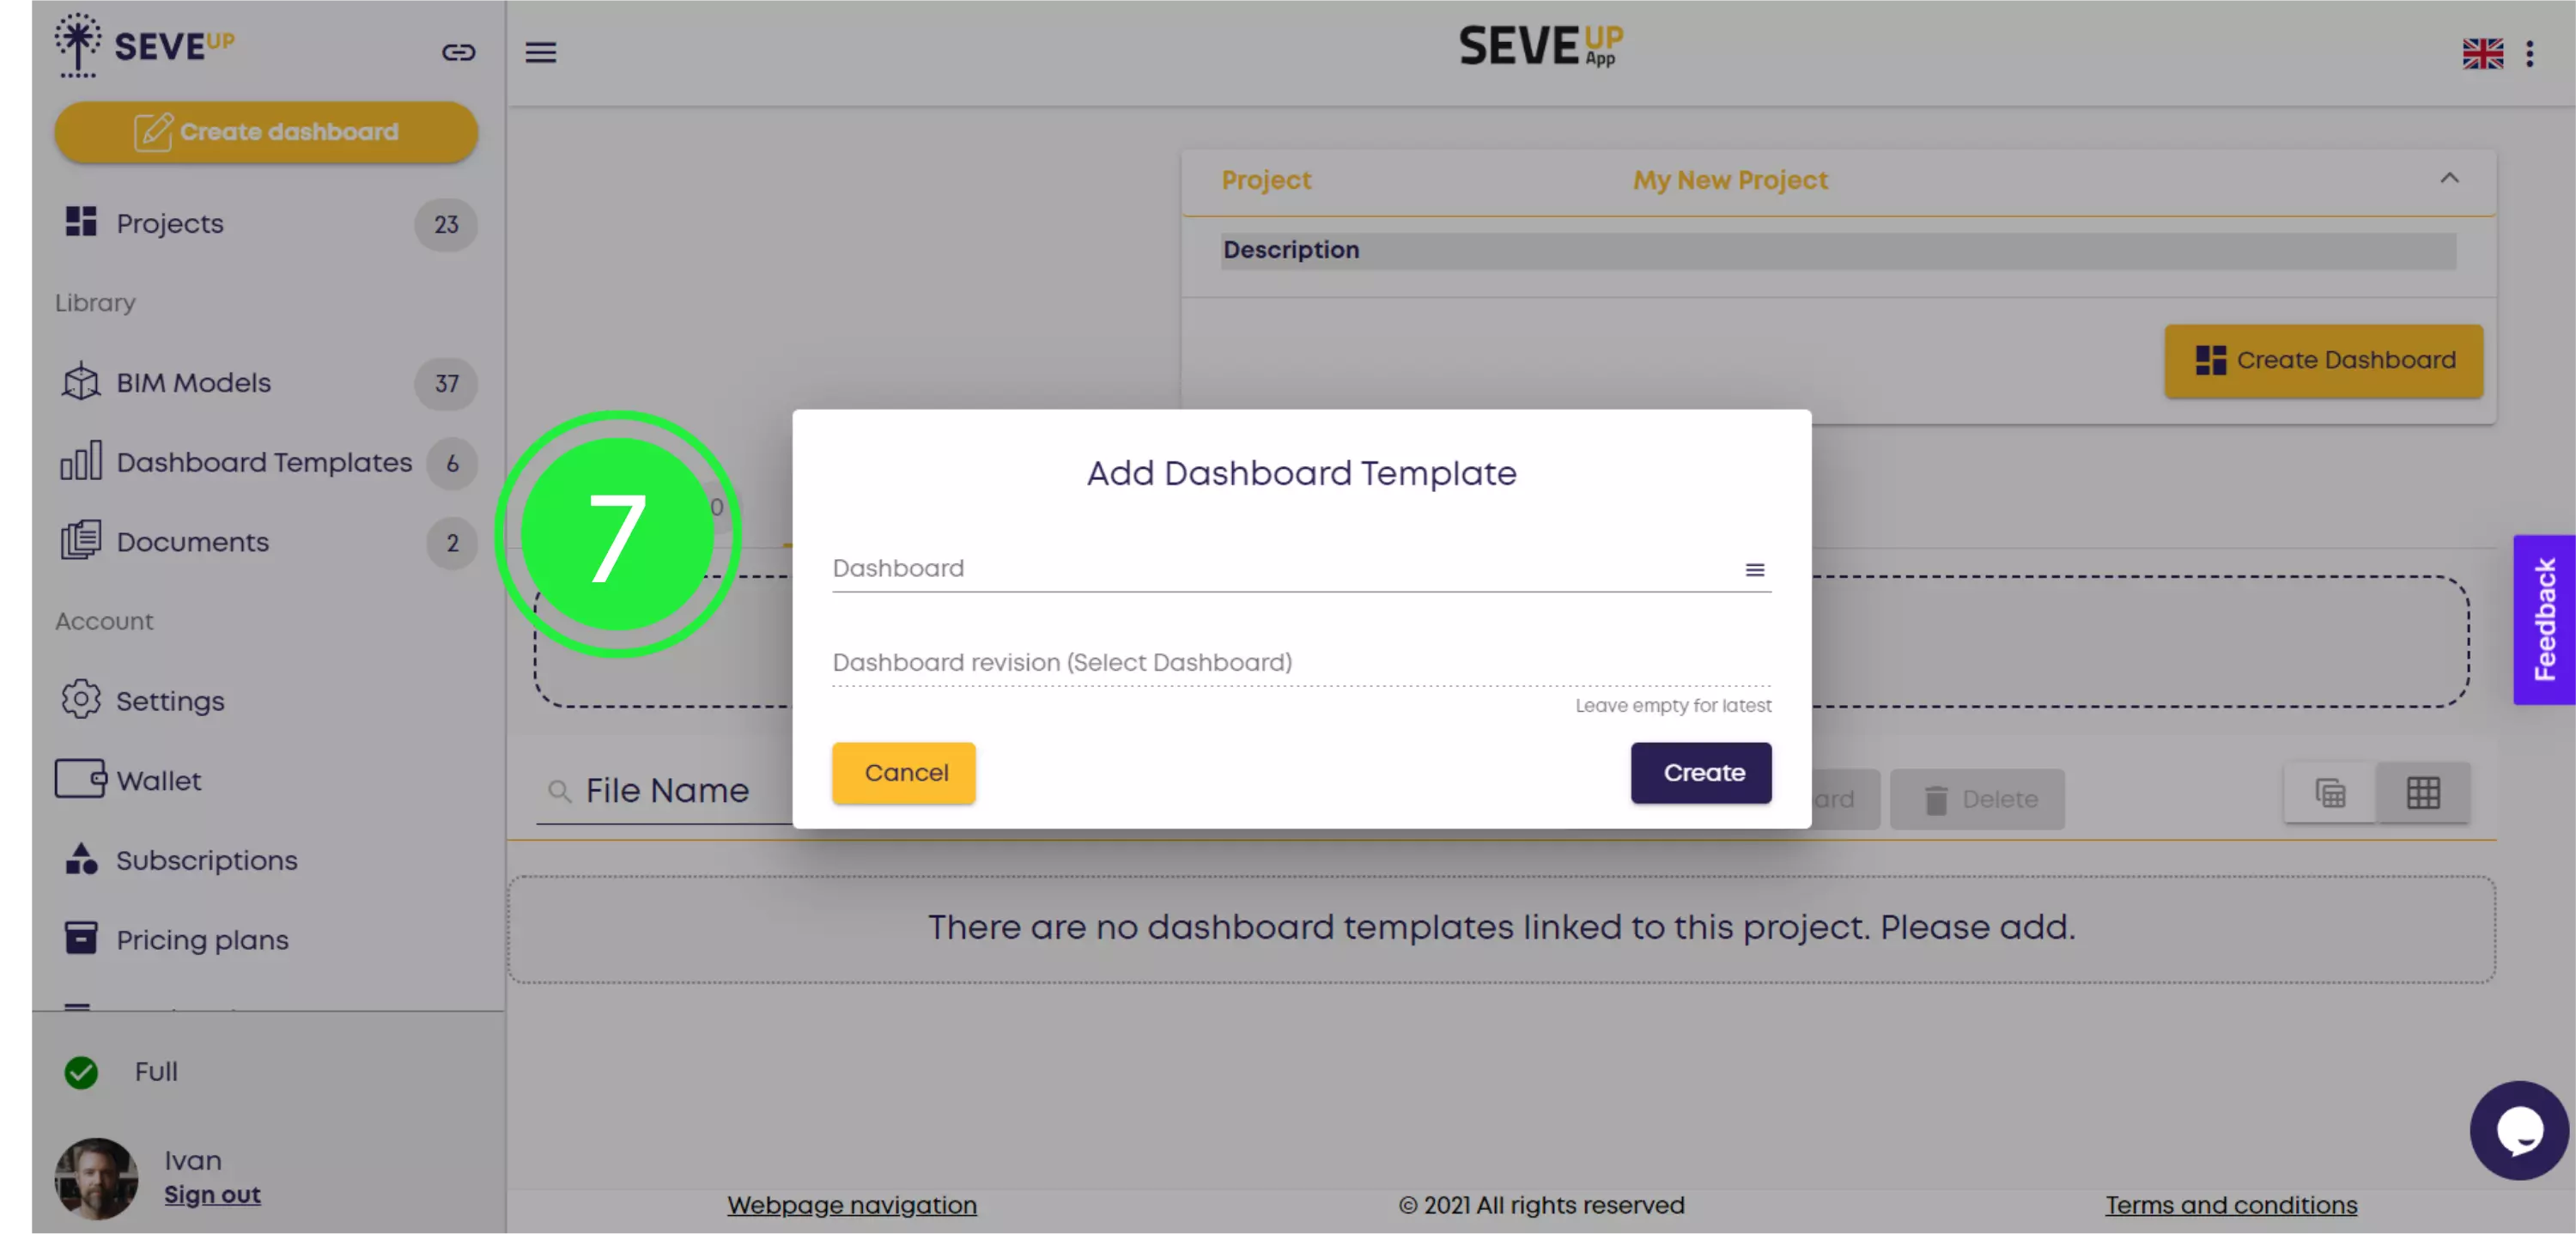
A pop-up will appear allowing you to choose to add a template from your library or to upload one from your computer. Since the template we want is in the Library, select “From the Library”.

Click on the menu button to see all the dashboard templates you can add from the library.
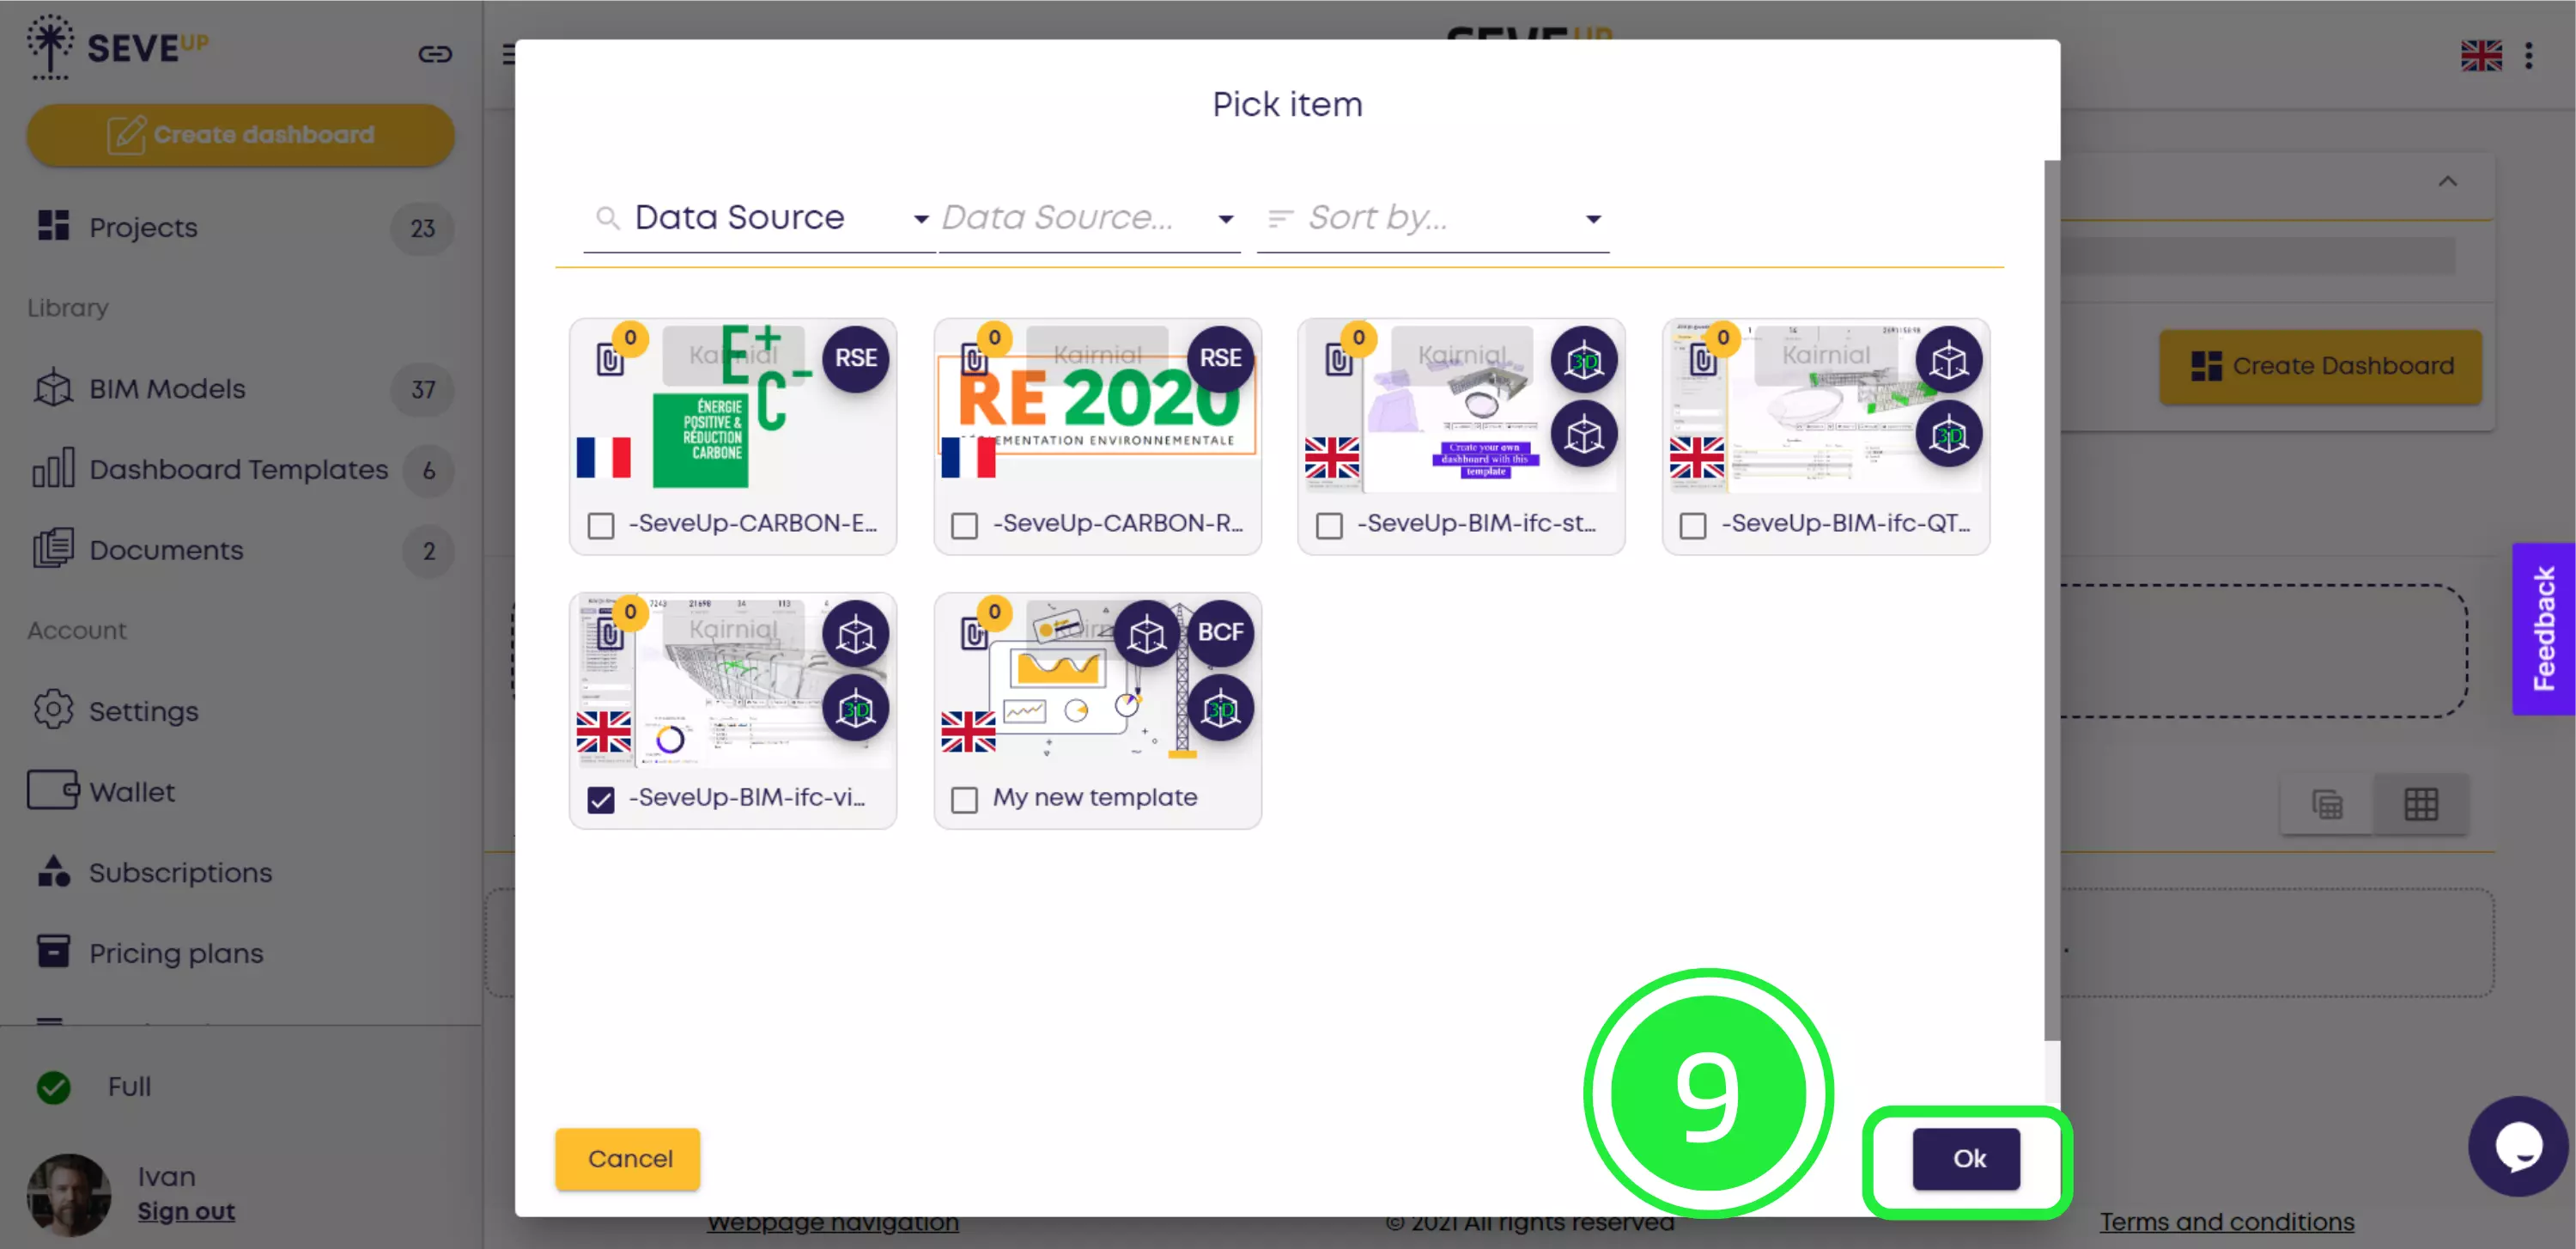
Select the tile of the dashboard template you want by clicking the check box in the bottom left corner.

To confirm the selected dashboard template, click “OK”.
Finally, click “Create”. The selected dashboard template has been successfully added to your project!
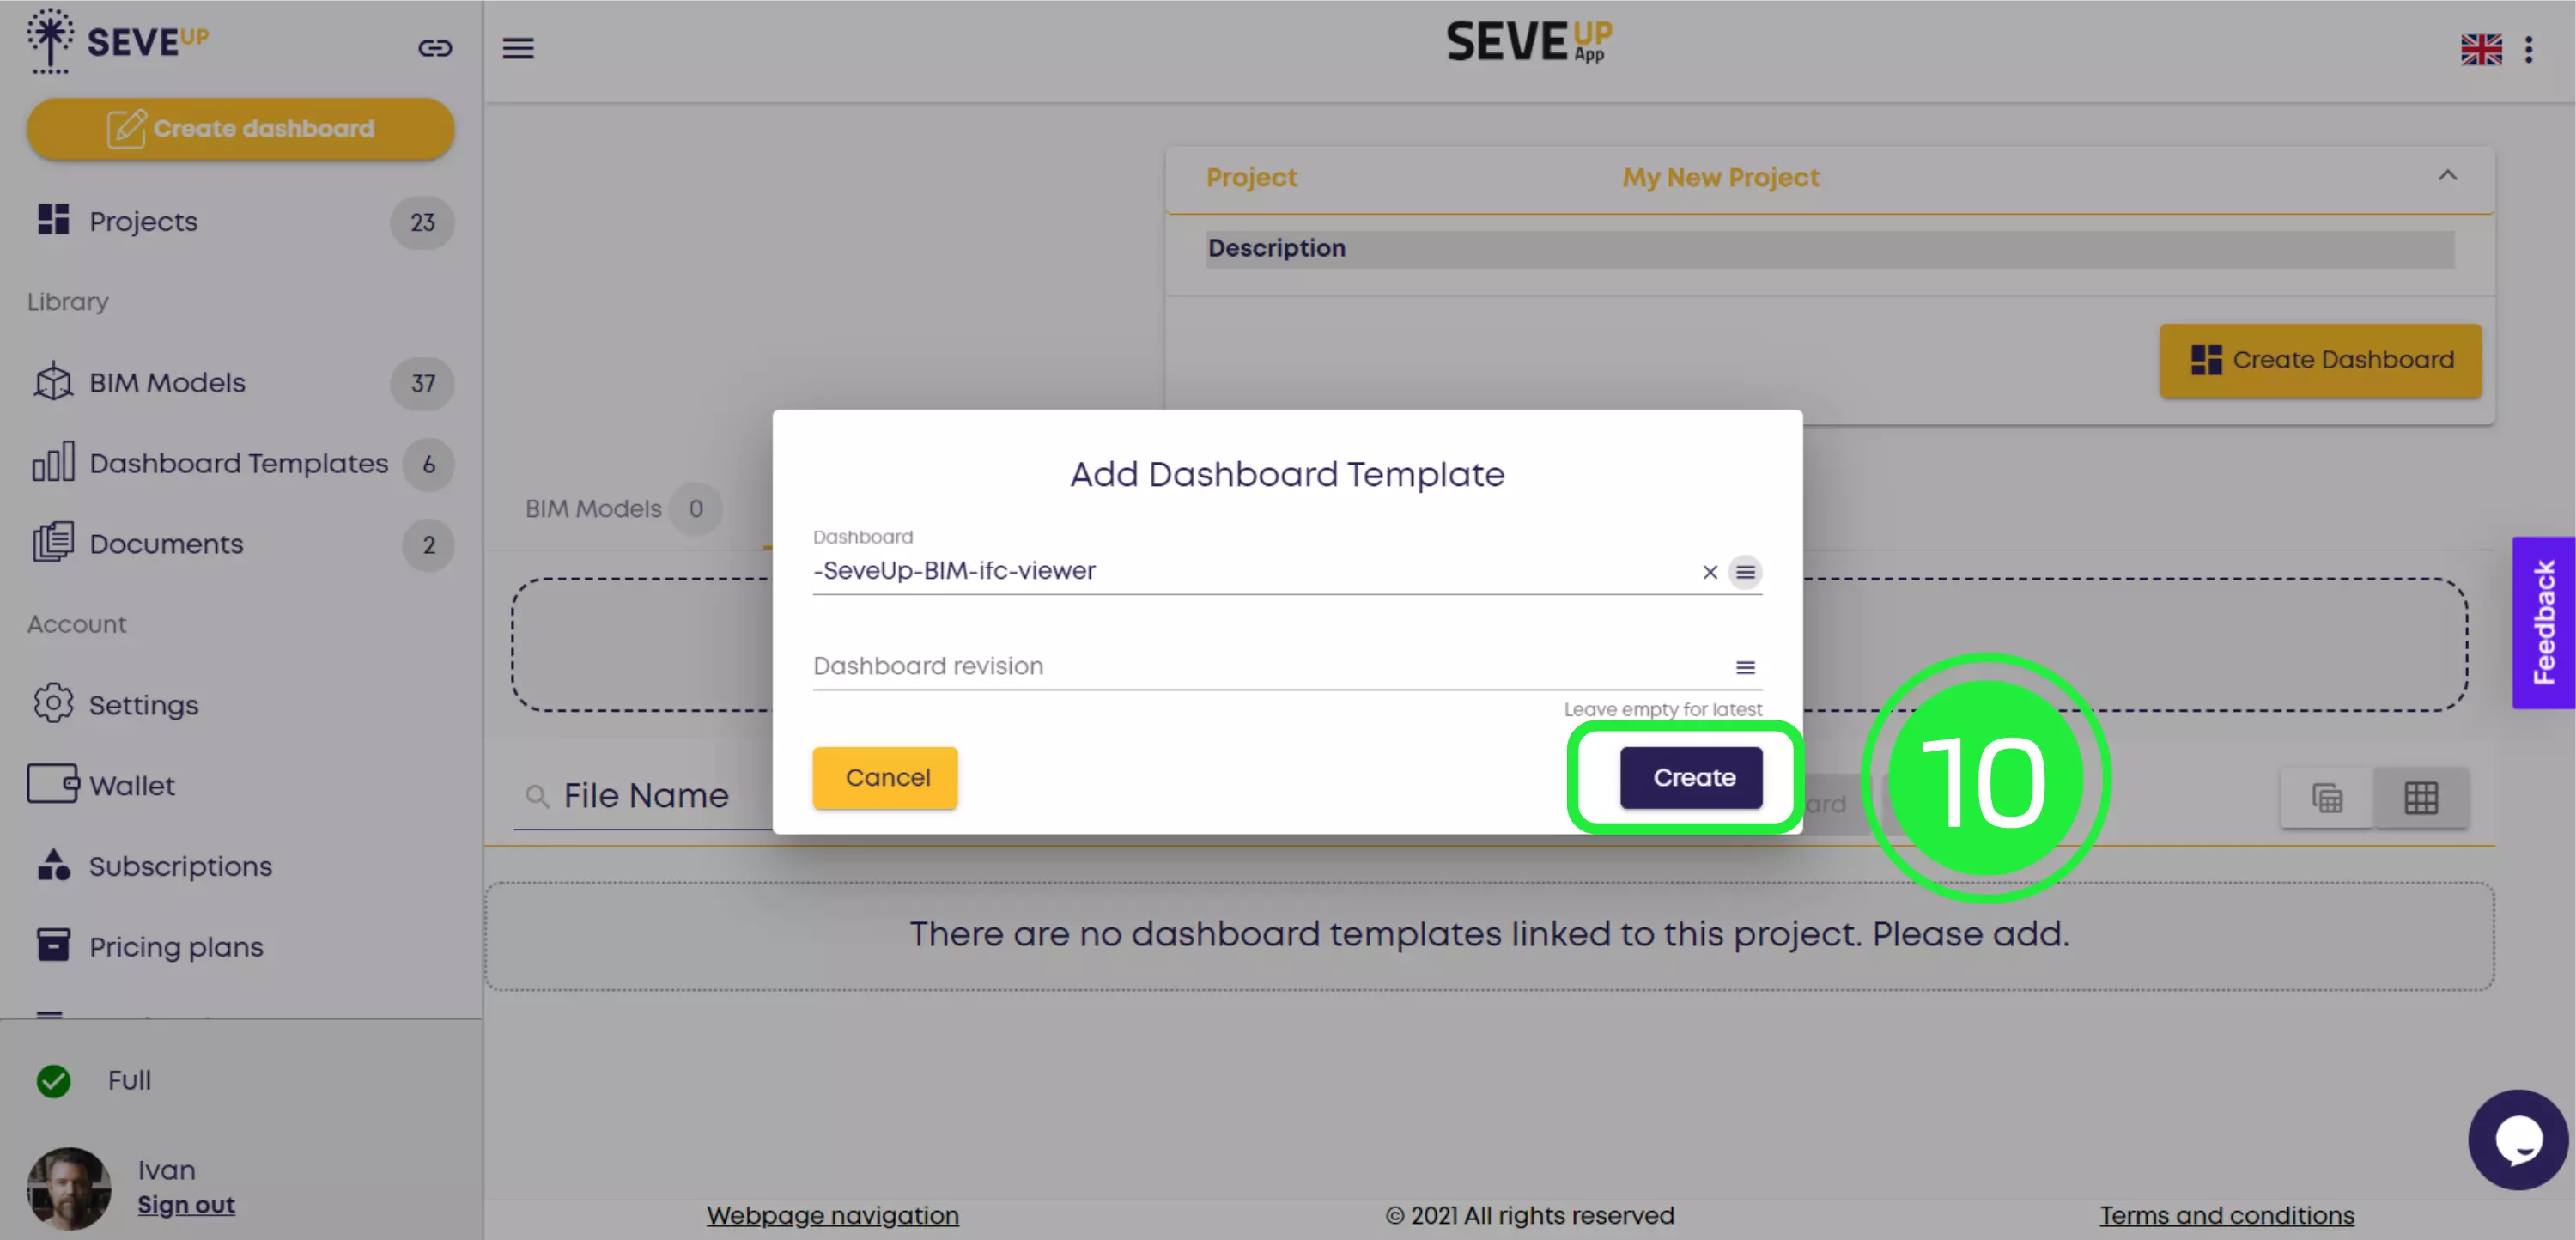
See how easy it was to add a BIM dashboard to your project? Now you can visualize your BIM data in more useful ways or further customize your dashboard to suit your needs.
Next, we’ll teach you how to leverage the data in your dashboard in our next tutorial, How to create a BIM dashboard in the SeveUp app and Power BI. Get ready to take your BIM data to the next level!
Maximize your BIM capabilities with the SeveUp app by following these steps. Unleash the full power of your BIM process effortlessly
Power BI Quick Tutorial: Mastering Insights in Minutes!


Want to get started with your very own BIM project? You’ll be surprised by just how easy it is. Create your own free account is SeveUp today and give it a try.

Unlock the power of your building data with SeveUp. Tailored dashboards, seamless integration
🎓 Free BIM Checker Training Learn how to automate your BIM model checks and get certified. Register for Free Click
Learn More🎓 Free BIM Checker Training Learn how to automate your BIM model checks and get certified. Register for Free Click
Learn More🎓 Free BIM Checker Training Learn how to automate your BIM model checks and get certified. Register for Free Choose
Learn More